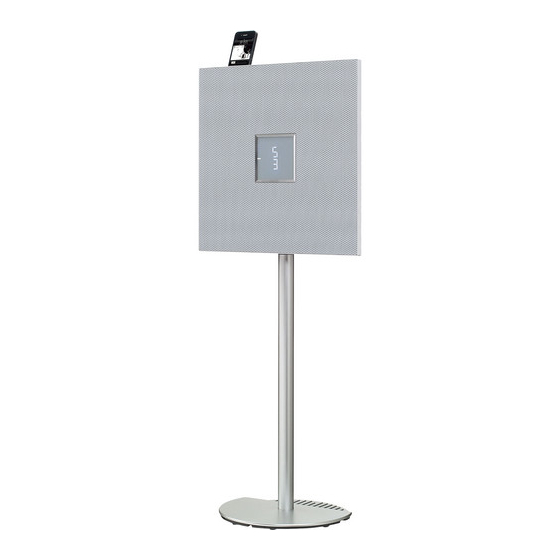
Yamaha ISX-800 Mode D'emploi
Masquer les pouces Voir aussi pour ISX-800:
Table des Matières

Publicité

Les langues disponibles

Les langues disponibles

Liens rapides

AB
INTEGRATED AUDIO SYSTEM
SYSTÈME AUDIO INTÉGRÉ
ISX-800
OWNER'S MANUAL
MODE D'EMPLOI
BEDIENUNGSANLEITUNG
MANUALE DI ISTRUZIONI

Publicité

Table des Matières
loading

Sommaire des Matières pour Yamaha ISX-800

  • Page 1 INTEGRATED AUDIO SYSTEM SYSTÈME AUDIO INTÉGRÉ ISX-800 OWNER’S MANUAL MODE D’EMPLOI BEDIENUNGSANLEITUNG MANUALE DI ISTRUZIONI...
  • Page 2 TO REDUCE THE RISK OF FIRE OR ELECTRIC SHOCK, and may cause fire, damage to this unit, and/or personal DO NOT EXPOSE THIS UNIT TO RAIN OR MOISTURE. injury. Yamaha will not be held responsible for any damage resulting from use of this unit with a voltage CAUTION other than specified.
  • Page 3: Table Des Matières

    Keep the USB cap out of stand. Read the separate Base reach of children so as to Assembly Guide for information Support ISX-800 ensure that it is not on how to assemble the stand. Cable clamp mistakenly swallowed. Screw set...
  • Page 4: Names Of Parts And Their Functions

    NAMES OF PARTS AND THEIR FUNCTIONS Top panel AUTO BEEP SOURCE + BEEP SOURCE DIMMER CLOCK ALARM TYPE LABEL SIDE iPod VOLUME SOURCE ALARM SNOOZE SLEEP PRESET DISPLAY SNOOZE/SLEEP (Power) Set the sleep timer or switch the alarm to snooze mode Press to turn the system on/off.
  • Page 5: Front Panel Display

    NAMES OF PARTS AND THEIR FUNCTIONS Front panel display Play/shuffle/repeat indicator Displays the playback mode (P. 6, 9). Remote control signal receiver Clock indicator Shows the clock hour hand (P. 5). iPod Source indicator Shows selected source. Alarm indicator Turns on if the alarm has been set (P. 14). Sleep indicator Turns on if the sleep timer has been set (P.
  • Page 6 NAMES OF PARTS AND THEIR FUNCTIONS Remote control Remote control signal transmitter (Power) Press to turn the system on/off. ALARM Switches the alarm on/off. SNOOZE/SLEEP Set the sleep timer or switch the alarm to snooze mode (P. 16, 17). Source button Switch the source to be played.
  • Page 7: Adjusting The Clock

    ADJUSTING THE CLOCK Setting the time Move the CLOCK switch on the rear panel to SET. Top panel Rear panel AUTO BEEP SOURCE + BEEP SOURCE DIMMER CLOCK ALARM TYPE LABEL SIDE VOLUME SOURCE ALARM SNOOZE SLEEP PRESET Set the time with Set time (flashing) Move the CLOCK switch on the rear panel to CLOCK1 or CLOCK2.
  • Page 8: Listening To Ipod

    LISTENING TO iPod Playing the iPod For details on compatible iPod models, refer to “SPECIFICATIONS” (P. 21). Connect an iPod to the iPod dock. Top panel Press SOURCE and set iPod as the playback AUTO BEEP SOURCE + BEEP SOURCE CLOCK ALARM TYPE DIMMER...
  • Page 9: Listening To Cd And Usb Devices

    LISTENING TO CD AND USB DEVICES The unit will operate as follows when playing back tracks/files on CD/USB devices. • If the CD/USB device being played back is stopped, the track that was being played back will start playing from the beginning of the track the next time playback begins.
  • Page 10 LISTENING TO CD AND USB DEVICES Listening to a data CD Press SOURCE to set CD as the playback source. Top panel Insert the data CD into the Disc slot with the SOURCE + BEEP AUTO BEEP SOURCE label side facing toward the front of the unit. DIMMER CLOCK ALARM TYPE...
  • Page 11 LISTENING TO CD AND USB DEVICES Listening to a USB device Press SOURCE and set USB as the playback Top panel source. SOURCE + BEEP AUTO BEEP SOURCE DIMMER CLOCK ALARM TYPE Connect a USB device to the USB port. Playback starts automatically.
  • Page 12: Listening To Dab Stations

    LISTENING TO DAB STATIONS DAB (Digital Audio Broadcasting) and DAB+ use digital signals for clearer sound and more stable reception compared to analog signals. DAB+ is based on the original DAB standard but uses a more efficient audio codec. DAB and DAB+ are broadcast in blocks of data called “ensembles” containing up to several radio stations that are simultaneously broadcast. DAB and DAB+ can also include an extensive amount of text information, enabling you to select a station by name.
  • Page 13: Selecting Preset Dab Stations

    LISTENING TO DAB STATIONS Switching DAB station information Select DAB information by pressing DISPLAY Top panel repeatedly. SOURCE + BEEP BEEP SOURCE CLOCK ALARM TYPE Information is displayed in the order shown below. Text information  Ensemble name LABEL SIDE is displayed before the ensemble name.) ...
  • Page 14: Listening To Fm Stations

    LISTENING TO FM STATIONS Selecting the FM station Press SOURCE and set FM as the playback source. Top panel SOURCE + BEEP AUTO BEEP SOURCE DIMMER CLOCK ALARM TYPE Reception frequency LABEL SIDE VOLUME SOURCE ALARM SNOOZE SLEEP PRESET Using the remote control Press RADIO to switch between DAB/FM.
  • Page 15: Listening To External Sources

    LISTENING TO EXTERNAL SOURCES Selecting a preset FM station Press SOURCE and set FM as the playback source. Top panel AUTO BEEP SOURCE + BEEP Press PRESET repeatedly to select the preset FM SOURCE DIMMER CLOCK ALARM TYPE station. Using the remote control LABEL SIDE Press PRESET VOLUME...
  • Page 16: Using The Alarm Function

    Playback method Function A specific playlist stored on the iPod can be played back repeatedly. To play a playlist, create a playlist with the name “ALARM Yamaha DTA” in advance. Playlist* When creating the playlist name, make sure there are spaces iPod between words, and take note of upper/lower case letters.
  • Page 17 Press PRESET • When iPod is set as the source, the unit plays back the “ALARM Yamaha DTA” playlist at the set alarm time. If this playlist cannot be Press and hold ALARM. found within the iPod, the unit resumes play from the last track you played (resume).
  • Page 18: Turning The Alarm On/Off

    USING THE ALARM FUNCTION Turning the alarm on/off Press ALARM. Top panel When the alarm is on, the alarm indicator ( ) is shown, AUTO BEEP SOUR and the alarm time is shown for a while. If you press ALARM DIMMER CLOCK ALARM...
  • Page 19: Using The Sleep Timer

    USING THE SLEEP TIMER You can set the time to turn off the system automatically. Press SNOOZE/SLEEP a number of times to set Top panel the time until the system turns off. AUTO BEEP SOURC DIMMER CLOCK ALARM T The sleep timer can be set to 30, 60, 90 and 120 minutes. When the time is set, the sleep indicator ( ) is shown on the front panel display.
  • Page 20: Troubleshooting

    If there is a problem with the unit, check the following list first. If you cannot resolve the problem with the suggested solutions or if the problem is not listed below, turn off and unplug the system, and consult the nearest authorized Yamaha dealer or service center.
  • Page 21: Usb Device Playback

    TROUBLESHOOTING USB device playback Problem Cause Solution MP3/WMA file on the USB device does The USB device is not recognized. Turn off the system and reconnect the USB device to the unit. not play. Connect an AC adapter if supplied with the device. If the solutions above do not resolve the problem, the USB device is not playable on the unit.
  • Page 22: Notes On Discs And Usb Devices

    • Do not connect devices other than USB mass storage class devices (such as USB chargers or USB hubs), PCs, card readers, an external HDD, etc. • Yamaha will not be held responsible for any damage to or data loss on the USB device occurring while the device is connected to this unit.
  • Page 23: Specifications

    SPECIFICATIONS  PLAYER SECTION  GENERAL • Power supply .............AC 100 to 240 V, 50/60 Hz iPod (Digital connection) • Power consumption ................20 W • Compatible iPod models • System off consumption..............1.5 W ..........iPod touch (1st, 2nd, 3rd and 4th generations) •...
  • Page 24 AVERTISSEMENT dangereux et peut être responsable d’incendie, de dommage à POUR RÉDUIRE LES RISQUES D’INCENDIE OU DE l’appareil ou de blessure corporelle. Yamaha ne saurait être DÉCHARGE ÉLECTRIQUE, N’EXPOSEZ PAS CET tenue responsable des dommages résultant de l’alimentation APPAREIL À LA PLUIE OU À L’HUMIDITÉ.
  • Page 25: Accessoires Fournis

    Utilisez ces éléments pour Remarque monter le stand. Le montage Socle Tenir le capuchon USB du stand est décrit dans le Support ISX-800 hors de portée des enfants guide d’installation Bride pour câble (Assembly Guide). afin d’éviter qu’il ne soit Jeu de vis malencontreusement avalé.
  • Page 26: Nom Des Parties Et Leurs Fonctions

    NOM DES PARTIES ET LEURS FONCTIONS Panneau supérieur SOURCE + BEEP AUTO BEEP SOURCE CLOCK ALARM TYPE DIMMER LABEL SIDE iPod VOLUME SOURCE ALARM SNOOZE SLEEP PRESET DISPLAY SNOOZE/SLEEP (Alimentation) Règle la minuterie ou bascule l’alarme en mode snooze Appuyez pour allumer/éteindre le système. L’heure est affichée (P.
  • Page 27: Afficheur

    NOM DES PARTIES ET LEURS FONCTIONS Afficheur Indicateur de lecture/mode aléatoire/répétition Affiche le mode de lecture (P. 6, 9). Capteur de télécommande Indicateur d’horloge Affiche l’aiguille des heures de l’horloge (P. 5). iPod Indicateur de source Indique la source sélectionnée. Indicateur d’alarme S’allume si l’alarme est activée (P.
  • Page 28 NOM DES PARTIES ET LEURS FONCTIONS Télécommande Émetteur de télécommande (Alimentation) Appuyez pour allumer/éteindre le système. ALARM Active/désactive l’alarme. SNOOZE/SLEEP Règle la minuterie ou bascule l’alarme en mode snooze (P. 16, 17). Touche de sélection de source Change de source de lecture. Quand vous utilisez la radio, appuyez sur RADIO pour alterner entre DAB/FM.
  • Page 29: Réglage De L'horloge

    RÉGLAGE DE L’HORLOGE Réglage de l’heure Placez le sélecteur CLOCK du panneau arrière sur Panneau supérieur SET. SOURCE + BEEP AUTO BEEP SOURCE DIMMER CLOCK ALARM TYPE Panneau arrière LABEL SIDE VOLUME SOURCE ALARM SNOOZE SLEEP PRESET Réglez l’heure avec Réglage de l’heure (clignote) Placez le sélecteur CLOCK du panneau arrière sur...
  • Page 30: Écoute D'un Ipod

    ÉCOUTE D’UN iPod Lecture de l’iPod Pour plus de détails à propos des modèles d’iPod compatibles, veuillez consulter “CARACTÉRISTIQUES TECHNIQUES” (P. 21). Branchez un iPod au dock pour iPod. Panneau supérieur SOURCE + BEEP AUTO BEEP SOURCE Appuyez sur SOURCE et choisissez iPod comme DIMMER CLOCK ALARM TYPE...
  • Page 31: Écoute D'un Cd Et D'appareils Usb

    ÉCOUTE D’UN CD ET D’APPAREILS USB Cette section décrit le fonctionnement de l’appareil pour la lecture de plages/fichiers sur CD/appareils USB. • Quand vous arrêtez puis relancez la lecture du CD/de l’appareil USB, cet appareil reprend la lecture de la dernière plage lue depuis le début.
  • Page 32: Écoute D'un Cd De Données

    ÉCOUTE D’UN CD ET D’APPAREILS USB Écoute d’un CD de données Appuyez sur SOURCE pour choisir le CD comme Panneau supérieur source de lecture. SOURCE + BEEP AUTO BEEP SOURCE DIMMER CLOCK ALARM TYPE Insérez le CD de données dans la fente pour disque avec l’étiquette tournée vers l’avant de l’appareil.
  • Page 33 ÉCOUTE D’UN CD ET D’APPAREILS USB Écoute d’un appareil USB Appuyez sur SOURCE et choisissez USB comme Panneau supérieur source de lecture. SOURCE + BEEP AUTO BEEP SOURCE DIMMER CLOCK ALARM TYPE Branchez un appareil USB au port USB. La lecture commence automatiquement. Le numéro de dossier/ fichier s’affiche un instant quand vous lancez la lecture ou LABEL SIDE sautez les plages.
  • Page 34: Écoute Des Stations Dab

    ÉCOUTE DES STATIONS DAB DAB (diffusion audionumérique) et DAB+ utilisent des signaux numériques pour un son plus net et une réception plus stable par rapport aux signaux analogiques. DAB+ est basé sur la norme DAB originale, mais utilise un codec audio plus efficace. DAB et DAB+ sont diffusés en blocs de données appelés “ensembles”, contenant plusieurs stations radio diffusées simultanément.
  • Page 35: Affichage Des Informations Sur La Station Dab

    ÉCOUTE DES STATIONS DAB Affichage des informations sur la station DAB Vous pouvez sélectionner les informations DAB Panneau supérieur affichées en appuyant plusieurs fois sur la touche BEEP SOURCE + BEEP SOURCE DISPLAY. CLOCK ALARM TYPE Les informations affichées changent selon l’ordre suivant. Informations textuelles LABEL SIDE ...
  • Page 36: Écoute De Stations Fm

    ÉCOUTE DE STATIONS FM Sélection de la station FM Appuyez sur SOURCE et choisissez FM comme Panneau supérieur source de lecture. SOURCE + BEEP AUTO BEEP SOURCE DIMMER CLOCK ALARM TYPE Fréquence LABEL SIDE de la station VOLUME SOURCE ALARM SNOOZE SLEEP PRESET Utilisation de la télécommande...
  • Page 37: Rappel D'une Présélection Fm

    ÉCOUTE DE SOURCES EXTERNES Rappel d’une présélection FM Appuyez sur SOURCE et choisissez FM comme Panneau supérieur source de lecture. SOURCE + BEEP AUTO BEEP SOURCE CLOCK ALARM TYPE DIMMER Appuyez plusieurs fois sur PRESET pour choisir la présélection voulue. LABEL SIDE Utilisation de la télécommande Appuyez sur PRESET...
  • Page 38: Utilisation De La Fonction D'alarme

    Veillez quand vous définissez le nom de la liste à entrer les espaces iPod entre les mots et à respecter les majuscules/minuscules. Si la liste de lecture “ALARM Yamaha DTA” est introuvable sur l’iPod, Reprise l’appareil reprend la lecture de la dernière plage lue.
  • Page 39: Réglage De L'heure Du Réveil Et Du Type D'alarme

    Appuyez et maintenez ALARM enfoncé. • Si vous avez choisi iPod comme source, l’appareil lit la liste de lecture “ALARM Yamaha DTA” à l’heure de réveil programmée. Si cette liste de lecture est introuvable sur l’iPod, l’appareil reprend la lecture de la dernière plage lue (reprise).
  • Page 40: Activation/Désactivation De L'alarme

    UTILISATION DE LA FONCTION D’ALARME Activation/désactivation de l’alarme Appuyez sur ALARM. Panneau supérieur Quand l’alarme est activée, le témoin d’alarme ( AUTO BEEP SOUR s’allume et l’heure de l’alarme s’affiche quelques instants. Si CLOCK ALARM DIMMER vous appuyez à nouveau sur ALARM, l’indicateur d’alarme ) s’éteint et l’alarme est coupée.
  • Page 41: Utilisation De La Minuterie

    UTILISATION DE LA MINUTERIE Vous pouvez régler l’heure à laquelle le système doit s’arrêter automatiquement. Appuyez plusieurs fois sur SNOOZE/SLEEP pour Panneau supérieur choisir le délai avant la mise hors tension du AUTO BEEP SOURC DIMMER CLOCK ALARM T système. Vous pouvez choisir un délai de 30, 60, 90 et 120 minutes.
  • Page 42: Guide De Dépannage

    Si cet appareil ne semble pas fonctionner normalement, vérifiez les points de la liste suivante. Si l’anomalie constatée n’est pas mentionnée, ou bien si les mesures suggérées sont sans effet, mettez le système hors service, débranchez le cordon d’alimentation et adressez-vous au revendeur ou service après-vente Yamaha le plus proche. Généralités...
  • Page 43: Lecture D'un Appareil Usb

    GUIDE DE DÉPANNAGE Lecture d’un appareil USB Anomalies Causes possibles Solution Un fichier MP3/WMA sur l’appareil USB L’appareil USB n’est pas détecté. Arrêtez le système et rebranchez l’appareil USB à l’appareil. ne peut pas être lu. Connectez un adaptateur secteur, s’il est fourni avec l’appareil.
  • Page 44: Remarques Sur Les Disques Et Appareils Usb

    à cet appareil. * CD-R/RW au format ISO 9660 • Yamaha décline toute responsabilité quant aux dommages ou pertes de données enregistrées sur le dispositif USB pouvant se produire lorsqu’un dispositif est relié à cet appareil.
  • Page 45: Caractéristiques Techniques

    CARACTÉRISTIQUES TECHNIQUES  SECTION LECTEUR  GÉNÉRALITÉS • Alimentation............CA 100 à 240 V, 50/60 Hz iPod (connexion numérique) • Consommation ..................20 W • iPod compatibles • Consommation lorsque le système est désactivé.........1,5 W ............ iPod touch (1re, 2e, 3e et 4e générations) •...
  • Page 46 VORSICHT: VOR DER BEDIENUNG DIESES GERÄTES DURCHLESEN. Um optimales Leistungsvermögen sicherzustellen, lesen wenden Sie sich bitte an einen Yamaha-Kundendienst. Sie bitte die Anleitung aufmerksam durch. Bewahren Sie Das Gehäuse sollte niemals selbst geöffnet werden. die Anleitung danach für spätere Nachschlagzwecke 15 Falls Sie das Gerät für längere Zeit nicht verwenden (z.B.
  • Page 47: Mitgeliefertes Zubehör

    Stab Verwenden Sie diese Artikel Halten Sie die USB- zum Montieren des Sockel Abdeckung von Ständers. Lesen Sie dazu die Auflage ISX-800 Kindern fern, damit sie separate Montageanleitung. Kabelklemme nicht versehentlich verschluckt wird. Schraubensatz Verwendung der Fernbedienung Setzen Sie die Batterien mit der korrekten Polarität (+ und –) in die Richten Sie die Fernbedienung auf den Empfänger des...
  • Page 48: Namen Und Funktionen Der Teile

    NAMEN UND FUNKTIONEN DER TEILE Oberseite AUTO BEEP SOURCE + BEEP SOURCE DIMMER CLOCK ALARM TYPE LABEL SIDE iPod VOLUME SOURCE ALARM SNOOZE SLEEP PRESET DISPLAY SNOOZE/SLEEP (Netzschalter) Stellt den Sleep-Timer ein oder aktiviert den Schlummer- Schaltet das System ein/aus. Die Zeit wird auch bei Modus des Weckers (S.
  • Page 49: Bedienfelddisplay

    NAMEN UND FUNKTIONEN DER TEILE Bedienfelddisplay Anzeige Wiedergabe/Zufallswiedergabe/ Wiederholungswiedergabe Zeigt den Wiedergabemodus an (S. 6, 9). Empfänger Fernbedienungssignal Uhranzeige iPod Zeigt den Stundenzeiger der Uhr an (S. 5). Wiedergabequellenanzeige Zeigt die gewählte Wiedergabequelle an. Weckanzeige Leuchtet bei aktiviertem Wecker (S. 14). Sleep-Anzeige Leuchtet bei aktiviertem Sleep-Timer (S.
  • Page 50 NAMEN UND FUNKTIONEN DER TEILE Fernbedienung Sender des Fernbedienungssignals (Netzschalter) Schaltet das System ein/aus. ALARM Stellt den Wecker ein/aus. SNOOZE/SLEEP Stellt den Sleep-Timer ein oder aktiviert den Schlummer- Modus des Weckers (S. 16, 17). Wiedergabequellentaste Wählt die Wiedergabequelle. Wenn Sie Radio hören, drücken Sie RADIO, um zwischen DAB/FM umzuschalten.
  • Page 51: Einstellen Der Uhr

    EINSTELLEN DER UHR Einstellen der Zeit Stellen Sie den CLOCK-Schalter auf der Rückseite Oberseite auf SET. SOURCE + BEEP AUTO BEEP SOURCE DIMMER CLOCK ALARM TYPE Rückseite LABEL SIDE VOLUME SOURCE ALARM SNOOZE SLEEP PRESET Stellen Sie die Zeit mit ein.
  • Page 52: Wiedergabe Eines Ipod

    WIEDERGABE EINES iPod Wiedergabe des iPod Einzelheiten zu den kompatiblen iPod-Modellen finden Sie unter TECHNISCHE DATEN (S. 21). „ “ Schließen Sie einen iPod an das iPod-Dock an. Oberseite SOURCE + BEEP AUTO BEEP Drücken Sie SOURCE und stellen Sie iPod als SOURCE DIMMER CLOCK...
  • Page 53: Wiedergabe Von Cds Oder Usb-Geräten

    WIEDERGABE VON CDs ODER USB-GERÄTEN Titel/Dateien von CDs/USB-Geräten werden folgendermaßen wiedergegeben. • Wenn die Wiedergabe einer CD/eines USB-Geräts gestoppt wird, beginnt die Wiedergabe beim nächsten Mal am Anfang des zu dem Stopp-Zeitpunkt wiedergegebenen Titels. • Wenn Sie bei angehaltener Wiedergabe auf der Fernbedienung drücken, werden die Titel beim nächsten Wiedergabestart folgendermaßen wiedergegeben: –...
  • Page 54 WIEDERGABE VON CDs ODER USB-GERÄTEN Wiedergabe einer Daten-CD Drücken Sie SOURCE, um CD als Oberseite Wiedergabequelle zu wählen. SOURCE + BEEP AUTO BEEP SOURCE DIMMER CLOCK ALARM TYPE Legen Sie die Daten-CD so in den Disc-Schacht ein, dass die beschriftete Seite zur Vorderseite des Geräts zeigt.
  • Page 55 WIEDERGABE VON CDs ODER USB-GERÄTEN Wiedergabe eines USB-Geräts Drücken Sie SOURCE, um USB als Oberseite Wiedergabequelle zu wählen. AUTO BEEP SOURCE + BEEP SOURCE DIMMER CLOCK ALARM TYPE Schließen Sie ein USB-Gerät an den USB- Anschluss an. Die Wiedergabe startet automatisch. Nach Wiedergabestart LABEL SIDE oder Vorspringen zum nächsten Titel wird für kurze Zeit die Ordner-/Dateinummer angezeigt.
  • Page 56: Wiedergabe Von Dab-Radiosendern

    WIEDERGABE VON DAB-RADIOSENDERN Bei DAB (Digital Audio Broadcasting) und DAB+ werden digitale Signale genutzt, um im Vergleich zu analogen Signalen einen besseren Klang und einen stabileren Empfang zu gewährleisten. DAB+ basiert auf dem ursprünglichen DAB-Standard, nutzt aber einen effizienteren Audio-Codec. DAB und DAB+ werden in Datenblöcken übertragen, den sogenannten „Ensembles“, die mehrere Radiosender enthalten, die gleichzeitig übertragen werden.
  • Page 57 WIEDERGABE VON DAB-RADIOSENDERN Umschalten der DAB-Radiosender-Informationen Wählen Sie die DAB-Informationen, indem Sie Oberseite DISPLAY wiederholt drücken. SOURCE + BEEP BEEP SOURCE CLOCK ALARM TYPE Die Informationen werden in der untenstehenden Reihenfolge angezeigt. Textinformationen LABEL SIDE  Ensemble-Name wird vor dem Ensemble-Namen angezeigt) ...
  • Page 58: Wiedergabe Von Fm-Radiosendern

    WIEDERGABE VON FM-RADIOSENDERN Auswählen des FM-Senders Drücken Sie SOURCE, um FM als Oberseite Wiedergabequelle zu wählen. SOURCE + BEEP AUTO BEEP SOURCE DIMMER CLOCK ALARM TYPE Empfangs- LABEL SIDE frequenz VOLUME SOURCE ALARM SNOOZE SLEEP PRESET Bei Verwendung der Fernbedienung Drücken Sie RADIO, um zwischen DAB/FM umzuschalten.
  • Page 59: Wiedergabe Von Externen Quellen

    WIEDERGABE VON EXTERNEN QUELLEN Auswählen eines voreingestellten FM-Senders Oberseite Drücken Sie SOURCE, um FM als SOURCE + BEEP AUTO BEEP SOURCE CLOCK ALARM TYPE DIMMER Wiedergabequelle zu wählen. Drücken Sie PRESET wiederholt, um einen voreingestellten FM-Sender zu wählen. LABEL SIDE Bei Verwendung der Fernbedienung VOLUME SOURCE...
  • Page 60: Verwenden Der Weckfunktion

    Stellen Sie sicher, dass Sie im Namen der Wiedergabeliste die iPod Leerstellen und die Groß-/Kleinschreibung beachten. Wenn die Wiedergabeliste „ALARM Yamaha DTA“ auf Ihrem iPod nicht Fortsetzen gefunden werden kann, gibt das Gerät den Titel wieder, den Sie zuletzt gehört haben.
  • Page 61 Drücken Sie PRESET Weckzeit • Wenn iPod als Quelle festgelegt ist, gibt das Gerät die Wiedergabeliste „ALARM Yamaha DTA“ zum festgelegten Weckzeitpunkt wieder. Wenn die Wiedergabeliste auf Ihrem iPod Weckanzeige nicht gefunden werden kann, setzt das Gerät die Wiedergabe mit dem Titel fort, den Sie zuletzt gehört haben (Fortsetzen).
  • Page 62: Bedienungsvorgänge Während Der Wiedergabe Des Wecktons

    VERWENDEN DER WECKFUNKTION Ein-/Ausschalten des Weckers Drücken Sie ALARM. Oberseite Bei aktiviertem Wecker leuchtet die Weckanzeige ( ) auf, AUTO BEEP SOUR und die Weckzeit wird für eine gewisse Zeit angezeigt. Wenn DIMMER CLOCK ALARM Sie ALARM erneut drücken, werden die Alarmanzeige ) und der Wecker ausgeschaltet.
  • Page 63: Verwendung Des Sleep-Timers

    VERWENDUNG DES SLEEP-TIMERS Sie können die Zeit einstellen, zu der sich das Gerät automatisch ausschaltet. Drücken Sie SNOOZE/SLEEP mehrmals, um die Oberseite Ausschaltzeit des Geräts einzustellen. AUTO BEEP SOURC DIMMER CLOCK ALARM T Der Sleep-Timer kann auf 30, 60, 90 und 120 Minuten eingestellt werden.
  • Page 64: Fehlerbehebung

    Wenn ein Problem mit diesem Gerät auftritt, prüfen Sie als erstes die folgende Liste. Falls Sie die Störung nicht mithilfe der folgenden Abhilfemaßnahmen beheben können, oder die Störung nachfolgend nicht aufgelistet ist, schalten Sie dieses Gerät aus, ziehen Sie den Netzstecker und wenden Sie sich an Ihren nächsten autorisierten Yamaha-Fachhändler oder Yamaha-Kundendienst. Allgemeines Problem Mögliche Ursache...
  • Page 65: Dab-Empfang

    FEHLERBEHEBUNG Problem Mögliche Ursache Lösung Im Bedienfelddisplay wird „Err“ angezeigt, Beim Gerät ist ein Fehler aufgetreten. Werfen Sie die Disc mit aus. nachdem eine Disc eingesetzt wurde. USB-Gerät-Wiedergabe Problem Mögliche Ursache Lösung Die MP3-/WMA-Datei auf dem USB- Das USB-Gerät wird nicht erkannt. Schalten Sie das System aus, und schließen Sie das USB-Gerät erneut an das Gerät an.
  • Page 66: Hinweise Zu Discs Und Usb-Geräten

    (wie USB-Ladestationen oder USB-Hubs), PCs, Kartenleser, externe Festplatten usw. an. * CD-R/RW mit ISO 9660-Format • Yamaha übernimmt keinerlei Haftung für auftretende Schäden oder Datenverlust von USB-Geräten, die an dieses Gerät angeschlossen sind. • Die Abspielbarkeit und Stromversorgung aller Arten von USB-Geräten Dieses Gerät kann Discs wiedergeben, auf denen eines der oben...
  • Page 67: Technische Daten

    TECHNISCHE DATEN  PLAYER-BEREICH  ALLGEMEINES • Stromversorgung ......100 bis 240 V Wechselstrom, 50/60 Hz iPod (Digitalanschluss) • Stromverbrauch ...................20 W • Kompatible iPod-Modellen • Verbrauch bei ausgeschaltetem System ..........1,5 W ............iPod touch (1., 2., 3. und 4. Generation) •...
  • Page 68 CA fintanto che essa rimane collegata alla di voltaggi superiori è pericoloso e può causare incendi, presa di rete, ciò anche se l’unità viene spenta col guasti e/o ferite. Yamaha non può venire considerata comando . In questo stato l’unità consuma una quantità...
  • Page 69: Accessori In Dotazione

    Per assemblare il sostegno utilizzare questi componenti. Tenere il coperchio USB Base Per informazioni su come fuori dalla portata dei Sostegno ISX-800 assemblare il sostegno, bambini, onde evitarne Morsetto cavo leggere separatamente la l’ingestione accidentale. Gruppo di viti Guida per l’assemblaggio.
  • Page 70: Nome Dei Componenti E Relative Funzioni

    NOME DEI COMPONENTI E RELATIVE FUNZIONI Pannello superiore SOURCE + BEEP AUTO BEEP SOURCE DIMMER CLOCK ALARM TYPE LABEL SIDE iPod VOLUME SOURCE ALARM SNOOZE SLEEP PRESET DISPLAY SNOOZE/SLEEP (Alimentazione) Impostare il timer per lo spegnimento o commutare la sveglia Premere per accendere/spegnere il sistema.
  • Page 71: Display Del Pannello Anteriore

    NOME DEI COMPONENTI E RELATIVE FUNZIONI Display del pannello anteriore Indicatore di riproduzione/riproduzione casuale/ripetizione Visualizza la modalità di riproduzione (P. 6, 9). Ricevitore del segnale del telecomando Indicatore orologio iPod Mostra la lancetta delle ore dell’orologio (P. 5). Indicatore della sorgente Visualizza la sorgente selezionata.
  • Page 72 NOME DEI COMPONENTI E RELATIVE FUNZIONI Telecomando Trasmettitore del segnale del telecomando (Alimentazione) Premere per accendere/spegnere il sistema. ALARM Attiva/disattiva la sveglia. SNOOZE/SLEEP Per impostare il timer per lo spegnimento o commutare la sveglia sulla modalità snooze (P. 16, 17). Pulsante della sorgente Per commutare sulla sorgente di riproduzione.
  • Page 73: Regolazione Dell'orologio

    REGOLAZIONE DELL’OROLOGIO Impostazione dell’ora Spostare l’interruttore CLOCK del pannello Pannello superiore posteriore su SET. SOURCE + BEEP AUTO BEEP SOURCE CLOCK ALARM TYPE DIMMER Pannello posteriore LABEL SIDE VOLUME SOURCE ALARM SNOOZE SLEEP PRESET Impostare l’ora mediante Tempo impostato (lampeggiante) Spostare l’interruttore CLOCK del pannello posteriore su CLOCK1 o CLOCK2.
  • Page 74: Ascolto Dell'ipod

    ASCOLTO DELL’iPod Riproduzione con l’iPod Per i dettagli sui modelli di iPod compatibili, fare riferimento a “DATI TECNICI” (P. 21). Collegare l’iPod alla base iPod. Pannello superiore SOURCE + BEEP AUTO BEEP Premere SOURCE e impostare l’iPod come SOURCE DIMMER CLOCK ALARM TYPE sorgente per la riproduzione.
  • Page 75: Ascolto Di Cd E Dispositivi Usb

    ASCOLTO DI CD E DISPOSITIVI USB Riproducendo brani/file da CD/dispositivi USB, l’unità funziona nella seguente modalità. • In caso di arresto del CD/del dispositivo USB che viene riprodotto, la traccia riprodotta in quel momento ricomincia alla ripresa della riproduzione. • Premendo sul telecomando mentre la riproduzione è...
  • Page 76 ASCOLTO DI CD E DISPOSITIVI USB Ascolto di un CD dati Premere SOURCE per impostare il CD come Pannello superiore sorgente di riproduzione. SOURCE + BEEP AUTO BEEP SOURCE DIMMER CLOCK ALARM TYPE Inserire il CD dati nell’alloggiamento con il lato dell’etichetta rivolto verso la parte anteriore dell’unità.
  • Page 77 ASCOLTO DI CD E DISPOSITIVI USB Ascolto di un dispositivo USB Premere SOURCE e impostare l’USB come Pannello superiore sorgente di riproduzione. SOURCE + BEEP AUTO BEEP SOURCE CLOCK ALARM TYPE DIMMER Collegare un dispositivo USB alla porta USB. La riproduzione si avvia automaticamente. Il numero della cartella/del file brano viene visualizzato per un attimo quando LABEL SIDE inizia la riproduzione o si saltano i brani.
  • Page 78: Ascolto Di Stazioni Dab

    ASCOLTO DI STAZIONI DAB DAB (Digital Audio Broadcasting - Trasmissioni audio digitali) e DAB+ utilizzano segnali digitali per un audio più chiaro e una ricezione più stabile rispetto ai segnali analogici. DAB+ si basa sullo standard DAB originale, ma utilizza un codec audio più efficace. DAB e DAB+ vengono trasmessi in blocchi di dati, detti “ensemble”, contenenti anche diverse stazioni radio, trasmesse contemporaneamente.
  • Page 79 ASCOLTO DI STAZIONI DAB Attivazione delle informazioni sulle stazioni DAB Selezionare DAB premendo DISPLAY più volte. Pannello superiore Le informazioni vengono visualizzate nell’ordine indicato qui SOURCE + BEEP BEEP SOURCE CLOCK ALARM TYPE di seguito. Informazioni testuali  Il nome dell’ensemble LABEL SIDE viene visualizzato prima del nome dell’ensemble.) ...
  • Page 80: Ascolto Di Stazioni Radio In Fm

    ASCOLTO DI STAZIONI RADIO IN FM Memorizzare la stazione FM Premere SOURCE e impostare FM come sorgente Pannello superiore per la riproduzione. SOURCE + BEEP AUTO BEEP SOURCE CLOCK ALARM TYPE DIMMER Frequenza LABEL SIDE di ricezione VOLUME SOURCE ALARM SNOOZE SLEEP PRESET Uso del telecomando...
  • Page 81: Ascolto Di Sorgenti Esterne

    ASCOLTO DI SORGENTI ESTERNE Selezione di una stazione FM preselezionata Premere SOURCE e impostare FM come sorgente Pannello superiore di riproduzione. SOURCE + BEEP AUTO BEEP SOURCE CLOCK DIMMER ALARM TYPE Premere più volte PRESET per selezionare la stazione FM preselezionata. LABEL SIDE Uso del telecomando Premere PRESET...
  • Page 82: Uso Della Funzione Sveglia

    Assegnando un nome alla playlist, accertarsi che vi siano spazi tra le iPod parole, e prendere nota delle lettere maiuscole/minuscole. Se non è possibile trovare la playlist “ALARM Yamaha DTA” nell’iPod, Ripresa l’unità riprende la riproduzione dall’ultimo brano ascoltato. Brano selezionato Il brano selezionato viene riprodotto ripetutamente.
  • Page 83 Uso del telecomando Premere PRESET • Se la sorgente impostata è l’iPod, l’unità riproduce la playlist “ALARM Yamaha DTA” all’ora impostata per la sveglia. Se non è Ora della sveglia possibile trovare la playlist nell’iPod, l’unità riprende la riproduzione dall’ultimo brano ascoltato (ripresa).
  • Page 84: Attivazione/Disattivazione Della Sveglia

    USO DELLA FUNZIONE SVEGLIA Attivazione/disattivazione della sveglia Premere ALARM. Pannello superiore Quando la sveglia è attivata, ne viene visualizzato l’indicatore AUTO BEEP SOUR ) e per alcuni istanti l’ora. Premendo nuovamente DIMMER CLOCK ALARM ALARM, l’indicatore della sveglia ( ) e la sveglia si spengono.
  • Page 85: Uso Del Timer Per Lo Spegnimento

    USO DEL TIMER PER LO SPEGNIMENTO È possibile impostare l’ora di spegnimento automatico del sistema. Premere SNOOZE/SLEEP alcune volte finché il Pannello superiore sistema non si spegne. AUTO BEEP SOURC Il timer per lo spegnimento può essere impostato su 30, 60, 90 DIMMER CLOCK ALARM T...
  • Page 86: Risoluzione Dei Problemi

    Se c’è un problema nell’unità, verificare innanzitutto l’elenco che segue. Qualora non si riuscisse a risolvere il problema applicando le soluzioni suggerite, o se il problema non rientra fra quelli elencati qui di seguito, spegnere l’unità e staccare la spina, quindi rivolgersi al più vicino rivenditore o centro di assistenza autorizzato Yamaha. Problemi di carattere generale...
  • Page 87: Riproduzione Di Un Dispositivo Usb

    RISOLUZIONE DEI PROBLEMI Riproduzione di un dispositivo USB Problema Causa Soluzione I file MP3/WMA nel dispositivo USB non Il dispositivo USB non è stato riconosciuto. Spegnere il sistema e ricollegare il dispositivo USB all’unità. vengono riprodotti. Collegare una spina di alimentazione CA, se in dotazione con il dispositivo.
  • Page 88: Note Sui Dischi E I Dispositivi Usb

    (per esempio: caricabatterie USB o hub USB), PC, lettori di schede, dischi rigidi esterni, ecc. • La Yamaha declina ogni responsabilità in caso di danni al dispositivo USB o di perdita di dati dallo stesso, che si dovessero verificare mentre tale * CD-R/RW formato ISO 9660 dispositivo è...
  • Page 89: Dati Tecnici

    DATI TECNICI  SEZIONE LETTORE  DATI GENERALI • Alimentazione ..........CA da 100 a 240 V, 50/60 Hz iPod (Connessione digitale) • Consumo ....................20 W • iPod compatibili • Consumo a sistema spento ..............1,5 W ............iPod touch (1a, 2a, 3a e 4a generazione) •...
  • Page 90 VAROITUS CAUTION Muiden kuin tässä esitettyjen toimintojen säädön tai asetusten muutto saattaa Use of controls or adjustments or performance of procedures other than altistaa vaaralliselle säteilylle tai muille vaarallisille toiminnoille. those specified herein may result in hazardous radiation exposure. Advarsel: Usynlig laserstråling ved åbning når sikkerhedsafbrydere er ude af AVERTISSEMENT funktion.
  • Page 92 Printed in China WY78640 © 2011 Yamaha Corporation...

Table des Matières