Table des Matières

Publicité

Les langues disponibles

Les langues disponibles

Liens rapides

EN
PL
FR
Hood / User Manual
Okap / Instrukcja Obsługi
Hotte / Manuel d'utilisation
BHCA66641BFBHS
185732166/ EN/ PL/ FR/ R.AA/ 15/06/2022 08:17
7704331211

Publicité

Table des Matières

Dépannage

loading

Sommaire des Matières pour Beko BHCA66641BFBHS

  • Page 1 Hood / User Manual Okap / Instrukcja Obsługi Hotte / Manuel d'utilisation BHCA66641BFBHS 185732166/ EN/ PL/ FR/ R.AA/ 15/06/2022 08:17 7704331211...
  • Page 2 Welcome! Dear Customer, Thank you for choosing the Beko product. We want your product, manufactured with high quality and technology, to offer you the best efficiency. Therefore, carefully read this manual and any other documentation provided before using the product.
  • Page 3: Table Des Matières

    Table of Contents 1 Safety Instructions ......General Safety ......Electrical Safety ......Product Safety......Intended Use ........ Child, Vulnerable Persons and Pet Safety ........... Transportation Safety ....2 Environmental Instructions ..Waste Directive......2.1.1 Compliance with the WEEE Dir- ective and Disposing of the Waste Product......
  • Page 4: Safety Instructions

    1 Safety Instructions • This section includes the General Safety safety instructions necessary • This product can be used by to prevent the risk of personal children 8 years of age and injury or material damage. older, and people who are un- •...
  • Page 5: Electrical Safety

    • Have the adequacy of your • If the product is handed over building's ventilation and flue to someone else for personal system checked by authorized use or second-hand use pur- persons. poses, the user’s manual, • This product is not intended product labels and other relev- for use by persons (including ant documents and parts...
  • Page 6: Product Safety

    • The appliance power should • In case of any damage, switch be cut off during installation, off the product and disconnect maintenance, cleaning and re- it from the mains. To do this, pair processes. turn off the fuse at home. •...
  • Page 7 • Do not create a high flame un- thoroughly of the odours and der the product. Otherwise, vapours generated during the oil in the oil trap filter may cooking. ignite, causing a fire. • Adequate ventilation must be • Run the product after placing available in the room when the cooking pots, pans, etc.
  • Page 8: Intended Use

    • Do not connect to flues with Intended Use heating stove connection, • This product is designed for flues where waste gas is dis- home use. Commercial use posed from or flues with rising will void the guarantee. flames. Comply with local reg- •...
  • Page 9: Transportation Safety

    • The packaging materials are • Do not put other items on the dangerous for children. Keep product and carry the product the packaging materials out of upright. the reach of children or sort • When you need to transport them into waste according to the product, wrap it with waste instructions.
  • Page 10: Your Product

    3 Your product 3.1 Product Introduction 1 Hood body 2 Hood glass lid 3 Damper 4 Aluminium filter 5 Lamp 6 Lamp 7 Aluminium filter lock 8 Control panel Wall mounting part Dependent on the model. It may not be available on your product.
  • Page 11 Air router Covers to prevent reverse airflow Flue connection adapter EN / 11...
  • Page 12: Technical Specifications

    3.3 Technical Specifications Product external dimensions (height/width/depth) (mm) min. 910 - max. 1138 /595 /419 Voltage/Frequency 220-240 V ~1N; 50 Hz Total power consumption max. 300 W Suction power 700-720 m3/h Diameter of air outlet pipe 120-150 mm Control Model A 3 levels Model B 3 levels + 1 booster...
  • Page 13: Using The Hood

    4 Using the Hood The hood has an engine with various MODEL C speeds. For a good performance, we re- commend using low speeds under normal conditions and high speeds in case of strong odour and vapour condensation. The program is cancelled if power is cut when any programs in your hood are active.
  • Page 14 In intensive ventilation mode, when You can only change the light colour any speed key is touched, it returns shade while the lamp has high light to that speed level and continues to intensity. operate. In the event of a power outage, your Operating the lamp hood will remember the colour a.
  • Page 15 If the ambient temperature difference The warning is not cancelled if the occurs even when the hob is not op- power is cut when the hood gives erating while the automatic mode is aluminium filter fill warning. When active, the temperature sensor in the power is available, it continues to product will detect the difference warn with the light of Speed 2 key...
  • Page 16: Maintenance And Cleaning

    If you turn off the warning without re- placing the carbon filter, the operat- ing time of 100 hours is reset and it starts over. At the end of the next 100 hours, warning is given again. 5 Maintenance and Cleaning 5.1 General Cleaning Information 5.2 Aluminium Filter General warnings...
  • Page 17: Hood Lamp

    Removing carbon filters a. Open the glass cover of the hood and re- move the aluminium filter. b. Unscrew the carbon filters on the right and left of the motor holder. c. Reinstall the aluminium filter in its slot after flushing by following the above steps in reverse.
  • Page 18 Witamy! Drogi kliencie, Dziękujemy za wybór urządzenia Beko. Chcemy, aby produkt, wyprodukowany w wysokiej ja- kości i technologii, oferował najlepszą wydajność. W tym celu należy uważnie przeczytać ni- niejszą instrukcję i inną dokumentację dostarczoną z urządzeniem przed użyciem. Pamiętaj o wszystkich informacjach i ostrzeżeniach zawartych w instrukcji obsługi. W ten spo- sób będziesz chronić...
  • Page 19 Spis treści 1 Instrukcje bezpieczeństwa ..20 Ogólne zasady bezpieczeństwa..20 Bezpieczeństwo elektryczne..21 Bezpieczeństwo urządzenia..22 Przeznaczenie ......25 Bezpieczeństwo dzieci, osób wy- magających szczególnego trakto- wania i zwierząt domowych ..Zabezpieczenie podczas transpor- tu..........2 Instrukcje dotyczące środowiska 26 Dyrektywa w sprawie odpadów ..
  • Page 20: Instrukcje Bezpieczeństwa

    1 Instrukcje bezpieczeństwa • Rozdział ten omawia instrukcje Ogólne zasady bezpieczeństwa, które pomo- bezpieczeństwa gą zapobiec ryzyku uszkodze- • Niniejszy sprzęt może być nia ciała lub mienia. użytkowany przez dzieci w • Jeśli produkt zostanie przeka- wieku co najmniej 8 lat i przez zany komuś...
  • Page 21: Bezpieczeństwo Elektryczne

    ne gazy (piecyki na drewno, • Nie używaj urządzenia, jeśli gaz, olej i węgiel, kotły, bojlery jest uszkodzone lub ma wi- itp.). doczne uszkodzenia. • Należy zlecić kontrolę spraw- • Upewnij się, że pokrętła funkcji ności systemu wentylacyjnego produktu są wyłączone po i kominowego budynku oso- każdym użyciu.
  • Page 22: Bezpieczeństwo Urządzenia

    wiony przez autoryzowanego utratę gwarancji na produkt i agenta serwisowego. Ryzyko zagrażają bezpieczeństwu porażenia prądem! użytkownika. • Nie podłączaj okapu do zasila- • Nie instaluj głównego przewo- nia, dopóki nie zostanie za- du w pobliżu grzejników. Prze- montowany. wód może się stopić, powo- •...
  • Page 23 winna być mniejsza niż 650 • Nie wystawiaj urządzenia na mm w przypadku piekarników działanie otwartego ognia. Mo- gazowych i 500 mm w przy- że to spowodować zapalenie padku piekarników elektrycz- oleju gromadzącego się w fil- nych. trze. Nie używaj urządzenia •...
  • Page 24 dzeń, które odprowadzają po- ży przestrzegać lokalnych wietrze z powrotem do po- przepisów dotyczących mieszczenia). oczyszczania odpływu. • Urządzenia spalające gaz lub • Do podłączenia przewodu ko- olej opałowy, takie jak grzejniki minowego do urządzenia nale- pokojowe, które dzielą to sa- ży użyć...
  • Page 25: Przeznaczenie

    zapewniony zostanie nadzór Przeznaczenie lub instruktaż odnośnie użyt- • Ten produkt jest przeznaczony kowania sprzętu w bezpieczny do użytku domowego. Komer- sposób. cyjne użytkowanie spowoduje • Materiały opakowaniowe są unieważnienie gwarancji. niebezpieczne dla dzieci. Ma- • Producent nie ponosi żadnej teriały opakowaniowe należy odpowiedzialności za jakiekol- przechowywać...
  • Page 26: Instrukcje Dotyczące Środowiska

    • Sprawdź ogólny wygląd pro- duktu pod kątem uszkodzeń, które mogły wystąpić podczas transportu. 2 Instrukcje dotyczące środowiska 2.1 Dyrektywa w sprawie odpadów administrację lokalną. Właściwa utylizacja urządzenia pomaga zapobiegać negatyw- 2.1.1 Zgodność z dyrektywą WEEE nym skutkom dla środowiska i zdrowia ludzi. i usuwanie odpadów Zgodność...
  • Page 27: Produkt

    3 Produkt 3.1 Wprowadzenie produktu 1 Korpus okapu 2 Szklana pokrywa okapu 3 Amortyzator 4 Filtr aluminiowy 5 Oświetlenie 6 Oświetlenie 7 Blokada filtra aluminiowego 8 Panel sterowania Air router W zależności od modelu. Może nie być dostęp- ny w Twoim produkcie. 3.2 Akcesoria Dostarczone akcesoria różnią...
  • Page 28 Adapter do podłączenia komina Osłony zapobiegające cofaniu się po- wietrza PL / 28...
  • Page 29: Specyfikacje Techniczne

    3.3 Specyfikacje techniczne Wymiary zewnętrzne produktu (wysokość/szerokość/głę- min. 910 - max. 1138 /595 /419 bokość) (mm) Napięcie/Częstotliwość 220-240 V ~1N; 50 Hz Całkowite zużycie energii max. 300 W Moc ssania 700-720 m3/h Średnica rury wylotowej powietrza 120-150 mm Kontrola Model A 3 poziomy Model B 3 poziomy + 1 booster...
  • Page 30: Korzystanie Z Okapu

    4 Korzystanie z okapu Okap posiada silnik o różnych prędkościach. MODEL C Zalecamy używanie niskich prędkości w nor- malnych warunkach i dużych prędkości w przypadku silnego zapachu i kondensacji pa- ry, aby zapewnić dobre działanie. Program jest anulowany w przypad- ku odcięcia zasilania, gdy włączone są...
  • Page 31 ð Uruchamia się tryb intensywnej wentyla- b. Jeśli nadal będziesz naciskał przycisk cji i trwa maksymalnie 10 minut. W tym , co 2 sekundy lampa zmieni ponownie czasie przycisk świeci się. Po 10 mi- odcień. Jeśli pojawi się żądany odcień, nutach przycisk nadal działa z Prędko- przestań...
  • Page 32 Po czyszczeniu lampka ostrzegawcza przy- Jeśli różnica temperatur otoczenia cisku Prędkości 2 nie wyłącza się automa- wystąpi nawet wtedy, gdy okap nie tycznie. Po naciśnięciu przycisku Prędkości pracuje, a tryb automatyczny jest ak- 2 przez ponad 3 sekundy, ostrzeżenie o wy- tywny, czujnik temperatury w urzą- pełnieniu filtra aluminiowego zostanie zrese- dzeniu wykryje tę...
  • Page 33: Czyszczenie I Konserwacja

    Jeśli zasilanie zostanie odcięte, gdy Jeśli wyłączysz ostrzeżenie bez wy- okap wyświetli ostrzeżenie o wypeł- miany filtra węglowego, czas działa- nieniu filtra węglowego, ostrzeżenie nia wynoszący 100 godzin zostanie nie zostanie anulowane. Gdy zasila- zresetowany i naliczanie rozpocznie nie jest dostępne, okap nadal wy- się...
  • Page 34: Lampa Okapu

    Wyjmowanie aluminiowych filtrów 5.4 Filtr węglowy (użytkowanie bez komina) a. Otwórz pokrywę okapu do góry i pocią- gnij aluminiową blokadę filtra w dół, jak Ostrzeżenia ogólne pokazano na rysunku. • Jeśli zamontowano produkt bez komina, należy wymieniać filtry węglowe co 4 mie- siące podczas normalnego użytkowania.
  • Page 35: Rozwiązywanie Problemów

    6 Rozwiązywanie problemów Jeśli problem nie zniknie po wykonaniu in- • Brak prądu. >>> Upewnij się, że sieć jest strukcji podanych w tym rozdziale, skontak- sprawna i sprawdź bezpieczniki w skrzyn- tuj się ze sprzedawcą lub autoryzowanym ce. W razie potrzeby wymień bezpieczniki serwisem.
  • Page 36 Bienvenue ! Cher client, chère cliente Nous vous remercions d’avoir choisi l’appareil Beko . Nous voulons que votre appareil de haute qualité et doté d’une technologie de pointe vous offre une efficacité optimale. Pour ce faire, lisez attentivement ce manuel et tout autre document fourni avant d’utiliser l’appareil.
  • Page 37 Table des matières 1 Consignes de sécurité ....38 Consignes de sécurité générales .. 38 Sécurité électrique ......39 Sécurité de l’appareil ....41 Utilisation prévue ......43 Sécurité des enfants, des per- sonnes vulnérables et des ani- maux domestiques ....... Sécurité...
  • Page 38: Consignes De Sécurité

    1 Consignes de sécurité • Cette section contient les ins- • Évitez de réparer ou de rem- tructions de sécurité néces- placer tout composant de saires à la prévention des l’appareil sauf si cela est clai- risques de dommage corporel rement spécifié...
  • Page 39: Sécurité Électrique

    combustion dans la maison peut être tenu responsable sont réabsorbés. Ne faites pas des dommages qui pourraient fonctionner l’appareil avec des survenir en raison d'opérations appareils qui assurent la circu- effectuées par des personnes lation de l’air et qui peuvent non autorisées.
  • Page 40 lation et faire réaliser l'installa- • Si votre appareil est équipé tion électrique. Appelez en- d'une fiche, n'effectuez pas de suite le service agréé le plus connexions électriques en dé- proche. branchant la fiche pendant • En cas de panne, n’utilisez l'installation.
  • Page 41: Sécurité De L'appareil

    • Ne lavez jamais l’appareil par • Faites fonctionner l’appareil pulvérisation ou aspersion après avoir placé les casse- d’eau ! Il existe un risque roles, poêles, etc. sur les d’électrocution ! fours. Sinon, la chaleur crois- sante peut déformer certaines Sécurité de l’appa- parties de votre appareil.
  • Page 42 complètement l'air de la cui- que les gaz d’échappement sine des odeurs et des va- de l’autre appareil ne soient peurs générées pendant la pas aspirés dans la pièce par cuisson. la ventilation. • Une ventilation adéquate doit • Ne raccordez pas aux être disponible dans la pièce conduits d'évacuation des gaz lorsque des appareils à...
  • Page 43: Utilisation Prévue

    • Il ne doit pas y avoir de feu ou- Sécurité des en- vert sous le capot. (par fants, des per- exemple : flambé) sonnes vulnérables • Mise en garde : Les parties et des animaux do- accessibles peuvent chauffer mestiques lorsqu'elles sont utilisées avec •...
  • Page 44: Sécurité Des Transports

    l’appareil lorsqu'il fonctionne • Lorsque vous souhaitez trans- et ne les laissez pas jouer avec porter l’appareil, emballez-le l'appareil. avec du matériel d’emballage à bulles ou du carton épais et Sécurité des trans- attachez-le avec du ruban ports adhésif. Fixez fermement l’ap- •...
  • Page 45: Votre Appareil

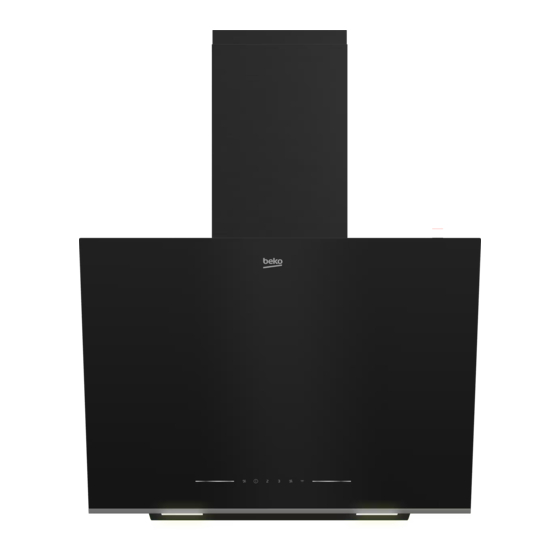
    3 Votre appareil 3.1 Présentation de l’appareil 1 Corps de la hotte 2 Couvercle en verre de la hotte 3 Clapet 4 Filtre en aluminium 5 Lampe 6 Lampe 7 Verrouillage du filtre en aluminium 8 Panneau de commande Pièce de fixation murale En fonction du modèle.
  • Page 46 Routeur aérien Adaptateur de raccordement au conduit de fumée Protections pour empêcher l'inversion du flux d'air FR / 46...
  • Page 47: Spécifications Techniques

    3.3 Spécifications techniques Dimension externe de l’appareil (hauteur/largeur/profon- min. 910 - max. 1138 /595 /419 deur)(mm) Tension/fréquence 220-240 V ~1N; 50 Hz Consommation totale d’énergie max. 300 W Puissance d'aspiration 700-720 m3/h Diamètre du tuyau de sortie d'air 120-150 mm Contrôle Modèle A 3 niveaux...
  • Page 48: Utilisation De La Hotte

    4 Utilisation de la hotte La hotte est équipée d'un moteur à plusieurs MODÈLE C vitesses. Pour une bonne performance, nous recommandons d'utiliser des vitesses faibles dans des conditions normales et des vi- tesses élevées en cas de forte odeur et de condensation de la vapeur.
  • Page 49 ð Le mode de ventilation intensive dé- ð La lampe passe à l'autre couleur. marre et fonctionne pendant un maxi- b. Si vous continuez à appuyer sur la mum de 10 minutes. Pendant ce temps, touche , la couleur suivante apparaîtra la touche s'allume.
  • Page 50 Si vous ouvrez le couvercle de l’ap- Lorsque le mode de nettoyage de pareil lorsque le mode automatique l'air est actif, il est automatiquement est activé, ses performances dimi- annulé par la pression de n'importe nueront. N'ouvrez pas le couvercle quelle touche, à...
  • Page 51: Entretien Et Nettoyage

    Avertissement de remplissage du filtre à Si vous faites fonctionner votre hotte charbon (pour les produits avec filtre à à n'importe quel niveau de vitesse charbon) avec l'avertissement de remplissage Le voyant de la touche Vitesse 2 clignote du filtre à charbon, l'avertissement toutes les 100 heures de fonctionnement.
  • Page 52: Lampe De La Hotte

    a. Retirez les filtres en aluminium. b. Lavez les filtres dans l'eau avec un déter- gent liquide et réinstallez-les après sé- chage. Les filtres en aluminium peuvent changer de couleur au cours du lavage ; ceci est normal et ne nécessite pas de remplacer vos filtres. Vous pouvez également laver le filtre en aluminium dans le lave-vaisselle.
  • Page 53: Dépannage

    c. Placez les encoches de vos nouveaux d. Fermez le couvercle de la vitre de la hotte filtres à charbon dans les encoches du après avoir installé le filtre en aluminium. support du moteur et tournez-les dans le sens des aiguilles d'une montre pour les mettre en place.

Table des Matières