Publicité
Liens rapides
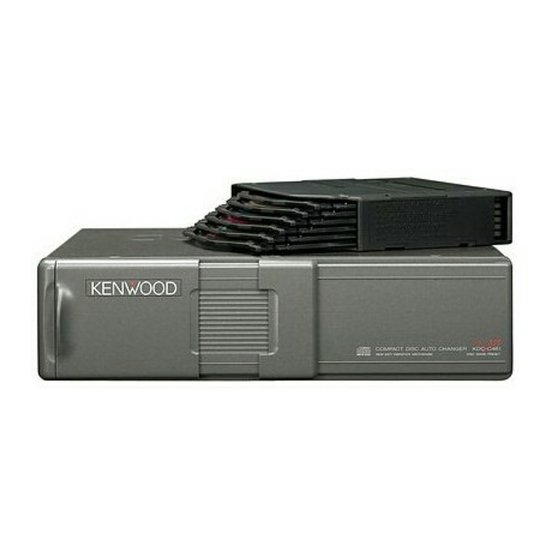
KDC-C461
COMPACT DISC AUTO CHANGER
INSTRUCTION MANUAL
CHANGEUR AUTOMATIQUE DE DISQUES COMPACTS
MODE D'EMPLOI
CAMBIADOR AUTOMATICO DE DISCOS COMPACTOS
MANUAL DE INSTRUCCIONES
©PRINTED IN JAPAN B64-1118-00 (E2) (M C)
'99/2 1 '98/12 11 10 9 8 7 6 5 4 3 2 1
Downloaded from:
http://www.usersmanualguide.com/
Publicité

Manuels Connexes pour Kenwood KDC-C461


Sommaire des Matières pour Kenwood KDC-C461
- Page 1 KDC-C461 COMPACT DISC AUTO CHANGER INSTRUCTION MANUAL CHANGEUR AUTOMATIQUE DE DISQUES COMPACTS MODE D’EMPLOI CAMBIADOR AUTOMATICO DE DISCOS COMPACTOS MANUAL DE INSTRUCCIONES ©PRINTED IN JAPAN B64-1118-00 (E2) (M C) ‘99/2 1 ‘98/12 11 10 9 8 7 6 5 4 3 2 1 Downloaded from: http://www.usersmanualguide.com/...
- Page 2 Warning The marking of products using lasers (Except for some areas) CLASS 1 LASER PRODUCT The label is attached to the chassis/case and says that the component uses laser beams that have been classified as Class 1. It means that the unit is using laser beams that are of a w eaker class. There is no danger of hazardous radiation outside the unit.
- Page 3 Safety precautions / Lens fogging / Heat protection Do Not Use Special Shape CDs WA RIN G • Be sure to use round shape CDs only for this Take the follow ing precautions to prevent fire unit and do not use any special shape CDs. and avoid personal injury : Use of special shape CDs may cause the unit •...
- Page 4 Précautions de sécurité / Condensation sur la lentille / Protection contre la chaleur N et t oyage de l’appareil AV ERTISSEM EN T • Si le panneau avant est sale, l’essuyer avec Pour éviter tout risque de feu et de blessures un chiffon au silicone ou un chiffon doux et physiques, observer les précautions sec après avoir éteint l’appareil.
- Page 5 Precauciones de seguridad / Empañado de lente / Protección del cabezal Lim pieza de la unidad A D V ERTEN CIA • Si la carátula está sucia, apague la unidad y Para evitar incendios y daños personales limpie con un paño siliconado suave y seco. respete las siguientes precauciones: N OTA •...
- Page 6 Handling compact discs / Manipulation des disques compacts M anipulación de discos compactos St ains, scrat ches, or w arping can La suciedad, rayaduras o cause sk ipping, m alf unct ion, or low def orm ación pueden ocasionar sound qualit y. Tak e t he f ollow ing salt os de pist a, f allos de precaut ions t o avoid dam age t o t he f uncionam ient o o baja calidad de...
- Page 7 Downloaded from: http://www.usersmanualguide.com/...
- Page 8 Installation / Installation Instalación A ccessories / A ccessories A ccesorios A × 2 B × 4 C × 4 D × 1 E × 1 Rem oving t he t ransport at ion screw s / Com m ent enlever les vis de t ransport / Cóm o rem over los t ornillos de t ransport e Remove all 3 transportation screw s for protecting the internal mechanism before you start to install the unit.
- Page 9 A ngle adjust m ent sw it ches / Com m ut at eur de réglage d’angle Conm ut adores de ajust e de ángulo • The angle adjustment sw itches on the both • Los conmutadores de ajuste de ángulo side of the unit are to be set according to the ubicados en ambos lados del aparato deberán angle of installation of the CD auto changer.
- Page 10 Installation / Installation Instalación Cover the holes indicated by 3 w ith the Tape los agujeros indicados por la 3 con sellos dustproof seals E . (Bottom and sides) guardapolvos E . (Fondo y costados). Use the holes marked to install the unit. Utilice los agujeros marcados para instalar la unidad.
- Page 11 Vert ical inst allat ion / Inst allat ion vert icale Inst alación vert ical Bottom view / Vue de dessous / Vista del panel inferior Side view / Side view / Side view ø4 In case of hanging in t he t runk / Lorsqu’on suspend le changeur à...
- Page 12 Loading compact discs / Chargement des disques Introducción Projection / Saillie / Saliente Tray / Plateau / Bandeja M ake sure the disc magazine is the right Assurez-vous que le magasin de disque est correctement inséré avec le logo "disc" w ay up w ith the "disc"...
- Page 13 de discos compactos "EJECT" Asegúrese de que el cartucho de discos esté debidamente orientado hacia arriba, con el logotipo "disc" hacia arriba. Extraiga la bandeja por medio del saliente. Coloque el disco en la bandeja con la etiqueta dirigida hacia arriba. Inserte la bandeja en el cartucho de discos hasta que encaje.
- Page 14 Connections / Raccordements Conexiones Output / Sortie / Salida CD auto-changer control output / Sortie de commande du changeur automatique de CD / Salida de control de cambiador automático de discos compactos D Changer connection cable (5m) / Câble de raccordement du changeur (5m) / Cable de conexión del cambiador (5m)
- Page 15 Troubleshooting guide / Guide de dépannage Guía de solución de problemas Sym pt om Cause Rem edy Sound skips due to The unit is mounted at a slant. M ount the unit so that is level. vibration. Changer unit is mounted in an M ount the unit in a stable place.
- Page 16 Specifications / Fiche technique Especificaciones Specif icat ions subject t o change w it hout not ice. Laser diode ....................GaAlAs ( λ =780 nm) Digital Filter ....................8 Time Over Sampling D/A Converter........................1 bit Spindle speed.....................500 ~ 200 rpm (CLV) Wow & Flutter..................Below M easurable Limit Frequency Response ( ±...
- Page 17 This file has been downloaded from: www.UsersManualGuide.com User Manual and User Guide for many equipments like mobile phones, photo cameras, monther board, monitors, software, tv, dvd, and othes.. Manual users, user manuals, user guide manual, owners manual, instruction manual, manual owner, manual owner's, manual guide, manual operation, operating manual, user's manual, operating instructions, manual operators, manual operator, manual product, documentation manual, user maintenance, brochure, user reference, pdf manual Downloaded from:...