Table des Matières
Publicité
Les langues disponibles
Les langues disponibles
Liens rapides
MANUEL D'INSTRUCTION/INSTRUCTION MANUAL
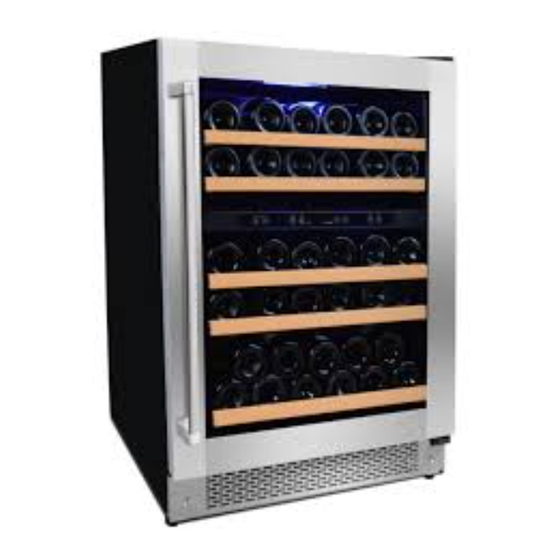
CELLIER A VIN 44 Bouteilles -2 ZONES
BUILT-IN WINE CELLAR 44 bottle -2 zones
MODELE/MODEL:
PMC44DS
Pour une utilisation optimale de cet appareil ainsi que pour votre sécurité, veuillez lire attentivement les instructions contenues dans ce
manuel avant de faire fonctionner cet appareil.
To ensure proper use of this appliance and your safety, please read the following
instructions completely before operating this appliance.
080716
Publicité
Chapitres
Table des Matières

Manuels Connexes pour AVG PMC44DS


Sommaire des Matières pour AVG PMC44DS
- Page 1 CELLIER A VIN 44 Bouteilles -2 ZONES BUILT-IN WINE CELLAR 44 bottle -2 zones MODELE/MODEL: PMC44DS Pour une utilisation optimale de cet appareil ainsi que pour votre sécurité, veuillez lire attentivement les instructions contenues dans ce manuel avant de faire fonctionner cet appareil.
-
Page 2: Table Des Matières
TABLE DES MATIÈRES 1. Précautions importantes……………………………………………….…..…...3-4 2. Installation …………………………………………………………………………………….5-6 3. Description de l’unité et entreposage …….…………………..…..……..…7-8-9 4. Mode d’emploi.. …………………………………………………..…..……...……….10-11 5. Nettoyage & entretien………….………………………………………………….…11-12 6. Garantie limitée…………………….………...………………..………………………13-14 7. Guide de dépannage ……………..………………………….……………….…..…….15... -
Page 3: Précautions Importantes
1. PRÉCAUTIONS IMPORTANTES VEUILLEZ LIRE TOUTES LES INSTRUCTIONS AVANT D’UTILISER L’APPAREIL PRECAUTIONS REFRIGERANT R600a DANGER - RISQUE D’INCENDIE OU D’EXPLOSION. RÉFRIGÉRANT INFLAMMABLE UTILISÉ. NE DOIT ÊTRE RÉPARÉ SEULEMENT QUE PAR DU PERSONNEL QUALIFIÉ. NE PAS PERCER LES TUBES FRIGORIFIQUES ATTENTION - RISQUE D’INCENDIE OU D’EXPLOSION. RÉFRIGÉRANT INFLAMMABLE UTILISÉ. CONSULTEZ LE GUIDE DE RÉPARATION / MANUEL D’INSTRUCTION AVANT DE TENTER DE RÉPARER CE PRODUIT. -
Page 4: Avertissements
ATTENTION Avant son utilisation l’appareil doit être positionné et installé adéquatement en suivant les directives contenues dans ce manuel, sous la section « installation ». Lorsque vous utilisez un appareil électrique, il convient de toujours d’observer les précautions de base afin de réduire le risque de choc électrique, de feu ou de blessure corporelle. -
Page 5: Installation
2. INSTALLATION INSTALLATION ENCASTRÉE (VOIR DESSIN) Cet appareil est prévu pour une installation autoportante ou encastrée. Pour une installation encastrée, veuillez- vous référer au dessin présenté ci-dessous . La profondeur de l’ouverture doit être de 24 pouces Cet appareil peut être installé de façon autonome ou encastrée. ... -
Page 6: Informations Additionelles
INFORMATIONS ADDITIONELLES Placez l’appareil à l’abri des rayons du soleil et de sources de chaleur (four, chauffage,radiateur..) Des températures ambiantes extrêmement froides peuvent aussi causer des problèmes de fonctionnement. Évitez d’installer l’appareil dans des endroits humides. Pour assurer une ventilation adéquate le devant de l’appareil doit être libre. -
Page 7: Description De L'unité Et Entreposage
3. DESCRIPTION DE L’UNITE ET ENTREPOSAGE CAPACITÉ D’ENTREPOSAGE Les bouteilles peuvent varier en taille et en dimension. Ainsi, votre cabinet est conçu pour être flexible et s’adapter à vos besoins. Les bouteilles peuvent varier en taille et en dimension. Ainsi, la capacité est basée sur un format de bouteille standard de type «... -
Page 8: Pour Retirer Ou Déplacer Une Tablette
Bien observer les instructions fournies, en tenant compte du type de tablette inclus dans votre unité et NE JAMAIS EMPILER PLUS D’UNE RANGÉE DE BOUTEILLES SUR UNE TABLETTE COULISSANTE. Ne pas retirer plus d’une tablette à la fois. NOTE : Avant de modifier la configuration originale de votre unité... -
Page 9: Inverser La Porte
INVERSER LA PORTE Retirez le couvercle de la charnière supérieure droite pour exposer les trois vis de la charnière supérieure. Tout en tenant la porte avec la main gauche, utiliser un tournevis étoilé (Phillips) et retirer les trois vis de la charnière Saisir la porte fermement avec les deux mains et désengagez-la de la charnière inférieure Retirer le pivot inférieur IMPORTANT : AVANT DE COMMENCER, DÉBRANCHEZ L’UNITÉ, AUSSI IL EST RECOMMANDÉ... -
Page 10: Mode D'emploi
4. MODE D’EMPLOI RECOMMANDATIONS RELATIVES À LA TEMPÉRATURE Conservation du vin Vins rouge de 15 à 18°C de 58° à 64º F Vins secs et blancs de 9 à 15°C de 48° à 58º F Vins rosés de 9 à 15°C de 48°... -
Page 11: Entretien De L'appareil
MISE EN MARCHE/ARRÊT (ON/OFF) Appuyez sur cette touche pendant environ 3 secondes pour mettre en marche et éteindre l’appareil. CELSIUS OU FAHRENHEIT L’affichage de la température peut être changé de Celsius en Fahrenheit simplement appuyant sur la touche LUMIERE INTÉRIEURE Chaque zone a un contrôle de lumière intérieure : pour allumer ou éteindre la lumière simplement appuyer sur la touche. -
Page 12: Decongélation
DECONGÉLATION Il est inutile de décongeler l'appareil et ce, même s’il y a dépôt de glace sur le mur arrière intérieur puisqu’il s’éliminera automatiquement. L’accumulation de glace sur le mur arrière intérieur s’éliminera automatiquement quand le compresseur aura terminé son cycle. L'eau s'égouttera en passant par le sortie de vidange du mur arrière intérieur dans un contenant situé... -
Page 13: Garantie Limitée
GARANTIE GÉNÉRALE SUR LES PIÈCES ET LA MAIN-D’OEUVRE Pendant (2) deux ans AVG garantit* à l’acheteur, le cellier ainsi que toutes ses pièces contre tout défaut de fabrication et de matériel, à condition d’une utilisation normale et adéquate du produit et d’un entretien adéquat, tel que décrit dans et conformément aux manuels d’instruction fournis avec chaque... - Page 14 DÉPLACEMENT OU L’INSTALLATION, INCENDIE, INONDATION, FORCE MAJEURE : AVG ne sera pas responsable de la réparation ou du remplacement d’une quelconque pièce qui, selon AVG , a fait l’objet d’une altération, de négligence, d’abus, d’une mauvaise utilisation, d’un accident, de dommages durant un déplacement ou l’installation, d’un incendie, d’une inondation ou d’un cas de force majeure après la...
-
Page 15: Pour Contacter Notre Centre De Service Autorisé
GUIDE DE DEPANAGE Vous pouvez facilement résoudre plusieurs des problèmes courants et vous épargner ainsi des frais de ser vice. Essayez les suggestions ci-dessous qui s’appliquent à votre unité, si la situation ne se résorbe pas veuillez contacter le magasin ou vos avez effectué votre achat. PROBLÈMES CAUSE(S) POSSIBLE(S) ... - Page 16 TABLE OF CONTENTS 1.IMPORTANT SAFETY PRECAUTIONS………………….…….……………..17-18 2.INSTALLATION INSTRUCTIONS……………………………………………….19-20 3.APPLIANCE FEATURES & STORAGE………………………………21-22-23-24 4.OPERATING YOUR APPLIANCE………….………….………………………..24-25 5.CARE AND MAINTENANCE………………………………………………………….26 6.LIMITED WARRANTY………………………………………………………………27-28 7.TROUBLESHOOTING GUIDE…………………………………………….………...29...
-
Page 17: Important Safety Instructions
1. IMPORTANT SAFETY INSTRUCTIONS APPLIANCE SAFETY YOUR SAFETY AND THE SAFETY OF OTHERS ARE VERY IMPORTANT. ALWAYS READ AND OBEY ALL SAFETY WARNINGS. DANGER R600 REFRIGERANT WARNINGS DANGER -RISK OF FIRE OR EXPLOSION. FLAMMABLE REFRIGERANT USED. DO NOT USE MECHANICAL DEVICES TO DEFROST FREEZER. - Page 18 CAUTION THE UNIT MUST BE POSITIONED AND INSTALLED PROPERLY FOLLOWING THE INSTRUCTIONS CONTAINED IN THIS MANUAL, UNDER THE SECTION "INSTALLATION". WHEN USING AN ELECTRICAL APPLIANCE, YOU SHOULD ALWAYS OBSERVE BASIC SAFETY PRECAUTIONS TO REDUCE THE RISK OF ELECTRIC SHOCK, FIRE OR PERSONAL INJURY.
-
Page 19: Before Using Your Wine Cellar
BEFORE USING YOUR WINE CELLAR Remove the exterior and interior packaging. Before connecting the Wine Cellar to the power source, let it stand upright for approximately 24 hours. This will reduce the possibility of a malfunction in the cooling system from handling during transportation. After plugging the appliance into a wall outlet, allow the unit to cool down for 3 ~ 4 hours before placing wine bottles in the appliance. -
Page 20: Electrical Connection
ADDITONNAL SPECIFICATIONS This appliance is designed to be installed built-in or free standing. Locate the appliance away from direct sunlight and sources of heat (stove, heater, radiator, etc.). Direct sunlight may affect the acrylic coating and heat sources may increase electrical consumption. Ambient temperature below 65°F (18°C) or above 90°F (32°C) will hinder the performance of this appliance. -
Page 21: Appliance Features & Storage
APPLIANCE FEATURES & STORAGE STORAGE Wine bottles vary in size and dimensions. Thus, your cabinet is designed to be flexible and adapt to your needs. The capacity of this unit is based on a «Bordeaux» 750 ml standard type bottle format. (See format below). CONFIGURATION EDW44DS ... - Page 22 Also make sure that the bottles are not all grouped together at the top or bottom of the cabinet. Observe the loading instructions provided, according to the type of storage fixtures with which your cabinet is equipped Never try to pull out more than one sliding shelf at a time.
- Page 23 DOOR REVERSAL To reverse the door from right swing to left swing: UNSCREW UPPER DOOR HINGE AND HINGE COVER TAKE THE DOOR DOWN REMOVE DOOR AXIS INSTALL THE LOWER DOOR AXIS ON THE LEFT LOWER DOOR HINGE, THEN TURN OVER THE GLASS DOOR 180°. MOUNT THE DOOR ON THE LEFT LOWER DOOR HINGE.
-
Page 24: Operating Your Appliance
8. Use your thumb to press down on one of the three black capped screws on the top left corner of the cabinet. Turn it counterclockwise to unscrew it and remove it. Repeat for the other two black capped screws and set them safely aside. -
Page 25: How To Operate The Unit
HOW TO OPERATE THE UNIT TURN UNIT ON/OFF Press this key for turn on and turn off appliance. Press and hold it for at least 3 seconds. INTERIOR LIGHT To turn on or turn off the interior light, press this key once. The interior light will keep lighting if it is not turn off. FAHRENHEIT /CELSIUS SETTING (C°/F°) The temperature display can be changed between Celsius and Fahrenheit by pressing this key. -
Page 26: Care And Maintenance
5.CARE AND MAINTENANCE DEFROST The ice build-up on the inner back wall during compressor operation will be automatically defrosted in a compressor off cycle. When defrosting is in process, only the circulation fans for both zones run. Defrost water will drain into the drip dish(on the compressor) .and the water will be evaporated by the compressor CLEANING YOUR APPLIANCE... -
Page 27: Limited Warranty
GENERAL PARTS AND LABOR WARRANTY AVG warrants for (2) two years , to the purchaser of every new unit, the cabinet and all parts thereof, to be free from defects in material or workmanship, under normal and proper use and maintenance service as specified by AVG and upon proper installation and start-up in accordance with the instruction manual supplied with each AVG unit. -
Page 28: Commercial Use
NOT COVERED BY THIS WARRANTY AVG’s sole obligation under this warranty is limited to either repair or supply replacement parts, and is subject to the additional limitations below. This warranty neither assumes nor authorizes any person to assume obligations other than those expressly covered by this warranty. -
Page 29: Troubleshooting Guide
7.TROUBLESHOOTING GUIDE You can solve many common appliance problems easily, saving you the cost of a possible Service Call. Try the suggestions below to see if you can solve the problem before calling for service. PROBLEM POSSIBLE CAUSE Appliance does not operate. Not plugged in.