Table des Matières
Publicité
Les langues disponibles
Les langues disponibles
Liens rapides
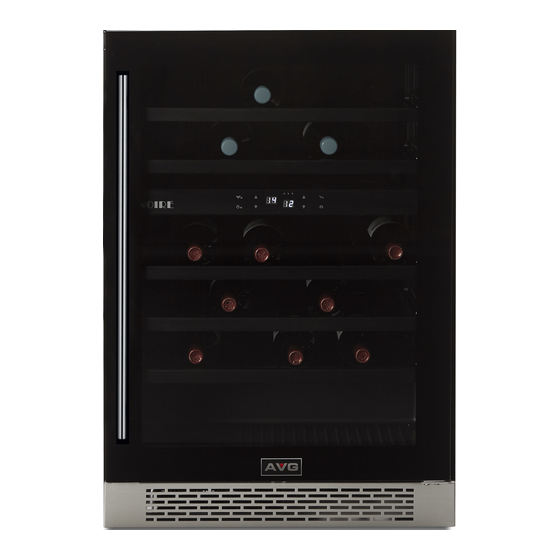
NOIRE
MANUEL D'UTILISATION/ INSTRUCTION MANUAL
CELLIER A VIN ENCASTRABLE/BUILT-IN WINE CELLAR
Modèle/Model: BSC46DB2
Pour une utilisation optimale de cet appareil ainsi que pour votre sécurité, veuillez lire attentivement les
instructions contenues dans ce manuel avant de faire fonctionner cet appareil.
To ensure proper use of this appliance and your safety, please read the following instructions completely
.
before operating this appliance
1
27102020NP
Publicité
Table des Matières

Manuels Connexes pour AVG BSC46DB2


Sommaire des Matières pour AVG BSC46DB2
- Page 1 NOIRE MANUEL D’UTILISATION/ INSTRUCTION MANUAL CELLIER A VIN ENCASTRABLE/BUILT-IN WINE CELLAR Modèle/Model: BSC46DB2 Pour une utilisation optimale de cet appareil ainsi que pour votre sécurité, veuillez lire attentivement les instructions contenues dans ce manuel avant de faire fonctionner cet appareil. To ensure proper use of this appliance and your safety, please read the following instructions completely . before operating this appliance 1 27102020NP ...
-
Page 2: Table Des Matières
TABLE DES MATIÈRES 1. PRÉCAUTIONS IMPORTANTES..…………………………..….....3-4-5 2. INSTRUCTIONS INSTALLATION ……………………………………….6-7-8 3. UTILISATION………………………………………………………………..… 8 a. Commandes et réglages de température……………………9-10 b. Fonctions………………………………………………………….10-11 c. Inverser la porte……………………………………………..… 12-13 d. Installer la poignée…………………..……………………………..14 e. Entreposage et rangement ………………………………….……14 4. ENTRETIEN ……………………..………………………….………..………..15 5. GARANTIE………………………………………………………………….16-17 6. -
Page 3: Précautions Importantes
1. PRÉCAUTIONS IMPORTANTES ATTENTION Avant son utilisation l’appareil doit être positionné et installé adéquatement en suivant les directives contenues dans ce manuel, sous la section « installation ». Lorsque vous utilisez un appareil électrique, il convient de toujours d’observer les précautions de base afin de réduire le risque de choc électrique, de feu ou de blessure corporelle. MISE EN GARDE DE SÉCURITÉ Une utilisation impropre de votre appareil peut causer des dommages sérieux è l’unité et/ou des blessures à... - Page 4 N’enlevez en aucun cas la troisième broche (celle qui sert de mise à la terre) du câble d’alimentation. Ne jamais brancher ou débrancher l’appareil avec les mains mouillées. Si l’appareil ou le câble d’alimentation fait défaut, débranchez‐le de la prise d’alimentation. Débranchez le câble d’alimentation, éteignez‐le ou enlevez le fusible. DANGER : Ne jamais laisser d’enfants utiliser ou jouer avec cet appareil. Risque d'emprisonnement. Avant de mettre votre appareil au rebut veuillez retirer la porte et laisser les tablettes à l’intérieur pour que les enfants ne puissent pas facilement y grimper. ...
- Page 5 Ne placez pas des éléments chauds dans l’unité avant qu’elles n’aient refroidit à la température ambiante. Ne pas écraser le fil électrique entre l’unité et le cabinet. Ne pas tourner l’appareil à l’envers, sur le côté, ou à un angle hors niveau. Ne déplacez pas l’appareil sans vider le contenu et seulement après avoir sécurisé la porte en position fermée. Les composantes doivent être remplacées avec des pieces originales et l’entretien doivent être effectuées par un technicien autorisé afin de minimiser le risque d’incendie ...
-
Page 6: Instructions Installation
2. INSTRUCTIONS D’INSTALLATION ATTENTION Si l’appareil est transporté en position horizontale, l’huile du compresseur risque de couler sur le circuit de refroidissement. C’est pourquoi il est nécessaire de laisser l’appareil en position verticale pendant 12 heures avant de le mettre en marche. Cette période permet à l’huile de retourner dans le compresseur. Enlevez l’emballage extérieur, le film protecteur en plastique collé à la surface (si vous prévoyez utiliser l’appareil prochainement), et nettoyez les pièces extérieures avec un nettoyant conçu pour ... -
Page 7: Connexion Électrique
Le matériel d’emballage est recyclable, comme l’indique son symbole de recyclage. Pour le jeter, respectez les règlements locaux. Le matériel d’emballage (sacs de plastique, pièces en polystyrène, etc.) constitue une source potentielle de danger et doit être tenu hors de la portée des enfants. Inspectez minutieusement l’appareil. Si vous cernez un défaut, cessez l’installation et communiquez avec le détaillant. Utilisez cet appareil uniquement pour les fins auxquelles il a été conçu. N’installez pas l’appareil de manière à l’exposer directement aux rayons du soleil, dans ... -
Page 8: Installation Encastrée
INSTALLATION ENCASTRÉE Si vous souhaitez encastrer cet appareil, utilisez les dimensions écrites dans le diagramme et le tableau ci‐dessous à titre de guide d’installation : Dimensions d’installation encastrée (mm/po) Légende A 660 mm (26 po) B 610 mm (24 po) C 883 mm (34¾ po) D 152 mm (6 po) E 51 mm (2 po) 3. UTILISATION CONDITIONS D’UTILISATION Le bon fonctionnement de cet appareil est garanti uniquement si les conditions suivantes sont respectées : La température de la pièce où se trouve l’appareil est conforme à la catégorie climatique inscrite sur l’étiquette signalétique de l’appareil. ... - Page 9 COMMANDES TABLEAU DE COMMANDES : Bouton « » : Pour mettre en marche et arrêter l’appareil ( ON et OFF, respectivement), tenez ce bouton enfoncé pendant environ 3 secondes. Bouton « » Bouton d’économie d’énergie : Gardez ce bouton enfoncé pendant 3 secondes pour activer ou désactiver la fonction d’économie d’énergie. Lorsque cette fonction est activée, le voyant DEL et l’écran s’éteignent, et le voyant °C/°F s’allume. ...
-
Page 10: Fonctions
RÉGLAGE DE LA TEMPÉRATURE La température zonale peut avoir une différence de +/‐ 5°F (+/‐ 3º C) selon le chargement et les conditions ambiantes. Par exemple, exposer votre appareil à un froid extrême ou à de fortes chaleurs peut faire fluctuer les températures intérieures. Pour régler : Utilisez les flèches pour régler la température voulue à l’intérieur de l’appareil. Chaque fois que vous appuyez sur les boutons la température augmente/diminue de 1 degré °F (ou 1°C). Lorsque vous appuyez sur les boutons une fois, la température augmente ou diminue de 1 degré chaque fois. Si vous essayez de dépasser la valeur minimale/maximale qui peut être établie, l'affichage passera automatiquement à la valeur de la température réglable ... - Page 11 REMARQUES Si vous placez trop de bouteilles en une seule fois ou si la porte n’est pas bien fermée, l’écran affichera « HI ».Ceci est tout à fait normal. Veuillez attendre environ 5 minutes après avoir fermé la porte; l’avis « HI » devrait disparaître de l’écran. Il est normal que l’appareil affiche « HI » ou « LO » à l’occasion. Si cet affichage est fréquent ou persiste, réinitialisez l’appareil en le débranchant et le rebranchant. Si le problème est toujours présent après une réinitialisation, communiquez avec le service à la clientèle. Avant de rebrancher le câble d’alimentation à une prise, attendez de 3 à 5 minutes. Un branchement trop hâtif peut endommager l’appareil. Si vous tentez de remettre en marche l’appareil avant ce délai, il ne se mettra pas en marche. ...
-
Page 12: Inverser La Porte
INVERSER LA PORTE ATTENTION : Nous recommandons que cette opération soit réalisée par deux (2) personnes. CHARNIÈRE INFÉRIEURE (DROITE) VIS AXE DE LA PORTE VIS PLAQUE DE L’INTERRUPTEUR D’ÉCLAIRAGE CHARNIÈRE SUPÉRIEURE (DROITE) CLOU DÉCORATIF VIS CHARNIÈRE SUPÉRIEURE (GAUCHE) VIS 1 1 C HARNIÈRE INFÉRIEURE (GAUCHE) ... - Page 13 6. Faites pivoter la porte de 180 degrés. Installez la porte dans la même direction que lorsqu’elle a été enlevée et alignez‐la correctement. 7. Bloquez l’orifice du coin supérieur droit du cabinet avec le clou décoratif supplémentaire. 13 ...
-
Page 14: Installation De La Poignée
INSTALLATION DE LA POIGNÉE Pour installer la poignée veuillez suivre les instructions ci‐dessous : 1. Tirer le joint d’étanchéité de la porte ①, puis le dégager‐le partiellement tel qu’indiqué à l’Illustration # 1. Le joint peut être enlevé facilement, à la main, aucun outil n'est nécessaire. 2. Aligner la poignée ④ et en utilisant les vis fournies puis serrer les ② à l'aide d'un tournevis à tête étoilée (Phillips) jusqu'à ce que la poignée soit fixée fermement contre la porte. Ne pas trop serrer car cela pourrait abimer la porte et /ou la poignée. Replacer le joint de porte dans sa position initiale. Légende : Joint d’étanchéité ① ② Trous pour vis Tournevis étoilé(Phillips) ③ ... -
Page 15: Entretien
4. ENTRETIEN DE L’APPAREIL NETTOYAGE DE L’APPAREIL Coupez le courant, débranchez l’appareil et videz le contenu incluant les tablettes. Lavez les surfaces intérieures avec de l’eau chaude et une solution au bicarbonate de soude (2 cuillères à soupe pour ¼ d’eau). Lavez les tablettes avec un détergent doux. Essorez bien l’éponge ou le chiffon avant de nettoyer le contrôle ou toute composante électrique. Lavez l’extérieur de l’appareil avec de l’eau chaude et du détergent liquide doux. Rincez bien et essuyez le tout à l’aide d’un chiffon doux et propre. PANNE DE COURANT La plupart des coupures de courant se rétablissent en quelques heures et ne devraient pas affecter température de votre unité si vous ouvrez la porte le moins possible. Si le courant ne se rétablit pas après une longue période de temps, voyez à protéger le contenu de votre appareil. ... -
Page 16: Garantie
5. GARANTIE LIMITÉE AVANTGARDE USAGE RESIDENTIEL INFORMATION SUR LA GARANTIE DES PIÈCES ET DE LA MAIN‐D’OEUVRE Les celliers AVANTGARDE sont fabriqués avec l’optique d’offrir une valeur exceptionnelle, et en visant votre entière satisfaction pour chacun de nos produits. Ainsi, tous les celliers AVANTGARDE sont couverts par une garantie limitée de deux (2) ans, valable sur les pièces et la main‐d’œuvre. GARANTIE GÉNÉRALE SUR LES PIÈCES ET LA MAIN‐D’OEUVRE Pendant (2) deux ans AVANTGARDE garantit* à l’acheteur, le cellier ainsi que toutes ses pièces contre tout défaut de fabrication et de matériel, à condition d’une utilisation normale et adéquate du produit et d’un entretien adéquat, tel que décrit dans et conformément aux manuels d’instruction fournis avec chaque unité AVANTGARDE. ... - Page 17 RÉCLAMATION COUVERTE PAR LA GARANTIE Toutes les réclamations couvertes par la garantie pour un défaut de main‐d’œuvre ou de matériel doivent être soumises directement à la division SERVICE, 2255 boul. Dagenais ouest Laval, Qc tel : 450.963.1303 ou 1.888.651.2534. Toutes les réclamations doivent inclure le numéro ...
-
Page 18: Guide De Dépannage
6. GUIDE DE DEPANNAGE Vous pouvez résoudre un grand nombre de problèmes courants facilement. Essayez les suggestions ci‐dessous avant d’avoir recours à un technicien. PROBLÈME CAUSE POSSIBLE L’appareil ne fonctionne pas. L’appareil n’est pas branché. L’appareil est éteint. Le disjoncteur ou le fusible du circuit est sauté. L’appareil n’est pas suffisamment Vérifiez le réglage de température. froid. Il est parfois nécessaire d’adapter le réglage à l’environnement extérieur. La porte est trop souvent ouverte. La porte n’est pas fermée adéquatement. Le scellant de porte ne fonctionne pas adéquatement. L’appareil se met en marche et La température de la pièce est plus chaude que la normale. s’arrête fréquemment. Beaucoup de contenu a été ajouté en une seule fois dans l’appareil. La porte est trop souvent ouverte. La porte n’est pas fermée adéquatement. Le réglage de température est incorrect. Le scellant de porte ne fonctionne pas adéquatement. La lumière ne fonctionne pas. L’appareil n’est pas branché. Le disjoncteur ou le fusible du circuit est sauté. L’ampoule est brûlée. Le bouton de la lumière est en position d’arrêt (OFF). Ou la fonction conservation d’énergie bouton est allumé. Présence de vibrations. Vérifiez que l’appareil est au niveau. L’appareil fait trop de ... - Page 19 TABLE OF CONTENTS IMPORTANT SAFETY INSTRUCTIONS..…………………………..20-21-22 INSTALLATION INSTRUCTIONS ………………..………………………..… 23-24 OPERATING YOUR APPLIANCE Conditions……………………………………………………………….…25 control and temperature Settings …………………….……………...26 Functions……….………………………………………………………26-27 Reversing the door ………………………………………....28 Installing handle & Storage.…………………………………….…..29 CARE AND MAINTENANCE ……………………..………………….…………...30 WARRANTY………………………………………………………………………31-32 TROUBLESHOOTING ……………………………..……..………………………..33 19 ...
-
Page 20: Important Safety Instructions
1. IMPORTANT SAFETY INSTRUCTIONS WARNING Before the appliance is used, it must be properly positioned and installed as described in this manual. So read the manual carefully. To reduce the risk of fire, electric shock or injury when using the appliance, follow basic precautions. IMPORTANT SAFETY INFORMATION Improper handling can cause serious damage to the appliance and/or injury to the user. - Page 21 Any repairs and work on the appliance should only be carried out by the customer service department, as unauthorized work could prove highly dangerous for the user. The same applies to changing the power cable. Component parts shall be replaced with manufacture’s components so as to minimize the risk of possible ignition due to incorrect parts or improper service. Unplug the unit if it is not going to be used for an extended period of time. Always turn the unit off and unplug it from the electric outlet when cleaning. Use outlets that cannot be turned off by a switch or pull chain. Do not start or stop the unit by switching the circuit’s power on and off. Never plug or unplug the unit with wet hands. Do not stand on the base, drawers or doors or use them to support anything else. Do not allow flames or sources of ignition to enter the appliance. When transporting and cleaning the appliance, ensure that the refrigerant circuit is off. In the event of damage, make sure that there are no ignition sources nearby. This appliance is not intended for use by persons (including children) with reduced physical, sensory or mental capabilities or lack of experience and knowledge unless they have been given initial supervision or instruction concerning use of the appliance by a person responsible for their safety. Children should be supervised to ensure that they do ...
- Page 22 Do not under any circumstances cut or remove or bypass the third (ground) prong from the power cord. Do not locate the appliance in direct sunlight or in a room with a high ambient temperature, or in the vicinity of any sources of direct heat, such as a radiator or oven. To prevent back and other types of injuries, use at least two people to move and install the appliance. Install the wine refrigerator in a well ventilated area. The temperature range for this refrigerator is optimized for Perishable food items . Do not place hot or warm items into the refrigerator before they cool down to room temperature. Only use in an upright position on a flat, level surface and provide proper ventilation. Do not pinch or kink the power supply line between the unit and cabinet. Do not place any other appliances on top of the unit. Do not turn the unit upside down, on its side, or at an angle off level. BE CAREFUL WHEN HANDLING, MOVING, AND USING THE APPLIANCE TO AVOID EITHER ...
-
Page 23: Installation Instructions
2. INSTALLATION INSTRUCTIONS ATTENTION If the appliance is transported in a horizontal position, the oil from the compressor may leak into the cooling circuit. For this reason, allow the appliance to rest in a vertical position for 12 hours before turning it on, so that the oil flows back into the compressor. Remove the external packaging, remove the protective plastic film from the surface of the appliance (if used) and clean the external parts of the appliance with a cleaner designed for this purpose. Do not use steel wool or any coarse agents, which could irreparably damage the surface of the appliance. IMPORTANT This unit can be installed as either built‐in or free‐standing unit. For free‐standing installation, allow at least 4” of clearance at the back, sides and top of the unit to permit the proper air circulation to cool the compressor and condenser. For built‐in installation, certain clearances are ... -
Page 24: Electrical Requirements
ELECTRICAL REQUIREMENTS A 115 Volt (AC only) 60 Hz grounded electrical supply equipped with a 15‐ or 20‐ amp fuse or circuit breaker is required. It is recommended that a separate circuit serving only your appliance be provided. Use outlets that cannot be turned off by a switch or pull chain. Connect this appliance to a 3‐prong power supply outlet that has a ground terminal. If you only have a 2‐prong ... -
Page 25: Operating Your Appliance
3. OPERATING YOUR APPLIANCE OPERATING CONDITIONS Proper operation of the appliance is guaranteed only if the following conditions are met: The temperature in the room where the appliance is located conforms to the climate class stated on the appliance’s rating label. Maximum ambient relative humidity: RH 75%. The appliance must be placed at a sufficient distance from heat sources (e.g., ovens, central heating, direct sunlight, etc.). ... -
Page 26: Functions
WINE STORAGE If you are storing wine for long periods of time, it should be stored at a temperature of between 10°C and 14°C (50°F and 57°F). The following drinking temperatures are recommended for the various types of wine: Red wines: 57°F to +64°F (+14°C to +18°C) Rosé wines: 50°F to +54°F (+10°C to +12°C) White wines: 46°F to +54°F (+8°C to +12°C) TEMPERATURE SETTINGS The zone temperature may have a difference of +/‐ 5°F (+/‐ 3ºC) from the setting depending on loading and ambient conditions. For example, placing your unit in extreme cold or hot conditions may cause interior temperatures to fluctuate. TO SET THE TEMPERATURE: Use the buttons to set the desired temperature. Each time the buttons are pressed, the temperature will increase / decrease by 1°F (or 1°C). When you press the button once, the temperature will increase or decrease by 1°F (or 1°C). If you try to go beyond the minimum/maximum value that can be established, the display will jump to the lowest/highest adjustable temperature value automatically. If a button is not pressed for 5 seconds, the LED will stop flashing and the setting mode will be exited. You can set the temperature in the range of 39°F to 64°F (or 4°C to 18°C) . FUNCTIONS TEMPERATURE MEMORY FUNCTION If the power is suddenly lost, the set temperature will be saved by the unit. Once the power is back on, the unit will be at the same set temperature. “CLOSE DOOR” REMINDER FUNCTION When you forget to close the door or the door is not fully closed, there will be warning alarm ... - Page 27 NOTES If too many bottles are put in at once or the door has not been closed tightly, the unit will display the "HI" signal on the display panel. This is normal. Please wait 5 minutes after closing the door and “HI” will disappear. It is normal that the cabinet shows “HI” or “LO” from time to time. If it occurs frequently or lasts for a long time, you can restart the unit by unplugging it, then re‐plugging after 5 minutes. If the problem occurs again after restarting, please contact customer service. Before reconnecting the power, wait 3 to 5 minutes. Otherwise you could damage your appliance. If you attempt to start the appliance before the end of this time delay, the appliance ...
-
Page 28: Reversing The Door
REVERSING THE DOOR IMPORTANT: THIS OPERATION REQUIRES AT LEAST TWO (2) PERSONS. INSTRUCTIONS 1. Open the door at a 90ᵒ angle, take out two screws from lower door axis (#3) and pull out door. 2. Set the door aside in a safe place and take out decorative nail (#7) from top of door frame. Remove the two screws (#4) at bottom and take out the Extrusion‐board of lamp switch (#5). ... -
Page 29: Installing The Handle
INSTALLING THE HANDLE To install the handle please follow the below instructions: 1. Pull away the door gasket in the area where the handle is to be installed on the left side as shown below in Fig .1 . The gasket is easily displaced by hand, no tools are necessary. 2. Align the handle with the screws installed. Tighten the screws using a Phillips head screwdriver until the handle sets both flush and secured tightly against the door frame. DO NOT over tighten as this will cause damage to the handle assembly. Fig .2 Replace the door gasket to its ... -
Page 30: Care And Maintenance
4. CARE AND MAINTENANCE CLEANING YOUR WINE CELLAR Turn off the power, unplug the appliance, and remove all items including shelves and rack. Wash the inside surfaces with warm water and baking soda solution. The solution should be about 2 tablespoons of baking soda with a quart of water. Wash the shelves with a mild detergent solution. Wring excess water out of the sponge or cloth when cleaning area of the controls, or any electrical parts. Wash the outside cabinet with warm water and mild liquid detergent. Rinse well and wipe dry with a clean soft cloth. POWER FAILURE Most power failures are corrected within a few hours and should not affect the temperature of your appliance if you minimize the number of times the door is opened. If the power is going to be off for a longer period of time, you need to take the proper steps to protect your contents. ... -
Page 31: Warranty
5. WARRANTY RESIDENTIAL USE PARTS AND LABOR WARRANTY INFORMATION AVANTGARDE Wine cellars and Beverages Centers are manufactured to provide outstanding value, and your complete satisfaction is our goal. Therefore all AVANTGARDE units carry a (2) two year limited warranty on both parts and labor. GENERAL PARTS AND LABOR WARRANTY AVANTGARDE warrants for (2) two years , to the purchaser of every new unit, the cabinet and all parts thereof, to be free from defects in material or workmanship, under normal and proper use and ... - Page 32 NOT COVERED BY THIS WARRANTY AVANTGARDE’s sole obligation under this warranty is limited to either repair or supply replacement parts, and is subject to the additional limitations below. This warranty neither assumes nor authorizes any person to assume obligations other than those expressly covered by this warranty. NO CONSEQUENTIAL DAMAGES: AVANTGARDE is not responsible for economic loss; profit loss; or special, direct, indirect, or consequential damages, including without limitation, losses or damages arising from food or product spoilage claims whether or not on account of refrigeration failure. ...
-
Page 33: Troubleshooting Guide
6.Troubleshooting Guide You can solve many common appliance problems easily, saving you the cost of a possible service call. Try the suggestions below to see if you can solve the problem before calling the servicer. Problem Possible cause Not plugged in. Appliance does not operate. The appliance is turned off. Tripped circuit breaker or blown fuse. Check the temperature control setting. Appliance is not cold enough. External environment may require a higher setting. The door is opened too often. The door is not closed completely. The door gasket does not seal properly. The room temperature is higher than normal. Turns on and off frequently. A large amount of contents has been added to the appliance. The door is opened too often. The door is not closed completely. The temperature control is not set correctly. ...