Table des Matières

Manuels Connexes pour Philips Saeco Minuto HD8763/18


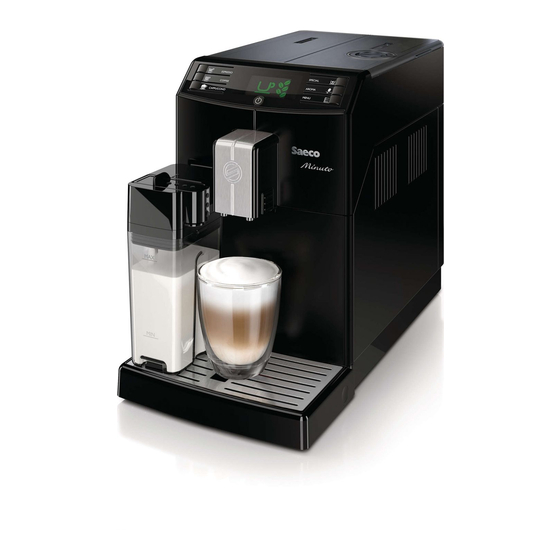
Sommaire des Matières pour Philips Saeco Minuto HD8763/18
- Page 1 Quick Instruction Guide Type HD8763 READ THIS GUIDE CAREFULLY BEFORE USING THE MACHINE. FOR COMPLETE INSTRUCTIONS DOWNLOAD USER MANUAL FROM WWW.PHILIPS.COM/SUPPORT Register your product and get support at www.philips.com/welcome...
- Page 2 Welcome to Philips Saeco! Register on WWW.PHILIPS.COM/WELCOME and you will receive tips and updates on how to take care of your machine. This booklet contains quick instructions on how to operate your machine properly. For complete instructions download the usermanual from WWW.PHILIPS.COM/SUPPORT ¡Bienvenido al mundo Philips Saeco! Regístrese en la página WWW.PHILIPS.COM/WELCOME para re-...
- Page 3 Herzlich Willkommen in der Welt von Philips Saeco! Registrieren Sie sich auf der Internetseite WWW. PHILIPS.COM/WELCOME und erhalten Sie Hinweise und Aktualisierungen zur Wartung. In diesem Heft werden die Hinweise für den korrekten Betrieb des Geräts in Kurzform dargestellt. Die komplette Bedienungsanleitung können Sie auf WWW.PHILIPS.COM/SUPPORT herunterladen.
-
Page 4: Table Des Matières
EN - CONTENT SAFETY INSTRUCTIONS ......................................6 FIRST INSTALLATION......................................10 MANUAL RINSE CYCLE......................................11 FIRST ESPRESSO/COFFEE ....................................12 MY FAVOURITE ESPRESSO ....................................12 ADJUSTING THE CERAMIC COFFEE GRINDER ...............................13 FIRST CAPPUCCINO ......................................14 MY FAVOURITE CAPPUCCINO ....................................15 MILK FROTH ........................................16 ADJUSTING THE MILK FROTH LENGTH ................................17 HOT WATER........................................19 DESCALING ........................................20 BREW GROUP CLEANING ....................................24... - Page 5 DE - INHALT SICHERHEITSHINWEISE .....................................32 ERSTE INBETRIEBNAHME ....................................36 MANUELLER SPÜLZYKLUS....................................37 ERSTER ESPRESSO / KAFFEE ....................................38 MEIN LIEBLINGS-ESPRESSO ....................................38 EINSTELLUNG KERAMIKMAHLWERK ..................................39 ERSTER CAPPUCCINO ......................................40 MEIN LIEBLINGS-CAPPUCCINO...................................41 AUFGESCHÄUMTE MILCH ....................................42 EINSTELLUNG AUSGABEMENGE AUFGESCHÄUMTE MILCH...........................43 HEISSWASSER ........................................45 ENTKALKEN ........................................46 REINIGUNG DER BRÜHGRUPPE ..................................50 REINIGUNG DER MILCHKARAFFE ..................................51 HINWEISSIGNALE (GELB) ....................................55 ALARMSIGNALE (ROT) .......................................56...
-
Page 6: Safety Instructions
Only have repairs hopper. If ground coff ee, instant coff ee or carried out by a service centre authorised by any other substance is put in the coff ee bean Philips to avoid a hazard. hopper, it may damage the machine. - Page 7 Safety instructions www.philips.com/support Normas de seguridad • Let the machine cool down before inserting or removing any parts. • Never use warm or hot water to fi ll the wa- symbol on the product or on its pack- ter tank. Use only cold non sparkling drink- aging indicates that this product may not be ing water.
- Page 8 Normas de seguridad rán ser efectuadas por un centro de asisten- ES - NORMAS DE SEGURIDAD cia técnica autorizado por Philips. La máquina está dotada de dispositivos de se- • La máquina no está destinada a ser utilizada guridad. No obstante, es necesario leer atenta- por niños de edad inferior a 8 años.
- Page 9 Safety instructions www.philips.com/support Normas de seguridad • No colocar la máquina sobre superfi cies ca- de corriente y cortar el cable de alimenta- lientes ni cerca de hornos calientes, calefac- ción. tores o fuentes de calor similares. - Entregar el aparato y el cable de alimenta- •...
-
Page 10: First Installation
Instructions www.philips.com/support Instrucciones FIRST INSTALLATION PRIMERA INSTALACIÓN Remove the water tank lid. Lift the water tank using the Rinse the water tank and fi ll it with fresh water up to the Remove the coff ee bean hop- handle. MAX level. -
Page 11: Manual Rinse Cycle
Instructions www.philips.com/support Instrucciones The machine performs an The machine is ready for the automatic rinse cycle. manual rinse cycle. La máquina realiza un ciclo La máquina está lista para de enjuague automático. el ciclo de enjuague ma- nual. MANUAL RINSE CYCLE... -
Page 12: First Espresso/Coffee
Instructions www.philips.com/support Instrucciones The machine reminds you to install the water Dispense water until the no At the end, fi ll the water tank dispensing spout. Press the button to confi rm. water icon is displayed. again up to the MAX level. -
Page 13: Adjusting The Ceramic Coffee Grinder
Instructions www.philips.com/support Instrucciones Wait until the desired quan- ... press to stop the process. Stored! tity of coff ee is reached. Note: to stop programming for coff ee, press the button. Esperar a que se alcance la ... pulsar para interrumpir el proceso. ¡Memorizado! cantidad de café... -
Page 14: First Cappuccino
Instructions www.philips.com/support Instrucciones FIRST CAPPUCCINO PRIMER CAPUCHINO Danger of scalding! Dis- MILK pensing may be preceded by small jets of hot water. ¡Riesgo de quemaduras! Al principio del suminis- tro se pueden producir Remove the water dispens- Lift the carafe lid. -
Page 15: My Favourite Cappuccino
Instructions www.philips.com/support Instrucciones Coff ee brewing and milk dispensing automatically stop when the preset level is reached; press the button to stop them earlier. Los suministros de leche y de café se detienen auto- máticamente al alcanzarse el nivel programado; no obstante, es posible interrumpirlos con antelación... -
Page 16: Milk Froth
Instructions www.philips.com/support Instrucciones The machine starts brewing Wait until the desired quan- ... press to stop the pro- ... press to stop the process. coff ee into the cup. tity of coff ee is reached... cess. Milk Stored! Cappuccino Stored! ... -
Page 17: Adjusting The Milk Froth Length
Instructions www.philips.com/support Instrucciones Place a cup under the dis- The machine reminds you to Press the button. The machine shows the icon above. Press the button to select pensing spout. insert the carafe and pull out milk froth. the milk carafe dispenser. - Page 18 Instructions www.philips.com/support Instrucciones The machine is heating-up. The machine starts dispens- Wait until the desired quan- Press and hold the button until the “MEMO” icon is dis- ing milk froth into the cup. tity of milk is reached... played. The machine reminds you to insert the carafe and pull out the milk carafe dispenser.
-
Page 19: Hot Water
Instructions www.philips.com/support Instrucciones HOT WATER AGUA CALIENTE Danger of scalding! Dis- pensing may be preceded by small jets of hot water. ¡Riesgo de quemaduras! Al principio del suminis- tro se pueden producir pequeñas salpicaduras Insert the water dispensing Lock it in place. -
Page 20: Descaling
Instructions www.philips.com/support Instrucciones DESCALING - 35 min. DESCALCIFICACIÓN - 35 min When the “CALC CLEAN” icon is displayed, you need to descale the machine. Not doing this will ultimately make your appliance stop working properly. In this case repair is not covered under your warranty. - Page 21 Instructions www.philips.com/support Instrucciones 1 - Raise the dispensing spout; Insert the empty milk carafe. Remove the “INTENZA+” water Press the button. 2 - Press the side buttons; fi lter from the water tank if it was installed and replace it 3 - Remove and empty the drip tray and coff ee grounds with the small white original one.
- Page 22 Instructions www.philips.com/support Instrucciones The descaling solution will be dispensed at intervals (dura- When this icon is displayed, Rinse the water tank and fi ll it with fresh water up to the tion: approx. 25 min). the water tank is empty.
- Page 23 Instructions www.philips.com/support Instrucciones When the amount of water needed for the rinse cycle has The machine automatically Remove the small white water fi lter and place back the “IN- been completely dispensed, this icon is displayed. Press the primes the circuit. Thereaf- TENZA+”...
-
Page 24: Brew Group Cleaning
Instructions www.philips.com/support Instrucciones BREW GROUP CLEANING LIMPIEZA DEL GRUPO DE CAFÉ Turn off the machine and unplug the power cord. Remove Remove the brew group, press the «PUSH» button. Pull it Remove the coff ee residues the drip tray and coff ee grounds drawer. Thereafter open the horizontally by the handle without turning it. -
Page 25: Cleaning The Milk Carafe
Instructions www.philips.com/support Instrucciones CLEANING THE MILK CARAFE LIMPIEZA DE LA JARRA DE LECHE It is important that you clean the milk carafe daily or after each use as it preserves hygiene and ensures perfect milk froth consistency Es importante limpiar... - Page 26 Instructions www.philips.com/support Instrucciones Once the machine stops dis- Press the release buttons to ‘Put back the milk carafe by shifting it up to the icon. Re- Weekly pensing water, the cleaning move the milk carafe and empty it.’ remove the top of the carafe.
- Page 27 Instructions www.philips.com/support Instrucciones Clean all the parts thoroughly with lukewarm water. Fill the milk carafe with water up to the maximum level Monthly You can also clean these parts in the dishwasher. (MAX). Pour one Saeco milk circuit cleaner bag into the milk Reassemble the parts following the reverse order.
- Page 28 Instructions www.philips.com/support Instrucciones Remove the milk carafe from Insert the milk carafe into the machine. Pull out the Press the button. The icon above is displayed. the machine. Rinse and fi ll milk carafe dispenser to the right up to the icon.
-
Page 29: Warning Signals (Yellow Colour)
Instructions www.philips.com/support Instrucciones WARNING SIGNALS (YELLOW COLOUR) SEÑALES DE AVISO (AMARILLO) The machine is warming up The machine is performing The “INTENZA+” water fi lter The brew group is being reset to brew coff ee and dispense a rinse cycle. Wait until this needs to be replaced. -
Page 30: Warning Signals (Red Colour)
Turn off the machine. After 30 seconds, turn it on again. Repeat the procedure 2 or 3 times. If the machine does not start, contact the Philips SAECO hotline in your country (contact details in the warranty booklet) and quote the error code shown on the display. -
Page 31: Productos Para El Mantenimiento
HD5061 número de producto: CA6706 Visit Philips online shop to check availability and purchasing oppor- tunities in your country. Visite la tienda en línea de Philips para comprobar la disponibilidad y las ofertas de compra en su país. -
Page 32: Sicherheitshinweise
Sicherheitshinweise www.philips.com/support Consignes de sécurité müssen durch ein von Philips autorisiertes DE - SICHERHEITSHINWEISE Kundendienstzentrum ausgeführt werden, Das Gerät ist mit Sicherheitsvorrichtungen um jede Gefahr zu vermeiden. ausgestattet. Dennoch sollten Sie die beschrie- • Das Gerät darf nicht von Kindern unter 8 benen Sicherheitshinweise in dieser Schnell- Jahren benutzt werden. - Page 33 Sicherheitshinweise www.philips.com/support Consignes de sécurité • Stellen Sie das Gerät auf eine waagerechte, Entsorgung ebene und stabile Fläche. - Die Verpackungsmaterialien können recy- • Stellen Sie das Gerät nicht auf heiße Flä- celt werden. chen, in der Nähe von heißen Öfen, Heizge- - Gerät: Den Stecker von der Steckdose abzie-...
- Page 34 Consignes de sécurité les réparations doivent être eff ectuées par FR - CONSIGNES DE SÉCURITÉ un centre d’assistance agréé par Philips pour La machine est dotée de dispositifs de sécurité. éviter tout danger. Il est toutefois nécessaire de lire attentivement •...
- Page 35 Sicherheitshinweise www.philips.com/support Consignes de sécurité de travail. Élimination • Toujours poser la machine sur une surface - Les matériaux d'emballage peuvent être plane et stable. recyclés. • Ne pas placer la machine sur des surfaces - Appareil : ôter la fi che de la prise de courant chaudes, proches de fours chauds, de ré-...
-
Page 36: Erste Inbetriebnahme
Hinweise www.philips.com/support Instructions ERSTE INBETRIEBNAHME PREMIÈRE INSTALLATION Den Deckel des Wassertanks Den Wassertank am Griff Den Wassertank ausspülen und bis zum Füllstand MAX mit Den Deckel vom Kaff eeboh- abnehmen. anheben. frischem Wasser füllen. Überprüfen, ob dieser vollständig nenbehälter abnehmen. -
Page 37: Manueller Spülzyklus
Hinweise www.philips.com/support Instructions Das Gerät führt einen auto- Das Gerät ist für den manu- matischen Spülzyklus aus. ellen Spülzyklus bereit. La machine eff ectue un La machine est prête pour cycle de rinçage automa- le cycle de rinçage manuel. tique. -
Page 38: Erster Espresso / Kaffee
Hinweise www.philips.com/support Instructions Das Gerät zeigt an, dass die Wasserdüse installiert werden Wasser ausgeben, bis das Anschließend den Wasser- muss. Zur Bestätigung die Taste drücken. Symbol Wasser fehlt ange- tank erneut bis zum Füll- Das Gerät beginnt, heißes Wasser auszugeben. -
Page 39: Einstellung Keramikmahlwerk
Hinweise www.philips.com/support Instructions Abwarten, bis die ge- ... die Taste drücken, um den Vorgang zu stoppen. Gespeichert! wünschte Menge an Kaff ee Hinweis: erreicht ist. Um die Programmierung des großen Kaff ees zu stoppen, wird die Taste drückt. Attendre que la quantité... -
Page 40: Erster Cappuccino
Hinweise www.philips.com/support Instructions ERSTER CAPPUCCINO PREMIER CAPPUCCINO Verbrennungsgefahr! MILK Beim Start können heiße Wasserspritzer austreten. Danger de brûlures ! Il peut y avoir quelques éclaboussures d’eau Die Wasserdüse abnehmen, Den Deckel der Karaff e an- Milch bis in die Mitte zwischen den Füllstandsanzeigen MIN chaude au début de la... -
Page 41: Mein Lieblings-Cappuccino
Hinweise www.philips.com/support Instructions Die Ausgabe der Milch und des Kaff ees wird automa- tisch beendet, wenn die eingestellte Menge erreicht ist. Sie kann jedoch auch durch Druck der Taste vorzeitig abgebrochen werden. La distribution du lait et du café s’interrompt auto- matiquement lorsque le niveau réglé... -
Page 42: Aufgeschäumte Milch
Hinweise www.philips.com/support Instructions Das Gerät beginnt die Aus- Abwarten, bis die ge- ... die Taste drücken, um ... die Taste drücken, um den Vorgang zu stoppen.. gabe des Kaff ees in die Tasse. wünschte Menge an Kaff ee den Vorgang zu stoppen. -
Page 43: Einstellung Ausgabemenge Aufgeschäumte Milch
Hinweise www.philips.com/support Instructions Eine Tasse unter den Auslauf Das Gerät weist darauf hin, Die Taste drücken. Das Gerät zeigt das oben abgebildete Symbol an. Die Taste drü- stellen. dass die Karaff e eingesetzt cken, um die aufgeschäumte Milch anzuwählen. und die Düse der Karaff e her- ausgezogen werden muss. - Page 44 Hinweise www.philips.com/support Instructions Das Gerät befi ndet sich in der Das Gerät beginnt die Aus- Abwarten, bis die ge- Die Taste gedrückt halten, bis das Symbol “MEMO” auf Aufheizphase. gabe der aufgeschäumten wünschte Menge an Milch dem Display angezeigt wird. Das Gerät weist darauf hin, Milch in die Tasse.
-
Page 45: Heisswasser
Hinweise www.philips.com/support Instructions HEISSWASSER EAU CHAUDE Verbrennungsgefahr! Beim Start können heiße Wasserspritzer austreten. Danger de brûlures ! Il peut y avoir quelques éclaboussures d’ e au chaude au début de la Die Wasserdüse einsetzen. In der Position blockieren. Einen Behälter unter die Heißwasserdüse stellen. -
Page 46: Entkalken
Hinweise www.philips.com/support Instructions ENTKALKEN - 35 Min. DÉTARTRAGE - 35 min. Wird das Symbol “CALC CLEAN” angezeigt, so muss das Entkalken vorgenommen werden. Diese Vorgänge nicht auszuführen, führt dazu, dass das Gerät nicht mehr störungsfrei funktioniert. Eine entsprechende Reparatur ist nicht durch die Garantie gedeckt. - Page 47 Hinweise www.philips.com/support Instructions 1 - Den Kaff eeauslauf nach oben schieben; Die leere Milchkaraff e einsetzen. Den Wasserfi lter “INTEN- Die Taste drücken. 2 - Die seitlichen Tasten drücken; ZA+” (soweit vorhanden) aus dem Wassertank herauszie- 3 - Die Abtropfschale und den Kaff eesatzbehälter abnehmen hen und durch den kleinen weißen Original-Filter ersetzen.
- Page 48 Hinweise www.philips.com/support Instructions Das Entkalkungsmittel wird in Intervallen ausgegeben (Dau- Wird dieses Symbol ange- Den Tank ausspülen und bis zum Füllstand MAX mit frischem er: ca. 25 Min.). zeigt, so ist der Wassertank Wasser füllen. Wieder ins Gerät einsetzen. leer.
- Page 49 Hinweise www.philips.com/support Instructions Wurde das für die Spülung erforderliche Wasser vollständig Das Gerät führt die auto- Den kleinen weißen Filter entfernen, den Wasserfi lter “IN- ausgegeben, zeigt das Gerät das oben abgebildete Symbol matische Entlüftung des TENZA+” (soweit vorhanden) wieder im Wassertank instal- an.
-
Page 50: Reinigung Der Brühgruppe
Hinweise www.philips.com/support Instructions REINIGUNG DER BRÜHGRUPPE NETTOYAGE DU GROUPE DE DISTRIBUTION Das Gerät ausschalten und das Netzkabel herausziehen. Die Die Taste «PUSH» drücken und am Handgriff ziehen, um die Den Kaff eeauff angbehälter Abtropfschale und den Kaff eesatzbehälter abnehmen. Dann Brühgruppe herauszunehmen. -
Page 51: Reinigung Der Milchkaraffe
Hinweise www.philips.com/support Instructions REINIGUNG DER MILCHKARAFFE NETTOYAGE DE LA CARAFE À LAIT Die Milchkaraff e muss täglich und nach jeder Benutzung gereinigt wer- den, um die Hygiene und die Zubereitung von auf- geschäumter Milch mit perfekter Konsistenz zu gewährleisten. Il est important de net- Die Auslösetasten drücken,... - Page 52 Hinweise www.philips.com/support Instructions Wenn das Gerät die Wasser- Die Auslösetasten drücken, Die Düse der Karaff e bis zum Symbol zurück schieben. Die Wöchentlich ausgabe stoppt, ist die Reini- Milchkaraff e entfernen und leeren. um den oberen Teil der Ka- gung beendet.
- Page 53 Hinweise www.philips.com/support Instructions Alle Teile sorgfältig mit lauwarmem Wasser reinigen. Die Milchkaraff e bis zum Füllstand (MAX) mit Wasser füllen. Die Teile können auch in der Spülmaschine gereinigt Eine Packung des Produktes für die Reinigung des Milchsys- Monatlich werden. tems Saeco in die Milchkaraff e schütten und abwarten, bis Alle Teile in umgekehrter Reihenfolge wieder montieren.
- Page 54 Hinweise www.philips.com/support Instructions Die Milchkaraff e aus dem Die Milchkaraff e in das Gerät einsetzen. Die Düse der Ka- Die Taste drücken. Auf dem Display wird das oben ab- Gerät entfernen. Die Milch- raff e nach rechts bis zum Symbol herausziehen.
-
Page 55: Signaux D'avertissement (Jaune)
Hinweise www.philips.com/support Instructions HINWEISSIGNALE (GELB) SIGNAUX D'AVERTISSEMENT (JAUNE) Gerät in Aufheizphase für die Das Gerät führt einen Spül- Der Wasserfi lter “INTEN- Brühgruppe in der Rückstel- Ausgabe von Kaff ee, Heiß- zyklus aus. Warten bis die ZA+” muss ausgetauscht lungsphase nach einer Zu- wasser und Dampf. -
Page 56: Signaux D'alarme (Rouge)
Das Gerät ausschalten. Nach 30 Sekunden erneut einschalten. Den Vorgang 2 oder 3 Mal wiederholen. Kann das Gerät nicht gestartet werden, so ist die Hotline Philips SAECO im jeweiligen Land zu kontaktieren (die Kontaktnummern sind im Garantieheft angeführt), und der auf dem Display angezeigte Fehlercode anzugeben. -
Page 57: Produits Pour L'entretien
CA6700 numéro produit : HD5061 n° produit : CA6706 Besuchen Sie den Online-Shop Phi- lips für die Verfügbarkeit und die Kaufmöglichkeiten in Ihrem Land. Visitez le magasin en ligne Philips pour vérifi er la disponibilité et les opportunités d'achat dans votre Pays. - Page 60 The manufacturer reserves the right to change the features of the product without prior notice. Der Hersteller behält sich das Recht vor, Änderungen am Produkt ohne Vorankündigung vorzunehmen. Le producteur se réserve le droit d‘apporter des modifi cations au produit sans aucun préavis. El fabricante se reserva el derecho a realizar modifi...