Whirlpool AXMT 6434/IX Mode D'emploi
Table des Matières
Liens rapides
Table des Matières

Manuels Connexes pour Whirlpool AXMT 6434/IX


Sommaire des Matières pour Whirlpool AXMT 6434/IX
- Page 1 AXMT 6434/IX AXMT 6434/WH...
-
Page 2: Table Des Matières
Français Mode d’emploi CUISINIERE ET FOUR Sommaire Mode d’emploi,1 CONSIGNES DE S É CURIT É Description de l’appareil-Vue d’ensemble, 14 Description de l’appareil-Tableau de bord, 14 Installation,15 Mise en marche et utilisation,19 Utilisation du four,19 Utilisation du plan de cuisson,21 Nettoyage et entretien,25 English Operating Instructions... -
Page 3: Consignes De Sécurité
Avant d’utiliser l’appareil, lisez attentivement les guides de sécurité, d’utilisation et d’entretien. Gardez ces documents à portée de main pour toute référence future. Ces instructions sont également disponibles sur le site Web : www.whirlpool.eu VOTRE SÉCURITÉ ET CELLE DES AUTRES EST TRÈS IMPORTANTE Ce manuel et l’appareil lui-même fournissent des avertissements de sécurité... -
Page 4: Usage Prévu De L'appareilproduct
RISQUE D'INCENDIE : N'entreposez pas d'éléments sur les surfaces de cuisson puisqu'elles sont inflammables. AVERTISSEMENT : Si la surface est fissurée, éteignez l'appareil pour éviter tout risque de choc électrique (uniquement pour les appareils ayant une surface en verre). Ces instructions sont valables si le symbole du pays s'affiche sur l'appareil. Si le symbole ne s'affiche pas sur l'appareil, il est recommandé... -
Page 5: Connexion De Gas
Utilisez des gants de protection pour effectuer toutes les opérations de déballage et d'installation. Après avoir déballé l'appareil, assurez-vous que la porte se ferme bien. En cas de problème, contactez votre revendeur ou le service après-vente le plus proche. Pour éviter tout dommage, retirez le four de son socle en mousse de polystyrène seulement au moment de l'installation. -
Page 6: Utilisation Appropriée
Pour les appareils avec prise intégrée, si la fiche ne convient pas à votre prise de courant, contactez un technicien qualifié. N'utilisez pas de rallonges, de multiprises ou d'adaptateurs. Ne branchez pas l'appareil à une prise qui peut être actionnée par télécommande. Le câble d'alimentation doit être suffisamment long pour relier l'appareil, une fois monté... -
Page 7: Protection De L'environnement
NETTOYAGE ET ENTRETIEN Avant d'effectuer toute opération de nettoyage ou d'entretien, assurez-vous de débrancher l'appareil du secteur. Utilisez des gants de protection pour les opérations de nettoyage et entretien. Assurez-vous de débrancher l'appareil avant de remplacer l'ampoule pour éviter tout risque de choc électrique. N'utilisez jamais un équipement de nettoyage à... -
Page 8: Déclaration De Confirmité
DÉCLARATION DE CONFIRMITÉ Cet appareil répond aux exigences d’éco-conception de la directive européenne no 65/2014, et no 66/2014 en conformité avec la norme européenne EN 60350-1. TABLEAU DES CARACTERISTIQUES Dimensions du 32,4 x 43,5 x 40,3 cm four HxLxP l 57 Volume largeur 42 cm Dimensions utiles... -
Page 9: Safety Instructions
Before using the appliance carefully read Health and Safety and Use and Care guides. Keep these instructions close at hand for future reference. These instructions shall also be available on website: www.whirlpool.eu SAFETY OF OTHERS IS VERY IMPORTANT YOUR SAFETY AND This manual and the appliance itself provide important safety warnings, to be read and observed at all times. -
Page 10: Intended Use Of The Product
These instructions are valid if the country symbol appears on the appliance. If the symbol doesn't appear on the appliance, it is necessary to refer to the technical instructions which will provide the necessary instructions concerning modification of the appliance to the conditions of use of the country"... -
Page 11: Gas Connection
The appliance must be disconnected from the power supply before carrying out any installation operation. During installation, make sure the appliance does not damage the power cable. Only activate the appliance when the installation procedure has been completed. Kitchen units in contact with the appliance must be heat resistant (min 90°C). Carry out all cabinet cutting works before fitting the appliance in the furniture and carefully remove all wood chips and sawdust. -
Page 12: Correct Use
CORRECT USE CAUTION : The cooking process has to be supervised. A short cooking process has to be supervised continuously. WARNING : Unattended cooking on a hob with fat or oil can be dangerous and may result in fire. Never try to extinguish a fire with water, but switch off the appliance and then cover flame e.g. with a lid or a fire blanket. Metallic objects such as knives, forks, spoons and lids should not be placed on the hob surface since they can get hot. -
Page 13: Energy Saving Tips
For further information on the treatment, recovery and recycling of household electrical appliances, contact your competent local authority, the collection service for household waste or the store where you purchase the appliance. This appliance is marked in compliance with European Directive 2012/19/EU, Waste Electrical and Electronic Equipment (WEEE). -
Page 14: Description De L'appareil
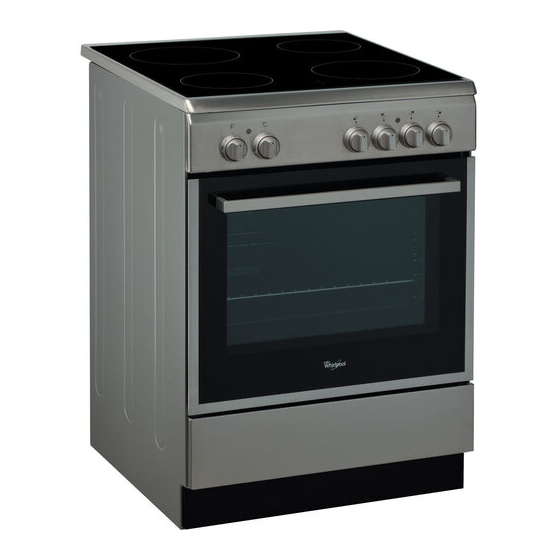
Description de l’appareil Vue d’ensemble 1. Brûleur à gaz 2.Grille du plan de cuisson 1. Icône PROGRAMME BASSE TEMPERATURE 3. Tableau de bord 2. IcônesPROGRAMMES AUTOMATIQUE 6TH SENSE IcônesPROGRAMMES AUTOMATIQUE 6TH SENSE 4. Support GRILLE 3. Indicateur de Préchauffage 5. Support LECHEFRITE 4. -
Page 15: Positionnement Et Nivellement
Installation Aération des locaux L’appareil doit être installé dans des locaux qui sont aérés en permanence, selon les prescriptions des normes en vigueur dans le pays d’installation. Il est indispensable que la pièce où l’appareil est installé dispose d’une quantité d’air égale à la quantité d’air comburant nécessaire à... -
Page 16: Raccordement Électrique
• ne pas placer de rideaux derrière ou sur les côtés Raccordement gaz de la cuisinière à moins de 200 mm de distance. Pour raccorder l’appareil au réseau de distribution • pour l’installation de hottes, se conformer aux du gaz ou à la bouteille de gaz, utiliser un tuyau instructions de leur notice d’emploi. -
Page 17: Vérification De L'étanchéité
Si une ou plusieurs de ces conditions ne peuvent être remplies ou que la cuisinière est installée dans des conditions de classe 2 – sous-classe 1 (appareil encastré entre deux meubles), il faut utiliser un tuyau flexible en acier ( voir ci-dessous ). Raccordement gaz par tuyau flexible en acier inox, à... - Page 18 1.00 (Petit) (A) Pressions 28-30 Nominale (mbar) Minimum d'alimentation (mbar) Maximum (mbar) à 15°C et 1013 mbar- gaz sec Propane P.C.S. = 50,37 MJ/Kg Butane P.C.S. = 49,47 MJ/Kg Naturel P.C.S. = 37,78 MJ/m ø 180 AXMT 6434/IX AXMT 6434/WH...
-
Page 19: Mise En Marche Et Utilisation
Mise en marche et utilisation Utilisation du plan de cuisson Allumage des brûleurs Pour repérer le type de brûleur adéquat, se référer Un petit cercle plein près de chaque bouton aux dessins du paragraphe «Caractéristiques des BRULEUR indique le brûleur associé à ce dernier. brûleurs et des injecteurs». -
Page 20: Mise À L'heure De L'horloge
Mise à l’heure de l’horloge 2. Le four se place en phase de préchauffage, l’indicateur préchauffage s’allume. Son réglage est possible que le four soit éteint ou Pour modifier la température, tourner le bouton allumé mais ceci ne correspond pas à une THERMOSTAT. -
Page 21: Programmes De Cuisson Manuels
Programmes de cuisson manuels Tous les programmes ont une température de cuisson présélectionnée. Il est possible de la régler manuellement, entre 40°C et 250°C au choix. Pour le programme TOURNEBROCHE, la valeur présélectionnée est 270°C. Fonction Fonction Description UTILISATION ET ENTRETIEN Pour cette cuisson traditionnelle mieux vaut cuire sur un seul FOUR TRADITION niveau. -
Page 22: Comment Programmer Une Cuisson
Comment programmer une cuisson Conseils de cuisson La programmation n’est possible qu’après avoir Pour les cuissons ventilées ne pas utiliser les gradins sélectionné un programme de cuisson. 1et 5: ils sont directement frappés par l’air chaud qui pourrait brûler les mets délicats. Programmer la durée de cuisson 1. - Page 23 Tableau de cuisson au four Table de cuisson Grille (depuis Recette Fonction Préchauffage la partie Temp. (°C) Durée (min) Accessoires et observations inférieure) MULTINIVEAU 160 - 180 30 - 90 Moule à gâteaux sur l'étagère grillagée Grille 3 : moule à gâteaux sur l'étagère Gâteaux à...
- Page 24 Dinde/Oie Plateau de dégivrage / plaque de FOUR TRADITION 190 - 200 80 - 140 3 Kg cuisson sur l'étagère grillagée Poisson cuit au four / cuit dans une Plateau de dégivrage / plaque de MULTINIVEAU 180 - 200 30 - 60 feuille d'aluminium cuisson sur l'étagère grillagée (filet, entier)
-
Page 25: Nettoyage Et Entretien
Nettoyage et entretien Contrôler les joints du four Mise hors tension Contrôler périodiquement l’état du joint autour de la Avant toute opération de nettoyage ou d’entretien, porte du four. S’il est abîmé, s’adresser au service couper l’alimentation électrique de l’appareil. après-vente le plus proche de chez soi. -
Page 26: Nettoyage Automatique Par Pyrolyse
Nettoyage automatique par PYROLYSE • l’icône indique qu’il est possible d’annuler, à tout moment, le cycle de nettoyage par Pendant le programme PYROLYSE, la température à pression sur la touche l’intérieur du four atteint 500°C et lance le processus de pyrolyse, autrement dit, la carbonisation des •... -
Page 27: Description Of The Appliance-Overall View
Description of the appliance Overall view 1. Hob burner 2. Hob Grid 3.Control panel 4.Sliding grill rack 1. LOW TEMPERATURE MODE icon 5.DRIPPING pan icons AUTOCOOKING FUNCTION 6TH SENSE AUTOCOOKING FUNCTION 6TH SENSE 6.Adjustable foot 3. Indicator Preheating 7.ELECTRIC HOTPLATE 4. -
Page 28: Installation
Installation Room ventilation The appliance may only be installed in permanently- ventilated rooms, according to current national legislation and any subsequent amendments in force. The room in which the appliance is installed must be ventilated adequately in order to provide as much air as is needed by the normal gas combustion process (the flow of air must not be lower than 2 m /h per kW... -
Page 29: Electrical Connection
Levelling If it is necessary to level the Gas connection appliance, screw the Connection to the gas network or to the gas cylinder adjustable feet into the may be carried out using a flexible rubber or steel positions provided on each hose, in accordance with current national legislation corner of the base of the and any subsequent amendments in force, after... -
Page 30: Adapting To Different Types Of Gas
Connecting a flexible jointless stainless steel pipe to a threaded attachment Make sure that the hose complies with current national regulations and that the aluminium gaskets comply with UNI 9001-2, or the rubber gaskets comply with current national regulations. To begin using the hose, remove the hose holder on 3. - Page 31 1.00 (Small) (A) Supply Nominal (mbar) 28-30 pressure Minimum (mbar) Maximum (mbar) At 15°C and 1013 mbar- dry gas Propane P.C.S. = 50.37 MJ/kg Butane P.C.S. = 49.47 MJ/kg Natural P.C.S. = 37.78 MJ/m ø 180 AXMT 6434/IX AXMT 6434/WH...
-
Page 32: Start-Up And Use
Start-up and use Using the hob To identify the type of burner, please refer to the Lighting the burners diagrams contained in the paragraph “Burner and For each BURNER knob there is a complete ring nozzle specifications.” showing the strength of the flame for the relevant burner. -
Page 33: Setting The Timer
Setting the timer 5. The cooking time may be modified ( see Cooking Modes ). This function does not interrupt cooking and does 6. If a blackout occurs while the oven is already in not affect the oven; it is simply used to activate the operation, an automatic system within the appliance buzzer when the set amount of time has elapsed. -
Page 34: Manual Cooking Modes
Manual cooking modes All cooking modes have a default cooking temperature which may be adjusted manually to a value between 40°C and 250°C as desired. In the SPIT ROAST mode, the default power level value is 270°C. Funzione Funzione Descrizione USE AND CARE TRADITIONAL OVEN When using this traditional cooking mode, it is best to use one cooking rack only. -
Page 35: Practical Cooking Advice
Practical cooking advice Programming cooking Do not place racks in position 1 and 5 during fan- A cooking mode must be selected before assisted cooking. This is because excessive direct programming can take place. heat can burn temperature sensitive foods. In the SPIT ROAST, BARBECUE and ROASTING Programming the cooking duration cooking modes, place the dripping pan in position 1... - Page 36 Oven cooking advice table Shelf (from Recipe Function Preheating Temp. (°C) Time (min) Accessories and notes bottom) MULTILEVEL 160 - 180 30 - 90 Cake tin on wire shelf Leavened cakes Shelf 3: cake tin on wire shelf MULTILEVEL 1 - 3 160 - 180 30 - 90 Shelf 1: cake tin on wire shelf...
-
Page 37: Oven Cooking Advice Table
Oven cooking advice table Shelf 4: wire shelf (turn food two thirds of Salsicce / Spiedini / the way through cooking) GRILL/SPIT ROAST 240 - 250 15 - 30 Costine / Hamburger Shelf 3: drip tray with water Shelf 3: spit roast Pollo arrosto 1-1,3 Kg GRILL/SPIT ROAST 70 - 80... -
Page 38: Care And Maintenance
Care and maintenance Replacing the oven light bulb Switching the appliance off To replace the Disconnect your appliance from the electricity oven light bulb: Cavity supply before carrying out any work on it. Light bulb Cleaning the appliance Seal Never use steam cleaners or pressure cleaners on Cover the appliance. -
Page 39: Pyrolytic Cycle
Automatic cleaning using the Safety devices PYROLYTIC cycle • The icon on the display, when lit, indicates During the PYROLYTIC cycle, the internal that the oven door was automatically locked as temperature of the oven reaches 500°C. The soon as the temperature reached a high value. pyrolytic cycle is activated and burns away food and grime residues. - Page 40 Indesit Company S.P.A. Viale Aristide Merloni,47 03/2016-195136677.02 60044 Fabriano (AN) XEROX FABRIANO www.whirlp ool.com...