Jotul F118 Manuel D'installation
Masquer les pouces
Voir aussi pour F118:
- Manuel d'installation et d'utilisation (34 pages) ,
- Instructions d'installation et d'utilisation (25 pages)
Table des Matières
Publicité
Les langues disponibles
Les langues disponibles
Liens rapides
NO/DK - Installasjonsmanual med tekniske data
SE
- Installationsmanual med tekniska data
GB
- Installation manual with technical data
FR
- Manuel d'installation et données techniques
ES
- Manual de instalación con información técnica
IT
- Manuale di installazione con dati tecnici
DE
- Montageanleitung mit technischen Daten
NL
- Installatiehandleiding met technische gegevens
Figures/Pictures
Manualene må oppbevares under hele produktets levetid. The manuals which are enclosed with the product must be kept throughout the product's entire
service life. Les manuels fournis avec le produit doivent être conservés pendant toute la durée de vie du produit. Los manuales suministrados con este producto
deben guardarse durante todo el ciclo de vida del producto. I manuali inclusi con il prodotto vanno conservati per l'intera durata di vita del prodotto. Das im
Lieferumfang des Produkts enthaltene Begleitmaterial ist über die gesamte Nutzungsdauer aufzubewahren. De bij de haard meegeleverde handleidingen
moeten gedurende de volledige gebruiksduur van de haard bewaard blijven.
NO/DK - Les nøye "Generell bruks- og vedlikeholdsmanual" før bruk.
SE
- Läs "Allmänn användnings- och underhållsmanual" noga innan användning.
GB
- Before use, please read "General use and maintenance manual" carefully.
FR
- Avant utilisation, lisez attentivement "Manuel général d'utilisation et d'entretien".
ES
- Antes de proceder a su uso, lea atentamente "Manual de uso general y mantenimiento".
IT
- Prima dell'uso, si prega di leggere attentamente "Manuale d'uso generale e di
manutenzione".
DE
- Lesen Sie sich vor der Verwendung "Allgemeine Verwendungs- und Pflegeanleitung" sorgfältig
durch.
NL
- Lees "Algemeen gebruik- en onderhoudhandleiding" aandachtig door voordat u de haard gaat
gebruiken.
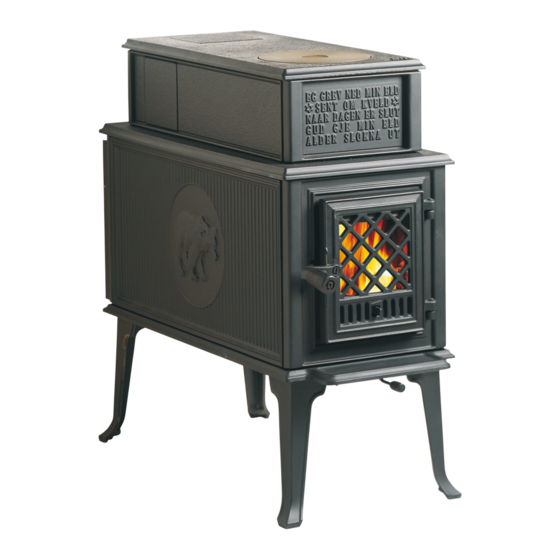
Jøtul F 118
19
23
27
35
3
7
11
15
31
Publicité
Table des Matières

Manuels Connexes pour Jotul F118


Sommaire des Matières pour Jotul F118
- Page 1 Jøtul F 118 NO/DK - Installasjonsmanual med tekniske data - Installationsmanual med tekniska data - Installation manual with technical data - Manuel d’installation et données techniques - Manual de instalación con información técnica - Manuale di installazione con dati tecnici - Montageanleitung mit technischen Daten - Installatiehandleiding met technische gegevens Figures/Pictures...
- Page 2 DANMARK...
- Page 15 fRANcAis 1.0 Relations avec les autorités Manuel d’installation et données techniques L’installation d’un poêle est soumise aux législations et réglementations nationales en vigueur. Les réglementations locales, y compris celles se rapportant aux Relations avec les autorités ......15 normes nationales et européennes, doivent être respectées lors de l’installation du produit.
-
Page 16: Cheminées Et Conduits
fRANcAis 3.0 Installation 3.4 Cheminées et conduits • Le poêle peut être relié à une cheminée et à un conduit approuvés pour les poêles à combustible solide, avec les 3.1 Le sol températures de fumées spécifiées dans la section «2.0 Données techniques». -
Page 17: Montage Du Bouclier Thermique Latéral
fRANcAis 3.7 Retrait des cendres Montage du bouclier thermique latéral (équipement disponible en option) (voir fig. 4) • Utiliser une pelle ou un accessoire similaire pour évacuer les 1. Insérer les attaches supérieures sous le couvercle. cendres par la porte. • Laisser toujours un peu de cendres pour former une couche 2. - Page 18 fRANcAis 4.0 Maintenance 5.0 Équipements disponibles en option Danger: toute modification non autorisée du produit est interdite et annule la garantie. Utiliser uniquement les pièces détachées d’origine. Bouclier thermique latéral, fig. 4 - cat. nr. 320099. L’intervention d’un technicien compétent est recommandée. Bouclier thermique arrière, fig.
- Page 36 Fig.6 Fig. 2 Fig.7 Fig. 3 Fig. 8 Fig.4 Fig. 9 Fig. 5...
- Page 37 Fig. 14 Fig. 10 Fig. 11 Fig. 15 Fig. 12 Fig. 16 Fig. 13 Fig. 17...
- Page 40 Jøtul arbeider kontinuerlig for om mulig å forbedre sine produkter, og vi forbeholder oss ret- ten til å endre spesifikasjoner, farger og utstyr uten nærmere kunngjøring. Jøtul bemüht sich ständig um die Verbesserung seiner Produkte, deshalb können Spezifika- tionen, Farben und Zubehör von den Abbildungen und den Beschreibungen in der Broschüre abweichen.