Table des Matières
Publicité
Les langues disponibles
Les langues disponibles
Liens rapides
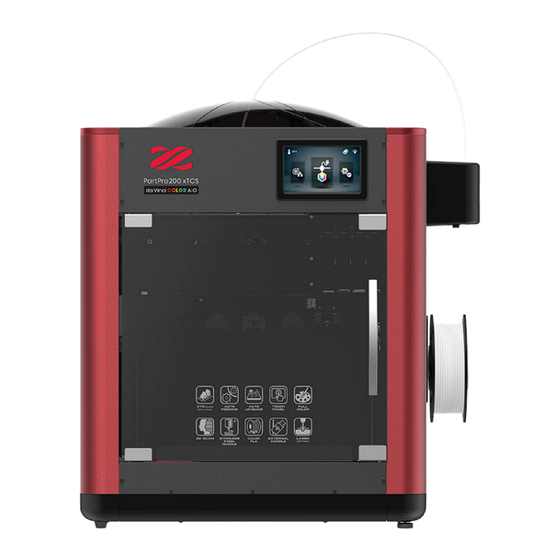
da Vinci Color AiO
User manual
The manual is mainly intended for users to understand how to use the
da Vinci Color AiO 3D printer ("Color AiO") correctly. In this manual,
users can learn more about the operating tips, application skills and
maintenance of the Color AiO 3D printer.
New member is required to register account on http://support.
xyzprinting.com before able to download latest manual &
software for better user experience.
For more information on the Color AiO, please contact your local
dealer or visit the official website of XYZprinting: http://www.
xyzprinting.com.
HD23FC1S182
ENG
2
3
5
7
8
21
22
25
Publicité
Chapitres
Table des Matières

Manuels Connexes pour XYZ Printing da Vinci Color AiO


Sommaire des Matières pour XYZ Printing da Vinci Color AiO
-
Page 1: Table Des Matières
Support detail The manual is mainly intended for users to understand how to use the da Vinci Color AiO 3D printer (“Color AiO”) correctly. In this manual, users can learn more about the operating tips, application skills and maintenance of the Color AiO 3D printer. -
Page 2: Safety Precautions
Safety Precautions Safety and Compliance Please read through this manual and all safety precautions carefully before using, operating, unpacking, replacing, remov- ing any part or maintaining this product. Please also comply with the instructions of relevant safety precautions. CAUTION Important Safety Precautions Heavy object. -
Page 3: Product Descriptions
Product Descriptions Product exterior 1. 5 inch color touch panel 4. Print bed+EZ removable rubber magnet 7. USB Port 10. USB Port (To PC) 2. Auto-feeding module 5. Scan module 8. USB Port 11. Power jack (WiFi dongle) 3. Print head 6. -
Page 4: Accessory Checklist
Product Descriptions Accessory Checklist 1. User Manual 5. USB Cable 9. PC Mylar x 2pcs 13. Clear Tube 2. USB Drive 6. EZ Removable Rubber Magnet 10. Mask Tape x 3pcs 14. Calibrating Plate 3. 3D Color-inkjet PLA 7. Top Cover 11. -
Page 5: Unpacking And Installation
Unpacking and Installation Move the printer to a table or plat- form. (Do not move the printer by Remove the plastic wrap and PP. yourself as it is heavy.) Remove the packaging materials, top cover box, assessory box and plastic cover. Open the front door. - Page 6 Unpacking and Installation Ensure that the one end of guide tube(Accessory 8) has been tightly. inserted into the printing module port, then insert the other end into the clear tube (Accessory 13) to the end. Feed the guide tube through the top cover then attach the Insert the other end of the guide tube into the feed module top cover to the machine.
-
Page 7: Touch Screen Menu, Functions And Messages
Touch Screen Menu, Functions and Messages Main screen Settings Filament/Ink loading USB Printing Menu and unloading This menu can be used to import This includes the functions in Home files (.3cp) from a USB drive to the Page 1: This includes Filament, Ink Load machine for printing without a com- Settings of the Print-Bed, Print- and Unload. -
Page 8: Function Operation And Instructions
Function Operation and Instructions A. Load/unload filaments Filament Load filaments 1. Please cut the filament at 45 2. Place the filament on the 3. Tap Filament Load and 4. Tap Filament. angle before auto loading the spool holder. Unload in the main screen and filament into the printer. - Page 9 Function Operation and Instructions Filament Refill Material Color AiO will prompt you to refill material. 1. Tap the icon when printing. 2. The screen will show filament 3. Confirm the operation. 4. The nozzle will be preheated status, please tap "Refill" . and the filament will be unloaded automatically.
- Page 10 Function Operation and Instructions C. Ink Cartridge Installation The Color AiO uses four color inks which can be replaced separately. Ink Guidance 1. Prepare several paper towels and the 2. Unpack the ink cartridge. 3. Remove the cartridge cover. ink cartridge. 4.
- Page 11 Function Operation and Instructions Tap the ink, the screen will show the status of the ink, including "Ink Low", "No Ink", "Invalid Ink", and "Invalid Color" Change Ink 1. Tap Change Ink and tap to 2. Confirm the operation. 3.Wait until the cartridge moves 4.
- Page 12 Function Operation and Instructions C2-1 Calibration Test Page Paper Test Page We suggest you print a test page after you install the ink cartridge. Please prepare a sheet of paper. 1. Tap Calibration. 2. Tap Test Page. 3. Test Page. 4.
- Page 13 Function Operation and Instructions C2-2 Ink Calibration Ink Cartridge Troubleshoot Pic 1 Pic 2 Pic 2-1 Picture 1 shows an example of Picture 2 show some slight color Picture 2-1 shown some slighly normal test page. offset on horizontal part of test black ink smudge on the horizon- page.
-
Page 14: Color Calibration
Function Operation and Instructions C2-3 Calibration Color Calibration 1. Tap Calibration. 2. Tap Color. 3. Please fix the printing paper onto the print bed. 4. Take out the printed paper and tap 5. Check the printed calibration chart using the on- PROCEED. - Page 15 Function Operation and Instructions C2-4 Calibration Inkjet Calibration 1. After the color object is printed, if you find color shift, you can adjust the print position manually. Y-Axis X-Axis 2. The adjustment position Manually adjust the Manually adjust the Once parameter settings are of X-Axis and Y-Axis was the completed, tap "PROCEED"...
- Page 16 Function Operation and Instructions D. Setting D1-1 Print-Bed Calibration (leveling) 1. Select Calibration. 2. Confirm the operation. 3. Wait while the sensor measures the height of the print bed at three different locations. Once the 4. After the calibration is measurement is complete, the printer will automatically level the print bed.
- Page 17 Function Operation and Instructions D2-1 Print-Head Clean Nozzle 1. Please clean the nozzle after 2. Tap Clean Nozzle in the print 3. Check if cleaning is necessary. Tap Check to clean it. printing 60 hours. head section. When the temperature of the print head reaches the operating temperature, the cleaning operation will start. Note: do not touch the metal part of the print head as it becomes hot during the operation.
- Page 18 Function Operation and Instructions Filament Refer to the Change Filament function in the main screen. Unused filament for one day of longer should be stored in zip-lock bag. WiFi Before turning on the printer and setting up the WiFi network, please insert the WiFi dongle into the USB port on the top of printer.
- Page 19 Function Operation and Instructions Language Sound Change Language Setting The Sound option can be set to ON or OFF to control the sound emitted when the touch screen is tapped The Color AiO provides eight display languages, including traditional and simplified Chinese, English, Japanese, German, Italian, Spanish and French.
- Page 20 Function Operation and Instructions Door Lock 1. Door lock on (ON) : when printing, 2. Door lock off (OFF) : the door won't the door will be locked; 60 sec after be locked during printing, pause, or stop the print ends, the door will unlock. The status.
-
Page 21: Printing
For details, visit the official website: http://www.xyzprinting.com/ 1. Connect the computer and printer and select da Vinci Color AiO. 2. Click on OPEN to select the model file to be printed from 3. -
Page 22: Scanning
Scanning Mount the scan module in the machine (see the installation steps) and install the “XYZscan Color” software on your computer to operate the scanning fuction of your 3D printer. Face the front side of the object to be scanned toward the scan module and it takes about 10-40 minutes to scan it, depending on computer performance and scanning quality. - Page 23 Scanning The limitations of the object to be scanned • The object should be stable and stationery. It must not be shaken or moved during the rotation of the turntable. • Scan area for the object mode is 5cm ϕ x 5 cm – 14cm ϕ x 14 cm (H). •...
- Page 24 Scanning Scan software: Operate XYZscan Color Make sure that the scan backboard is properly installed in Environmental illustration your 3D printer and press the "Scan" button on the machine, make sure the machine enters scan mode. 1. Open the scan software. 2.
-
Page 25: Support Detail
Support detail When the problem occurs with the printer, please refer to the following troubleshooting instructions. If the problem persists, please contact the Customer Service Center. Problem code and handling When a problem occurs with the printer, the service code will be displayed on the printer screen and / or the software interface. Please refer to this service code description form for preliminary testing. - Page 26 Scannen Einzelheiten zum Kundendienst Die Anleitung soll Nutzer vorwiegend mit der richtigen Bedienung des 3D-Druckers da Vinci Color AiO („Color AiO“) vertraut machen. In dieser Anleitung erfahren Nutzer mehr über Bedienungshinweise, Anwendungsmöglichkeiten und Wartung des 3D-Druckers Color AiO. Siehe Support. http://support.xyzprinting.com, um das neueste Handbuch &...
-
Page 27: Sicherheitsmaßnahmen
Sicherheitsmaßnahmen Sicherheit und Konformität Bitte lesen Sie diese Anleitung und sämtliche Sicherheitshinweise sorgfältig, bevor Sie dieses Produkt auspacken, benu- tzen, bedienen, warten oder ein Teil davon ersetzen oder entfernen. Beachten Sie zudem alle sicherheitsrelevanten An- weisungen. CAUTION Wichtige Sicherheitsmaßnahmen Heavy object. Watch Your Hands. -
Page 28: Produktbeschreibung
Produktbeschreibung Produktaufbau 1. 5-Zoll-Farb-Touchscreen 5. Scan-Modul 9. Ein-/Ausschalter 2. Automatisches Zuführungsmodul 6. Filamentspulenhalter 10. USB-Port (an PC) 3. Druckkopf 7. USB-Port 11. Netzanschluss 4. Druckplatte + abnehmbarer EZ-Gummimagnet 8. USB-Port (WLAN-Dongle) -
Page 29: Technische Daten
Produktbeschreibung Prüfliste zum Zubehör 1. Bedienungsanleitung 5. USB-Kabel 9. PC-Mylar x 2 13. Transparenten Schlauch 2. USB-Laufwerk 6. Abnehmbarer EZ-Gummimagnet 10. Plattenklebeband 14. Kalibrierungsplatte 3. 3D Color-inkjet PLA 7. Obere Abdeckung 11. WLAN-Dongle 15. Schattierungsplatte 4. Netzkabel 8. Führungsschlauch 12. Handschuhe (ein Paar) Warnhinweise und Anweisungen zu Wartungswerkzeugen Die folgenden Werkzeuge dürfen nur von oder unter Aufsicht eines Erwachsenen verwendet werden. -
Page 30: Auspacken Und Installieren
Auspacken und Installieren Stellen Sie den Drucker auf einen Tisch oder eine Plattform. Entfernen Sie Plastikfolie und PP. (Transportieren Sie das Gerät nicht eigenhändig. Es ist sehr schwer.) Entfernen Sie die Verpackungsmaterialien, den Karton mit der oberen Abdeckung, den Zubehörkarton und die Kunststoffabdeckung. Öffnen Sie die vordere Klappe. - Page 31 Auspacken und Installieren Stellen Sie sicher, dass ein Ende des Führungsschlauchs (Zubehör 8) fest in die Öffnung am Druckmodul eingesteckt ist, stecken Sie dann das andere Ende in den transparenten Schlauch (Zubehör 13) am Ende. Führen Sie das Führungsrohr durch die obere Abdeckung und Stecken Sie das andere Ende des Führungsschlauchs in das setzen Sie diese dann wieder auf die Maschine.
-
Page 32: Touchscreen-Menü, Funktionen Und Meldungen
Touchscreen-Menü, Funktionen und Meldungen Hauptbildschirm Einstellungen Filament/Tinte USB-Druckmenü laden und entladen Über dieses Menü können Sie Dies beinhaltet die Funktionen der Dateien (.3cp) zum Drucken ohne Startseite 1: Dies beinhaltet Optionen zum Computer von einem USB-Laufwerk Einstellungen zu Print-Bed (Druck- Laden und Entladen von Filament auf das Gerät importieren. -
Page 33: Funktionsbedienung Und Anweisungen
Funktionsbedienung und Anweisungen A. Filament laden/entladen Filament Filament laden 1. Das Filament mit einem 45 Grad- 2. Platzieren Sie das Filament im 3.Tippen Sie am Hauptbildschirm 4. Tippen Sie auf „Filament“. Winkel abschneiden, bevor es Spulenhalter. auf „Filament Load and Unload automatisch in den Drucker geladen (Filament laden und entladen)“... - Page 34 Funktionsbedienung und Anweisungen Filament Material auffüllen Color AiO fordert Sie zum Auffüllen von Material auf. 1. Tippen Sie beim Drucken auf das 2. Der Bildschirm zeigt den 3. Bestätigen Sie den Vorgang. 4. Die Düse wird erhitzt und das Symbol. Filamentstatus.
- Page 35 Funktionsbedienung und Anweisungen C. Tintenpatrone installiert Der Color AiO nutzt vier Farbtinten, die separat ersetzt werden können. Tintenführung 1. Halten Sie einige Papiertücher und 2. Packen Sie die Tintenpatrone aus. 3. Entfernen Sie die Patronenabdeckung. die Tintenpatrone bereit. 4. Drücken Sie den Patronenkopf gegen 5.
- Page 36 Funktionsbedienung und Anweisungen Tippen Sie auf die Tinte und der Bildschirm zeigt den zugehörigen Status, wie „Ink Low (Tintenstand gering)“, „No Ink (Keine Tinte)“ oder „Invalid Ink (Ungültige Tinte)“. Ink (Tinte) Change Ink (Tinte wechseln) 1. Tippen Sie auf „Change Ink 2.
- Page 37 Funktionsbedienung und Anweisungen Paper Test Page C2-1 Ink (Tinte) Calibration (Kalibrierung) Test Page (Testseite) Wir empfehlen, nach Installation der Tintenpatrone eine Testseite zu drucken. Bitte bereiten Sie ein Blatt Papier vor. 1. Tippen Sie auf „Calibration 2. Tippen Sie auf „Test Page 3.
- Page 38 Funktionsbedienung und Anweisungen C2-2 Ink (Tinte) Tintenkalibrierung Fehlersuche Tintenpatrone Bild 1 Bild 2 Bild2-1 Bild 1 zeigt ein Beispiel einer Bild 2 zeigt einen leichten Farb- Bild 2-1 zeigt eine leicht normalen Testseite. versatz im waagerechten Teil der schwarze Tintenverwischung im Testseite.
- Page 39 Funktionsbedienung und Anweisungen C2-3 Ink (Tinte) Calibration (Kalibrierung) Color Calibration (Farbkalibrierung) 1. Tippen Sie auf „Calibration 2. Tippen Sie auf „Color 3. Bitte befestigen Sie das Druckpapier auf der Druckplatte. (Kalibrierung)“. (Farbe)“. 4. Nehmen Sie das bedruckte Papier heraus und tippen Sie auf „PROCEED (Fortfahren)“.
- Page 40 Funktionsbedienung und Anweisungen C2-4 Ink (Tinte) Calibration (Kalibrierung) Inkjet Calibration (Tintenkalibrierung) 1.Wenn Sie eine Farbverschiebung finden, nachdem das Farbobjekt gedruckt wurde, können Sie die Druckposition manuell anpassen. Y-Axis X-Axis 2. Die Einstellposition der Sobald die Manuelle Einstellung der Manuelle Einstellung der X-Achse und der Y-Achse war X-Achsen-Bewegung Y-Achsen-Bewegung...
- Page 41 Funktionsbedienung und Anweisungen Einstellungen D1-1 Print-Bed (Druckplatte) Druckplatte kalibrieren (ausgleichen) 1. Wählen Sie Calibration 2. Bestätigen Sie den Vorgang. (Kalibrierung). 3. Warten Sie, während der Sensor die Höhe der Druckplatte an drei verschiedenen Positionen misst. 4. Tippen Sie nach erfolgreicher Sobald die Messung abgeschlossen ist, gleicht der Drucker die Druckplatte automatisch aus.
-
Page 42: Düse Reinigen
Funktionsbedienung und Anweisungen D2-1 Print-Head (Druckkopf) Düse reinigen 1. Bitte reinigen Sie die Düse nach 2. Tippen Sie im Druckkopfabschnitt 3. Prüfen Sie, ob eine Reinigung erforderlich ist. Tippen Sie zum Reinigen 60 Druckstunden. auf „Clean Nozzle (Düse reinigen)“. auf „Check (Prüfen)“. Sobald die Temperatur des Druckkopfs Betriebstemperatur erreicht, beginnt die Reinigung. - Page 43 Funktionsbedienung und Anweisungen Filament Beachten Sie die Funktion Change Filament (Filament wechseln) am Hauptbildschirm. Filament, das einen Tag oder länger nicht benutzt wird, sollte in einem Beutel mit Reißverschluss aufbewahrt werden. WLAN Bitte schließen Sie vor dem Anstellen des Druckers und vor der WLAN- Einrichtung den WLAN-Dongle an den USB-Port an der Oberseite des Druckers an.
-
Page 44: Language (Sprache)
Funktionsbedienung und Anweisungen Language (Sprache) Sound (Ton) Spracheinstellung ändern Die Option Sound (Ton) kann zur Steuerung des bei Berührung des Touchscreens ausgegebenen Tons auf Der Color AiO bietet acht Anzeigesprachen: Tra- ON (Ein) oder OFF (Aus) gesetzt werden. ditionelles Chinesisch, vereinfachtes Chinesisch, Englisch, Japanisch, Deutsch, Italienisch, Spanisch und Französisch. - Page 45 Funktionsbedienung und Anweisungen Door Lock (Klappenverriegelung) 1. Klappenverriegelung aktiv (ON (Ein)) 2. Klappenverriegelung inaktiv (OFF : Beim Druck wird die Klappe verriegelt; (Aus)) : Die Klappe wird während des 60 Sekunden nach Abschluss des Drucks sowie bei Pause oder Stopp Drucks wird sie entriegelt.
-
Page 46: Printing (Druck)
Die Bedienungsanleitung der Software können Sie ebenfalls von der offiziellen Webseite herunterladen. Einzelheiten finden Sie auf der offiziellen Webseite: http://www.xyzprinting.com/ 1. Verbinden Sie Computer und Drucker und wählen Sie da Vinci Color AiO. 2. Wählen Sie die zu druckende Modelldatei aus dem Ordner, 3. -
Page 47: Scannen
Scannen Montieren Sie das Scan-Modul in der Maschine (siehe Installationsschritte) und installieren Sie die „XYZscan Color“ Soft- ware auf Ihrem Computer, um die Scan-Funktion Ihres 3D-Druckers zu bedienen. Richten Sie die Vorderseite des zu scannenden Objekts zum Scan-Modul hin aus und es wird etwa 10-15 Minuten dau- ern, es zu scannen. - Page 48 Scannen Begrenzungen für das zu scannende Objekt • Das Objekt sollte stabil und unbeweglich sein. Es darf während des Drehens der Rotationseinheit nicht gerüttelt oder bewegt werden. • Der Scan-Bereich des Objekt-Modus beträgt 5 cm ϕ x 5 cm – 14 cm ϕ x 14 cm (H) •...
- Page 49 Scannen Scan-Software: XYZscan Color bedienen Stellen Sie sicher, dass die Scan-Backplane korrekt in Ihrem Umgebungsabbildung 3D-Drucker installiert ist und drücken Sie die "Scan" -Taste auf dem LCM-Bedienfeld. Vergewissern Sie sich, dass der Drucker in den Scan-Modus wechselt. 1. Öffnen Sie die Scan-Software. 2.
-
Page 50: Einzelheiten Zum Kundendienst
Einzelheiten zum Kundendienst Bitte beachten Sie folgende Informationen zur Problemlösung, wenn ein Problem mit dem Drucker auftritt. Falls sich das Problem nicht beheben lässt, wenden Sie sich bitte an den Kundendienst. Problemcode und Handhabung Wenn ein Problem mit dem Drucker auftritt, wird der Servicecode am Druckerbildschirm und/oder in der Softwareschnittstelle angezeigt. Bitte beachten Sie zunächst die Beschreibung der Servicecodes. - Page 51 Détails d'assistance Le présent manuel vise principalement à instruire les utilisateurs sur l'utilisation correcte de l'imprimante da Vinci Color AiO 3D (« Color AiO »). Ce manuel permet aux utilisateurs d'apprendre des astuces de fonctionnement ainsi que des compétences d'application et de maintenance de l'imprimante 3D Color AiO.
-
Page 52: Mesures De Sécurité
Mesures de sécurité Sécurité et compatibilité Lire attentivement ce manuel et toutes les mesures de sécurité avant d’utiliser, de faire fonctionner, de déballer, de rem- placer, de déposer toute pièce ou de maintenir ce produit. Se conformer également aux instructions des mesures de sécu- rité... -
Page 53: Description Du Produit
Description du produit Extérieur du produit 1. Panneau tactile couleur 5 pouces 4. Plaque d'impression + 7. Port USB 11. Prise électrique aimant à caoutchouc amovible EZ 8. Port USB (clé WiFi) 2. Module d'alimentation automatique 5. Module de balayage 9. -
Page 54: Liste De Contrôle Des Accessoires
Description du produit Liste de contrôle des accessoires 1. Manuel de l'utilisateur 5. Câble USB 9. PC Mylar x 2 13. Tube transparent 2. Périphérique USB 6. Aimant à caoutchouc amovible EZ 10. Ruban adhésif de masquage 14. Plaque d'étalonnage 3. -
Page 55: Déballage Et Installation
Déballage et installation Amener l’imprimante sur une table ou une plate-forme. Retirer l'enveloppe plastique et la (La machine est lourde. Ne pas la dé- sangle. placer tout seul.) Retirer les matériaux d'emballage, la boîte du couvercle supérieur, la boîte d'accessoires et l'enveloppe plastique. Ouvrir la porte avant. - Page 56 Déballage et installation Assurez-vous qu'une extrémité du tube guide (accessoire 8) a été correctement insérée dans le port du module d'impression, insérez ensuite l'autre extrémité dans le tube transparent (accessoire 13) jusqu'au bout. Faites passer le tube de guidage à travers le couvercle supérieur, Introduire l'autre extrémité...
-
Page 57: Menu, Fonctions Et Messages De L'écran Tactile
Menu, fonctions et messages de l’écran tactile Écran principal Réglages Chargement Menu Impression USB et déchargement du filament/de l'encre Ce menu peut être utilisé pour Cet écran inclut les fonctions de la importer des fichiers (.3cp) à partir page d’Accueil 1 : d’un périphérique USB sur la Réglages de Print-bed (Plaque machine pour une impression sans... -
Page 58: Utilisation Des Fonctions Et Instructions
Utilisation des fonctions et instructions A. Chargement/déchargement de filaments Filament Chargement de filaments 1. Coupez le filament à un angle 2. Placer le filament sur le support 3.Toucher Chargement et décharge- 4. Toucher Filament. de 45° avant de procéder au de bobine. -
Page 59: Matériau De Reremplissage
Utilisation des fonctions et instructions Filament Matériau de reremplissage Color AiO vous invite à faire l'appoint de matériau. 1. Toucher l'icône pendant 2. L'écran affiche l'état du filament, 3. Confirmer l'opération. 4. La buse est préchauffée l'impression. toucher « Refill » (Reremplir). et le filament se décharge automatiquement. -
Page 60: Mise En Place De La Cartouche D'encre
Utilisation des fonctions et instructions C. Mise en place de la cartouche d'encre Color AiO utilise quatre encres de couleur qui peuvent être remplacées séparément. Instructions relatives à l’encre 1. Préparer plusieurs serviettes en 2. Déballer la cartouche d'encre. 3. Retirer le couvercle de la cartouche. papier et une cartouche d'encre. - Page 61 Utilisation des fonctions et instructions Toucher Ink (Encre) pour que l'écran affiche l'état de l'encre, à savoir « Ink Low » (Niveau encre bas), « No Ink » (Encre épuisée), et « Invalid Ink » (Encre invalide). Encre Change Ink (Changer encre) 1.
- Page 62 Utilisation des fonctions et instructions Paper Test Page C2-1 Encre Calibration (Étalonnage) Test Page (Page de test) Il est conseillé d'imprimer une page de test après avoir installé la cartouche d'encre. Préparer une feuille de papier. 1. Toucher Calibration 2. Toucher Test Page (Page de 3.
- Page 63 Utilisation des fonctions et instructions C2-2 Encre Étalonnage de l'encre Dépannage de la cartouche d'encre Image 1 Image 2 Image 2-1 L’image 1 illustre un exemple L’image 2 montre un léger dé- L’image 2-1 montre une légère ba- de page de test normale. calage de couleur sur la partie vure d’encre noire sur les parties horizontale de la page de test.
-
Page 64: Color Calibration (Étalonnage De La Couleur)
Utilisation des fonctions et instructions C2-3 Encre Calibration (Étalonnage) Color Calibration (Étalonnage de la couleur) 1. Toucher Calibration 2. Toucher Color (Couleur). 3. Bitte befestigen Sie das Druckpapier auf der Druckplatte. (Étalonnage). 4. Extraire le papier imprimé puis toucher « PROCEED » (Continuer). - Page 65 Utilisation des fonctions et instructions C2-4 Encre Calibration (Étalonnage) Inkjet Calibration (Étalonnage de l'encre) 1. Après avoir imprimé l'objet couleur, vous pouvez ajuster manuellement la position d'impression si vous décelez un décalage de couleur. Y-Axis X-Axis 2. La position de réglage de Une fois les réglages des Réglez manuellement le Réglez manuellement le...
- Page 66 Utilisation des fonctions et instructions D. Réglages Print-Bed (Plaque d'impression) D1-1 Étalonnage de la plaque d'impression (nivellement) 1. Sélectionner Calibration 2. Confirmer l'opération. (Étalonnage). 3. Attendre que le capteur mesure la hauteur de la plaque d’impression en trois points différents. Une fois 4.
-
Page 67: D2-1 Tête D'impression
Utilisation des fonctions et instructions D2-1 Tête d’impression Nettoyage de la buse 1. Veuillez nettoyez la buse après 2. Toucher Clean Nozzle (Nettoyage 3. Vérifier si un nettoyage est requis. Valider pour la nettoyer. 60 heures d’impression. de la buse) dans la section Print Head (Tête d’impression). -
Page 68: Vérifier Si La Connexion Wifi Est Établie Avec Succès À L'aide De Xyzmaker
Utilisation des fonctions et instructions Filament Se reporter à la fonction Change Filament (Changer filament) de l'écran principal. Un filament non utilisé pendant un jour ou plus doit être stocké dans le sac zippé. WiFi Avant de mettre l'imprimante sous tension et de configurer le réseau WiFi, veuillez introduire la clé... -
Page 69: Language (Langue)
Utilisation des fonctions et instructions Language (Langue) Sound (Audio) Modification des réglages de la langue L’option Sound (Audio) peut être réglée sur ON (Marche) ou OFF (Arrêt) afin de commander La Color AiO dispose de huit langues d’affichage, le son émis en touchant l’écran dont le chinois traditionnel et simplifié, anglais, japonais, allemand, italien, espagnol et français. -
Page 70: Door Lock (Verrouillage De Porte)
Utilisation des fonctions et instructions Door Lock (Verrouillage de porte) 1. Door Lock on (ON) (Verrouillage de 2. Door lock off (OFF) (Verrouillage porte activé) : pendant l'impression, la de porte désactivé) : la porte ne sera porte est verrouillée puis se déverrouille pas verrouillée pendant l'état Printing 60 s après la fin de l'impression. -
Page 71: Impression
également télécharger le mode d’emploi du logiciel depuis le site Web officiel. Pour plus de détails, consulter le site Web officiel : http://www.xyzprinting.com/ 1. Brancher l'ordinateur à l'imprimante puis sélectionner da Vinci Color AiO. 2. Cliquer sur OPEN (Ouvrir) afin de sélectionner le fichier 3. -
Page 72: Scanner
Scanner Placez le module de balayage dans la machine (voir les étapes d’installation) et installez le logiciel « XYZscan Color » sur votre ordinateur pour utiliser la fonction de balayage de votre imprimante 3D. Orientez le côté avant de l’objet à scanner vers le module de balayage. Il faut à peu près 10 à 15 minutes pour le scan- ner. -
Page 73: Limites De L'objet À Scanner
Scanner Limites de l'objet à scanner • L'objet doit être stable et fixe. Il ne doit pas être secoué ni déplacé pendant la rotation du plateau. • Zone de balayage du mode objet 5 cm ϕ x 5 cm – 14 cm ϕ x 14 cm (H) •... -
Page 74: Logiciel De Balayage : Fonctionnement De Xyzscan Color
Scanner Logiciel de balayage : Fonctionnement de XYZscan Color Assurez-vous que le fond de panier de numérisation est Illustration environnementale correctement installé dans votre imprimante 3D et appuyez sur le bouton "Numériser" sur le panneau LCM, assurez-vous que l'imprimante passe en mode Numérisation. 1. -
Page 75: Détails D'assistance
Détails d'assistance En cas de problème avec l'imprimante, se reporter aux instructions de dépannage suivantes. Si le problème persiste, contacter le centre de service à la clientèle. Codes et gestion des problèmes Si un problème survient avec l'imprimante, le code de réparation s'affiche sur l'écran de l'imprimante et / ou l'interface logicielle. Se reporter au formulaire de description du code de réparation suivant pour les essais préliminaires. - Page 76 Dettagli sull’assistenza Il manuale è destinato principalmente agli utenti per capire come utilizzare correttamente la stampante 3D da Vinci Color AiO ("Color AiO"). In questo manuale, gli utenti possono ottenere ulteriori informazioni sui suggerimenti per l'uso, sulle capacità operative e sulla manutenzione della stampante 3D Color AiO.
-
Page 77: Precauzioni Di Sicurezza
Precauzioni di sicurezza Sicurezza e conformità Please read through this manual and all safety precautions carefully before using, operating, unpacking, replacing, remov- ing any part or maintaining this product. Please also comply with the instructions of relevant safety precautions. CAUTION Importanti precauzioni di sicurezza Heavy object. -
Page 78: Descrizione Del Prodotto
Descrizione del prodotto Esterno del prodotto Modulo di scansione 1. Touchscreen a colori a 5" 9. Interruttore di alimentazione 2. Modulo di alimentazione automatica 6. Supporto bobina di filamento 10. Porta USB (a PC) 3. Testina di stampa 7. Porta USB 11. - Page 79 Descrizione del prodotto Lista di controllo degli accessori 1. Manuale d’uso 5. Cavo USB 9. PC Mylar x 2 13. Tubo chiaro 2. Unità USB 6. Magnete in gomma rimovibile EZ 10. Nastro adesivo 14. Piastra di calibratura Piastra di ombreggiatura 3.
-
Page 80: Disimballaggio E Installazione
Disimballaggio e installazione Spostare la stampante su un tavolo o una piattaforma. Rimuovere la pellicola di plastica e PP. (Non spostare la stampante da soli in quanto è pesante.) Rimuovere i materiali di imballaggio, la scatola del coperchio superiore, la scatola accessori e il coperchio in plastica. Aprire lo sportello anteriore. - Page 81 Disimballaggio e installazione Assicurarsi che un'estremità del tubo guida (accessorio 8) sia stata inserita saldamente nella porta del modulo di stampa, quindi inserire l'altra estremità nel tubo chiaro (accessorio 13) fino alla fine. Inserire il tubo guida nel coperchio superiore, quindi fissare il Inserire l'altra estremità...
-
Page 82: Menu Touchscreen, Funzioni E Messaggi
Menu touchscreen, funzioni e messaggi Schermata principale Settings Filament/Ink loading USB Printing Menu and unloading (Menu di stampa USB) (Impostazioni) (Caricamento e scaricamento di filamento/inchiostro) Questo menu può essere utilizza- Include le funzioni della to per importare file (.3cp) da una pagina iniziale 1: unità... -
Page 83: Utilizzo Delle Funzioni E Istruzioni
Utilizzo delle funzioni e istruzioni A. Load/unload filaments (Carica/scarica filamenti) Filament (Filamento) Load filaments (Carica filamenti) 1. Tagliare il filamento a un angolo 2. Collocare il filamento sul 3. Toccare Filament Load 4. Toccare Filament (Filamento). di 45 gradi prima del caricamento supporto bobina. -
Page 84: Scaricare Le Stampe
Utilizzo delle funzioni e istruzioni Filament (Filamento) Refill Material (Ricarica materiale) Color AiO richiede di ricaricare materiale. 1. Toccare l'icona durante la 2. Sulla schermata viene 3. Confermare l'operazione. 4. L'ugello viene preriscaldato stampa. visualizzato lo stato del e il filamento viene scaricato filamento. - Page 85 Utilizzo delle funzioni e istruzioni C. Installazione della cartuccia di inchiostro La stampante Color AiO utilizza quattro inchiostri a colori, che possono essere sostituiti separatamente. Guida dell’inchiostro 1. Preparare vari tovaglioli di carta e la 2. Disimballare la cartuccia di inchiostro. 3.
- Page 86 Utilizzo delle funzioni e istruzioni Toccando Ink (Inchiostro), sulla schermata viene visualizzato lo stato dell'inchiostro, compresi "Ink Low" (Inchiostro in esaurimento), "No Ink" (Nessun inchiostro) e "Invalid Ink" (Inchiostro non valido). Ink (Inchiostro) Change Ink (Cambia inchiostro) 1. Toccare Change Ink (Cambia 2.
- Page 87 Utilizzo delle funzioni e istruzioni Paper Test Page C2-1 Calibration Test Page (Inchiostro) (Calibratura) (Pagina di prova) Si consiglia di stampare una pagina di prova dopo l'installazione della cartuccia di inchiostro. Preparare un foglio di carta. 1. Toccare Calibration 2. Toccare Test Page (Pagina di 3.
- Page 88 Utilizzo delle funzioni e istruzioni C2-2 Ink (Inchiostro) Calibratura dell'inchiostro Risoluzione di problemi della cartuccia di inchiostro Immagine 1 Immagine 2 Immagine 2-1 L’immagine 1 mostra un esempio L’immagine 2 mostra un leggero L’immagine 2-1 mostra una leg- di una normale pagina di prova. offset di colore sulla parte oriz- gera sbavatura dell’inchiostro nero zontale della pagina di prova.
- Page 89 Utilizzo delle funzioni e istruzioni C2-3 Ink (Inchiostro) Calibration (Calibratura) Color Calibration (Farbkalibrierung) 1. Toccare Calibration 2. Toccare Color (Colore). 3. Sistemare la carta di stampa sul piano di stampa. (Calibratura). 4. Estrarre la carta stampata e toccare PROCEED (PROCEDI). 5.
- Page 90 Utilizzo delle funzioni e istruzioni C2-4 Ink (Inchiostro) Calibration (Calibratura) Inkjet Calibration (Calibratura inchiostro) 1. Una volta stampato l'oggetto a colori, se riscontri una modifica del colore, puoi regolare manualmente la posizione di stampa. Y-Axis X-Axis 2. La posizione di regolazione Regola manualmente il Regola manualmente il Una volta completate le...
- Page 91 Utilizzo delle funzioni e istruzioni D. Settings (Impostazioni) D1-1 Print-Bed (Piano di stampa) Calibratura del piano di stampa (livellamento) 1. Selezionare Calibration 2. Confermare l'operazione. (Calibratura). 3. Attendere che il sensore misuri l’altezza del piano di stampa in tre diversi punti. Al termine della misu- 4.
- Page 92 Utilizzo delle funzioni e istruzioni D2-1 Print-Head Clean Nozzle (Pulizia ugello) 1. Pulire l’ugello dopo 60 ore di 2. Toccare Clean Nozzle (Pulizia 3. Verificare se è necessaria la pulizia. Toccare Check (Controlla) per pulirlo. stampa. ugello) nella sezione della testina di stampa.
- Page 93 Utilizzo delle funzioni e istruzioni Filament (Filamento) Fare riferimento alla funzione Change Filament (Cambia filamento) nella schermata principale. Il filamento non utilizzato per un giorno deve essere conservato nella busta con chiusura lampo. WiFi Prima di accendere la stampante e impostare la rete Wi-Fi, inserire il dongle WiFi nella porta USB sulla parte superiore della stampante.
-
Page 94: Language (Lingua)
Utilizzo delle funzioni e istruzioni Language (Lingua) Sound (Suono) Impostazione Change Language L’opzione Sound (Suono) può essere impostata su ON (Cambia lingua) o OFF per controllare il suono emesso quando si tocca il touchscreen. La stampante Color AiO offre otto lingue di visual- izzazione, tra cui cinese tradizionale e semplificato, inglese, giapponese, tedesco, italiano, spagnolo e francese. - Page 95 Utilizzo delle funzioni e istruzioni Door Lock (Blocco sportello) 1. Blocco sportello attivato (ON): 2. Blocco sportello disattivato (OFF): durante la stampa, lo sportello è lo sportello non si sblocca durante la bloccato; 60 sec dopo il termine della stampa, l'interruzione o l'arresto. stampa, lo sportello si sblocca.
-
Page 96: Stampa
Web ufficiale. Per i dettagli, visitare il sito web ufficiale: http://www.xyzprinting.com/ 1. Collegare il computer alla stampante e selezionare da Vinci Color AiO. 2. Fare clic su OPEN (APRI) per selezionare il file del modello 3. -
Page 97: Scansione
Scansione Monta il modulo di scansione sulla macchina (vedi i passaggi di installazione) e installa il software “XYZscan Color” sul computer per attivare la funzione di scansione della tua stampante 3D. Posiziona il lato anteriore dell’oggetto da scansionare verso il modulo di scansione; occorrono circa 10-15 minuti per la scansione. -
Page 98: I Limiti Dell'oggetto Da Scansionare
Scansione I limiti dell'oggetto da scansionare • El objeto debe ser estable y estar fijo. No debe agitarse ni moverse durante la rotación de la plataforma giratoria. • L'area di scansione per la modalità oggetto è pari a 5 cm ϕ x 5 cm – 14 cm ϕ x 14 cm (H). •... - Page 99 Scansione Software di scansione: Aziona XYZscan Color Assicurarsi che il backplane di scansione sia installato Illustrazione ambientale correttamente nella stampante 3D e premere il pulsante "Scansione" sul pannello LCM, assicurarsi che la stampante entri nella modalità di scansione. 1. Apri il software di scansione. 2.
-
Page 100: Dettagli Sull'assistenza
Dettagli sull’assistenza In caso di problemi alla stampante, fare riferimento alle seguenti istruzioni di risoluzione dei problemi. Se il problema persiste, contattare il Centro assistenza clienti. Codice e gestione del problema In caso di problemi alla stampante, il codice di servizio viene visualizzato sulla schermata della stampante e/o sull'interfaccia software. Fare riferimento al modulo di descrizione di questo codice di servizio per il test preliminare. - Page 101 Información sobre soporte técnico El propósito del manual es que los usuarios aprendan a utilizar correctamente la impresora da Vinci Color AiO 3D ("Color AiO"). En este manual, los usuarios obtendrán información sobre consejo de uso, aplicaciones y mantenimiento de la impresora Color AiO 3D.
-
Page 102: Precauciones De Seguridad
Precauciones de seguridad Seguridad y cumplimiento normativo Lea este manual y las precauciones de seguridad detenidamente antes de desembalar, poner en marcha o utilizar este pro- ducto, o de reemplazar o retirar cualquiera de sus componentes. Siga también las precauciones de seguridad pertinentes. CAUTION Precauciones de seguridad importantes Heavy object. -
Page 103: Descripción Del Producto
Descripción del producto Exterior del producto Módulo de escaneo 1. Pantalla táctil en color de 5" 9. Interruptor de encendido y apagado 2. Módulo de alimentación automática 6. Soporte de la bobina de filamento 10. Puerto USB (a PC) 3. Cabezal de impresión 7. - Page 104 Descripción del producto Lista de comprobación de accesorios 1. Manual del usuario 5. Cable USB 9. PC Mylar x 2 13. Tubo trasparente 2. Unidad USB 6. Imán extraíble de goma EZ 10. Cinta para cubrir 14. Placa de calibración Placa de sombreado 3.
-
Page 105: Desembalaje E Instalación
Desembalaje e instalación Coloque la impresora sobre una mesa o plataforma. Retire el envoltorio de plástico y PP. (La impresora es muy pesada; no la mueva sin ayuda). Retire los materiales de embalaje, la caja de la tapa superior, la caja de accesorios y la tapa de plástico. Abra la puerta frontal. - Page 106 Desembalaje e instalación Asegúrese de que uno de los extremos del tubo guía (accesorio 8) se ha insertado firmemente en el puerto del módulo de impresión, a continuación, inserte el otro extremo en el tubo trasparente (accesorio 13) hasta el final. Inserte el tubo guía a través de la tapa superior y colóquela en la Inserte el otro extremo del tubo guía en el módulo de máquina.
-
Page 107: Menú, Funciones Y Mensajes De La Pantalla Táctil
Menú, funciones y mensajes de la pantalla táctil Pantalla principal Carga y descarga de Configuración Menú Impresión USB la tinta y el filamento Incluye la carga y descarga del Este menú se puede utilizar para Incluye las funciones de la página filamento y la tinta. -
Page 108: Instrucciones De Funcionamiento
Instrucciones de funcionamiento A. Carga y descarga de filamentos Filamento Cargar filamentos 1. Corte el filamento con un 2. Coloque el filamento 3. Pulse Carga y descarga 4. Pulse Filamento. ángulo de 45 grados antes de en el soporte de la bobina. de filamento en la pantalla realizar la carga automática en principal, y seleccione... - Page 109 Instrucciones de funcionamiento Filamento Rellenar material Color AiO le pedirá que rellene el material. 1. Pulse el icono durante la 2. La pantalla mostrará el 3. Confirme la operación. 4. La boquilla se precalienta impresión. estado del filamento; pulse y el filamento se descarga "Rellenar".
- Page 110 Instrucciones de funcionamiento C. Instalación del cartucho de tinta Color AiO utiliza cuatro tintas de color que se pueden reemplazar por separado. Guía de tintas 1. Prepare varias toallitas de papel y el 2. Desembale el cartucho de tinta. 3. Retire la cubierta del cartucho. cartucho de tinta.
- Page 111 Instrucciones de funcionamiento Pulse la tinta; la pantalla mostrará el estado de la tinta: "Tinta baja", "Sin tinta" y "Tinta no válida". Tinta Cambiar tinta 1. Pulse Cambiar tinta y pulse 2. Confirme la operación. 3. Espere a que el cartucho 4.
- Page 112 Instrucciones de funcionamiento C2-1 Tinta Calibración Página de prueba Paper Test Page Le sugerimos que imprima una página de prueba después de instalar el cartucho de tinta. Prepare una hoja de papel. 1. Pulse Calibración. 2. Pulse Página de prueba. 3.
- Page 113 Instrucciones de funcionamiento C2-2 Tinta Calibración de la tinta Solución de problemas del cartucho de tinta Imagen 1 Imagen 2 Imagen 2-1 La imagen 1 muestra un ejemplo La imagen 2 muestra un ligero La imagen 2-1 muestra un ligero de una página de prueba normal.
- Page 114 Instrucciones de funcionamiento C2-3 Tinta Calibración Calibración del color 1. Pulse Calibración. 2. Pulse Color. 3. Fije el papel de impresión a la plataforma de impresión. 4. Extraiga el papel impreso y pulse CONTINUAR. 5. Siga las instrucciones en 6. Para la alineación horizontal, 7.
- Page 115 Instrucciones de funcionamiento C2-4 Tinta Calibración Calibración de la tinta 1. Cuando el objeto esté impreso, si observa desfases en el color ajuste manualmente la posición de impresión. Y-Axis X-Axis 2. La posición de ajuste del eje Ajuste manualmente el Ajuste manualmente el Cuando los nuevos parámetros X y del eje Y es la que viene...
-
Page 116: Modo Manual
Instrucciones de funcionamiento D. Configuración D1-1 Plataforma de impresión Calibración de la plataforma de impresión (nivelación) 1. Seleccione Calibración. 2. Confirme la operación. 3. Espere a que el sensor mida la altura de la plataforma de impresión en tres puntos diferentes. Una vez 4. -
Page 117: D2-1 Cabezal De Impresión
Instrucciones de funcionamiento D2-1 Cabezal de impresión Limpiar boquilla 1. Limpie la boquilla después de 2. Pulse Limpiar boquilla en la 3. Compruebe si fuera necesario limpiarla. Pulse Comprobar para limpiarla. imprimir 60 horas. sección del cabezal de impresión. Cuando la temperatura del cabezal de impresión alcance la temperatura de funcionamiento, comenzará la operación de limpieza. - Page 118 Instrucciones de funcionamiento Filamento Consulte la función Cambiar filamento, en la pantalla principal. El filamento no utilizado durante un día o más se debe almacenar en una bolsa con cierre hermético. WiFi Antes de encender la impresora y configurar la red wifi, inserte el dongle wifi en el puerto USB que hay en la parte superior de la impresora.
- Page 119 Instrucciones de funcionamiento Idioma Sonido Cambiar la configuración de idioma La opción Sonido se puede activar o desactivar para controlar el sonido que emite la pantalla táctil cuando La impresora Color AiO muestra la pantalla en ocho se pulsa. idiomas: chino tradicional y simplificado, inglés, japonés, alemán, italiano, español y francés.
- Page 120 Instrucciones de funcionamiento Bloqueo de la puerta 1. Bloqueo de la puerta activado: 2. Bloqueo de la puerta desactivado: durante la impresión, la puerta la puerta no se bloquea durante la se bloquea y se desbloqueará 60 impresión ni al pausar o detener la segundos después de que finalice la impresión.
-
Page 121: Impresión
Para obtener más información, visite el sitio web oficial: http://www.xyzprinting.com/ 1. Conecte el equipo y la impresora y seleccione da Vinci Color AiO. 2. Haga clic en ABRIR para seleccionar en la carpeta el archivo 3. -
Page 122: Escanear
Escanear Monte el módulo de escaneo en la máquina (consulte los pasos de instalación) e instale el software “XYZscan Color” en su equipo para utilizar la función de escaneo de su impresora 3D. Coloque la parte frontal del objeto que desea escanear hacia el módulo de escaneo. Tardará unos 10-15 minutos en escanearse. - Page 123 Escanear Limitaciones del objeto que se va a escanear • L'oggetto deve essere stabile e stazionario. Non deve essere scosso o spostato durante la rotazione della piattaforma girevole. • El área de escaneo para el modo objeto es de 5 cm ϕ x 5 cm - 14 cm ϕ x 14 cm (altura). •...
- Page 124 Escanear Software de escaneo: funcionamiento de XYZscan Color Asegúrese de que el plano posterior de escaneo esté Ilustración del entorno correctamente instalado en su impresora 3D y presione el botón "Escanear" en el panel de LCM, asegúrese de que la impresora ingrese al modo de escaneo.
-
Page 125: Información Sobre Soporte Técnico
Información sobre soporte técnico En caso de problemas con la impresora, consulte las siguientes instrucciones para la solución de problemas. Si el problema persiste, póngase en contacto con el servicio de atención al cliente. Código de problema y acciones En caso de problemas con la impresora, se mostrará un código de servicio en la pantalla de la impresora o en la interfaz del software. Consulte este documento de descripción de los códigos de servicio para realizar unas comprobaciones preliminares.