TD Systems K32DLM7H Manuel Utilisateur

Masquer les pouces Voir aussi pour K32DLM7H:
Table des Matières

Publicité

Les langues disponibles
  • FR

Les langues disponibles

  • FRANÇAIS, page 82

Liens rapides

Televisor LED de 32"
MODELO :K32DLM7H
ES MANUAL DE USUARIO.............................................................1
EN USER MANUAL .......................................................................41
FR MANUEL UTILISATEUR...........................................................81
DE BENUTZERHANDBUCH........................................................121
PT MANUAL DO USUÁRIO.........................................................161
Lea atentamente este manual antes del uso,
y consérvelo como referencia en el futuro.
08:52:56
+08'00'

Publicité

Table des Matières
loading

Sommaire des Matières pour TD Systems K32DLM7H

  • Page 1 08:52:56 +08'00' Televisor LED de 32” MODELO :K32DLM7H ES MANUAL DE USUARIO.............1 EN USER MANUAL ...............41 FR MANUEL UTILISATEUR............81 DE BENUTZERHANDBUCH............121 PT MANUAL DO USUÁRIO............161 Lea atentamente este manual antes del uso, y consérvelo como referencia en el futuro.
  • Page 2: Instrucciones De Seguridad

    INSTRUCCIONES IMPORTANTES INSTRUCCIONES DE SEGURIDAD ADVERTENCIA - PARA REDUCIR RIESGOS DE INCENDIO, ELECTROCUCIÓN O DAÑOS PERSONALES GRAVES: ● ● ● ● ● ● ● ● ● ● ● ●...
  • Page 3 ● ● ● ● ● ● ● PRECAUCIÓN - PARA REDUCIR RIESGOS DAÑOS PERSONALES O DAÑOS AL PRODUCTO/MATERIALES: ● ● ● ● ● MANIPULACIÓN Y USO DE BATERÍAS: ● ● ● ● ● ● ● ● ●...
  • Page 4 ELIMINACIÓN DE ELECTRODOMÉSTICOS USADOS ACCESORIOS INSTRUCCIONES IMPORTANTES…………...………………………..………………………1 MANEJO Y USO DE LA BATERÍA...........………………………2 CARACTERÍSTICAS......................5 INICIANDO.........................7...
  • Page 5: Table Des Matières

    TABLA DE CONTENIDOS CONEXIÓN A DISPOSITIVOS EXTERNOS..............9 CONEXIÓN COAXIAL....................14 CONEXIÓN USB......................15 INSERTAR UNA TARJETA CI...................15 CONEXIÓN DE AURICULARES ...................15 SELECCION DE FUENTE DE ENTRADA................16 MENÚ DE IMAGEN......................18 MODO DE IMAGEN....................18 TEMPERATURA DE COLOR..................19 CANAL DE TV........................21 BÚSQUEDA AUTOMÁTICA .....................25 BÚSQUEDA MANUAL DIGITAL……..………………….…………………………………..25 MENÚ...
  • Page 6: Características

    CARACTERÍSTICAS Pantalla LED 32" Esta unidad dispone de una pantalla LED para proporcionar una visión clara yuna baja radiación. Con bloqueo para hoteles Soporte de exploración de TV automática Soporte para sintonización digital de antena y cable (DVB-T y DVB-C) Soporte de función de guía de TV Soporte de función de TELETEXTO (Europa) Soporte de reproducción multimedia USB...
  • Page 7: Montaje En Pared

    QUÉ ESTÁ INCLUIDO/CONFIGURACIÓN DE LA COLOCACIÓN DE LA TV UNIDAD Y ACCESORIOS Soporte de apoyo IMAGEN SONIDO TAMAÑO GUÍA FUENTE 32” WIDESCREEN LED TV MODELO:K32DLM7H MENU SALIR FAV. Soporte de base Please read this manual carefully before using, d keep it for future reference.
  • Page 8: Funciones Del Botón

    Iniciando Vista frontal/trasera VOL+ VOL- ENTRADA MENÚ Funciones del botón...
  • Page 9 PC AUDIO ANTENA HDMI1 Auriculares S.SONIDO DIGITAL HDMI1/2/3:CEC HDMI1:ARC ANTENA: Conexión con antena CI+: conectar un módulo CI PC AUDIO: conéctelo al terminal AV: conectar la salida de vídeo de audio de la salida del PC un DVD o VCR VGA: entrada de vídeo de la PC YPbPr: Conecte con el terminal de salida de vídeo de YPbPr del DVD...
  • Page 10: Conexión A Dispositivos Externos

    Conexión a dispositivos externos Conexión de dispositivos externos a su TV LED PC AUDIO ANTENA HDMI1 Cable Cable de audio Cable coaxial Cable Amplificador de audio HDMI Reproductor de DVD Antena VHF/UHF Cable coaxial del RF Cable compuesto Compañía de TV Récepteur de câble/ Boîte satellite por cable Cable componente...
  • Page 11: Timeshift

    : Encienda la TV/ espera. :Muestra el índice principal en el modo Teletexto. IMAGEN:Selección del modo de imagen de salida. IMAGEN SONIDO TAMAÑO GUÍA :Revela información oculta como las respuestas a un cuestionario en modo Teletexto. SONIDO:Ampliar / Alejar el marco visualizado. :Congele un cambio de varias páginas en el modo de FUENTE teletexto.
  • Page 12: Configuración Inicial

    Configuración Configuración inicial ▼ ▲ CONECTAR ANTENA EXTERNA A LA UNIDAD Antena Amplificador de antena externo Amplificador de antena interno Toma de Toma de antena 75 alimentación del amplificador de antena...
  • Page 13: Conexión Hdmi

    CONEXIÓN HDMI HDMI2 HDMI3 S.SONIDO DIGITAL YPbPr USB1 Cable HDMI Use el cable HDMI para conectar la unidad con otros dipositivos para recibir una señal multimedia de alta definición. Parte posterior del DVD/video CONEXIÓN PC/VGA PC AUDIO Cable VGA Cable audio Use el cable VGA y el cable audio para onectar la unidad con una TV o PC, usar este producto como monitor.
  • Page 14: Conexión Av (Video Compuesto)

    CONEXIÓN AV (VIDEO COMPUESTO) HDMI3 S.SONIDO DIGITAL YPbPr Cable AV Cable Mini AV Para una conexión básica, use el cable I/D de audio compuesto (blanco/rojo) y CVBS (amarillo) para conectar la unidad a otros dispositivos. Parte trasera del DVD/video...
  • Page 15: Conexión Ypbpr

    CONEXIÓN YPBPR HDMI3 S.SONIDO DIGITAL YPbPr Cable Mini AV: L/R Cable Mini YPbPr Parte trasera del DVD/video CONEXIÓN COAXIAL HDMI2 HDMI3 S.SONIDO DIGITAL S.SONIDO AURICULAR SCART PC AUDIO ANTENA AURICULAR DIGITAL Use el cable coaxial para conectar la unidad con un amplificador u otro dispositivo de descodificación audio para salida de señal de audio coaxial.(Cable coaxial no incluido.)
  • Page 16: Conexión Usb

    CONEXIÓN USB USB1/USB2 Auriculares 0.5A INTRODUCIR UNA TARJETA CI HDMI3 S.SONIDO DIGITAL YPbPr HDMI3 USB2 HDMI1 HDMI2 (ARC) USB1 YPbPr Ranura CI CONEXIÓN DE AURICULARES USB1/USB2 Auriculares 0.5A S.SONIDO AURICULAR SCART PC AUDIO ANTENA DIGITAL Cable AURICULARES...
  • Page 17: Seleccion De Fuente De Entrada

    Selección de fuente de entrada ▼ ▲ Primera instalación Configuración 1 ▼ ▲ Configuración 2 ▼ ▲...
  • Page 18 Configuración 3 ▼ ▲ Configuración 4 ▼ ▲ Configuración 5 ▼ ▲ Configuración 6 ▼ ▲ NOTA:...
  • Page 19: Menú De Imagen

    Menú de imagen Modo de imagen Elementos del Valor Por defecto menú de imagen ; ;...
  • Page 20: Temperatura De Color

    Temperatura de color Relación de aspecto Reducción de interferencias...
  • Page 21: Menú De Sonido

    Menú de sonido ▼ Modo de sonido Elementos del Valor Por defecto menú sonido Estándar, Película, Música, Estándar Modo de sonido Voz, Usuario 0~100 Graves Agudos 0~100 Balance -50~50 Envolvente Apagado, encendido Apagado Apagado Apagado, encendido Apagado SPDIF Apagado, PCM, Auto Descripción audio “INTRO”...
  • Page 22: Canal De Tv

    SPDIF Conmutador de la función SPDIF Descripción audio Facilita la comprensión en casos de discapacidad visual. Canal de TV Pulse MENÚ para mostrar el menú principal y pulse ▼/▲ para seleccionar el menú de canal.
  • Page 23 Gestor de canales Gestión de favoritos...
  • Page 24 Canal Gestión de canales ▼ ▲...
  • Page 25 ▼ ▲ ▼ ▲ Gestión de favoritos ▼ ▲...
  • Page 26: Búsqueda Automática

    Búsqueda automática Búsqueda manual digital Búsqueda manual analógica...
  • Page 27: Menú De Características

    Menú de características País Seleccione el país. Este capítulo describe el funcionamiento de Características en el menú principal. Pulse MENÚ para mostrar el menú principal y pulse ▼/▲ para seleccionar el menú de características. Bloqueo La subpágina de Bloqueo se compone de tres secciones: Bloquear canal, Bloqueo paterno y Cambiar código pin, como se indica en la imagen siguiente.
  • Page 28: Modo Hotel

    Bloquear canal Orientación paterna ▼ ▲ Modo hotel ▼ ▲ Bloqueo de Hotel: Bloquear canal: Bloquear imagen: Bloquear sonido: Bloquear funciones: Bloquear configuración: Bloqueo de teclas: Bloquear fuente: Establecer fuente: Número de canal:...
  • Page 29 Idioma Reloj Temporizador de reposo...
  • Page 30 Temporizador de reposo Apagado automático Deficiencia auditiva Nota: Información CI Apagado automático...
  • Page 31 PVR/Timeshift ▼ ▲ Selección de partición Timeshift automático Búfer de Timeshift...
  • Page 32 Temporizador Grabación: Tipo: Canal: Hora de inicio: Duración: Fecha: Modo:...
  • Page 33: Menú De Configuración

    NOTA: Menú de configuración Text Elementos del menú de Valor Por defecto configuración (5, 10, 15, 20, 25, 30 segundos, nunca) Temporizador OSD Configuración PC “INTRO” Pantalla azul Desactivado/activado. Apagado Doméstico Modo doméstico Doméstico/Dinámico/Estándar/Suave. “INTRO” Restablecer configuración de TV Actualización del software “INTRO”...
  • Page 34: Temporizador Osd

    Temporizador OSD Configuración PC...
  • Page 35 Pantalla azul Modo doméstico Restablecer configuración...
  • Page 36 Actualización del software Foto...
  • Page 37 Música Película...
  • Page 38 eBook...
  • Page 39: Modo De Formato De Usb

    Modo de formato de USB Código Extensión de Medio Observación archivo Video Audio Xvid,MPEG-4,H.264, .avi WMV9/VC-1 WMA* .mp4 MPEG-2,MPEG-4,H.264 Resolución máxima y tasa de .mpg MPEG-1,MPEG-2 marco: 1280 x 720 @ 30fps .mkv MPEG-1/2/4,H.264 Película .mov .dat MPEG-1 .vob MPEG-2 MP1/MP2/MP3,PCM Resolución: 800 x 600 (Rv30)
  • Page 40: Especificaciones

    Especificaciones MODELO Tamaño del panel Panel LED Brillo 180Cd/㎡ 3000:1 YPbPr PC AUDIO HDMI ANTENA Auriculares S.SONIDO DIGITAL Sin soporte 732*77*433mm Medidas Con soporte 732*208*478mm Peso neto 3.9Kg Peso peso bruto 5.7Kg Fuente de energía Consumo de energía < 48W Las especificaciones están sujetas a cambios sin previo aviso!
  • Page 41 Parámetros de prueba para mediciones IEC 62087:2012 Método de medición utilizado EN 50564:2011 Temperatura ambiente de la 27.5℃ prueba (℃) Tensión de prueba en V 230.0V,50HZ frecuencia en Hz Distorsión armónica total (THD) 0.71% del sistema de suministro de electricidad Modo HDMI Señal video dinámica de emisión Terminal de entrada para las...
  • Page 42: Important Instructions

    IMPORTANT INSTRUCTIONS SAFETY INSTRUCTIONS CAUTION: TO REDUCE THE RISK NO USER SERVICEABLE PARTS WARNING – TO REDUCE THE RISK OF FIRE, ELECTRIC SHOCK, OR SERIOUS PERSONAL INJURY: ● ● ● ● ● ● ● ● ● ● ● ● ●...
  • Page 43 ● ● ● ● CAUTION- TO REDUCE THE RISK OR PERSONAL INJURY OR PRODUCT/PROPERTY DAMAGE: ● ● ● ● ● BATTERY HANDLING AND USAGE: ● ● ● ● ● ● ● ● ●...
  • Page 44: Disposal Of Old Electrical Appliances

    DISPOSAL OF OLD ELECTRICAL APPLIANCES To avoid possible hearing damage, do not listen at high audio volume for long periods of time. ACCESSORIES IMPORTANT INSTRUCTIONS……………………………………………………………………41 BATTERY HANDLING AND USAGE……….……………….……………………………………42 FEATURES ……………………………..…….………………………………………………45 Getting Started ………………………………….….…………………………………………….…47 All the pictures in this manual are just for your reference, appearance and display should subject to the final product.
  • Page 45 TABLE OF CONTENTS Connecting to External Devices..................49 COAXIAL CONNECTION.....................54 USB CONNECTION......................55 INSERT A CI CARD .......................55 EARPHONE CONNECTION ....................55 FIRST TIME INSTALLATION ....................56 PICTURE MENU ........................58 PICTURE MODE......................58 ASPECT RATIO.......................59 CHANNEL..........................61 AUTO SEARCH TO SEARCH....................65 DIGITAL MANUAL SEARCH……..………………….……………………………………....65 FEATURE MENU ........................66 LOCK CHANNEL ........................67 OSD TIMER..…………………………………………………………………………....73 USB FORMAT MODE ………………………………………………………………………....78...
  • Page 46 FEATURES 32" LED Display This unit has a built-in LED display window to provide clear vision and low radiation. With Hotel Lock Support Auto TV Scanning Support Digital Broadcasting Reception Support TV Guide Function Support TELETEXT (Europe) Function Support USB Multimedia Playback Support Multi-languages On Screen Display Support Full Function Remote Control Support HDMI, YPBPR AV, VGA, PC AUDIO and CI Input...
  • Page 47: Unit And Accessories

    What is Included/TV Placement Setup Unit and Accessories Stand Support IMAGEN SONIDO TAMAÑO GUÍA FUENTE 32” WIDESCREEN LED TV MODELO:K32DLM7H MENU SALIR FAV. Base Stand Please read this manual carefully before using, d keep it for future reference. 4 Screws...
  • Page 48: Getting Started

    Getting Started Front/Back View VOL+ VOL- ENTRADA MENÚ Button Functions : Turn on TV/Standby ENTRADA: Audio/Video input source selection MENÚ: Open settings menu VOL-: Decrease volume VOL+: Increase volume P-: Previous channel P+: Next channel IR RECEIVER: Receives infrared signals from the remote control INDICATOR LED: Status indicator...
  • Page 49 PC AUDIO ANTENA HDMI1 HEADPHONES S.SONIDO DIGITAL HDMI1/2/3:CEC HDMI1:ARC ANTENA: Antenna connection CI+: Connect a CI module PC AUDIO: Connect it to the audio AV: Connect video output from a output terminal of the PC DVD or VCR VGA: PC video input YPbPr: Connect to the YPbPr video output terminal of the DVD...
  • Page 50: Connecting To External Devices

    Connecting to External Devices Connecting external devices to your LED TV PC AUDIO ANTENA HDMI1 Audio cable cable HDMI cable VHF/UHF antenna RF Coaxial cable Composite cable cable TV cable receiver/satellite box company Component cable...
  • Page 51 :Turn on the TV/Standby. :Displays the main index in Teletext mode. IMAGEN:Output image mode selection. IMAGEN SONIDO TAMAÑO GUÍA :Reveals hidden information such as the answers to a quiz in TELETEXT mode. SONIDO:Zoom in/Zoom out the displayed frame. FUENTE :Freeze a multi-page changing on Teletext mode. TAMAÑO:Press to select the different picture size.
  • Page 52: Initial Setup

    Settings Initial Setup 1. Connecting your TV on the poweroutlet; 2. Press the POWER button on the remote to turn on the TV in green for the LED light. CAUTION:Always disconnect the TV from the power outlet when the TV will not be used for a long period of time.
  • Page 53: Hdmi Connection

    HDMI CONNECTION HDMI2 HDMI3 S.SONIDO DIGITAL YPbPr USB1 HDMI cable Use HDMI cable to connect the unit w other devices to receive high-definitio multimedia signal. Back of DVD/VCR PC/VGA CONNECTION PC AUDIO Audi cable VGA cable Use VGA cable and Audio cable to connect the unit with TV or PC, and use this product as a monitor.
  • Page 54: Av (Composite Video) Connection

    AV (COMPOSITE VIDEO) CONNECTION HDMI3 S.SONIDO DIGITAL YPbPr Mini AV cable AV cable For basic connection, use the composite Audio L/R (white/red) and CVBS (yellow) cable to connect the unit with other devices. Back of DVD/VCR...
  • Page 55: Ypbpr Connection

    YPBPR CONNECTION HDMI3 S.SONIDO DIGITAL YPbPr Mini AV cable: L/R Mini YPbPr cable Back of DVD/VCR COAXIAL CONNECTION HDMI2 HDMI3 S.SONIDO DIGITAL S.SONIDO AURICULAR SCART PC AUDIO ANTENA AURICULAR DIGITAL Use coaxial cable (not included) to connect the unit with amplifier or other audio decoding devices for coaxial audio signal output.
  • Page 56: Usb Connection

    USB CONNECTION USB1/USB2 Auriculares 0.5A USB Memory Device INSERT A CI CARD HDMI3 S.SONIDO DIGITAL YPbPr HDMI3 USB2 HDMI1 HDMI2 (ARC) USB1 YPbPr Insert your CI card (Conditional Access Module) to watch special digital channels in your area. EARPHONE CONNECTION USB1/USB2 Auriculares 0.5A...
  • Page 57: Select Input Source

    Select Input Source Press FUENTE to display the input source list. Press ▼/▲ to highlight the input source and press OK to confirm. Press EXIT to hide the On-Screen menu. (The way to set the disappered time: MENU-TIME Menu-OSD Timer) First Time Installation Connect to power source and turn on this TV, the first time below installation menu page...
  • Page 58 Setup 3 Press navigation button to select desired menu language. ▼/▲ Press OK button to confirm selection and turn to next page. Setup 4 Press navigation button to select desired auto power off time. ▼/▲ Press OK button to confirm selection and turn to next page. Setup 5 Press navigation button to select desired connection type.
  • Page 59: Picture Menu

    Picture Menu This chapter will describe the function of Picture in mainmenu. It will open the mainmenu by pressing ▼ the button “MENU” on the remote. The focus will move to the sub items in the Picture menu by pressing down the button “...
  • Page 60: Aspect Ratio

    Colour Temperature Colour temperature adjusting. There are three choices:standard、warm、cool. Aspect Ratio Aspect Ratio – Auto,4:3,16:9,Zoom1,Zoom2 or Panorama is the same as the function when pressing button TAMAÑO on the remote. Noise Reduction Noise reduction of the picture. To reduce noise and improve the appearance of the picture.
  • Page 61: Sound Menu

    Sound Menu Sound Menu It will open the mainmenu by pressing down the button “MENU” and then press the It will open the mainmenu by pressing down the button “MENU” and then press the button “▼” on the remote. The focus will move to the sub items in the Sound menu by pressing down the button “...
  • Page 62: Audio Description

    SPDIF Switch for SPDIF function Audio Description This is to facilitate for the disabilities whose eyes are not good. TV Channel Press MENU to display the main menu, and press ▼/▲ to select the Channel Menu.
  • Page 63 There are following functions in this page: Channel Management: To manage (Delete/Rename/Swap/Lock/Skip) all channels; Favorite Management: To manage (Add/Delete) Favorite channels; Country: To select country. TV connection:To select the DTV signal mode(Air/Cable) Auto Search: To select auto search mode (All/Digital/Analogue); Digital Manual Search: To search digital channel by entering parameters manually(only for Air/Cable);...
  • Page 64: Channel

    Channel Channel Management Press navigation button to select this it em and press OK or ▼/▲ navigation button to enter submenu.
  • Page 65 Press navigation to select preferred program. ▼/▲ a)Press RED button on remote control and use number buttons to input the password. Then press RED button to add/remove a delete mark on highlighted program. After that,press OK button to enter a dialogue box. Select OK to delete it; select Cancel to cancel this operatlon.
  • Page 66: Auto Search To Search

    Auto Search TO SEARCH Select “Auto Search” item to enter auto search user operation interface as following: Digital Manual Search Select “Digital Manual Search” item to enter air channel manual search in DTV source and the user operation interface as following: Analog Manual Search Select “Analogue Manual Search”...
  • Page 67: Feature Menu

    Feature Menu Country Select the country. This chapter will describe the function of Feature in mainmenu. Press MENU to display the main menu, and press ▼/▲ to select the Feature Menu. Lock The Lock sub page includes three parts:Lock Channel,Parental Lock,Change Pin Code as shown in the following picture.
  • Page 68: Lock Channel

    Lock Channel This item is used to turn on/off Lock Channel function. Parental Guidance Press OK or navigation button to enter subm enu and press ▼/▲ navigation button to select preferred option. Available options: Off, 3 to 18. Hotel Mode Press OK or navigation button to enter submenu.
  • Page 69 Language System language setting, includes OSD Language, Preferred Subtitle, Preferred Audio, Digital Teletext Language, Anglog Teletext Language. Clock It is used to check out the current system time and set time zone/DST. Sleep Timer When your TV is Running,start sleep function by setting Sleep Timer in any case. This function allows you to power off the TV within a period of time.
  • Page 70: Sleep Timer

    Sleep Timer This item is used to set the automatic sleep time in standby mode. Available options: Off, 10 Mins, 20 Mins, 30 Mins, 60 Mins, 90 Mins, 120 Mins, 180 Mins, 240 ins. Auto Power Off This item is used to set the Auto Power Off time. Available options: Off, 1 Hour, 2 Hours, 4 Hours.
  • Page 71 PVR/Timeshift Press OK or navigation button to enter submenu. Press navigation button to select preferred inem. ▼/▲ Partition Select Press OK or navigation button to enter subm - Press RED button to enter a dialog box and then s format your USB memory device. - Press GREEN button to set default partition.
  • Page 72 Timer Press OK or navigation button to enter submenu. Press RED button on remote control to delete highlighted option, Press GREEN button on remote control to delete all. Press BLUE button on remote control to enter Edit page. Press YELLOW button on remote control to enter Add page. Recorder: Turn on/off Recorder.
  • Page 73: Setup Menu

    NOTE: To change the numerical display of above items, press OK button to enter it and hen use navigation button to move the cursor; use number buttons to input your desired value and press OK button to confirm your setting. Setup Menu This chapter will describe the function of Setup in mainmenu.
  • Page 74: Osd Timer

    OSD Timer Set up OSD Timer which means how long the menus will exist. The optional periods are 5, 10, 15, 20, 25,30 Seconds. PC Setup It is only available in PC source.
  • Page 75 Blue Screen It is not available in PC, DTV source or when it is not movie mode in multimedia source. In TV source, if there is no signal and Blue Screen is Off, it will show snow ; if there is no signal and Blue Screen is On, it will show blue screen.
  • Page 76 Software Upgrade Software upgrade by bin code. Put The bin code into the root directory of the media and media plugged into the TV ‘s USB interface, press ENTER key to upgrade. Don’t power off during the upgrading process. The system will restarts when the upgrading process is done.
  • Page 77 Music Highlight the “MUSIC” item in multimedia mainmenu by press “ ” key, then press “OK” key enter music page, as follow: Same as "PLAY" key on remote, to start playing file, or resume the paused file. Same as "PAUSE" key on remote, to pause the playing file Same as "STOP"...
  • Page 78 Same as "PLAY" key on remote, to start playing file, or resume the paused file. Same as "PAUSE" key on remote, to pause the playing file Same as "STOP" key on remote, to stop the playing file, and return to the file browser interface.
  • Page 79: Usb Format Mode

    USB FORMAT MODE Codec File Media Remark Extension Video Audio Xvid,MPEG-4,H.264, .avi WMV9/VC-1 WMA* .mp4 MPEG-2,MPEG-4,H.264 Max Resolution And .mpg MPEG-1,MPEG-2 Frame Rate:1280X720@30fps .mkv MPEG-1/2/4,H.264 MOVIE .mov .dat MPEG-1 .vob MPEG-2 MP1/MP2/MP3,PCM Resolution: RV30,RV40 AAC,COOK 800x600(RV30) .rmvb 1280x720(Rv40) Bit Rate: 32K~320Kbps Channel: Mono/Stereo MUSIC .m4a...
  • Page 80: Specifications

    SPECIFICATIONS PC AUDIO HDMI COAXIAL Weight Specifications are subject to change without notice!
  • Page 81 Test parameters for measurements IEC 62087:2012 The measurement method used EN 50564:2011 Test ambient temperature(℃) 27.5℃ Test voltage in V and 230.0V,50HZ FREQUENCY IN HZ 0.71% of the electricity supply system HDMI mode The dynamic brosdcast-content Input terminal for the audio video signal(as de ed in IEC and video test signals...
  • Page 82: Instructions De Sécurité

    INSTRUCTIONS IMPORTANTES INSTRUCTIONS DE SÉCURITÉ ATTENTION – POUR REDUIRE LES RISQUES D'INCENDIE, DE CHOC ÉLECTRIQUE OU DE BLESSURE SÉRIEUSE: ● ● ● ● ● ● ● ● ● ● ● ● ● ●...
  • Page 83 ATTENTION - POUR EVITER LES RISQUES DE BLESSURE OU DE DOMMAGES AU PRODUIT OU AUTRE MATÉRIEL: ● ● ● ● ● UTILISATION ET MANIPULATION DES PILES: ● ● ● ● ● ● ● ● ●...
  • Page 84: Accessoires

    Enlèvement des appareils ménagers usagés ACCESSOIRES INSTRUCTIONS IMPORTANTES……………………………….………………………………81 UTILISATION ET MANIPULATION DES PILES……….…………………....……………82 CARACTÉRISTIQUE ..…….……………………………………………........…85 Démarrage..………………………………….….………………………………………….….87...
  • Page 85 TABLE DES MATIÈRES Connexion aux périphériques externes................89 CONNEXION COAXIALE....................94 CONNEXION USB.....................95 INSCRIRE UNE CARTE CI .....................95 CONNEXION ÉCOUTEUR...................95 PREMIERE INSTALLATOIN.....................96 MENU IMAGE ........................98 MODE IMAGE......................98 RATIO D'ASPECT......................99 CANAL...........................101 RECHERCHE AUTO POUR RECHERCHE..............105 RECHERCHE MANUELLE NUMÉRIQUE……..………….………………….…………...105 MENU FONCTIONNEMENT ..................106 CANAL VERROUILLAGE .......................108 MINUTERIE OSD....………………………………………………………………..113 MODE DE FORMAT USB………………...…………………………….……………………..118...
  • Page 86: Caractéristiques

    CARACTÉRISTIQUES ECRAN LED 32" Ce modèle est équipé d'un écran LED intégré qui offre une qualité d'image exceptionnelle et de bas niveaux de radiation. CAvec verrou hôtel Prend en charge la recherche TV auto Prend en charge la réception de chaînes numériques Prise en charge du guide TV Prend en charge l’affichage du télétexte (en Europe) Prend en charge la lecture multimédia depuis USB...
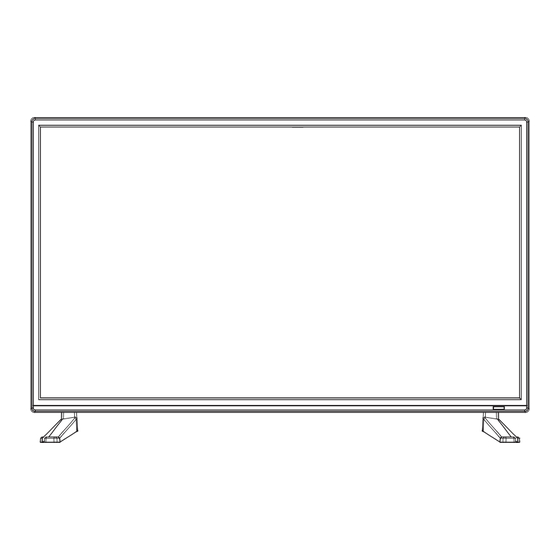
  • Page 87: Ceux Qui Sont Inclus/ Configuration Du Placement Tv

    Ceux qui sont inclus/ Configuration du placement TV Unité et accessoires Support debout IMAGEN SONIDO TAMAÑO GUÍA FUENTE 32” WIDESCREEN LED TV MODELO:K32DLM7H MENU SALIR FAV. Support Please read this manual carefully before using, d keep it for future reference.
  • Page 88: Fonctions Des Boutons

    Démarrer Vue avant / arrière VOL+ VOL- ENTRADA MENÚ Fonctions des Boutons...
  • Page 89 PC AUDIO ANTENA HDMI1 ÉCOUTEURS S.SONIDO DIGITAL HDMI 1/2/3:CEC HDMI 1:ARC ANTENA: Connexion d'antenne CI +: Connecter un module CI PC AUDIO: Connecter le à la borne AV: Connecter la sortie vidéo d'un de sortie audio du PC DVD ou d'un VCR VGA: Entrée vidéo PC YPbPr: Connecter à...
  • Page 90: Connexion Aux Périphériques Externes

    Connexion à des périphériques externes Connexion d'appareils externes à votre téléviseur LED PC AUDIO ANTENA HDMI1 Câble Câble Audio Câble coaxial Câble Amp Audio HDMI Lecteur DVD Antenne VHF/UHF Câble coaxial Câble composite Récepteur de câble/Boîte satellite Câble de la CompagnieTV Câble de composant...
  • Page 91 :Allumer le téléviseur / Veille :Afficher l'index principal en mode Télétexte. IMAGEN:Sélection du mode d'image de sortie. :Révéler les informations cachées telles que les réponses IMAGEN SONIDO TAMAÑO GUÍA au questionnaire en mode TELETEXT. SONIDO:Zoom avant / Zoom arrière du cadre affiché. :Congéler un changement de plusieurs pages en mode FUENTE Télétexte.
  • Page 92: Connecter Une Antenne Externe

    Réglages La configuration initiale ▼ ▲ CONNECTER UNE ANTENNE EXTERNE Antenne Amplificateur d'antenne Amplificateur extérieure d'antenne intérieure Prise Prise d'alimentation Antenne de l'amplificateur 75 OHM d'antenne...
  • Page 93: Connexion Hdmi

    CONNEXION HDMI HDMI2 HDMI3 S.SONIDO DIGITAL YPbPr USB1 Câble HDMI Utilisez un câble HDMI pour connecter la TV à un autre appareil pour recevoir un signal multimédia haute définition. Arrière du DVD/VCR CONNEXION PC/VGA PC AUDIO Câble VGA Câble audio Utilisez le câble VGA pour connecter la TV à...
  • Page 94: Connexion Av (Vidéo Composite)

    CONNEXION AV (VIDÉO COMPOSITE) HDMI3 S.SONIDO DIGITAL YPbPr Ccâble Mini AV Câble AV Pour connexion basique, utilisez un câble composite Audio (blanc/rouge) et CVBS (jaune) pour connecter l'unité à d'autres périphériques. Arrière du DVD/enregistreur...
  • Page 95: Connexion Ypbpr

    Connexion YPBPR HDMI3 S.SONIDO DIGITAL YPbPr Câble Mini AV :L/R Câble Mini YPbPr Vue arrière du DVD / enregistreur Connexion coaxiale HDMI2 HDMI3 S.SONIDO DIGITAL S.SONIDO AURICULAR SCART PC AUDIO ANTENA AURICULAR DIGITAL Utilisez un câble coaxial pour connecter un amplificateur audio ou autre appareil de décodage audio pour sortie audio coaxiale.
  • Page 96: Terminal D'entrée Usb

    Terminal d'entrée USB USB1/USB2 Auriculares 0.5A INSERER UNE CARTE CI HDMI3 S.SONIDO DIGITAL YPbPr HDMI3 USB2 HDMI1 HDMI2 (ARC) USB1 YPbPr Fente CI LIGAÇÃO PARA AURICULAR USB1/USB2 Auriculares 0.5A S.SONIDO AURICULAR SCART PC AUDIO ANTENA DIGITAL Câble CASQUE...
  • Page 97 Sélectionner la source d’entrée ▼ ▲ Première installation Configuration 1 ▼ ▲ Configuration 2 ▼ ▲...
  • Page 98 Configuration 3 ▼ ▲ Configuration 4 ▼ ▲ Configuration 5 ▼ ▲ Configuration 6 ▼ ▲ REMARQUE:...
  • Page 99: Menu Image

    Menu d'Image Mode d'image Élément du Valeur Défaut Menu d’Image...
  • Page 100 Température de couleur Aspect Ratio Réduction du bruit...
  • Page 101: Menu De Son

    Menu de Son Mode de Son Élément du Valor Défaut Menu de Son Standard, Film, Musique, Standard Mode de son Discours ou Utilisateur Basse 0~100 Aigu 0~100 Balancelíbrio -50~50 Entourer Désactivé ,Activé Désactivé Désactivé ,Activé Désactivé SPDIF Désactivé ,PCM, Auto Désactivé...
  • Page 102: Canal

    SPDIF Commutateur pour la fonction SPDIF Description audio Ceci est pour faciliter les handicapés visuels. Canal de télévision Appuyez sur MENU pour afficher le menu principal, et appuyez sur les touches ▼/▲pour sélectionner le Menu de canal.
  • Page 103 Gestionnaire de canaux Gestion favorite...
  • Page 104 Canal Gestion des canaux ▼ ▲...
  • Page 105 ▼ ▲ ▼ ▲ Gestion favorite ▼ ▲...
  • Page 106: Recherche Manuelle Numérique

    Recherche Automatique à RECHERCHR Pesquisa Manual Digital Recherche manuelle numérique...
  • Page 107: Menu De Fonctions

    Menu de Fonctions Pays Sélectionner un pays Ce chapitre décrira la fonction du Menu de Fonctions dans le menu principal. Appuyez sur MENU pour afficher le menu principal, puis appuyez sur▼/▲ pour sélectionner le menu des fonctions. Verrouiller La sous-page "Verrouiller" comprend trois parties: Verrouillage du canal, Verrouillage Parental,Changer le Code Pin, comme indiqué...
  • Page 108 Verrouillage du canal Surveillance parentale ▼ ▲ Mode Hôtel ▼ ▲...
  • Page 109 La langue L'horloge Minuterie de mise en veille...
  • Page 110 Minuterie de mise en veille Arrêt automatique Malentendant REMARQUE: Info CI Arrêt automatique...
  • Page 111 PVR / Timeshift ▼ ▲ Sélectionner Partition Timeshift Auto Timeshift Buffer...
  • Page 112 Minuterie Enregistreur: Type: Canal: Heure de démarrage: Durée: Date: Mode::...
  • Page 113: Menu De Réglage

    Menu de réglage Text Élément du Menu de réglage Valeur Défaut (5, 10, 15, 20, 25, 30 secondes,jamais) Minuterie OSD Réglage PC “Entrer” Écran bleu Désactivé/Activé Désactivé Accueil Accueil / Dynamique /Standard / Légère Mode d’Acceuil Réinitialiser le réglage TV “Entrer”...
  • Page 114: Minuterie Osd

    Minuterie OSD Réglage PC...
  • Page 115 Écran bleu Mode Acceuil Réinitialiser au réglage...
  • Page 116 Mise à niveau logicielle Photo...
  • Page 117 Musique Film...
  • Page 118 eBook...
  • Page 119: Modo De Formato Usb

    MODO DE FORMATO USB Codec Extensão Mídia Observação de Arquivo Vídeo Áudio Xvid,MPEG-4,H.264, .avi WMV9/VC-1 WMA* .mp4 MPEG-2,MPEG-4,H.264 Resolução Máxima e .mpg MPEG-1,MPEG-2 Taxa de Quadros: 1280 x 720 @ 30 fps .mkv MPEG-1/2/4,H.264 FILME .mov .dat MPEG-1 .vob MPEG-2 MP1/MP2/MP3,PCM Resolução: RV30,RV40...
  • Page 120: Caractéristiques

    CARACTÉRISTIQUES MODELE Panneau LED BLuminosité 180Cd/㎡ 3000:1 YPbPr PC AUDIO HDMI ANTENA I/O connecté Écouteur S.SONIDO DIGITAL Sans standard 732*77*433mm Mesurage Avec standard 732*208*478mm Poids standard 3.9Kg Poids Poids brut 5.7Kg < 48W Les spécifications peuvent être modifiées sans préavis!
  • Page 121: Le Test Des Paramètres Pour Le Mesure

    Le test des Paramètres pour le mesure CEI 62087: 2012 La méthode de mesure utilisée EN 50564: 2011 Température ambiante d'essai (℃) 27.5℃ Tension d'essai en V et FRÉQUENCE EN HZ 230.0V,50HZ 0.71% Distorsion harmonique totale (THD) du système d'alimentation électrique Mode HDMI Le signal vidéo dynamique du contenu Terminal d'entrée pour les signaux de...
  • Page 122: Sicherheitshinweise

    WICHTIGE ANLEITUNGEN SICHERHEITSHINWEISE WARNUNG – ZUR VERRINGERUNG DER BRAND-, STROMSCHLAGODER ERNSTEN VERLETZUNGSGEFAHR: ● ● ● ● ● ● ● ● ● ● ●...
  • Page 123 ● ● ● ● ● ● VORSICHT – ZUR VERRINGERUNG VON POTENZIELLEN PERSONEN- ODER PRODUKT-/SACHSCHÄDEN: ● ● ● ● ● ●...
  • Page 124 VERWENDUNG UND UMGANG MIT DER BATTERIE: ● ● ● ● ● ● ● ● ● ZUBEHÖR WICHTIGE HINWEISE…………………………………………..……………..……..…..….121 VERWENDUNG UND UMGANG MIT DER BATTERIE……….…………………………………..123 EIGENSCHAFTEN……………………………..…….……………………..…..…...…..…...125 Erster Schritt ………………………………….….…………………………………………..…..127...
  • Page 125 INHALTSVERZEICHNIS Verbindung mit Externen Geräten ..................129 COAXIAL ANSCHLUSS......................134 USB ANSCHLUSS........................135 EINE CI KARTE EINSETZEN .....................135 KOPFHÖRER ANSCHLUSS ....................135 ERSTINSTALLATION......................136 PICTURE MENÜ .........................138 BILDMODUS........................138 Seitenverhältnis........................139 CHANNEL..........................141 AUTO SEARCH ZUM SUCHEN..................145 DIGITAL MANUAL SEARCH……..………………….……………………………………..145 FEATURE MENÜ .........................146 SCHIAF TIMER .......................148 OSDTIMER..…………………………………………………………………………....153 USB FORMAT MODE ………………………………………………………………..158 SPEZIFIKATIONEN......................159...
  • Page 126 MERKMALE 32-Zoll-LED-Bildschirm Dieses Gerät verfügt über einen integrierten LED-Bildschirm, der für scharfe Bilder und niedrige Strahlungswerte sorgt. Mit Hotelsperre Unterstützt den automatischen TV-Scan Unterstützt den digitalen Sendungsempfang Unterstützt die Fernsehprogrammfunktion Unterstützt VIDEOTEXT (Europa) Unterstützt USB-Multimediawiedergabe Unterstützt mehrsprachiges OSD (Bildschirmanzeige) Unterstützt Fernbedienung mit allen Funktionen Unterstützt HDMI-, YPBPR-, AV-, VGA-, PC-AUDIO- und CI-Eingang Unterstützt KOPFHÖRER- und KOAXIAL-Ausgang...
  • Page 127: Gerät Und Zubehör

    Was ist eingeschlossen / TV-Platzierungs-Setup Gerät und Zubehör Standunterstützung IMAGEN SONIDO TAMAÑO GUÍA FUENTE 32” BREITBILD LED TV MODELL:K32DLM7H MENU SALIR FAV. Basisständer Lesen Sie bitte vor der Ers tben utzung diese Bedienungsanleitung sorgfältig durch und bewahren sie sorgfältig auf.
  • Page 128: Tastenfunktionen

    Erster Schritt Vorder- / Rückansicht VOL+ VOL- ENTRADA MENÚ Tastenfunktionen...
  • Page 129 PC AUDIO ANTENA HDMI1 HEADPHONES S.SONIDO DIGITAL HDMI1/2/3:CEC HDMI1:ARC ANTENA: Antennenanschluss CI+:einen CI-Modul verbinden PC AUDIO: es mit dem Audioausgang AV: Video-Ausgang von einer DVD des PCs verbinden oder einem VCR verbinden VGA: PC Video Eingang YPbPr: YPbPr-Videoausgang der DVD verbinden...
  • Page 130: Verbindung Mit Externen Geräten

    Verbindung mit externen Geräten Verbindung externer Geräte an Ihren LED-Fernseher PC AUDIO ANTENA HDMI1 Audio Kabel Kabel Koaxial Kabel HDMI Audio Verstärke Kabel DVD Spieler UKW/UHF Antenne HF Koaxial Kabel Gemischtadriges Kabel Kabelfernsehen Kabel Empfänger/Satellitenbox Unternehmen Komponente Kabel...
  • Page 131 : Fernseher/Bereitschaft einschalten. :Hauptindex im Teletext-Modus anzeigen. IMAGEN:Ausgabebildmodusauswahl. :Versteckte Informationen z.B. die Antworten auf IMAGEN SONIDO TAMAÑO GUÍA ein Quiz im TELETEXT-Modus aufdecken. SONIDO:Vergrößern / Verkleinern des angezeigten Rahmens :Ein mehrseitiger Wechsel im TELETEXT-Modus einfrieren. FUENTE TAMAÑO:Drücken Sie, um die unterschiedliche Bildgröße auszuwählen.
  • Page 132 Einstellungen Erste Inbetriebnahme 1. Anschließen des Fernsehers an der Steckdose; 2. Drücken Sie die POWER-Taste der Fernbedienung in grün für das LED-Licht, um den Fernseher einzuschalten. VORSICHT: Trennen Sie das Fernsehgerät immer aus der Steckdose ab, wenn Sie das Fernsehgerät nicht über einen langen Zeitraum benutzen. Der POWER-Taste auf der Frontseite ist nur zum Wechseln in dem Bereitschaftsmodus des Fernsehers verwendet, es wird das Gerät nicht von der Netzspannung trennen.
  • Page 133 HDMI-ANSCHLUSS HDMI2 HDMI3 S.SONIDO DIGITAL YPbPr USB1 HDMI-Kabel Schließen Sie andere Geräte für den Empfang eines hochauflösenden Multimedia-Signals mit dem HDMI-Kabel an das Hauptgerät an. Rückseite des DVD/VCR PC/VGA-ANSCHLUSS PC AUDIO Audiokabel VGA-Kabel Verwenden Sie zum Anschließen des Hauptgeräts an einen Fernseher oder PC ein VGA- oder Audiokabel, und nehmen Sie dieses Gerät als einen Monitor in Betrieb...
  • Page 134 AV- (KOMPOSITVIDEO) ANSCHLUSS HDMI3 S.SONIDO DIGITAL YPbPr Mini AV-Kabel AV-Kabel Für den Grundanschluss verwenden Sie das Composite-Audio-L/R- (weiss/rot) und das CVBS-Kabel (gelb), um andere Geräte an das Hauptgerät anzuschließen. Rückseite des DVD/VCR...
  • Page 135 YPBPR-ANSCHLUSS HDMI3 S.SONIDO DIGITAL YPbPr Mini AV-Kabel: L/R Mini YPbPr-Kabel Rückseite des DVD/VCR KOAXIALANSCHLUSS HDMI2 HDMI3 S.SONIDO DIGITAL S.SONIDO AURICULAR AURICULAR DIGITAL Das Gerät für die koaxiale Audiosignalausgabe mithilfe eines Koaxialkabels an einen Verstärker ode rein anderes Audio-Decodiergerät anschließen. (Koaxial-Kable ist nicht inbegriffen.)
  • Page 136: Usb Anschluss

    USB-ANSCHLUSS USB1/USB2 Auriculares 0.5A EINE CI-KARTE EINSETZEN HDMI3 S.SONIDO DIGITAL YPbPr HDMI3 USB2 HDMI1 HDMI2 (ARC) USB1 YPbPr CI-Steckplatz KOPFHÖRERANSCHLUSS USB1/USB2 Auriculares 0.5A S.SONIDO AURICULAR SCART PC AUDIO ANTENA DIGITAL KOPFHÖRER-Kabel...
  • Page 137: Erstinstallation

    Eingangsquelle wählen ▼ ▲ Erstinstallation ▼ ▲ Setup 2 ▼ ▲...
  • Page 138 Setup 3 ▼ ▲ Setup 4 ▼ ▲ Setup 5 ▼ ▲ Setup 6 ▼ ▲ HINWEIS:...
  • Page 139: Picture Menü

    Bildmenü Bildmodus Picture Menü Default Wert Items Colour Full...
  • Page 140: Seitenverhältnis

    Colour Temperature Seitenverhältnis Noise Reduction...
  • Page 141: Sound Mode

    Sound Menu Sound Menü Sound Mode Sound Mode Sound Menu Default Value Items Standard,Movie,Music,Spe Standard Sound Mode ech,User Bass 0~100 Treble 0~100 Balance -50~50 Surround Off,On Off,On SPDIF Off,PCM,Auto Audio Description “ENTER”...
  • Page 142 SPDIF Für SPDIF Funktion schalten Audio Description Dies ist für die Behinderungen zu erleichtern , deren Augen sind nicht gut. TV Channel MENU drücken, um das Hauptmenü anzuzeigen, und ▼ / ▲ drücken , um das Channel Menü...
  • Page 143 Channel Manager Favorite Management...
  • Page 144: Channel

    Channel Channel Management ▼ ▲ ▼ ▲...
  • Page 145 ▼ ▲ Favorite Management ▼ ▲...
  • Page 146: Auto Search Zum Suchen

    Auto Search ZUM SUCHEN Digital Manual Search Analog Manual Search...
  • Page 147: Featuremenü

    FeatureMenü Land Land auswählen. In diesem Kapitel wird die Funktion der Eigenschaft im Hauptmenü beschreiben. MENÜ drücken, um das Hauptmenü anzuzeigen, und ▼ / ▲drücken, um das Feature -Menü auszuwählen Lock Die Lock-Unter Seite enthält drei Teile: Lock Channel,Parental Lock,Change Pin Code wie im folgenden Bild gezeigt.
  • Page 148 Lock Channel Parenta Guidance ▼ ▲ Hotel Mode ▼ ▲...
  • Page 149 Sprache Schlaf-Timer...
  • Page 150 Schlaf-Timer Automatische Abschaltung Hörgeschädigt CI Info Automatische Abschaltung...
  • Page 151 PVR/Timeshift ▼ ▲ Partition auswählen Auto Timeshift Timeshift Puffer...
  • Page 152 Stunden...
  • Page 153: Setup-Menü

    Setup Menü...
  • Page 154: Osdtimer

    OSD Timer PC-Setup...
  • Page 155 Blauer Bildschirm Home-Modus Zurücksetzen auf Einstellung...
  • Page 156 Software Upgrade Foto Tastenbedienung ∣ ∣...
  • Page 157 Musik ∣ ∣ ∣ ∣ Movie...
  • Page 158 ∣ ∣ ∣ ∣ eBook...
  • Page 159: Usb Format Mode

    USB-FORMAT-MODUS Dateinamen Codec Medien Anmerkung erweiterung Video Audio Xvid,MPEG-4,H.264, .avi WMV9/VC-1 WMA* .mp4 MPEG-2,MPEG-4,H.264 Max. Auflösung und .mpg MPEG-1,MPEG-2 Bildfrequenz: 1280X720 @ 30fps .mkv MPEG-1/2/4,H.264 FILM .mov .dat MPEG-1 .vob MPEG-2 MP1/MP2/MP3,PCM Auflösung: 800x600(RV30) RV30,RV40 AAC,COOK 1280x720(Rv40) .rmvb Aufnahmerate: 32K ~ 48KHz Bitrate: 32K ~ 320Kbps Kanal: Mono / Stereo MUSIK...
  • Page 160: Spezifikationen

    SPEZIFIKATIONEN MODELL Helligkeit 180Cd/m 3000:1 PC AUDIO HDMI 732*77*433mm 732*208*478mm < 48W...
  • Page 161 Testparameter für Messungen IEC 62087:2012 Die eingesetzte Messmethode EN 50564:2011 Test-Umgebungstemperatur (℃) 27.5℃ Testspannung in V und 230.0V,50HZ FREQUENZ IN HZ 0.71% Oberschwingungsgehalt des Elektrizitätsversorgungssystems HDMI-Modus Das dynamische Rundfunk-Inhalt- Eingangspol für das Audio und Videosignal (wie in IEC 62087 Ed.2, Video Testsignale Zi er 11.6.1 de ert)
  • Page 162: Instruções De Segurança

    INSTRUÇÕES IMPORTANTES INSTRUÇÕES DE SEGURANÇA AVISO – PARA MINIMIZAR O RISCO DE INCÊNDIO, CHOQUES ELÉTRICOS OU LESÕES GRAVES: ● ● ● ● ● ● ● ● ● ● ● ●...
  • Page 163 ● ● ● ● ● ATENÇÃO - PARA MINIMIZAR O RISCO DE LESÕES OU DE DANOS MATERIAIS/NO PRODUTO: ● ● ● ● ● MANUSEAMENTO E UTILIZAÇÃO DA PILHA: ● ● ● ● ● ● ● ● ●...
  • Page 164 DISPOSAL OF OLD ELECTRICAL APPLIANCES ACESSÓRIOS INSTRUÇÕES IMPORTANTE……………………………………………………………………161 MANUSEAMENTO E UTILIZAÇÃO DA BATERIA……….……………………………………162 CIONALIDADES ..…….……………………………………………........…..165 Dando Iniciando ………………………………….….………………………………………….…167...
  • Page 165 ÍNDICE Conexão a Dispositivos Externos..................169 CONEXÃO COAXIAL....................174 CONEXÃO USB......................175 INSIRA UM CARTÃO CI ....................175 CONEXÃO FONE DE OUVIDO ...................175 INSTALAÇÃO DE PRIMEIRA VEZ..................176 MENU DE IMAGEM ......................178 MODO DE IMAGEM....................178 RELAÇÃO DE ASPECTO..................179 CANAL..........................181 PESQUISA AUTO PARA PESQUISAR................185 PESQUISA MANUAL DIGITAL……..………………….……………………………………..185 MENU CARACTERÍSTICA .....................186 BLOQUEIO DE CANAL ......................188...
  • Page 166 FUNCIONALIDADES ECRÃ LED DE 32” Esta unidade tem um ecrã LED integrado para proporcionar uma visão clara e baixa radiação. Com bloqueio para hotel Compatível com procura automática de TV Compatível com receção de radiodifusão digital Compatível com função de guia de TV Compatível com função de teletexto (Europa) Compatível com reprodução de multimédia por USB Compatível com ecrã...
  • Page 167: Montagem Em Parede

    O que está incluído / Configuração de Colocação de TV Unidade e Acessórios Suporte IMAGEN SONIDO TAMAÑO GUÍA FUENTE 32” WIDESCREEN LED TV MODELO:K32DLM7H MENU SALIR FAV. Suporte de Base Please read this manual carefully before using, d keep it for future reference.
  • Page 168 Dando Iniciando Vista Frontal / Traseira VOL+ VOL- ENTRADA MENÚ Função do botão...
  • Page 169 PC AUDIO ANTENA HDMI1 FONE DE OUVIDO S.SONIDO DIGITAL HDMI1/2/3:CEC HDMI1:ARC ANTENA: Conexão de antena CI+: Conecte um módulo CI PC AUDIO: Conecte-o ao terminal de AV: Conecte saída de vídeo de saída de áudio do PC um DVD ou VCR VGA: entrada de vídeo para PC YPbPr: Conecte-se ao terminal de saída de vídeo YPbPr do DVD...
  • Page 170: Conexão A Dispositivos Externos

    Conexão a Dispositivos Externos Conectando dispositivos externos à sua TV LED PC AUDIO ANTENA HDMI1 Cabo Cabo áudio Cabo coaxial Cabo Amplificador de áudio HDMI Leitor de DVD Antena VHF / UHF Cabo coaxial RF Cabo composto Empresa de Receptor de cabo / caixa de satélite TV a cabo Cabo componente...
  • Page 171 :Liga a TV / Tela de descanso. :Exibe o índice principal no modo Teletexto. IMAGEN:Seleção do modo de imagem de saída. :Revela informações ocultas, como as respostas a um questionário no modo TELETEXT. IMAGEN SONIDO TAMAÑO GUÍA SONIDO:Zoom in / Zoom out the frame exibido. :Congele uma mudança de várias páginas no modo Teletexto.
  • Page 172: Ligar Uma Antena Exterior À Unidade

    Configurações Configuração Inicial ▼ ▲ LIGAR UMA ANTENA EXTERIOR À UNIDADE Amplificador de antena exterior Amplificador de antena interior Ficha Ficha elétrica do da antena amplificador de com 75 Ohm antena...
  • Page 173 LIGAÇÃO HDMI HDMI2 HDMI3 S.SONIDO DIGITAL YPbPr USB1 Cabo HDMI Utilize o cabo HDMI para ligar a unidade a outros dispositivos e receber um sinal multimédia de alta definição. Parte posterior do leitor de DVD/VCR LIGAÇÃO PC/VGA PC AUDIO Cabo VGA Cabo de áudio Utilize o cabo VGA e o cabo de áudio para ligar a unidade à...
  • Page 174 LIGAÇÃO AV (SINAL DE VÍDEO COMPOSTO) HDMI3 S.SONIDO DIGITAL YPbPr Cabo Mini AV Cabo AV Para a ligação básica, utilize o cabo de áudio composto L/R (branco/vermelho) e CVBS (amarelo) para ligar a unidade a outros dispositivos. Parte posterior do leitor de DVD/VCR...
  • Page 175 LIGAÇÃO YPBPR HDMI3 S.SONIDO DIGITAL YPbPr Cabo Mini AV: L/R Cabo Mini YPbPr Parte posterior do leitor de DVD/VCR LIGAÇÃO COAXIAL HDMI2 HDMI3 S.SONIDO DIGITAL S.SONIDO AURICULAR SCART PC AUDIO ANTENA AURICULAR DIGITAL Utilize o cabo coaxial (não incluído) para ligar a unidade a um amplificador ou a outros dispositivos de descodificação de áudio para a saída do sinal de áudio coaxial.
  • Page 176: Ligação Usb

    LIGAÇÃO USB USB1/USB2 Auriculares 0.5A Dispositivo de memória IINSERIR UM CARTÃO CI HDMI3 S.SONIDO DIGITAL YPbPr HDMI3 USB2 HDMI1 HDMI2 (ARC) USB1 YPbPr Insira o cartão CI (módulo de acesso condicional) para ver canais digitais especiais na sua área. LIGAÇÃO PARA AURICULAR USB1/USB2 Auriculares 0.5A...
  • Page 177: Instalação De Primeira Vez

    Selecione Fonte de Entrada ▼ ▲ Instalação pela Primeira Vez Configuração 1 ▼ ▲ Configuração 2 ▼ ▲...
  • Page 178 Configuração 3 ▼ ▲ Configuração 4 ▼ ▲ Configuração 5 ▼ ▲ Configuração 6 ▼ ▲ NOTA:...
  • Page 179: Menu De Imagem

    Menu de Imagem Modo de Imagem Itens do Valor Padrão menu de Imagem...
  • Page 180: Relação De Aspecto

    Temperatura de Cor Relação de Aspecto TAMAÑO Redução de Ruído...
  • Page 181 Menu de Som ▼ Modo do Som SONIDO Itens do menu Valor Padrão do som Padrão, Filme, Música, Padrão Modo de Som Discurso, Usuário Baixo 0~100 Agudos 0~100 Equilíbrio -50~50 Surround Off,On Off,On SPDIF Off,PCM,Auto Descrição do Áudio “ENTRAR”...
  • Page 182 SPDIF Alternar para a função SPDIF Descrição do Áudio Isto é para facilitar as deficiências cujos olhos não são bons. Canal de Televisão Pressione MENU para exibir o menu principal e pressione ▼/▲para selecionar o menu do Canal.
  • Page 183 Gerente de Canal Gestão Favorito...
  • Page 184 Canal Gestão de Canal ▼ ▲...
  • Page 185 ▼ ▲ Gestão Favorito ▼ ▲...
  • Page 186: Pesquisa Manual Digital

    Pesquisa Automática PARA PESQUISA Pesquisa Manual Digital Pesquisa Manual Analógica...
  • Page 187: Menu Característica

    Menu de Característica País Selecione o país. Este capítulo descreverá a função de Característica no menu principal. Pressione MENU para exibir o menu principal e pressione▼/▲ para selecionar o Menu de Característica. Bloqueio A sub-página de bloqueio inclui três partes: Bloqueio de Canal, Bloqueio Parental, Código de Pino de Mudança, conforme mostrado na imagem a seguir.
  • Page 188 Canal Bloqueio Orientação Parental ▼ ▲ Modo Hotel ▼ ▲ Dica...
  • Page 189 Idioma Relógio DESPERTADOR...
  • Page 190 Despertador Desligamento Automático Deficientes Auditivos NOTA: CI Info Desligamento Automático...
  • Page 191 PVR/Mudança de horário ▼ ▲ Seleção de Partição Mudança de Horário Auto Amortecedor de Mudança de Horário...
  • Page 192 Temporizador Gravador: Tipo: Canal: Tempo de Início: Duração: Data: Modo:...
  • Page 193: Menu De Configuração

    Menu de Configuração Text Configurar Itens de Menu Valor Prodão (5, 10, 15, 20 25 30 Segundos, Nunca) Temporizador OSD Configuração do PC “ENTRAR” Tela Azul On/Off Casa Modo Casa Casa/Dinâmico/Normal/Suave Redefinir configuração de TV “ENTRAR” Atualização de software “ENTRAR”...
  • Page 194 Temporizador OSD Configuração do PC...
  • Page 195 Tela Azul Modo Casa Redefinir a Configuração...
  • Page 196 Atualização de Software Fotografia...
  • Page 197 Música Filme...
  • Page 198 Livro Eletrônico...
  • Page 199: Modo De Formato Usb

    MODO DE FORMATO USB Codec Extensão Mídia Observação de Arquivo Vídeo Áudio Xvid,MPEG-4,H.264, .avi WMV9/VC-1 WMA* .mp4 MPEG-2,MPEG-4,H.264 Resolução Máxima e .mpg MPEG-1,MPEG-2 Taxa de Quadros: 1280 x 720 @ 30 fps .mkv MPEG-1/2/4,H.264 FILME .mov .dat MPEG-1 .vob MPEG-2 MP1/MP2/MP3,PCM Resolução: RV30,RV40...
  • Page 200: Especificações

    ESPECIFICAÇÕES MODELO Tamanho do painel LED do Painel Brilho 180Cd/㎡ 3000:1 YPbPr ÁUDIO DE PC HDMI I / O Fone de Ouvido Sem suporte 732*77*433mm Medidas Com suporte 732*208*478mm Peso suporte 3.9Kg Peso peso bruto 5.7Kg Fonte de energia Consumo de energia <...
  • Page 201 Parâmetros de teste para medições IEC 62087:2012 O método de medição utilizado EN 50564:2011 Temperatura ambiente do teste (° C) 27.5℃ Tensão de teste em V e FREQUÊNCIA EM 230.0V,50HZ Teste a distorção harmônica (THD) do 0.71% sistema de fornecimento de eletricidade Modo HDMI A transmissão dinâmica - sinal de vídeo de Terminal de entrada para sinais...

Table des Matières