Table des Matières

Publicité

Les langues disponibles

Les langues disponibles

Liens rapides

SKS68800F0
NL KOELKAST
EN REFRIGERATOR
FR RÉFRIGÉRATEUR
DE KÜHLSCHRANK
GEBRUIKSAANWIJZING
USER MANUAL
NOTICE D'UTILISATION
BENUTZERINFORMATION
2
20
37
55

Publicité

Table des Matières
loading

Sommaire des Matières pour AEG SKS68800F0

  • Page 1 SKS68800F0 NL KOELKAST GEBRUIKSAANWIJZING EN REFRIGERATOR USER MANUAL FR RÉFRIGÉRATEUR NOTICE D'UTILISATION DE KÜHLSCHRANK BENUTZERINFORMATION...
  • Page 2: Accessoires En Verbruiksartikelen

    ACCESSOIRES EN VERBRUIKSARTIKELEN In de AEG webshop vindt u alles wat u nodig heeft om al uw apparaten van AEG mooi te houden en perfect te laten functioneren. Ook vindt u hier een groot aantal...
  • Page 3: Table Des Matières

    Inhoud INHOUD 4 Veiligheidsinformatie 6 Bedieningspaneel 10 Het eerste gebruik 10 Dagelijks gebruik 11 Nuttige aanwijzingen en tips 12 Onderhoud en reiniging 13 Problemen oplossen 16 Technische gegevens 16 Montage 17 Geluiden 19 Het milieu In deze gebruiksaanwijzing worden de volgende symbolen gebruikt: Belangrijke informatie over uw persoonlijke veiligheid en informatie over het voorkomen...
  • Page 4: Veiligheidsinformatie

    Veiligheidsinformatie VEILIGHEIDSINFORMATIE In het belang van uw veiligheid en om een correct gebruik te kunnen waarborgen is het van belang dat u, alvorens het apparaat te installeren en in gebruik te nemen, deze gebruiks- aanwijzing, inclusief de tips en waarschuwingen, grondig doorleest. Om onnodige vergissin- gen en ongevallen te voorkomen is het belangrijk ervoor te zorgen dat alle mensen die het apparaat gebruiken, volledig bekend zijn met de werking ervan en de veiligheidsvoorzienin- gen.
  • Page 5 Veiligheidsinformatie Controleer of de onderdelen van het koelcircuit tijdens transport en installatie van het apparaat niet beschadigd zijn geraakt. Indien het koelcircuit beschadigd is: – open vuur en ontstekingsbronnen vermijden – de ruimte waar het apparaat zich bevindt grondig ventileren •...
  • Page 6: Bedieningspaneel

    Bedieningspaneel Installatie Voor de aansluiting van elektriciteit dienen de instructies in de desbetreffende paragrafen nauwgezet te worden opgevolgd. • Pak het apparaat uit en controleer of er beschadigingen zijn. Sluit het apparaat niet aan als het beschadigd is. Meld mogelijke beschadigingen onmiddellijk bij de winkel waar u het apparaat gekocht heeft.
  • Page 7 Bedieningspaneel Mode-toets OK -toets Toets om de temperatuur lager te zetten Timer, - toets Toets om de temperatuur hoger te zetten Timer, + toets Display Het is mogelijk om het vooraf ingestelde geluid van toetsen te wijzigen in een harder geluid door de Mode -toets en de toets om de temperatuur kouder te zetten, tegelijkertijd gedu- rende enkele seconden in te drukken.
  • Page 8: Kinderslot-Functie

    Bedieningspaneel Temperatuurregeling De ingestelde temperatuur van de koelkast kan worden aangepast door op de thermostaat- knoppen te drukken. Standaard ingestelde temperatuur: • +5°C voor de koelkast Het temperatuurlampje toont de ingestelde temperatuur. De ingestelde temperatuur zal binnen 24 uur worden bereikt. Na een stroomonderbreking blijft de ingestelde temperatuur opgeslagen.
  • Page 9: Alarm Bij Open Deur

    Bedieningspaneel 3. Het indicatielampje Kinderslot gaat uit. COOLMATIC-functie Als u een grote hoeveelheid warm voedsel, bijvoorbeeld na het doen van de boodschappen, in de koelkast wilt plaatsen, adviseren wij u de COOLMATIC-functie in te schakelen om deze producten sneller te koelen en om te voorkomen dat voedsel dat al in de koelkast ligt warm wordt.
  • Page 10: Het Eerste Gebruik

    Het eerste gebruik • een zoemer Als de normale omstandigheden zijn hersteld (deur gesloten), wordt het geluidsalarm uitge- schakeld. Tijdens het alarm kan de zoemer worden uitgeschakeld door op een willekeurige knop te drukken. De lamp gaat na 7 minuten met de deur open, uit. HET EERSTE GEBRUIK De binnenkant schoonmaken Voordat u het apparaat voor de eerste keer gebruikt, wast u de binnenkant en de interne...
  • Page 11: Het Plaatsen Van De Deurschappen

    Nuttige aanwijzingen en tips Het plaatsen van de deurschappen Om het bewaren van voedselpakketten van ver- schillende afmetingen mogelijk te maken, kunnen de schappen op verschillende hoogtes worden ge- plaatst. Om deze aanpassingen uit te voeren, gaat u als volgt te werk: trek het schap geleidelijk in de richting van de pij- len totdat het los komt en plaats het schap op een andere gewenste hoogte terug.
  • Page 12: Nuttige Tips Voor Het Koelen

    Onderhoud en reiniging Nuttige tips voor het koelen Nuttige tips: Vlees (alle soorten) in plastic zakken verpakken en op het glazen schap leggen, boven de groentelade. Bewaar het, voor de veiligheid, slechts een of maximaal twee dagen op deze manier. Gekookt voedsel, koude schotels, enz.: deze moeten afgedekt worden en mogen op wille- keurig welk schap gezet worden.
  • Page 13: Het Ontdooien Van De Koelkast

    Problemen oplossen buitenkant van dit apparaat alleen schoon te maken met warm water met een beetje af- wasmiddel. Steek, na het schoonmaken van het apparaat, de stekker weer in het stopcontact. Het ontdooien van de koelkast Rijp wordt elke keer als de compressormotor tijdens normale werking stopt, automatisch van de verdamper van het koelvak verwijderd.
  • Page 14 Problemen oplossen Het apparaat werkt niet continu dus als de compressor stopt, betekent dit niet dat er geen stroom is. Daarom mag u geen elektrische onderdelen van het apparaat aanraken voordat u de stroom hebt uitgeschakeld. Probleem Mogelijke oorzaak Solution De compressor werkt con- De thermostaatknop staat mis- Stel een hogere temperatuur in...
  • Page 15 Problemen oplossen Probleem Mogelijke oorzaak Solution Er is een grote hoeveelheid Leg kleinere hoeveelheden voedsel voedsel tegelijk in de koelkast tegelijk in de koelkast geplaatst Er is geen koude luchtcirculatie Zorg voor koude luchtcirculatie Het is te koud in de koel- De thermostaatknop staat mis- Stel een hogere temperatuur in kast...
  • Page 16: Technische Gegevens

    Technische gegevens Het lampje vervangen 1. Schakel de wasautomaat uit en trek de stekker uit het stopcontact. 2. Druk het beweegbare deel in om de af- dekking van het lampje te haken (1). 3. Haal de afdekking van het lampje (2). 4.
  • Page 17: Elektrische Aansluiting

    Geluiden een plaats waar de omgevingstemperatuur overeenkomt met de klimaatklasse die staat aangegeven op het typeplaatje van het apparaat. Klimaatklasse Omgevingstemperatuur +10°C tot + 32°C +16°C tot + 32°C +16°C tot + 38°C +16°C tot + 43°C Elektrische aansluiting Zorg er vóór het aansluiten voor dat het voltage en de frequentie op het typeplaatje over- eenkomen met de stroomtoevoer in uw huis.
  • Page 18 Geluiden BRRR! BRRR! BLUBB! BLUBB! HISSS! HISSS! SSSRRR! SSSRRR!
  • Page 19: Het Milieu

    Het milieu CRACK! CRACK! HET MILIEU Het symbool op het product of op de verpakking wijst erop dat dit product niet als huishoudafval mag worden behandeld, maar moet worden afgegeven bij een verzamelpunt waar elektrische en elektronische apparatuur wordt gerecycled. Als u ervoor zorgt dat dit product op de juiste manier wordt verwijderd, voorkomt u mogelijke negatieve gevolgen voor mens en milieu die zich zouden kunnen voordoen in geval van verkeerde afvalverwerking.
  • Page 20: Accessories And Consumables

    Please spend a few minutes reading to get the very best from it. ACCESSORIES AND CONSUMABLES In the AEG webshop, you’ll find everything you need to keep all your AEG appliances looking spotless and working perfectly. Along with a wide range of accessories...
  • Page 21 Contents CONTENTS 22 Safety information 24 Control panel 27 First use 28 Daily use 28 Helpful hints and tips 29 Care and cleaning 31 What to do if… 33 Technical data 34 Installation 34 Noises 36 Environmental concerns The following symbols are used in this user manual: Important information concerning your personal safety and information on how to...
  • Page 22: Safety Information

    Safety information SAFETY INFORMATION In the interest of your safety and to ensure the correct use, before installing and first using the appliance, read this user manual carefully, including its hints and warnings. To avoid unnecessary mistakes and accidents, it is important to ensure that all people using the ap- pliance are thoroughly familiar with its operation and safety features.
  • Page 23 Safety information – thoroughly ventilate the room in which the appliance is situated • It is dangerous to alter the specifications or modify this product in any way. Any damage to the cord may cause a short-circuit, fire and/or electric shock. WARNING! Any electrical component (power cord, plug, compressor) must be replaced by a certified service agent or qualified service personnel to avoid hazard.
  • Page 24: Control Panel

    Control panel • It is advisable to wait at least four hours before connecting the appliance to allow the oil to flow back in the compressor. • Adequate air circulation should be around the appliance, lacking this leads to overheat- ing.
  • Page 25: Switching Off

    Control panel Display Timer function COOLMATIC function Minute Minder function Child Lock function Alarm indicator Temperature indicator Holiday function Switching on To switch on the appliance do these steps: 1. Connect the mains plug to the power socket. 2. Press the ON/OFF button if the display is off. 3.
  • Page 26: Child Lock Function

    Control panel To switch on the function: 1. Press the Mode button until the corresponding icon appears. The Minute Minder indicator flashes. The Timer shows the set value (30 minutes) for a few seconds. 2. Press the Timer regulator button to change the Timer set value from 1 to 90 minutes. 3.
  • Page 27: Holiday Function

    First use 2. Press the OK button to confirm. 3. The COOLMATIC indicator goes off. The function switches off by selecting a different fridge set temperature. Holiday function This function allows you to keep the refrigerator closed and empty during a long holiday period without the formation of a bad smell.
  • Page 28: Daily Use

    Daily use DAILY USE Movable shelves The walls of the refrigerator are equipped with a series of runners so that the shelves can be posi- tioned as desired. Do not move the glass shelf above the vegetable drawer and the bottle shelf to ensure correct air circulation.
  • Page 29: Hints For Energy Saving

    Care and cleaning • The thermic dilatation might cause a sudden cracking noise. It is natural, not dangerous physical phenomenon. This is correct. • When the compressor switches on or switches off, you will hear a faint "click" of the temperature regulator.
  • Page 30: Defrosting Of The Refrigerator

    Care and cleaning • rinse and dry thoroughly. Do not pull, move or damage any pipes and/or cables inside the cabinet. Never use detergents, abrasive powders, highly perfumed cleaning products or wax polishes to clean the interior as this will damage the surface and leave a strong odour. Clean the condenser (black grill) and the compressor at the back of the appliance with a brush.
  • Page 31: What To Do If

    What to do if… WHAT TO DO IF… During operation of the appliance some smaller but annoying trouble can often occur, which does not require calling a technician out. In the following chart information is given about them to avoid unnecessary charges on service. The operation of the appliance goes with certain sounds (compressor and circulating sound).
  • Page 32: Warning Signal

    What to do if… Problem Possible cause Solution The door does not close tightly Check if the door closes well and or it is not shut properly the gasket is undamaged and clean Food placed in the appliance was Allow food to cool to room tem- too warm perature before storing Large quantities of food to be...
  • Page 33: Replacing The Lamp

    Technical data • An error has occurred in the operation of the appliance. In case the electronic system of the appliance cannot identify the real temperature a sign will appear on the tem- perature display. • Until the staff of the customer service arrive at the spot and solve the problem, the appli- ance will continue operating with the help of a spare program.
  • Page 34: Installation

    Installation INSTALLATION WARNING! Read the "Safety Information" carefully for your safety and correct operation of the appli- ance before installing the appliance. Positioning This appliance can be installed in a dry, well ventilated indoor (garage or cellar) also, but for optimum performance install this appliance at a location where the ambient temperature corresponds to the climate class indicated on the rating plate of the appliance: Climate class...
  • Page 35 Noises BRRR! BRRR! BLUBB! BLUBB! HISSS! HISSS!
  • Page 36: Environmental Concerns

    Environmental concerns SSSRRR! SSSRRR! CRACK! CRACK! ENVIRONMENTAL CONCERNS The symbol on the product or on its packaging indicates that this product may not be treated as household waste. Instead it should be taken to the appropriate collection point for the recycling of electrical and electronic equipment. By ensuring this product is disposed of correctly, you will help prevent potential negative consequences for the environment and human health, which could otherwise be caused by inappropriate waste handling of this product.
  • Page 37: Pour Des Résultats Parfaits

    Veuillez prendre quelques instants pour lire cette notice afin d'utiliser au mieux votre appareil. ACCESSOIRES ET CONSOMMABLES Dans la boutique en ligne d'AEG, vous trouverez tout ce qu'il vous faut pour que vos appareils AEG fonctionnent parfaitement. Sans oublier une vaste gamme d'accessoires conçus et fabriqués selon les critères de qualité...
  • Page 38 Sommaire SOMMAIRE 39 Consignes de sécurité 42 Bandeau de commande 45 Première utilisation 45 Utilisation quotidienne 46 Conseils utiles 47 Entretien et nettoyage 48 En cas d'anomalie de fonctionnement 51 Caractéristiques techniques 51 Installation 52 Bruits 54 En matière de sauvegarde de l'environnement Les symboles suivants sont utilisés dans ce manuel:...
  • Page 39: Consignes De Sécurité

    Consignes de sécurité CONSIGNES DE SÉCURITÉ Pour votre sécurité et garantir une utilisation correcte de l'appareil, lisez attentivement cet- te notice, y compris les conseils et avertissements, avant d'installer et d'utiliser l'appareil pour la première fois. Pour éviter toute erreur ou accident, veillez à ce que toute personne qui utilise l'appareil connaisse bien son fonctionnement et ses fonctions de sécurité.
  • Page 40 Consignes de sécurité • Le circuit frigorifique de l’appareil contient de l’isobutane (R600a), un gaz naturel offrant un haut niveau de compatibilité avec l’environnement mais qui est néanmoins inflam- mable. Pendant le transport et l'installation de votre appareil, assurez-vous qu'aucune partie du circuit frigorifique n'est endommagée.
  • Page 41: Protection De L'environnement

    Consignes de sécurité • N'utilisez pas d'objets métalliques pour nettoyer l'appareil. • Contrôlez régulièrement l'orifice d'évacuation de l'eau de dégivrage dans le comparti- ment réfrigérateur Nettoyez-le, si besoin. Si l'orifice est bouché, l'eau s'écoulera en bas de l’appareil Installation Avant de procéder au branchement électrique, respectez scrupuleusement les instructions fournies dans cette notice.
  • Page 42: Bandeau De Commande

    Bandeau de commande BANDEAU DE COMMANDE Touche ON/OFF Touche Mode Touche OK Touche Température plus froide Thermostat, touche - Touche Température plus chaude Thermostat, touche + Écran Pour augmenter le volume défini lors de l'activation ou désactivation de boutons, appuyez simultanément sur le bouton Mode et le bouton de réglage de température (plus de froid) pendant plusieurs secondes.
  • Page 43: Mise À L'arrêt

    Bandeau de commande Mise à l'arrêt Pour mettre à l'arrêt l'appareil, procédez comme suit : 1. Appuyez sur la touche ON/OFF pendant 5 secondes. 2. L'affichage est désactivé. 3. Pour mettre l'appareil hors tension, débranchez-le électriquement. Réglage de la température La température de consigne du réfrigérateur est réglée en appuyant sur la touche de tem- pérature.
  • Page 44: Fonction Coolmatic

    Bandeau de commande 1. Appuyez sur la touche Mode jusqu'à ce que le symbole correspondant apparaisse. 2. Le voyant Sécurité enfants clignote. 3. Appuyez sur la touche OK pour confirmation. Le voyant Sécurité enfants apparaît. Pour désactiver la fonction : 1.
  • Page 45: Alarme Porte Ouverte

    Première utilisation La fonction s'éteint en choisissant une température différente pour le réfrigérateur. Alarme porte ouverte Une alarme sonore se déclenche si la porte reste ouverte pendant quelques minutes. Les conditions d'alarme porte ouverte sont indiquées par : • un voyant d'alarme clignotant •...
  • Page 46: Conseils Utiles

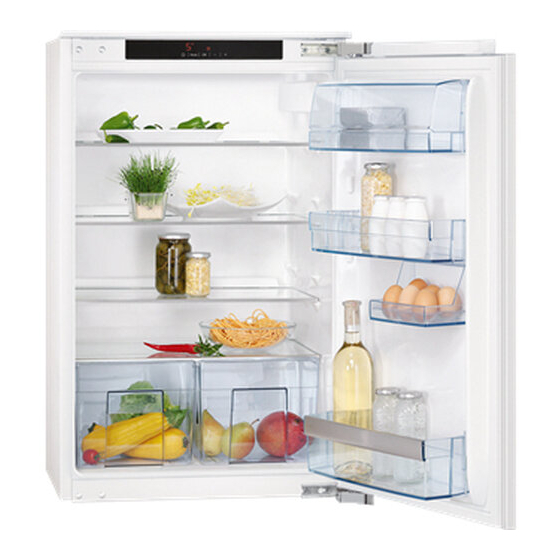
    Conseils utiles Emplacement des balconnets de la porte Selon la taille des emballages des aliments conser- vés, les balconnets de la porte peuvent être posi- tionnés à différentes hauteurs. Pour les ajuster, procédez comme suit : tirez progressivement le balconnet dans le sens des flèches pour le dégager, puis repositionnez-le selon les besoins.
  • Page 47: Conseils Pour La Réfrigération

    Entretien et nettoyage • Placez les aliments pour que l'air puisse circuler librement autour. Conseils pour la réfrigération Conseils utiles : Viande (tous les types) : enveloppez-la dans des sachets en plastique et placez-la sur la ta- blette en verre au-dessus du bac à légumes. La période de conservation est de 1 à...
  • Page 48: En Cas D'anomalie De Fonctionnement

    En cas d'anomalie de fonctionnement Après le nettoyage, rebranchez l'appareil. Dégivrage du réfrigérateur Le givre est automatiquement éliminé de l'évaporateur du compartiment réfrigérateur à chaque arrêt du compresseur, en cours d'utilisation normale. L'eau de dégivrage est collec- tée dans un récipient spécial situé à l'arrière de l'appareil, au-dessus du compresseur, d'où elle s'évapore.
  • Page 49 En cas d'anomalie de fonctionnement Problème Cause possible Solution Le compresseur fonction- Le thermostat n'est pas réglé Modifiez la position du thermos- ne en permanence correctement tat pour obtenir moins de froid La porte ne ferme pas de façon Vérifiez que les portes ferment hermétique ou n'est pas correc- correctement et que les joints tement fermée...
  • Page 50: Signal D'avertissement

    En cas d'anomalie de fonctionnement Problème Cause possible Solution De trop grandes quantités d'ali- Introduisez de plus petites quanti- ments à refroidir ont été intro- tés d'aliments à refroidir à la fois duites dans l'appareil en même temps L'air froid ne circule pas dans Activez la circulation d'air froid l'appareil dans l'appareil...
  • Page 51: Remplacement De L'ampoule

    Caractéristiques techniques Remplacement de l'ampoule 1. Débranchez l'appareil. 2. Poussez sur la partie mobile pour décro- cher le diffuseur de l'ampoule (1). 3. Enlevez le diffuseur (2). 4. Remplacez l'ampoule par une ampoule de même puissance spécifiquement conçue pour les appareils ménagers. 5.
  • Page 52: Bruits

    Bruits peuvent s'en trouver diminuées : les différentes classes climatiques existantes et les tempé- ratures ambiantes correspondantes en fonction du modèle de l'appareil sont les suivantes : Classe climatique Température ambiante +10 °C à +32 °C +16 °C à +32 °C +16 °C à...
  • Page 53 Bruits BRRR! BRRR! BLUBB! BLUBB! HISSS! HISSS! SSSRRR! SSSRRR!
  • Page 54: En Matière De Sauvegarde De L'environnement

    En matière de sauvegarde de l'environnement CRACK! CRACK! EN MATIÈRE DE SAUVEGARDE DE L'ENVIRONNEMENT Le symbole sur le produit ou son emballage indique que ce produit ne peut être traité comme déchet ménager. Il doit être remis au point de collecte dédié à cet effet (collecte et recyclage du matériel électrique et électronique).
  • Page 55: Zubehör Und Verbrauchsmaterialien

    Minuten Zeit zum Lesen, um seine Vorzüge kennen zu lernen. ZUBEHÖR UND VERBRAUCHSMATERIALIEN Im AEG Webshop finden Sie alles, was Sie für ein makelloses Aussehen und perfektes Funktionieren Ihrer AEG Geräte benötigen. Wir bieten auch ein umfangreiches Zubehörsortiment, das Ihre höchsten Qualitätsansprüche erfüllt, vom Profi-Kochgeschirr bis zu...
  • Page 56 Inhalt INHALT 57 Sicherheitshinweise 59 Bedienfeld 63 Erste Inbetriebnahme 63 Täglicher Gebrauch 64 Praktische Tipps und Hinweise 65 Reinigung und Pflege 67 Was tun, wenn … 69 Technische Daten 70 Montage 70 Geräusche 72 Hinweise zum Umweltschutz In dieser Benutzerinformation werden folgende Symbole verwendet: Wichtige Hinweise zur Sicherheit von Personen und Informationen zur...
  • Page 57: Sicherheitshinweise

    Sicherheitshinweise SICHERHEITSHINWEISE Lesen Sie zu Ihrer Sicherheit und für die optimale Geräteanwendung vor der Installation und dem Gebrauch des Gerätes die vorliegende Benutzerinformation aufmerksam durch, einschließlich der Ratschläge und Warnungen. Es ist wichtig, dass zur Vermeidung von Feh- lern und Unfällen alle Personen, die das Gerät benutzen, mit der Bedienung und den Sicher- heitsvorschriften vertraut sind.
  • Page 58 Sicherheitshinweise Achten Sie beim Transport und bei der Aufstellung des Gerätes darauf, nicht die Kompo- nenten des Kältekreislaufs zu beschädigen. Bei einer eventuellen Beschädigung des Kältekreislaufs: – Offene Flammen und Zündfunken vermeiden – Den Raum, in dem das Gerät installiert ist, gut lüften •...
  • Page 59: Montage

    Bedienfeld Montage Halten Sie sich für den elektrischen Anschluss strikt an die Anweisungen der betreffenden Abschnitte. • Kontrollieren Sie nach dem Auspacken das Gerät auf eventuelle Beschädigungen. Neh- men Sie das Gerät nicht in Betrieb, wenn es beschädigt ist. Melden Sie die Schäden um- gehend dem Händler, bei dem Sie es erworben haben.
  • Page 60: Einschalten Des Geräts

    Bedienfeld OK -Taste Taste zur Verringerung der Temperatur Einstelltaste „-“ des Timers Taste zur Erhöhung der Temperatur Einstelltaste „+“ des Timers Display Der voreingestellte Tastenton lässt sich durch gleichzeitiges Drücken der Taste Mode und der Taste zur Verringerung der Temperatur für mehrere Sekunden auf einen lauten Ton ein- stellen.
  • Page 61: Funktion Kindersicherung

    Bedienfeld • +5 °C für den Kühlschrank Die Temperaturanzeige zeigt die eingestellte Temperatur. Die eingestellte Temperatur wird innerhalb von 24 Stunden erreicht. Nach einem Stromausfall bleibt die eingestellte Temperatur gespeichert. Funktion Minute Minder Mit der Funktion Minute Minder wird ein akustischer Alarm für eine gewünschte Zeit einge- stellt.
  • Page 62 Bedienfeld Funktion COOLMATIC Wenn Sie zum Beispiel nach einem Einkauf größere Mengen warmer Lebensmittel einlegen möchten, empfehlen wir die Aktivierung der Funktion COOLMATIC, um die Produkte schnel- ler zu kühlen und zu vermeiden, dass die bereits im Kühlschrank befindlichen Lebensmittel erwärmt werden.
  • Page 63: Erste Inbetriebnahme

    Erste Inbetriebnahme Sobald der Normalzustand wieder hergestellt ist (Tür geschlossen), wird der Alarm ausge- schaltet. In der Alarmphase kann das akustische Alarmsignal durch Drücken einer beliebigen Taste ausgeschaltet werden. Die Lampe schaltet sich aus, wenn die Tür 7 Minuten lang geöffnet bleibt. ERSTE INBETRIEBNAHME Reinigung des Innenraums Bevor Sie das Gerät in Betrieb nehmen, beseitigen Sie den typischen "Neugeruch"...
  • Page 64: Praktische Tipps Und Hinweise

    Praktische Tipps und Hinweise Positionierung der Türeinsätze Die Türeinsätze können in verschiedener Höhe po- sitioniert werden, um Lebensmittelpackungen un- terschiedlicher Größe zu lagern. Gehen Sie dazu wie folgt vor: Ziehen Sie den Einsatz langsam in Pfeilrichtung, bis er sich herausheben lässt, und setzen Sie ihn dann nach Wunsch wieder ein.
  • Page 65: Reinigung Und Pflege

    Reinigung und Pflege • Decken Sie die Lebensmittel ab oder verpacken Sie diese entsprechend, besonders wenn diese stark riechen. • Legen Sie die Lebensmittel so hinein, dass um sie Luft frei zirkulieren kann. Hinweise für die Kühlung Tipps: Fleisch (alle Sorten): wickeln Sie Fleisch in lebensmittelechte Tüten und legen Sie diese auf die Glasablage über der Gemüseschublade.
  • Page 66: Abtauen Des Kühlschranks

    Reinigung und Pflege Reinigen Sie den Kondensator (schwarzes Gitter) und den Kompressor auf der Geräterück- seite mit einer Bürste. Dadurch verbessert sich die Leistung des Geräts und es verbraucht weniger Strom. Bitte achten Sie darauf, das Kühlsystem nicht zu beschädigen. Viele Haushaltsreiniger für Küchen enthalten Chemikalien, die den im Gerät verwendeten Kunststoff angreifen können.
  • Page 67: Was Tun, Wenn

    Was tun, wenn … WAS TUN, WENN … Während des Gerätebetriebs kann es zuweilen zu geringfügigen, aber dennoch unerfreuli- chen Problemen kommen, für die kein Techniker gerufen werden muss. In der folgenden Ta- belle finden Sie darüber Informationen, wie unnötige Reparaturkosten vermieden werden können.
  • Page 68 Was tun, wenn … Problem Mögliche Ursache Abhilfe Die Lampe ist defekt. Siehe hierzu „Austauschen der Lampe“. Es ist zu warm im Kühl- Der Temperaturregler kann Stellen Sie eine niedrigere Tempe- schrank. falsch eingestellt sein. ratur ein. Die Tür schließt nicht richtig Prüfen Sie, ob die Tür gut schließt oder ist nicht fest geschlossen.
  • Page 69: Austauschen Der Lampe

    Technische Daten • Beim Betrieb des Geräts ein Fehler aufgetre- ten ist. Wenn die Elektronik des Geräts die richtige Temperatur nicht feststellen kann, wird dies durch ein Symbol auf dem Tempe- ratur-Display angezeigt. • Das Gerät funktioniert weiterhin mit einem Ersatzprogramm, bis das Problem durch den Kundendienst vor Ort behoben wird.
  • Page 70: Montage

    Montage MONTAGE WARNUNG! Lesen Sie bitte die "Sicherheitshinweise" sorgfältig vor der Aufstellung des Geräts durch, um Gefahren für Sie selbst zu vermeiden und einen korrekten Betrieb des Geräts zu gewährleis- ten. Aufstellung Dieses Gerät kann auch in einer trockenen, gut belüfteten Garage oder in einem Keller in- stalliert werden, doch für eine optimale Leistung sollte dieses Gerät an einem Ort installiert werden, an dem die Umgebungstemperatur mit der Klimaklasse übereinstimmt, die auf dem Typschild des Geräts angegeben ist:...
  • Page 71 Geräusche HISSS! BRRR! BRRR! BRRR! BLUBB! BLUBB!
  • Page 72: Hinweise Zum Umweltschutz

    Hinweise zum Umweltschutz HISSS! HISSS! SSSRRR! SSSRRR! CRACK! CRACK! HINWEISE ZUM UMWELTSCHUTZ Das Symbol auf dem Produkt oder seiner Verpackung weist darauf hin, dass dieses Produkt nicht als normaler Haushaltsabfall zu behandeln ist, sondern an einem Sammelpunkt für das Recycling von elektrischen und elektronischen Geräten abgegeben werden muss.
  • Page 76 211621340-A-052011...

Table des Matières