Table des Matières
Publicité
Les langues disponibles
Les langues disponibles
Liens rapides
USING THE HOOD
Controls . . . . . . . . . . . . . . . . . . . . . . . . . . . . . . . . . .5
Chef Connect . . . . . . . . . . . . . . . . . . . . . . . . . . . . .5
CARE AND CLEANING
Filters . . . . . . . . . . . . . . . . . . . . . . . . . . . . . . . . . . . 6
Surfaces . . . . . . . . . . . . . . . . . . . . . . . . . . . . . . . . . .7
Lights . . . . . . . . . . . . . . . . . . . . . . . . . . . . . . . . . . . .7
TROUBLESHOOTING TIPS
. . . . . . . . . . . . . . . . . . . . . . . . . 22
Write the model and serial
numbers here:
Model # _________________
Serial # _________________
You can find them on a label
on the inside of the hood.
GE is a trademark of the General Electric Company. Manufactured under trademark license.
. . . . . . . . . . . . .3
. . . .8
. . . . . . . . . . 18
. . . . . . . . . . . . . . . . . . . . . . 23
. . . . . . . . . . . . . 24
OWNER'S MANUAL &
INSTALLATION
INSTRUCTIONS
UVW8301
UVW8361
FRANÇAIS
Pour consulter la
version française,
veuillez consulter le site
electromenagersge.ca/fr/
29-6324 5/19 MCC
Publicité
Chapitres
Table des Matières

Manuels Connexes pour GE UVW8301


Sommaire des Matières pour GE UVW8301
-
Page 1: Table Des Matières
Model # _________________ veuillez consulter le site electromenagersge.ca/fr/ Serial # _________________ You can find them on a label on the inside of the hood. GE is a trademark of the General Electric Company. Manufactured under trademark license. 29-6324 5/19 MCC... - Page 2 THANK YOU FOR MAKING GE APPLIANCES A PART OF YOUR HOME. Whether you grew up with GE Appliances, or this is your first, we’re happy to have you in the family. We take pride in the craftsmanship, innovation and design that goes into every GE Appliances product, and we think you will too.
-
Page 3: Safety Information
IMPORTANT SAFETY INFORMATION READ ALL INSTRUCTIONS BEFORE USING WARNING WARNING TO REDUCE THE RISK OF FIRE, TO REDUCE THE RISK OF INJURY ELECTRIC SHOCK OR INJURY TO PERSONS, TO PERSONS IN THE EVENT OF A RANGE TOP OBSERVE THE FOLLOWING: GREASE FIRE, OBSERVE THE FOLLOWING*: A. - Page 4 IMPORTANT SAFETY INFORMATION READ ALL INSTRUCTIONS BEFORE USING C. When cutting or drilling into wall or ceiling, do not WARNING TO REDUCE THE RISK OF A damage electrical wiring and other hidden utilities. RANGE TOP GREASE FIRE: D. Ducted fans must always be vented to the outdoors. A.
-
Page 5: Controls
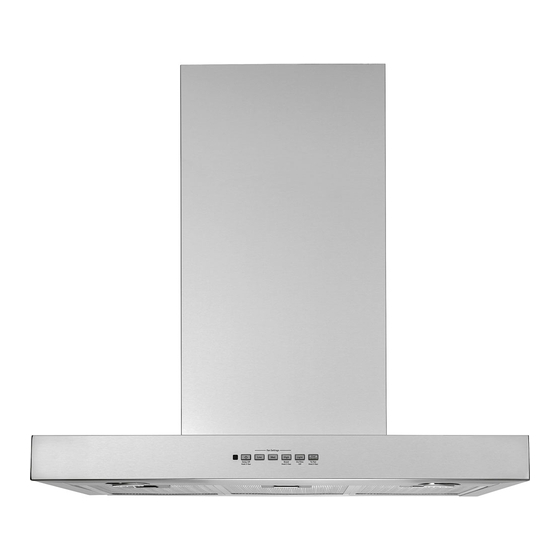
Controls Remote Control 1. Rangehood Control Panel: 5. Chef Connect: The control panel This is a Bluetooth pairing feature ® is located on the front of the canopy. The position for use with other compatible Chef Connect enabled and function of each control button are noted below. products on a cooktop or range. -
Page 6: Filters
Filters Be sure the circuit breaker is off and all surfaces are cool before cleaning or servicing any part of the vent hood. Metal Grease Filter The metal filters trap grease during cooking. The filters must ALWAYS be in place when the hood is in use. -
Page 7: Surfaces
Bar geappliances.ca. Keepers Friend Soft Cleanser™ follow the link below or scan the QR Code. www.barkeepersfriend.com/ge Lights CAUTION Allow lights to cool before touching. 1. Before attempting to replace the lights, make sure that the light switch is turned off. -
Page 8: Installation Instructions
Installation Wall Hoods Instructions UVW8301, UVW8361 “If you have questions, call GE Appliances at 800.GE.CARES (800.432.2737) or visit our website at: GEAppliances.com”. In Canada, call 800.561.3344 or visit geappliances.ca. BEFORE YOU BEGIN WARNING TO REDUCE THE RISK OF FIRE, Read these instructions completely and ELECTRIC SHOCK OR INJURY TO PERSONS, carefully. -
Page 9: Product Dimensions
Installation Preparation PRODUCT DIMENSIONS INSTALLATION CLEARANCES These vent hoods are designed to be installed onto 12-1/4″ a wall with no above cabinets. 4-5/8″ 25-3/4″ 24” Required Min. 13-13/16″ 36” Recommended Max. 2-3/4″ 20″ 30″ or 36″ The vent hood must be installed between the 24” required minimum and 36”... -
Page 10: Remove The Packaging
Installation Preparation TOOLS AND MATERIALS PLAN THE INSTALLATION REQUIRED (NOT SUPPLIED) CAUTION To reduce risk of fire and to properly exhaust air, be sure to duct the air outside. Do not vent exhaust air into spaces within walls or ceilings or into attics, crawl spaces, or garages. Safety glasses PARTS SUPPLIED FOR INSTALLATION Pencil and tape measure... -
Page 11: Installation Dimensions
Installation Preparation RANGE HOOD COMPONENTS INSTALLATION DIMENSIONS The Wall Hoods duct covers can be adjusted for A. Wall Hood G. Hood Mounting different ceiling heights depending on the distance B. Upper Duct Cover Bracket between the bottom of the hood and the cooktop C. - Page 12 Installation Preparation INSTALLATION HEIGHT TABLE (UX10DC93SS) (UX12DC93SS) (UX14DC93SS) Optional High Ceiling Duct Optional High Ceiling Duct Optional High Ceiling Duct Cover up to 10 ft. Cover up to 12 ft. Cover up to 14 ft. Installation Height with Supplied Duct Covers (not included with unit) (not included with unit) (not included with unit)
-
Page 13: Advance Planning
Installation Preparation ADVANCE PLANNING POWER SUPPLY Duct Install Planning IMPORTANT – (Please read carefully) ■ This hood is designed to be vented vertically WARNING through the ceiling. Use an 8" round duct. Use locally supplied elbows to vent horizontally FOR PERSONAL SAFETY, THIS APPLIANCE through the rear wall. - Page 14 Installation NEW CONSTRUCTION, PRE-PLANNING, OR REMODELING NOTE: For existing construction, skip to the section, Installing The Hood Bracket Mount. ■ Install horizontal wood supports between 2 wall ■ The bottom support aligns with the hood mounting studs that align with the vertical mounting height bracket.
- Page 15 Installation INSTALLING THE HOOD BRACKET MOUNT Hood Body Duct Covers and Power Supply 1. Put a protective covering over the surface 1. Place the duct cover bracket (E) on the wall so that below the location of the hood to protect from its edge is against the ceiling and level, making dirt and/or damage.
-
Page 16: Installing The Hood
Installation INSTALLING THE HOOD Remove the grease filters from 1. Securely press the damper on top of the exhaust the unit and set aside. The opening. Check that the damper opens freely. grease filters are removed by Attach damper to hood using machine screws pressing the handle in the front (J) provided. -
Page 17: Electrical Connection
Installation INSTALLING THE HOOD (Cont.) ELECTRICAL CONNECTION 1. Remove the electrical junction box cover. Vented Installations Connect the house ducting to the damper on the hood body. Seal all connections with duct tape (Do not use screws). Ceiling House Ducting 2. -
Page 18: Install Duct Covers
Installation INSTALL DUCT COVERS 1. For ducted and recirculation installation: Remove protective film from duct covers. Place the upper duct cover so that it slides down inside of the lower duct cover. NOTE: For recirculation, the upper duct cover must be installed with the exhaust vents on the top towards the ceiling. - Page 19 Using smaller duct pipe will cause reduced venting. Minimize the duct run length and number of transitions and elbows. GE Appliances service technicians cannot correct this issue if installed improperly. Fan fails to circulate Obstructions in duct work.
- Page 20 Notes 29-6324...
- Page 21 Notes 29-6324...
-
Page 22: Warranty
This warranty is extended to the original purchaser and any succeeding owner for products purchased for home use within the USA. If the product is located in an area where service by a GE Appliances Authorized Servicer is not available, you may be responsible for a trip charge or you may be required to bring the product to an Authorized GE Appliances Service location for service. -
Page 23: Accessories
Accessories Looking For Something More? GE Appliances offers a variety of accessories to improve your cooking and maintenance experiences! Refer to the Consumer Support page for phone numbers and website information. The following products and more are available: Parts Power Cord Kit... -
Page 24: Consumer Support
Have a question or need assistance with your appliance? Try the GE Appliances Website 24 hours a day, any day of the year! You can also shop for more great GE Appliances products and take advantage of all our on-line support services designed for your convenience. -
Page 25: Utilisation De La Hotte
Nº de série ______________ electromenagersge.ca/fr/ Ces numéros se trouvent sur une étiquette située à l'intérieur de la hotte. GE est une marque de commerce de General Electric Company. Fabriqué sous licence d'utilisation de marque de commerce. 29-6324 5/19 MCC... - Page 26 MERCI DE PERMETTRE À ÉLECTROMÉNAGERS GE DE FAIRE PARTIE DE VOTRE FOYER. Que vous ayez grandi avec des électroménagers GE ou qu'il s'agisse de votre premier appareil GE, nous sommes heureux de vous avoir dans la famille. Nous sommes fiers du savoir-faire, de l'innovation et du design qui font partie intégrante de tous les électroménagers GE que nous fabriquons, et nous pensons que vous le serez aussi.
-
Page 27: Consignes De Sécurité Importantes
CONSIGNES DE SÉCURITÉ IMPORTANTES LISEZ TOUTES LES INSTRUCTIONS AVANT D’UTILISER VOTRE APPAREIL. AVERTISSEMENT AVERTISSEMENT POUR DIMINUER LES RISQUES POUR RÉDUIRE LES RISQUES DE D'INCENDIE, DE CHOC ÉLECTRIQUE OU BLESSURES S'IL SURVIENT UN FEU DE GRAISSE DE BLESSURES, SUIVEZ LES CONSIGNES SUR LA CUISINIÈRE, SUIVEZ LES CONSIGNES SUIVANTES : SUIVANTES* :... -
Page 28: Pour Retirer La Pellicule Protectrice Et Le Ruban Adhésif D'emballage
CONSIGNES DE SÉCURITÉ IMPORTANTES LISEZ TOUTES LES INSTRUCTIONS AVANT D’UTILISER VOTRE APPAREIL. C. Lorsque vous effectuez des découpes ou que vous AVERTISSEMENT POUR RÉDUIRE LES RISQUES DE percez dans un mur ou un plafond, n'endommagez FEU DE GRAISSE SUR LA CUISINIÈRE : pas le câblage électrique ou les installations des services publics. -
Page 29: Commandes
Commandes Télécommande Panneau de commande de la hotte : Chef Connect : Il s'agit d'une fonction Bluetooth Le panneau utilisable avec les autres produits compatibles comme de commande est situé à l'avant de la hotte. La position et la fonction de chaque bouton de commande sont indiquées une surface de cuisson ou une cuisinière. -
Page 30: Filtres
Filtres Assurez-vous que le disjoncteur électrique est en position « fermée » et que toutes les surfaces sont froides avant de nettoyer ou de réparer la hotte. Filtre à graisse métallique Les filtres métalliques retiennent la graisse émise pendant la cuisson. Ce filtre doit TOUJOURS être en place lors de l'utilisation de la hotte. -
Page 31: Surfaces
échantillon de Bar Keepers Friend www.electromenagersge.ca. Soft Cleanser cliquez sur le lien ci-dessous ou scannez le code QR. www.barkeepersfriend.com/ge Lumières ATTENTION Laissez le temps aux lumières de refroidir avant de les manipuler. 1. Avant de remplacer les lumières, assurez-vous que le bouton d'éclairage est en position d'arrêt. -
Page 32: Instructions D'installation
Instructions Hottes murales d’installation UVW8301, UVW8361 « Si vous avez des questions, composez le 1-800-GE-CARES (1-800-432-2737) ou consultez notre site Web : GEAppliances.com ». Au Canada, téléphonez au 1-800-561-3344 ou visitez www.electromenagersge.ca. AVANT DE COMMENCER AVERTISSEMENT POUR DIMINUER LES RISQUES Lisez attentivement toutes ces instructions. -
Page 33: Préparatifs Avant L'installation
Préparatifs avant l'installation DIMENSIONS DU PRODUIT DÉGAGEMENTS POUR L'INSTALLATION 12-1/4 po Ces hottes d'évacuation ont été conçues pour être (31,2 cm) installées sur un mur sans armoire au-dessus. 4-5/8 po (11,7 cm) 25-3/4 po (65,4 cm) 13-13/16 po Min. requis : 24 po (61 cm) (35,1 cm) Max. -
Page 34: Outils Et Matériaux Nécessaires
Préparatifs avant l'installation OUTILS ET MATÉRIAUX NÉCESSAIRES PLANIFIER L'INSTALLATION (NON FOURNIS) ATTENTION Pour réduire les risques d'incendie et assurer l'évacuation adéquate de l'air, assurez-vous d'acheminer les conduits vers l'extérieur. N’évacuez pas l’air dans des espaces intra-muraux, dans le plafond, dans le grenier, Lunettes de sécurité... -
Page 35: Dimensions D'installation
Préparatifs avant l'installation COMPOSANTS DE LA HOTTE DE CUISINIÈRE DIMENSIONS D'INSTALLATION Les cache-conduits de la hotte murale peuvent A. Hotte murale G. Support de montage être ajustés pour des plafonds en fonction de la B. Cache-conduit de la hotte distance entre le bas de la hotte et la surface de supérieur H. - Page 36 Préparatifs avant l'installation TABLEAU DES HAUTEURS D'INSTALLATION (UX10DC93SS) (UX12DC93SS) (UX14DC93SS) Cache-conduit facultatif pour Cache-conduit facultatif pour Cache-conduit facultatif pour plafond haut, de 10 pi (3,1 m) ou plafond haut, de 12 pi (3,7 m) ou plafond haut, de 14 pi (4,3 m) ou moins moins moins...
-
Page 37: Planification Préliminaire
Préparatifs avant l'installation PLANIFICATION PRÉLIMINAIRE ALIMENTATION ÉLECTRIQUE Planification de l'installation du conduit IMPORTANT – (veuillez lire attentivement) ■ Cette hotte est destinée à être ventilée verticalement AVERTISSEMENT à travers le plafond. Conduit rond de 8 po (20,3 cm) Utilisez des coudes disponibles en quincaillerie pour POUR VOTRE SÉCURITÉ, CET APPAREIL DOIT ÊTRE évacuer l'air horizontalement à... -
Page 38: Nouvelle Construction, Pré-Planification Ou Rénovation
Installation NOUVELLE CONSTRUCTION, PRÉ-PLANIFICATION OU RÉNOVATION REMARQUE : Pour les constructions existantes, passez à la section Installation du support de la hotte. ■ Installez des supports en bois horizontaux entre ■ Le support inférieur s'aligne sur le support de 2 montants muraux alignés avec les emplacements montage de la hotte. -
Page 39: Installation Du Support De La Hotte
Installation INSTALLATION DU SUPPORT DE LA HOTTE Caisson de la hotte Cache-conduits et alimentation électrique 1. Recouvrez la surface située au-dessous de 1. Placez l'autre support du cache-conduit (E) contre l'emplacement de la hotte pour la protéger des le mur de telle sorte que son rebord soit, à niveau, saletés et/ou des dommages. -
Page 40: Installation De La Hotte
Installation INSTALLATION DE LA HOTTE Enlevez les filtres à graisse 1. Poussez fermement le registre sur le dessus de de la hotte et mettez-les de l'ouverture de la sortie de l'évacuation. Vérifiez que côté. Pour enlever les filtres à le registre s'ouvre librement. Fixez le registre à la graisse, appuyez sur la poignée hotte à... -
Page 41: Installation De La Hotte (Suite)
Installation INSTALLATION DE LA HOTTE (suite) BRANCHEMENT ÉLECTRIQUE 1. Retirez le couvercle de la boîte de jonction. Installations avec système de ventilation 2. Retirez la plaque sectionnable de la boîte Raccordez le conduit de la maison au registre sur électrique. le caisson de la hotte. -
Page 42: Installation Des Cache-Conduits
Installation INSTALLATION DES CACHE-CONDUITS 1. Pour une installation avec conduit de type recyclage de l'air : Enlevez le film protecteur des couvre-conduits. Placez le cache-conduit du conduit supérieur afin qu'il glisse vers le bas à l'intérieur du cache-conduit du conduit inférieur. REMARQUE : Pour le recyclage de l'air, le cache- conduit supérieur peut être installé... -
Page 43: Causes Possibles
Minimisez la longueur du conduit et le nombre de transitions et de coudes. Les techniciens de service de GE Appliances ne peuvent corriger ce problème si l'installation n'a pas été effectuée correctement. Le ventilateur ne Le conduit est obstrué. - Page 44 Notes 29-6324...
- Page 45 Notes 29-6324...
-
Page 46: Garantie
Au Canada : Cette garantie est offerte à l’acheteur initial, ainsi qu’à tout propriétaire subséquent d’un produit acheté au Canada en vue d’une utilisation domestique au Canada. Si le produit se situe dans une zone où aucun réparateur agréé par GE n'est disponible, vous devrez peut-être assumer les frais de déplacement de celui-ci ou apporter le produit à... -
Page 47: Accessoires
Accessoires Vous manquez de quelque chose? Électroménagers GE propose une panoplie d'accessoires qui permettent d'améliorer votre expérience de cuisson et de nettoyage! Reportez-vous à la page du service à la clientèle pour obtenir les numéros de téléphone et des informations sur le site Web. -
Page 48: Service À La Clientèle
Web àelectromenagersge.ca ou téléphoner au 1-800-661-1616. Pour nous joindre Si vous n’êtes pas satisfait du service après-vente d'Électroménagers GE, communiquez avec nous sur notre site Web en fournissant tous les détails et votre numéro de téléphone, ou écrivez à : Aux États-Unis General Manager, Customer Relations | GE Appliances, Appliance Park | Louisville, KY 40225...