Table des Matières

Publicité

Les langues disponibles

Les langues disponibles

Liens rapides

Instruction Manual (Pages 2–33)
Bedienungsanleitung (Seiten 34–65)
Manuel d'utilisation (Pages 66–97)
Manual de instrucciones (Páginas 98–129)
E
G
F
S

Publicité

Table des Matières
loading

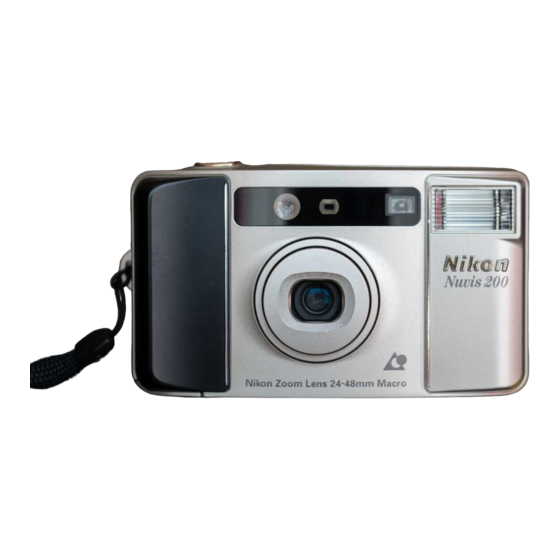
Sommaire des Matières pour Nikon Nuvis 200

  • Page 1 Instruction Manual (Pages 2–33) Bedienungsanleitung (Seiten 34–65) Manuel d’utilisation (Pages 66–97) Manual de instrucciones (Páginas 98–129)
  • Page 2 Foreword Thank you for purchasing the Nikon Nuvis 200 camera. Your new Nikon camera employs the Advanced Photo System (IX240 system). The symbol * appears on all Advanced Photo System (APS) format cameras. Be sure to read this instruction manual thoroughly before use, and keep it close at hand.
  • Page 3: Accessories

    Accessories Check that you have the item shown below before using your camera. Attaching the wrist strap Wrist strap Attach the wrist strap by inserting it through the slot as shown. Optional accessories •Camera case CS-L21...
  • Page 4: Your Nikon Camera Features

    Your Nikon camera features: ■ Choice of three print types (C, H, P), which can be mixed on the same roll. P. 14 C-type P-type (classic) (panorama) H-type (wide-vision) Aspect ratio = 2 : 3 Aspect ratio = 1 : 3 Aspect ratio = 9 : 16 ■...
  • Page 5: Table Des Matières

    Camera parts ................6-7 Advanced operation LCD panel indications ..............7 How to use focus lock ..............20 Tips on using the Nuvis 200 ............8 Selecting the flash mode ..............21 Getting started Auto flash photography ..............21 Flash cancel mode ................. 22 Installing the battery / Checking battery power .........
  • Page 6: Camera Parts

    Camera parts 1 Lens cover (-P. 9) 2 Lens 3 Auto exposure metering window 4 Viewfinder window (-P. 14) 5 Flash (-P. 21) 6 LCD panel 7 CHP selector (-P. 14) 8 Mid-roll rewind button (-P. 19) 9 Autofocus windows 10 Red-eye reduction lamp (-P.
  • Page 7: Lcd Panel Indications

    14 Viewfinder eyepiece (-P. 14) 15 Red LED (-P. 14) 16 Battery chamber lid (-P. 9) 17 Tripod socket (-P. 25) 18 Cartridge chamber cover (-P. 10) 19 Power switch (-P. 9) 20 Zoom lever (-P. 15) 21 Cartridge lock release lever (-P. 10) 22 Wrist strap slot (-P.
  • Page 8: Tips On Using The Nuvis 200

    IX240 film cartridges may not •Do not drop the camera or hit it against a hard surface. be available. Nikon cannot be held responsible for malfunctions caused by using the Nuvis 200 in ways not specified in this manual.
  • Page 9: Getting Started

    Installing the battery/ Getting started Checking battery power Install the battery. Turn the camera on. Check battery power. Open the battery chamber lid ▼ •The lens cover automatically opens and •If “ ” blinks or nothing appears on the lens moves out to the W (wide- the LCD panel, the battery is exhausted using a coin or the like.
  • Page 10: Loading The Film

    Loading the film Check that the letter “´ ” is Push the cartridge lock Insert a film cartridge in the release lever in the direction cartridge chamber and close visible on the LCD panel. of the arrow to open the the cover.
  • Page 11: Ix240 Film Cartridge

    IX240 film cartridge Processed film inside the cartridge* Unexposed film* Data disk Partially exposed film* < Fully exposed but unprocessed film* Lightlock door Irreversible Processed Indicator Lightlock door drive *Visual Exposure Indication (VEI) Cartridge spool Check that “ ”and the •Available film cartridges: 40-exposure, Notes on handling IX240 film 25-exposure, and 15-exposure films.
  • Page 12: Data Recording Function

    Data recording function MODE MODE ADJUST ADJUST Set your preferable display mode. •Press the MODE button to select one of five displays. Each time the button is pressed, the display changes in the order indicated: Turn the camera off and press ▼...
  • Page 13: Basic Operation

    Holding the camera Shutter release Basic operation properly operation •When holding the camera horizontally, •When holding the camera vertically, •Lightly press the shutter release button keep your elbows against the body with make sure that the flash is on top as to achieve focus and exposure and the both hands on the camera as shown.
  • Page 14: Viewfinder Indications

    Viewfinder indications Selecting a print type Available picture area Areas cut off in the final print differ depending on the print type (C/H/P). C-type (classic) Aspect ratio = 2 : 3 1Autofocus frame mark Use the CHP selector to select your H-type Center this mark on the subject.
  • Page 15: Zooming

    Zooming Move the zoom lever in the direction Move the zoom lever in the direction Look through the viewfinder (48mm) to extend the lens for taking (24mm) to retract the lens for taking and compose the picture by telephoto pictures. wide-angle pictures.
  • Page 16: Focusing And Shooting

    Focusing and shooting Focus on the subject. Gently depress the shutter release Compose the picture. button all the way to take a picture. Lightly press the shutter release ▼ •Center the autofocus frame mark on •If there is not enough light, the red LED button.
  • Page 17: Difficult-To-Focus Subjects

    Difficult-to-focus subjects: The following subjects may be too difficult to focus. In these cases, use focus lock (- P. 20) by focusing on another subject equidistant from the camera. • Subjects too small to fully cover the autofocus frame mark •...
  • Page 18: Removing The Film

    Removing the film The film starts rewinding Make sure the blinking letter “´” Open the cartridge chamber automatically. is visible on the LCD panel. cover and remove the film. •At the end of the film roll, the film •When the film is completely rewound, the Do not open the cartridge chamber rewinds automatically.
  • Page 19: Take The Exposed Film Cartridge To A Photo Lab

    Take the exposed film To rewind the film in mid-roll cartridge to a photo lab. •We recommend bringing your film Press the button using Remove the film. cartridge to a photo lab that displays an the point of ball-point pen or “Authorized Photo Lab Mark”...
  • Page 20: Advanced Operation

    Advanced operation How to use focus lock When your main subject is not in the center of the frame: Compose the picture. Center the autofocus frame Recompose the picture and shoot. mark on the main subject. •When the main subject is outside the ▼...
  • Page 21: Selecting The Flash Mode

    Selecting the flash mode Auto flash photography The flash automatically fires when the available light is low. ADJUS Press the button until the desired flash mode indicator appears. •For details, see the reference page of each Turn the camera on. Check that the red LED flash mode.
  • Page 22: Flash Cancel Mode

    Flash cancel mode Anytime flash mode Use this mode where flash photography is prohibited or to achieve a natural Use this mode to fire the flash intention lighting effect in night scenes. MODE MODE ADJUST ADJUST Press the button until Compose the picture and Press the button until “...
  • Page 23: Slow Sync Flash Mode

    Slow sync flash mode ally regardless of the available light. Use this mode to obtain the correct exposure for both the main subject and background in low-light situations or at night. ADJUS Compose the picture and Press the button until Compose the picture and shoot.
  • Page 24: Red-Eye Reduction Mode

    Red-eye reduction mode In flash photography, the subject’s eyes may sometimes appear bright red. To reduce the “red-eye” effect, use this mode. ADJUS Press the button until “ ” Compose the picture and Check that the red LED lights up before shooting. appears on the LCD panel.
  • Page 25: Self-Timer Operation

    Self-timer operation Infinity focus When you want to include yourself in the picture: Useful for shooting landscapes, or distant scenes through glass ADJUS ADJUST Press the button until Compose the picture and Press the $ button until “ ”appears on the depress the shutter release “$ # ”...
  • Page 26: Setting The Date And Time

    Setting the date and time MODE ADJUS ADJUST ADJUS Entering the setting mode Setting the “year” Setting the “month” ▼ Turn the camera off and ▼ Press the ADJUST button to ▼ Press the SEL button. The press the SEL button for set the correct year.
  • Page 27 ADJUS Getting out of the setting When the battery is replaced mode •Note that “ - - - ” appears on the LCD panel when the battery is replaced. ▼ Press the SEL button and the •No data will be recorded if “ - - - ” corrected date appears on the appears on the LCD.
  • Page 28: Troubleshooting

    Troubleshooting Check the cause of the trouble using the following chart. It may save you a trip to your nearest Nikon service center. Problem Check this Ref. page The shutter cannot be •If the red LED blinks when the shutter release button is pressed lightly, the flash is being charged 14, 21 and the shutter is locked.
  • Page 29 •If no indicators appear after installing a new battery, the camera is broken. In this case, – contact your nearest Nikon dealer or a camera shop for repair. A characteristic of electronic camera In rare cases, when strong static electricity or the like is applied to the camera, the camera may not work properly.
  • Page 30: Specifications

    Type of camera Focusing IX240 (Advanced Photo System) type autofocus AE lens-shutter camera with Active-infrared autofocus system; Activated by lightly pressing shutter release Nikon Zoom 24–48mm f/4.5–8.4 lens button; Distance range from 0.6m (2 ft.) to infinity. Usable film Focus lock IX240 System (Advanced Photo System) film cartridge (16.7 x 30.2mm)
  • Page 31 Film advance Power source Film is automatically thrust to the first frame after inserting cartridge; Film One 3V lithium battery CR2 automatically advances by one frame after each shot; Auto rewind at the end of Data recording function film roll; Mid-roll rewind function available Magnetic recording system;...
  • Page 32: For Safe Handling Of The Camera (Warning/Caution)

    Remove the battery and take the camera, as this may damage the camera, cause it to catch the camera to your local Nikon dealer for repair. on fire, or harm your health. •If you detect smoke coming from the camera, stop operation immediately and turn the camera off.
  • Page 33 CAUTION •Do not operate the camera with wet hands, as this may cause an •Do not walk around while looking through the viewfinder, as electric shock. you might lose your step, fall down, and injury yourself. •Keep the camera out of reach of children. This will prevent them •Do not throw used batteries into a fire.
  • Page 34 Vorwort Herzlichen Glückwunsch zu Ihrer neuen Nikon Nuvis 200 für das Advanced Photo System (IX240). Kameras für das Advanced Photo System (APS) sind durch das Symbol T* gekennzeichnet. Bitte lesen Sie diese Anleitung vor Benutzung der Kamera aufmerksam durch und bewahren Sie sie gut auf.
  • Page 35 Zubehör Die nachstehend aufgeführte Position gehört zum Lieferumfang der Kamera. Anbringung der Trageschnur Trageschnur Die Trageschnur wie gezeigt durch die Halterung an der Kamera führen und sichern. Getrennt lieferbares Zubehör •Etui CS-L21...
  • Page 36 Die besonderen Merkmale Ihrer Nuvis 200 : ■ Drei vor jeder Aufnahme wählbare Bildformate (C, H, P) S. 46 Classic-Bild Breitbild Panorama-Bild Seitenverhältnis 2 : 3 Seitenverhältnis 9 : 16 Seitenverhältnis 1 : 3 ■ Das Tweifach-Zoomobjektiv überstreicht den Brennweitenbereich von 24 mm bis 48 mm.
  • Page 37 Inhalt Vorwort ..................34 Entnehmen des Films..............50 Zubehör ..................35 Entwicklung des Films ..............51 Die besonderen Merkmale Ihrer Nuvis 200 ........36 Rückspullung teilbelichteter Filme ..........51 Teilebezeichnungen ..............38-39 Funktionen für Fortgeschrittene Anzeigedaten der LCD ..............39 Schärfenspeicherung ..............52 Tips zum Gebrauch der Nuvis 200 ..........
  • Page 38: Teilebezeichnungen

    Teilebezeichnungen 1 Objektivabdeckung (-S. 41) 2 Objektiv 3 Belichtungsmeßfenster 4 Sucherfenster (-S. 46) 5 Blitzgerät (-S. 53) 6 LCD-Feld 7 Formatwähler (-S. 46) 8 Taste zur Rückspulung teilbelichteter Filme (-S. 51) 9 Autofokus-Fenster 10 Lampe zur Verringerung roter Augen (-S. 56) 11 Auslöser (-S.
  • Page 39: Anzeigedaten Der Lcd

    14 Sucherokular (-S. 46) 15 Rote LED (-S. 46) 16 Batteriefachdeckel (-S. 41) 17 Stativbuchse (-S. 57) 18 Patronenfachdeckel (-S. 42) 19 Hauptschalter (-S. 41) 20 Zoomhebel (-S. 47) 21 Entriegelung des Filmpatronenfachs (-S. 42) 22 Halterung für Trageschnur (-S. 35) Anzeigedaten der LCD 1 Anzeige von Datum und Uhrzeit (-S.
  • Page 40: Tips Zum Gebrauch Der Nuvis 200

    Blitzgerät und Kamera auf. Lassen Sie der Kamera deshalb Zeit, •Bei Auslandsreisen empfiehlt sich die Mitnahme einer abzukühlen, bevor Sie die Aufnahmen fortsetzen. ausreichenden Anzahl von Filmen IX240. Nikon übernimmt keine Haftung für Betriebsstörungen, die sich aus unsachgemäßer Benutzung der Nuvis 200 ergeben.
  • Page 41: Aufnahmevorbereitungen

    Aufnahmevorbereitungen Einlegen der Batterie/Batterieprüfung Setzen Sie die Batterie ein. Schalten Sie die Kamera ein. Prüfen Sie den Batteriezustand. ▼ Öffnen Sie den •Die Objektivabdeckung wird •Blinkt “ ” oder bleibt die LCD leer, Batteriefachdeckel mit einer automatisch geöffnet, und das Objektiv ist die Batterie erschöpft und muß...
  • Page 42: Einlegen Des Films

    Einlegen des Films Vergewissern Sie sich davon, Schieben Sie die Schieben Sie eine Filmpatrone in das Fach, Entriegelung des daß “´ ” in der LCD und schließen Sie den Filmpatronenenfachs in erscheint. Deckel. Pfeilrichtung, um den •Erscheint eine Zahl im Bildzähler der Patronenfachdeckel zu •Die Kamera ist für IX240-Film konstruiert;...
  • Page 43: Die Filmpatrone Ix240

    Die Filmpatrone IX240 Film entwickelt* Unbelichteter Film* Datenscheibe Teilbelichteter Film* < Film voll belichtet, jedoch noch unentwickelt* Lichtschleuse Mechanische Doppelentwicklungssperre Lichtschleusenantrieb *Filmstatusanzeige (VEI) Patronenspule Vergewissern Sie sich, “ ” •IX240-Film ist in Patronen zu 40, 25 Hinweise zur Behandlung der und 15 Aufnahmen erhältlich.
  • Page 44: Datenaufzeichnung

    Datenaufzeichnung MODE MODE ADJUST ADJUST Stellen Sie die gewünschte •Wählen Sie eine der fünf möglichen Schreibweise durch Druck auf die MODE-Taste. Bei jedem Druck schaltet die Anzeige wie folgt durch: Schreibweise des Datums Jahr/Monat/Tag Monat/Tag/Jahr Tag/Monat/Jahr ein. 年  月  日 月...
  • Page 45: Normaler Aufnahmebetrieb Richtige Kamerahaltung

    Richtige Normaler Aufnahmebetrieb Auslösung Kamerahaltung •Für Aufnahmen im Querformat nehmen •Halten Sie die Kamera für •Tippen Sie den Auslöser leicht an, um Sie die Kamera wie abgebildet in beide Hochformataufnahmen so, daß sich der Belichtungsmessung und Hände und stützen die Ellenbogen am Blitz wie abgebildet oben befindet.
  • Page 46: Sucheranzeige

    Wahl des Bildformats Sucheranzeige Verfügbare Bildformate Der Sucher zeigt das Bildfeld je nach dem gewählten Bildformat. Classic-Bild Seitenverhältnis = 2 : 3 1Autofokus-Meßfeld: Legen Sie dieses Vor jeder Aufnahme kann das Feld zur Scharfeinstellung auf das Breitbild gewünschte Bildformat gewünschte Objekt. Seitenverhältnis = 9 : 16 eingestellt werden (C, H, P).
  • Page 47: Brennweiteneinstellung (Zoomen)

    Brennweiteneinstellung (Zoomen) Für Weitwinkelaufnahmen schieben Sie Für Tele-Aufnahmen schieben Sie den Blicken Sie in den Sucher, und den Zoomhebel in Richtung (24 mm). Zoomhebel in Richtung (48 mm). wählen Sie den Bildausschnitt durch Betätigung des Zoomhebels. Geben Sie den Zoomhebel frei, ▼...
  • Page 48: Scharfeinstellung Und Aufnahme

    Scharfeinstellung und Aufnahme Stellen Sie scharf. Drücken Sie den Auslöser Wählen Sie den zur Aufnahme sanft durch. Bildausschnitt. ▼ Tippen Sie den Auslöser an. •Bei unzureichenden Lichtbedingungen •Bringen Sie das AF-Meßfeld mit dem •Wenn die Schärfeneinstellung leuchtet die rote LED auf, und der Blitz Hauptobjekt zur Deckung.
  • Page 49: Grenzfälle Der Automatischen Scharfeinstellung

    Grenzfälle der automatischen Scharfeinstellung In den nachstehend genannten Fällen kann der Kamera eine Scharfeinstellung unmöglich sein. Speichern Sie in einem solchen Fall die Schärfe auf ein Ersatzobjekt in gleicher Entfernung. (- S. 52) • Das Autofokus-Meßfeld wird nicht vom bildwichtigen Objekt ausgefüllt. •...
  • Page 50: Entnehmen Des Films

    Entnehmen des Films Die Filmrückspulung setzt Vergewissern Sie sich, daß Öffnen Sie den Patronenfachdeckel, automatisch ein. und entnehmen Sie den Film. “´” in der LCD blinkt. •Am Filmende schaltet die Kamera Öffnen Sie den Patronenfachdeckel erst, •Sobald der Film vollständig zurückgespult nachdem “´”...
  • Page 51: Entwicklung Des Films

    Entwicklung des Films Rückspulung teilbelichteter Filme Drücken Sie die Taste Entnehmen Sie den Film. •Wir empfehlen, den Film zur Bearbeitung einem Labor zu übergeben, der Spitze eines das sich durch das obenstehende Logo Öffnen Sie das Patronenfach. ▼ Kugelschreibers o.ä. als autorisiertes Fotolabor für das Entnehmen Sie die Filmpatrone.
  • Page 52: Funktionen Für Fortgeschrittene Schärfenspeicherung

    Funktionen für Schärfenspeicherung Fortgeschrittene Wenn sich das Hauptobjekt nicht in der Bildmitte befindet, verfahren Sie wie folgt: Wählen Sie den Bringen Sie das AF- Schwenken Sie auf den endgültigen Ausschnitt, und lösen Sie aus. Meßfeld mit dem Bildausschnitt. ▼ Der Auslöser muß nach der Schärfen- Hauptobjekt zur Deckung.
  • Page 53: Wahl Der Blitzbetriebsart

    Wahl der Blitzautomatik Blitzbetriebsart Bei unzureichenden Lichtbedingungen wird automatisch der Blitz zugeschaltet. ADJUS Drücken Sie die Taste J , bis die gewünschte Blitzbetriebsart angezeigt wird. Schalten Sie die Kamera ein. Vergewissern Sie sich davon, das die •Einzelheiten finden Sie auf den für die einzelnen rote LED leuchtet, und lösen Sie aus.
  • Page 54: Blitzabschaltung

    Blitz bei jeder Aufnahme Blitzabschaltung Diese Betriebsart eignet sich für Aufnahmen an Orten, an denen Blitzen verboten In dieser Einstellung zündet der Blitz auch ist, bzw. zur Erhaltung der natürlichen Lichtstimmung bei Nachtaufnahmen. MODE MODE ADJUST ADJUST Drücken Sie die Taste Wählen Sie den Drücken Sie die Taste Bildausschnitt, und lösen...
  • Page 55: Langzeitsynchronisation

    Langzeitsynchronisation In dieser Betriebsart ergibt sich bei schwachem Licht bzw. bei Nacht eine bei gutem Licht bei jeder Auslösung. ausgewogene Belichtung von Vorder- und Hintergrund. ADJUS Drücken Sie die Taste Wählen Sie den Bildausschnitt, Wählen Sie den Bildausschnitt, und lösen Sie aus. und lösen Sie aus.
  • Page 56: Verringerung Roter Augen

    Verringerung roter Augen Bei Blitzaufnahmen erscheinen die Augen der fotografierten Personen zuweilen rot. Dieser Effekt kann mit dieser Betriebsart verringert werden. ADJUS Drücken Sie die Taste , bis Wählen Sie den Vergewissern Sie sich davon, daß die “ ” in der LCD erscheint. Bildausschnitt, und tippen rote LED leuchtet, bevor Sie auslösen.
  • Page 57: Selbstauslöser

    Schärfeeinstellung auf Unendlich Selbstauslöser Damit Sie selbst im Bild nicht fehlen. Für Landschaftsaufnahmen oder Aufnahmen durch Fensterglas in die Ferne. ADJUS ADJUST Drücken Sie die Taste , bis Wählen Sie den Drücken Sie die Taste $ so Bildausschnitt, und tippen “...
  • Page 58: Einstellung Das Datums Und Der Uhrzeit

    Einstellung des Datums und der Uhrzeit MODE ADJUS ADJUST ADJUS Aktivierung des Einstellung des Jahres Einstellung des Monats Einstellmodus Drücken Sie die SEL-Taste. ▼ ▼ Stellen Sie die Jahreszahl Schalten Sie die Kamera aus ▼ Die Monatszahl beginnt zu durch Druck auf die ADJUST- und halten Sie die Taste SEL blinken.
  • Page 59 ADJUS Verlassen des Batteriewechsel Einstellmodus •Beachten Sie, daß nach einem Batteriewechsel “ - - - ” in der LCD Bei Druck auf die SEL-Taste ▼ erscheint. erscheint das eingegebene •Bei Anzeige “ - - - ” werden keine Datum in der LCD. Daten aufgezeichnet.
  • Page 60: Fehlersuche

    Fehlersuche Bitte prüfen Sie bei vermeintlichen Fehlern zunächst anhand der nachstehenden Hinweise, ob Sie das Problem nicht leicht selbst beheben können. Problem Abhilfe Siehe Seite •Wenn bei leicht gedrücktem Auslöser die rote LED blinkt, lädt das Blitzgerät auf, und der Verschluß...
  • Page 61 •Wenn auch nach dem Einlegen einer neuen Batterie keine Anzeige erscheint, liegt eine – Betriebsstörung vor. Wenden Sie sich an Ihren Nikon Händler oder den Nikon Kundendienst. Eine Besonderheit elektronischer Kameras In seltenen Fällen kann es vorkommen, daß die Kamera durch starke statische Aufladung oder ähnliche Ursachen nicht einwandfrei funktioniert.
  • Page 62: Technische Daten

    Technische Daten Kameratyp Scharfeinstellung IX240-Autofokus-Kamera für das Advanced Photo System mit Aktives Infrarot-Autofokus-System; Aktivierung durch Antippen des Auslösers; Belichtungsautomatik, Zentralverschluß und Nikon Zoomobjektiv Einstellbereich 0,6 m bis unendlich 24-48 mm / 4,5-8,4 Schärfenspeicherung Geeignet für Schärfe bleibt gespeichert, solange Auslöser angetippt gehalten wird.
  • Page 63 Filmtransport Spannungsquelle Film wird nach dem Einlegen automatisch aus der Patrone ausgestoßen und Eine 3-V-Lithium-Batterie CR2 nach jeder Aufnahme weitertransportiert; automatische Rückspulung am Datenaufzeichnung Filmende; Rückspulung teilbelichteter Filme möglich Magnetisch; Datum/ Datenanzeige in LCD in fünf Formaten: Jahr/Monat/Tag, Eingebautes Blitzgerät Stunde/Minute, Monat/Tag/Jahr, Tag/Monat/Jahr bzw.
  • Page 64: Sicherheitshinweise

    Gesundheitsschäden zu vermeiden. elektrischen Schlägen führen könnte. Entnehmen Sie in einem solchen ZUR BESONDEREN BEACHTUNG: Fall die Batterie, und übergeben Sie die Kamera Ihrem Nikon Händler zur •Benutzen Sie die Kamera nicht mit nassen Händen, um elektrische Instandsetzung. Schläge zu vermeiden.
  • Page 65 •Tragen Sie die Kamera nicht, wenn sie auf einem Stativ befestigt ist - Sie •Beachten Sie stets die Warnhinweise auf Batterien, damit sich diese nicht könnten anstoßen und sich oder andere verletzen. entzünden oder explodieren. •Laufen Sie nicht mit dem Auge am Sucher - Sie könnten stolpern, fallen •Verwenden Sie keinesfalls andere Batterien als in dieser Anleitung und sich verletzen.
  • Page 66: Avant-Propos

    Avant-propos Merci pour votre acquisition de l'appareil Nikon Nuvis 200. Votre nouvel appareil photo Nikon utilise le nouveau standard (Advanced Photo System: IX240 System). Le symbole T* apparaît sur tous les appareils de format Advanced Photo System (APS). Prenez soin de lire attentivement ce mauel avant d'utiliser votre nouvel appareil et gardez-le à...
  • Page 67: Fixation De La Courroie

    Accessoires Vérifiez la présence de l'article ci-dessous avant d'utiliser votre appareil. Fixation de la courroie Courroie Fixes la courroie en la passant dans la boucle comme indiqué. Accessoires en option •Etui d'appareil CS-L21...
  • Page 68: Caractéristiques De Votre Appareil Nikon

    Caractéristiques de votre appareil Nikon: ■ Choix de trois formats d'impression (C, H, P) pouvant se combiner sur le même film. P. 78 Format Format (panorama) (classique) Format (vision large) Rapport vertical/horizontal = 1 : 3 Rapport vertical/horizontal = 2 : 3 Rapport vertical/horizontal = 9 : 16 ■...
  • Page 69 Fonctions évoluées Ecran de contrôle CL ..............71 Comment utiliser la mémorisation de la mise au point ....84 Conseils sur l'emploi du Nuvis 200 ..........72 Sélection du mode de flash ............85 Démarrage Photographie avec flash auto ............85 Installation de la pile/Vérification de la tension de la pile ....
  • Page 70: Descriptif De L'appareil

    Descriptif de l'appareil 1 Couvercle de l'objectif (-P. 73) 2 Objectif 3 Fenêtre de mesure d'exposition auto 4 Fenêtre du viseur (-P. 78) 5 Flash (-P. 85) 6 Ecran de contrôle CL 7 Sélecteur CHP (-P. 78) 8 Commande de rebobinage du film partiellement exposé (-P. 83) 9 Fenêtres de mise au point auto 10 Illuminateur d'atténuation des yeux rouges (-P.
  • Page 71: Ecran De Contrôle Cl

    14 Oculaire du viseur (-P. 78) 15 Témoin lumineux rouge (-P. 78) 16 Couvercle du logement de la pile (-P. 73) 17 Filetage de fixation pour pied (-P. 89) 18 Couvercle du logement de la cartouche (-P. 74) 19 Interrupteur d'alimentation (-P. 73) 20 Commande de zoom (-P.
  • Page 72: Conseils Sur L'emploi Du Nuvis 200

    •Ne laissez pas tomber l'appareil et évitez tout choc contre des surfaces dures. telles cassettes ne seront peut-être pas disponibles. Nikon ne saurait être tenu responsable de mauvais fonctionnements survenant si le Nuvis 200 n'est pas utilisé conformément aux instructions de ce manuel.
  • Page 73: Démarrage

    Démarrage Installation de la pile/Vérification de la tension de la pile Mettez l'appareil sous Vérifiez la tension de la Insérez la pile. tension. pile. ▼ Ouvrez le couvercle du logement •Le couvercle de l'appareil s'ouvre •Si “ ” clignote ou si rien n'apparaît de la pile avec une pièce de automatiquement et l'objectif saillit en sur l'écran de contrôle CL, la pile est...
  • Page 74: Chargement Du Film

    Chargement du film Vérifiez que la lettre“´” est Poussez le déverrouillage du Insérez une cassette de film dans visible sur l'écran de le logement de la cassette et logement de la cartouche contrôle CL. refermez le couvercle. dans le sens de la flèche •Si le nombre de vues apparaît sur •Utilisez uniquement une cassette de film pour ouvrir le couvercle du...
  • Page 75: Cassette De Film Ix240

    Cassette de film IX240 Film traité à l'intérieur de la cartouche* Disque de données Film non exposé* Volet de Film partiellement exposé* protection < Film totalement exposé mais non traité* Mécanisme d'ouverture du Ergot de condamnation de la réexposition volet de protection * Indicateur visuel d'exposition (VEI) Bobine enrouleuse Vérifiez que “...
  • Page 76: Enregistrement Des Données

    Enregistrement des données MODE MODE ADJUST ADJUST Réglez au mode d'affichage de •Pressez la commande MODE pour sélectionner l'un des cinq affichages. A chaque pression, l'affichage change dans l'ordre indiqué: votre choix. Année/Mois/Jour Mois/Jour/Année Jour/Mois/Année 年  月  日 月 日 年 日 月 年...
  • Page 77: Opération De Base

    Maintien correct de Opération de base Déclencheur l'appareil •Quand vous tenez l'appareil •Quand vous tenez l'appareil •Sollicitez légèrement le déclencheur horizontalement, collez les coudes au verticalement, vérifiez que le flash est pour activer la mise au point et le buste et maintenez-le avec les deux en haut comme indiqué.
  • Page 78: Viseur

    Sélection du format Viseur d'impression Zone image disponible Les zones coupées sur l'impression finale varient selon le format d'impression (C/H/P). Format (classique) Rapport vertical/ 1Zone de mise au point automatique horizontal = 2 : 3 Sélectionnez le format d'impression souhaité Positionnez-la sur le sujet.
  • Page 79: Cadrage Au Zoom

    Cadrage au zoom Déplacez le curseur de zoom dans le sens Déplacez le curseur de zoom dans le sens Regardez dans le viseur et (24 mm) pour rétracter l'objectif pour (48mm) pour étendre l'objectif pour le composez l'image en cadrage serré au téléobjectif. le cadrage large au grand angle.
  • Page 80: Mise Au Point Et Prise De Vues

    Mise au point et prise de vues Mettez au point sur le sujet. Pressez franchement mais en douceur le Composez l'image déclencheur pour prendre la photo. ▼ Sollicitez légèrement le déclencheur. •Si la lumière est insuffisante, le témoin •Centrez la zone de mise au point auto lumineux rouge s'allume et le flash se •Le témoin lumineux rouge s'allume sur le sujet.
  • Page 81: Sujets Difficiles À Mettre Au Point

    Sujets difficiles à mettre au point Les sujets suivants peuvent être trop difficiles à mettre au point. Dans ce cas, recourez à la mémorisation de la mise au point (- P. 84) en mettant au point sur un autre sujet équidistant de l'appareil.
  • Page 82: Retrait Du Film

    Retrait du film “ ” Vérifiez que la lettre Ouvrez le couvercle du logement Le film se rebobine ´ clignotante est visible sur de la cassette et retirez le film. automatiquement. l'écran de contrôle CL. •En fin de rouleau, le film se rebobine N'ouvrez pas le couvercle du logement de la automatiquement •En fin de rouleau, la lettre “´...
  • Page 83: Emportez La Cassette De Film Exposé À Un Laboratoire Photo

    Emportez la cassette de film Rebobinage du film partiellement exposé exposé à un laboratoire photo Pressez la commande avec la Retirez le film. •Nous vous recommandons d'emporter votre cassette de films à un laboratoire pointe d'un stylo à bille ou similaire. photo portant la “Marque de laboratoire Ouvrez le couvercle du ▼...
  • Page 84: Fonctions Évoluées

    Fonctions évoluées Comment utiliser la mémorisation de la mise au point Si votre sujet principal n'est au centre de la vue Composez l'image. Axez la zone de mise au Recomposez l'image et déclenchez. point auto sur le sujet •Si le sujet principal se trouve en dehors Sollicitez légèrement le déclencheur principal.
  • Page 85: Sélection Du Mode De Flash

    Sélection du mode de flash Photographie avec flash auto Le flash se déclenche automatiquement quand la lumière disponible est insuffisante. ADJUS Pressez la commande jusqu'à ce que l'indicateur de mode de flash Mettez l'appareil sous Vérifiez que le témoin lumineux souhaité...
  • Page 86: Flash Annulé

    Flash annulé Flash imposé Utilisez ce mode de flash aux endroits où la photographie au flash est interdite Utilisez ce mode pour déclencher le flash ou pour conserver lumière naturelle pour des scènes nocturnes. de la lumière disponible. MODE MODE ADJUST ADJUST Pressez la commandee...
  • Page 87: Flash Auto En Synchronisation Lente

    Flash auto en synchronisation lente volontairement, indépendamment Utilisez ce mode pour obtenir l'exposition correcte pour le sujet principal et l'arrière-plan dans des situations en faible lumière ou de nuit. ADJUS Composez l'image et déclenchez. Pressez la commande Composez l'image et prenez la photo.
  • Page 88: Atténuation Des Yeux Rouges

    Atténuation des yeux rouges En photographie au flash, les yeux du sujet peuvent parfois apparaître rouges. Utilisez ce mode pour réduire ce phénomène des "yeux rouges". ADJUS Pressez la commande Composez l'image et Vérifiez que le témoin lumineux rouge s'allume avant de déclencher. sollicitez légèrement le jusqu'à...
  • Page 89: Retardateur

    Mise au point sur l'infini Retardateur Pour figurer vous aussi sur la photo. Utile pour photographier des paysages, ou des scènes éloignées à travers une vitre. ADJUS ADJUST Pressez la commande Composez l'image et prenez la photo. jusqu'à ce que “ ”...
  • Page 90: Programmation De La Date Et De L'heure

    Programmation de la date et de l'heure MODE ADJUS ADJUST ADJUS Passage en mode de Réglage de “l'année” Réglage du mois programmation ▼ Pressez la touche ADJUST ▼ Pressez la commande SEL. Mettez l'appareil hors tension ▼ pour sélectionner l'année La section “mois”...
  • Page 91: Sortie Du Mode De Programmation

    ADJUS Sortie du mode de Au remplacement de la pile programmation •Notez que “ - - - ” apparaîtra sur l'écran de contrôle CL au remplacement Pressez la commande SEL, la ▼ de la pile. date correcte apparaîtra sur •Aucune donnée ne sera enregistrée l'écran de contrôle CL.
  • Page 92: Dépannage

    Dépannage Contrôlez la cause du problème en utilisant le tableau suivant. Cela vous évitera peut-être de passer au centre de service Nikon le plus proche. Problème Vérification à faire Voir page Le déclenchement est • Si le témoin lumineux rouge clignote quand le déclencheur est légèrement sollicité, le flash est 78, 85 en cours de recyclage et l'obturateur est bloqué.
  • Page 93: Une Caractéristique Des Appareils Électroniques

    CL à la mise sous •Si aucun indicateur n'apparaît après l'insertion d'une nouvelle pile, l'appareil est en — panne. Dans ce cas, contactez le revendeur Nikon le plus proche ou un laboratoire photo tension de l'appareil. pour la réparation.
  • Page 94: Caractéristiques

    Appareil à obturateur AE à mise au point auto de type IX240 (Advanced Photo Système de mise au point infrarouge actif; activé par sollicitation légère du System) avec objectif zoom Nikon 24-48 mm f/4,5-8,4 déclencheur; distance de mise au point: de 0,6 m à l'infini Film compatible Mémorisation de la mise au point...
  • Page 95 Avancement du film Alimentation Le film avance automatiquement jusqu'à la première vue après l'insertion de la Une pile a lithium de 3 V CR2 cassette; le film avance automatiquement d'une vue après chaque prise; Fonction d'enregistrement des données rebobinage en fin de film; rebobinage de film partiellement exposé possible Système d'enregistrement magnétique;...
  • Page 96: Pour L'utilisation Sans Risque De L'appareil

    Laissez-le refroidir avant de retirer la pile. Puis confiez votre appareil à votre revendeur local Nikon pour réparation. •Ne trempez pas l'appareil dans l'eau et ne le laissez pas se mouiller, cela pourrait provoquer des décharges électriques ou le feu.
  • Page 97 PRECAUTIONS •Ne marchez pas en regardant dans le viseur; vous pourriez •Ne faites pas fonctionner l'appareil avec les mains mouillées; cela pourrait provoquer des décharges électriques. trébucher, tomber et vous blesser. •Conservez l'appareil hors de portée des enfants. Cela évitera •Ne jetez pas les piles usagées au feu.
  • Page 98 Toute reproduction, en tout ou partie, de ce manuel est, sauf pour de brèves citations dans des bancs d’essai ou des articles de presse, interdite sans l’autorisation écrite de NIKON CORPORATION. Queda prohibida la reproducción total o parcial de este folleto (salvo en lo que se refiere a citas breves en artículos o revistas especializadas), sin la autorización escrita de NIKON CORPORATION.

Table des Matières