Table des Matières
Publicité
Les langues disponibles
Les langues disponibles
Liens rapides
Instructions for use
en
de
Gebrauchsanweisung
fr
Notice d'utilisation
es
Instrucciones de uso
pt
Instruções de uso
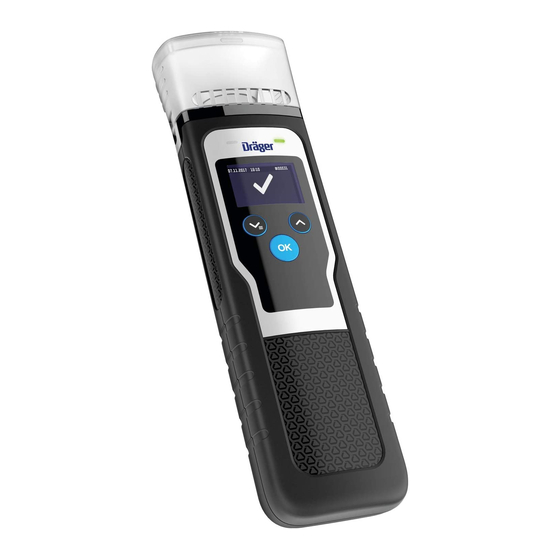
Dräger Alcotest 5000
WARNING
!
Strictly follow the Instructions for Use.
The user must fully understand and strictly observe the instructions.
Use the product only for the purposes specified in the Intended use
section of this document.
i
Istruzioni per l'uso
it
nl
Gebruiksaanwijzing
ca
Instruccions d'ús
Publicité
Chapitres
Table des Matières
Dépannage

Manuels Connexes pour Dräger Alcotest 5000


Sommaire des Matières pour Dräger Alcotest 5000
- Page 1 Notice d’utilisation Instruccions d'ús Instrucciones de uso Instruções de uso Dräger Alcotest 5000 WARNING Strictly follow the Instructions for Use. The user must fully understand and strictly observe the instructions. Use the product only for the purposes specified in the Intended use...
-
Page 2: Table Des Matières
Content Content Safety-related information......4 Conventions used in this document ....5 Description . - Page 3 Content Order list ........23...
-
Page 4: Safety-Related Information
Safety-related information Safety-related information Before using this product, carefully read the instructions for use. Only trained and competent personnel are permitted to inspect, repair and service the product. Dräger recommend a Dräger service contract for all maintenance activities and that all repairs are carried out by Dräger. -
Page 5: Conventions Used In This Document
Conventions used in this document Conventions used in this document The following alert messages are used in this document to provide and highlight areas of the associated text that require a greater awareness by the user. A definition of the meaning of each alert message is as follows: CAUTION Indicates a potentially hazardous situation which, if not avoided, could... -
Page 6: Description
Description Description What’s in the box? ® Dräger Alcotest 5000 (incl. 3 AA alkaline batteries) Non-contact funnel (3 pcs) Wrist strap... - Page 7 Description Funnel LED (red, green) Display DOWN/MENU button OK button UP button USB communications socket for service only Wrist strap eyelet...
-
Page 8: Buttons
Intended use Buttons Button Function Switching on and off the instrument and confirming entries or selected functions. In further text OK. Accessing the menu and navigating down in the menu and skipping between digit positions. In further text DOWN or MENU. Navigating up in the menu, skipping between digit positions. -
Page 9: Prerequisites
Intended use Prerequisites NOTICE Avoid taking the samples in the draft of wind. The test result could be affected. 00833785 4.1.1 Adequate breath sample The test person should breathe regularly and calmly before the sample is taken. The test person must be capable of exhaling the minimum breath ... -
Page 10: Initial Start-Up
Intended use 4.1.3 Initial start-up A setup wizard is opened when the instrument is switched on for the first time. The following settings are made using the setup wizard: Language Date Time format Time All settings can be changed later on via menu. NOTICE Loss of pre settings. -
Page 11: Performing The Measurement
Intended use Performing the measurement HYGIENE Do not touch the funnel at the top. It is mandatory to keep a distance of 2-3 cm to the object or the person to be tested. A test person’s skin, any secretions or surfaces must not be touched with the funnel. Also avoid direct contact with the substances to be tested. -
Page 12: Results
Intended use Results After 2 to 7 seconds (depending on the measured concentration and the instrument temperature) the test result is shown in the display and stored in the instrument. Two kinds of results are possible: 27.12.2016 10:25 #00075 27.12.2016 10:25 #00075 00633785... -
Page 13: Passive And Manual Tests
Intended use Passive and manual tests 4.5.1 Passive test The passive test can be performed if a person is unable to provide an adequate breath sample (for description, see page 9 section "Adequate breath sample") or a substance must be tested. 1. -
Page 14: Setting Up The Instrument
Setting up the instrument Setting up the instrument Switching the instrument on and off Switch on the instrument by pressing OK for approx. 2 sec. The display shows Dräger. The instrument is instantly ready for measurement. Switch off the instrument by pressing OK for approx. 4 sec. The display shows a countdown from 3 to 0. -
Page 15: Inserting Or Replacing The Batteries
Setting up the instrument Inserting or replacing the batteries Inserting the batteries upon initial operation or changing them if the battery symbol, shown in the display’s right upper corner, indicates empty. CAUTION Damage to the instrument. Do not try to charge any kinds of batteries via the USB port. -
Page 16: Menu
Menu Removing the funnel 1. Simply pull off the funnel from the instrument by grabbing it at its laterally applied grip areas. Menu Open the menu by pressing DOWN/MENU. Navigate through the menu list by using UP and DOWN. Select a menu entry by pressing OK. Menu items The menu contains the following entries: Results... -
Page 17: Quitting The Submenu Or Menu
Menu Speaker The instrument sound can be muted or the sound level can be set to loud or quiet by accessing the submenu. Language To change the language, navigate with UP and DOWN and confirm by pressing OK. Software version Shows the software version number and it’s part number. -
Page 18: Troubleshooting
Troubleshooting Troubleshooting An error message is displayed in the event of instrument faults. The number that appears below the message is used for service functions. If the fault remains after switching on and off several times, contact DrägerService. Fault / message Cause Remedy Instrument cannot... -
Page 19: Maintenance
Maintenance Maintenance If necessary: Change batteries. Every 24 months a calibration check is recommended. Maintenance must only be performed by experts. Only original spare parts may be used for maintenance. Cleaning CAUTION Damage to the instrument. ►... -
Page 20: Disposal
Maintenance Disposal Only dispose of as special waste in accordance with local waste disposal regulations. Disposing the instrument This product must not be disposed of as household waste. This is indicated by the adjacent symbol. You can return this product to Dräger free of charge. For information, please contact the national marketing organisations or Dräger. -
Page 21: Technical Data
Technical data Technical data Measuring principle Electrochemical sensor Ambient conditions During operation -15 °C to +50 °C / +5 °F to +122 °F 10 to 100 % rel. hum. (non-condensing) 600 to 1300 hPa During storage -20 °C to +70 °C / -4 °F to +158 °F Measurement results 0 mg/L to 0.029 mg/L no alcohol (... - Page 22 Technical data Power supply 3 x 1.5 V AA alkaline batteries Batteries for approx. 5000 measurements Data storage The last 500 results will be stored. Interface USB socket for service only CE markings Electromagnetic compatibility (Directive 2014/30/EU). This device complies with part 15 of the FCC Rules. Operation is subject to the following two conditions: (1) This device may not cause harmful interference, and (2) this device must accept any interference received, including...
-
Page 23: Order List
Order list Reorient or relocate the receiving antenna. Increase the separation between the equipment and receiver. Connect the equipment into an outlet on a circuit different from that to which the receiver is connected. Consult the dealer or an experienced radio/TV technician for help. ... - Page 24 Inhalt Inhalt Sicherheitsbezogene Informationen ....27 Konventionen in diesem Dokument ....28 Beschreibung .
- Page 25 Inhalt Bestellliste ........47...
-
Page 26: Sicherheitsbezogene Informationen
Sicherheitsbezogene Informationen Sicherheitsbezogene Informationen Vor Gebrauch des Produkts die Gebrauchsanweisung aufmerksam lesen. Nur geschultes und fachkundiges Personal darf das Produkt überprüfen, reparieren und instand halten. Dräger empfiehlt, einen Service-Vertrag mit Dräger abzuschließen und alle Instandhaltungsarbeiten durch Dräger durchführen zu lassen. Der Anwender muss die Anweisungen vollständig verstehen und ... -
Page 27: Konventionen In Diesem Dokument
Konventionen in diesem Dokument Konventionen in diesem Dokument Die folgenden Warnzeichen werden in diesem Dokument verwendet, um die zugehörigen Warntexte zu kennzeichnen und hervorzuheben, die eine erhöhte Aufmerksamkeit seitens des Anwenders erfordern. Die Bedeutungen der Warnzeichen sind wie folgt definiert: VORSICHT Hinweis auf eine potenzielle Gefahrensituation. -
Page 28: Beschreibung
Beschreibung Beschreibung Was ist in der Schachtel? ® Dräger Alcotest 5000 (einschl. 3 AA Alkali-Batterien) Berührungsfreier Trichter (3 Stück) Handgelenkschlaufe... - Page 29 Beschreibung Trichter LED (rot, grün) Anzeige NACH-UNTEN/MENÜ-Taste OK-Taste NACH-OBEN-Taste USB-Anschluss nur für Service Öse für Handgelenkschlaufe...
-
Page 30: Tasten
Verwendung Tasten Tasten Funktion Ein- und Ausschalten des Geräts sowie Bestätigen von Eingaben oder gewählten Funktionen. Im weiteren Text OK. Das Menü öffnen und im Menü nach unten navigieren und zwischen Zahlenstellen springen. Im weiteren Text NACH UNTEN oder MENÜ. Im Menü... -
Page 31: Voraussetzungen
Verwendung Voraussetzungen HINWEIS Probennahme bei Luftzug vermeiden. Das Testergebnis könnte verfälscht werden. 00833785 4.1.1 Adäquate Atemprobe Der Proband soll vor der Probennahme regelmäßig und ruhig atmen. Der Proband muss in der Lage sein, das Mindestatemvolumen auszuatmen. Für einen gültigen Test muss der Ausatemstrom mindestens 1 ... -
Page 32: Vorbereitungen Für Den Gebrauch
Verwendung 4.1.3 Erstinbetriebnahme Wenn das Gerät zum ersten Mal eingeschaltet wird, öffnet sich ein Einrichtungsassistent. Mit dem Einrichtungsassistenten werden die folgenden Einstellungen vorgenommen: Sprache Datum Uhrzeitformat Uhrzeit Alle Einstellungen können später über das Menü geändert werden. HINWEIS Verlust von Voreinstellungen. -
Page 33: Ausführen Der Messung
Verwendung Ausführen der Messung HYGIENE Den Trichter nicht am oberen Teil berühren. Zu dem zu prüfenden Objekt/dem Probanden muss unbedingt ein Abstand von 2-3 cm gewahrt werden. Die Haut eines Probanden sowie Ausscheidungen oder Oberflächen dürfen nicht mit dem Trichter berührt werden. Den direkten Kontakt mit zu testenden Substanzen vermeiden. -
Page 34: Ergebnis
Verwendung VORSICHT Verfälschung von Ergebnissen Bei mehreren Tests in kurzer Zeit kann sich im Innern des Trichters ► Kondensat ansammeln. Den Trichter auswechseln, bevor Kondensat in das Gerät gelangt. Ergebnis Nach 2 bis 7 Sekunden (je nach der gemessener Konzentration und der Temperatur des Geräts) wird das Testergebnis auf der Anzeige angezeigt und im Gerät gespeichert. -
Page 35: Passive Und Manuelle Tests
Verwendung Im Menü kann die Bestätigung der Testergebnisse Alkohol und Kein Alkohol wie folgt konfiguriert werden: Die Testergebnisse durch Drücken auf OK bestätigen oder die Testergebnisse werden automatisch nach 2 Sek. bestätigt. Passive und manuelle Tests 4.5.1 Passiver Test Der passive Test kann ausgeführt werden, wenn eine Person nicht in der Lage ist, eine adäquate Atemluftprobe zu liefern (Beschreibung: siehe Seite 32 Kapitel "Adäquate Atemprobe") oder wenn eine... -
Page 36: Manueller Test
Das Gerät einrichten 4.5.3 Manueller Test Der manuelle Test kann ausgeführt werden, wenn eine Person nicht in der Lage ist, das erforderliche Atemtestvolumen zu leisten. 1. Das Gerät einschalten. 2. Das Gerät 2-3 cm vom Mund des Probanden entfernt halten. 3. -
Page 37: Eine Teleskopstange Anbringen
Das Gerät einrichten Eine Teleskopstange anbringen Um entfernte Probanden zu erreichen (z. B. einen hoch sitzenden Fahrer eines Lastkraftwagens) kann das Gerät mit einem 1/4″ Anschlussstück an einer Teleskopstange angebracht werden. ® Eine Teleskopstange ist im Lieferumfang des Dräger Alcotest ... -
Page 38: Trichter
Menü Trichter Das Gerät wird mit drei Trichtern geliefert. Zu dem zu prüfenden Objekt/dem Probanden muss unbedingt ein Abstand von 2-3 cm gewahrt werden. Aus Gründen der Hygiene dürfen die Haut eines Probanden sowie Ausscheidungen oder Oberflächen nicht mit dem Trichter berührt werden. -
Page 39: Softwareversion
Menü Info-Bildschirm Zeigt die Seriennummer und die Sachnummer des Geräts sowie die Seriennummer des EC-Sensors an. Nächster Service Zeigt die verbleibende Zeit für Justierung und Genauigkeitsprüfung in Tagen an. Datum/Uhrzeit Datum und Uhrzeit können durch Zugriff auf das Untermenü eingestellt werden. Mit NACH OBEN und NACH UNTEN die Ziffern ändern und mit OK bestätigen. -
Page 40: Das Untermenü Oder Menü Verlassen
Menü Anmelden Nur für Service. Den vierstelligen Code einfügen, um das Service-Menü zu öffnen. Auto zu nächstem Test Durch Drücken auf OK öffnen und mit NACH OBEN bzw. NACH UNTEN entweder Kein Alkohol oder Alkohol wählen. Durch Drücken auf OK öffnen und entweder deaktiviert oder aktiviert mit OK auswählen. -
Page 41: Störungsbeseitigung
Störungsbeseitigung Störungsbeseitigung Im Falle eines Gerätefehlers wird eine Fehlermeldung angezeigt. Die Nummer, die unterhalb der Meldung erscheint, wird für Servicefunktionen genutzt. Wenn die Störung auch nach mehrmaligem Aus- und Einschalten noch besteht, DrägerService kontaktieren. Fehler / Meldung Ursache Abhilfe Gerät kann nicht Die Batterien sind leer Batterien prüfen eingeschaltet werden. -
Page 42: Wartung
Wartung Wartung Wenn nötig: Batterien auswechseln. Alle 24 Monate wird eine Kalibrierprüfung empfohlen. Die Wartung darf nur von Fachleuten ausgeführt werden. Für die Wartung dürfen nur Original-Ersatzteile verwendet werden. Reinigung VORSICHT Schaden am Gerät. ► Das Gerät nicht in Flüssigkeit eintauchen. ►... -
Page 43: Entsorgung
Wartung Entsorgung Nur entsprechend den örtlichen Abfallentsorgungsvorschriften als Sonderabfall entsorgen. Das Gerät entsorgen Dieses Produkt darf nicht als Siedlungsabfall entsorgt werden. Dies wird durch das nebenstehende Symbol angezeigt. Dräger nimmt dieses Produkt kostenlos zurück. Informationen dazu geben die nationalen Vertriebsorganisationen und Dräger. Batterien entsorgen VORSICHT ►... -
Page 44: Technische Daten
Technische Daten Technische Daten Messprinzip Elektrochemischer Sensor Umgebungsbedingungen Betrieb -15 °C bis +50 °C (+5 °F bis +122 °F) 10 bis 100 % r. F. (nicht kondensierend) 600 bis 1300 hPa Lagerung -20 °C bis +70 °C (-4 °F bis +158 °F) Messergebnisse 0 mg/L bis 0,029 mg/L kein Alkohol (... -
Page 45: Stromversorgung
Technische Daten Gewicht ca. 245 g Stromversorgung 3 x 1,5 V AA Alkali-Batterien Batterien für ca. 5000 Messungen Datenspeicherung Die letzten 500 Ergebnisse werden gespeichert. Schnittstelle USB-Anschluss nur für Service CE-Kennzeichnungen Elektromagnetische Verträglichkeit (Richtlinie 2014/30/EU). - Page 46 Bestellliste Bestellliste Name und Beschreibung Teilenr. ® Alcotest 5000 V1 83 27 701 Sprachen: de, en, fr, es, nl, it, ca, pt ® Alcotest 5000 V2 83 27 702 Sprachen: en, pl, fi, sv, da, no, et, lt, lv ® Alcotest 5000 V3 83 27 703...
- Page 47 Sommaire Sommaire Informations relatives à la sécurité ....50 Conventions utilisées dans ce document ... . . 51 Description .
- Page 48 Sommaire Liste de commande ......71...
-
Page 49: Informations Relatives À La Sécurité
Informations relatives à la sécurité Informations relatives à la sécurité Veuillez lire attentivement la notice d'utilisation du produit avant de l'utiliser. Veuillez ne confier les opérations de vérification, de réparation et d'entretien qu'au personnel compétent et muni de la formation adéquate. -
Page 50: Conventions Utilisées Dans Ce Document
Conventions utilisées dans ce document Conventions utilisées dans ce document Les symboles d'avertissement suivants sont utilisés dans ce document pour signaler et mettre en relief les textes d'avertissement associés auxquels l'utilisateur devra prêter une attention soutenue. Les symboles d'avertissement sont définis comme suit : ATTENTION Indique une situation potentiellement dangereuse qui, si elle n'est pas évitée, peut entraîner des blessures. -
Page 51: Description
Description Description Contenu de l'emballage ® Dräger Alcotest 5000 (3 piles alcalines AA incluses) Entonnoir sans contact (3 pièces) Dragonne... - Page 52 Description Entonnoir Diode (rouge, verte) Écran Bouton BAS/MENU Bouton OK Bouton HAUT Port de communication USB pour la maintenance uniquement Œillet pour la dragonne...
-
Page 53: Boutons
Domaine d'application Boutons Bouton Fonction Allumer et éteindre l'instrument et valider les entrées ou les fonctions sélectionnées. Il sera désigné dans ce manuel par OK. Accéder au menu, faire défiler le menu vers le bas et modifier les chiffres. Il sera désigné dans ce manuel par BAS ou MENU. -
Page 54: Conditions D'utilisation
Domaine d'application Conditions d'utilisation REMARQUE Prélevez les échantillons à l'abri du vent. Autrement, le résultat du test pourrait s'en trouver faussé. 00833785 4.1.1 Prélèvement d'échantillon d'haleine La personne testée doit respirer régulièrement et calmement avant la prise de l'échantillon. La personne testée doit être capable d'expirer le volume d'air ... -
Page 55: Première Mise En Service
Domaine d'application 4.1.3 Première mise en service L'assistant de configuration s'ouvre à la première mise en service de l'instrument. L'assistant de configuration vous aide à effectuer les réglages suivants : Langue Date Format horaire Heure Tous ces réglages peuvent être modifiés ultérieurement dans le menu. REMARQUE Perte des préréglages. -
Page 56: Réalisation De La Mesure
Domaine d'application Réalisation de la mesure HYGIÈNE Ne touchez pas le sommet de l'entonnoir. Il est obligatoire de maintenir une distance de 2-3 cm par rapport à l'objet ou la personne à tester. Ni la peau de la personne testée, ni aucune sécrétion ou surface ne doit toucher l'entonnoir. -
Page 57: Résultats
Domaine d'application ATTENTION Corruption des résultats Il se peut que de la condensation se forme à l'intérieur de l'entonnoir si plusieurs tests consécutifs sont réalisés de manière rapprochée. ► Changez l'entonnoir avant que la condensation entre dans l'instrument. Résultats Après 2 à 7 secondes (en fonction de la concentration mesurée et de la température de l'instrument), le résultat du test s'affiche sur l'écran puis est stocké... -
Page 58: Tests Passifs Et Manuels
Domaine d'application Dans le menu, vous pouvez configurer la confirmation des résultats du test Alcool et Absence d'alcool comme suit : Confirmez les résultats du test en appuyant sur OK les résultats du test sont automatiquement confirmés après 2 secondes. -
Page 59: Test Manuel
Configuration de l'instrument 4.5.3 Test manuel Il est possible de réaliser un test manuel si la personne à tester n'est pas en état d'expirer le volume d'air nécessaire. 1. Allumez l'instrument. 2. Tenez l'instrument 2-3 cm devant la bouche de la personne à tester. -
Page 60: Fixation D'une Barre Télescopique
Configuration de l'instrument Fixation d'une barre télescopique Pour atteindre des personnes à tester éloignées (ex : assises en hauteur dans un camion), vous pouvez fixer l'instrument à une barre télescopique à l'aide d'un connecteur 1/4". ® Aucune barre télescopique n'est incluse avec le Dräger Alcotest ... -
Page 61: Entonnoir
Menu Entonnoir L'instrument est livré avec trois entonnoirs. Il est obligatoire de maintenir une distance de 2-3 cm par rapport à l'objet ou la personne à tester. Pour des raisons d'hygiène, ni la peau de la personne testée, ni aucune sécrétion ou surface ne doit entrer en contact avec l'entonnoir. - Page 62 Menu Écran d'info Affiche le numéro de série et la référence de l'instrument, ainsi que le numéro de série du capteur EC. Prochain entretien Affiche le temps restant en jours avant la prochaine vérification d'ajustement et de précision. Date et heure Il est possible de régler la date et l'heure en accédant au sous-menu.
-
Page 63: Quitter Le Sous-Menu Ou Le Menu
Menu Automatiq. test suiv. Vous pouvez y accéder en appuyant sur OK. Choisissez ensuite Absence d'alcool ou Alcool à l'aide de HAUT et BAS. Validez avec OK, puis paramétrez sur désactivé ou activé en appuyant sur OK. Arrêter Appuyez brièvement sur OK pour éteindre l'instrument. Quitter le sous-menu ou le menu 1. -
Page 64: Dépannage
Dépannage Dépannage En cas de panne de l'instrument, un message d'erreur s'affiche. Le numéro apparaissant sous le message est destiné au service technique. Veuillez contacter DrägerService si la panne persiste même après plusieurs mises en marche / arrêts. Panne / message Cause Solution L'appareil ne... -
Page 65: Maintenance
Maintenance Maintenance Si nécessaire : Changez les piles. Il est conseillé de procéder à une vérification du calibrage tous les 24 mois. Les opérations de maintenance ne doivent être effectuées que par des experts. N'utilisez que des pièces détachées d'origine pour la ... -
Page 66: Mise Au Rebut
Maintenance Mise au rebut Ne mettez l'instrument au rebut que comme un déchet spécial, conformément aux réglementations locales sur la mise au rebut des déchets. Mise au rebut de l'instrument Ce produit ne doit pas être jeté avec les ordures ménagères. Cela est indiqué... -
Page 67: Caractéristiques Techniques
Caractéristiques techniques Caractéristiques techniques Principe de mesure Capteur électrochimique Conditions ambiantes En service -15 °C à +50 °C / +5 °F à +122 °F 10 à 100 % d'humidité relative (sans condensation) 600 à 1300 hPa En stockage -20 °C à +70 °C / -4 °F à +158 °F Résultats de la mesure 0 mg/L à... - Page 68 Caractéristiques techniques Alimentation électrique 3 piles alcalines AA de 1,5 V Les piles permettent de réaliser environ 5000 mesures Stockage des données La mémoire conserve les 500 derniers résultats. Interface Port USB pour la maintenance uniquement Sigle CE Compatibilité électromagnétique (directive 2014/30/UE) Cet appareil est conforme à...
- Page 69 Caractéristiques techniques puis en le remettant en marche, nous recommandons à l'utilisateur d'essayer de résoudre le problème de l’une des façons suivantes : Réorienter ou déplacer l’antenne de réception. Éloigner l’appareil du poste de réception. Brancher l'appareil sur un circuit différent de celui du récepteur. ...
-
Page 70: Liste De Commande
Liste de commande Liste de commande Nom et description Référence ® Alcotest 5000 V1 83 27 701 Langues : de, en, fr, es, nl, it, ca, pt ® Alcotest 5000 V2 83 27 702 Langues : en, pl, fi, sv, da, no, et, lt, lv ®... - Page 71 Contenido Contenido Información relacionada con la seguridad ... . 75 Convenciones en este documento ....76 Descripción .
- Page 72 Contenido Lista de referencias ......95...
-
Page 73: Información Relacionada Con La Seguridad
Información relacionada con la seguridad Información relacionada con la seguridad Antes de utilizar el producto, leer atentamente las instrucciones de uso. Solo personal especializado y debidamente formado debe comprobar, reparar y mantener el producto. Dräger recomienda cerrar un contrato de mantenimiento con Dräger y que todos los trabajos de mantenimiento sean realizados por Dräger. -
Page 74: Convenciones En Este Documento
Convenciones en este documento Convenciones en este documento En este documento se utilizan los siguientes símbolos de advertencia para identificar los textos de advertencia correspondientes y resaltar aquellos que requieren una mayor atención por parte del usuario. El significado de los símbolos de advertencia se define a continuación: ATENCIÓN Indica una situación potencialmente peligrosa que, de no evitarse, podría provocar lesiones físicas. -
Page 75: Descripción
Descripción Descripción ¿Qué hay en la caja? ® Dräger Alcotest 5000 (incl. 3 pilas alcalinas AA) Embudo sin contacto (3 uds.) Cinta para muñeca... - Page 76 Descripción Embudo LED (rojo, verde) Pantalla Botón ABAJO/MENÚ Botón OK Botón ARRIBA Entrada de comunicaciones USB solo para servicio técnico Orificio para la cinta para muñeca...
-
Page 77: Botones
Uso previsto Botones Botón Función Encender y apagar el instrumento y confirmar entradas o funciones seleccionadas. De ahora en adelante: OK. Acceder al menú y desplazarse hacia abajo por el menú, así como saltar entre posiciones de los dígitos. De ahora en adelante: ABAJO o MENÚ. Desplazarse hacia arriba en el menú, saltar entre posiciones de los dígitos. -
Page 78: Prerrequisitos
Uso previsto Prerrequisitos NOTA No tomar muestras con una corriente de aire. El resultado de la prueba podría verse afectado. 00833785 4.1.1 Muestra de aliento adecuada La persona de la prueba debe respirar de manera regular y relajada antes de tomar la muestra. La persona de la prueba debe ser capaz de espirar el volumen de ... -
Page 79: Primer Encendido
Uso previsto 4.1.3 Primer encendido Cuando el instrumento se enciende por primera vez, se abre un asistente de configuración. Es posible hacer los siguientes ajustes a través del asistente de configuración: Idioma Fecha Formato de hora Hora ... -
Page 80: Realización De La Medición
Uso previsto Realización de la medición HIGIENE No tocar el embudo en la parte superior. Es obligatorio mantener una distancia de 2-3 cm del objeto o la persona que se va a someter a la prueba. La piel, las secreciones o las superficies de la persona de la prueba no deben entrar en contacto con el embudo. -
Page 81: Resultados
Uso previsto ATENCIÓN Distorsión de los resultados Puede acumularse condensación dentro del embudo después ► realizar varias pruebas en un corto espacio de tiempo. Cambiar el embudo antes de que entre condensación en el instrumento. Resultados Después de 2 a 7 segundos (dependiendo de la concentración medida y de la temperatura del instrumento), el resultado de la prueba se muestra en la pantalla y se guarda en el instrumento. -
Page 82: Pruebas Pasivas Y Manuales
Uso previsto En el menú se puede configurar la confirmación de los resultados de la prueba Alcohol y Sin alcohol de la siguiente manera: Confirmar los resultados de la prueba pulsando OK. O bien: Los resultados de la prueba se confirman automáticamente ... -
Page 83: Prueba Manual
Preparación del instrumento 4.5.3 Prueba manual La prueba manual se puede realizar si la persona de la prueba no puede alcanzar el volumen requerido para la prueba de aliento. 1. Encender el instrumento. 2. Sostener el instrumento a 2-3 cm de distancia de la boca de la persona de la prueba. -
Page 84: Montaje De Una Barra Telescópica
Preparación del instrumento Montaje de una barra telescópica Para llegar a personas alejadas (p. ej., un conductor sentado en una posición elevada en un camión), se puede colocar el instrumento en una barra telescópica con un conector de 1/4". No se incluye barra telescópica en el suministro del Dräger ... -
Page 85: Embudo
Menú Embudo El instrumento se suministra con tres embudos. Es obligatorio mantener una distancia de 2-3 cm del objeto o la persona que se va a someter a la prueba. Por cuestiones higiénicas, la piel, las secreciones o las superficies de la persona de la prueba no deben entrar en contacto con el embudo. - Page 86 Menú Pantalla de inform. Muestra el número de serie y de referencia del instrumento, así como el número de serie del sensor EC. Próx. mantenimiento Muestra el tiempo restante para la comprobación de la precisión y los ajustes en días. Fecha y hora La fecha y la hora se pueden ajustar accediendo al submenú.
-
Page 87: Salida Del Submenú O El Menú
Menú Iniciar sesión Solo para servicio técnico. Insertar el código de 4 dígitos para acceder al menú de servicio. Autom. a sig. prueba Acceder pulsando OK y elegir Sin alcohol o Alcohol con ARRIBA y ABAJO. Acceder con OK y establecer desactivado o activado pulsando OK. -
Page 88: Solución De Problemas
Solución de problemas Solución de problemas Se muestra un mensaje de error en caso de producirse un fallo del instrumento. El número que aparece debajo del mensaje se utiliza para funciones de servicio. Si el fallo se mantiene después de encender y apagar varias veces, contactar con DrägerService. -
Page 89: Mantenimiento
Mantenimiento Mantenimiento Si es necesario: cambiar las pilas. Se recomienda una comprobación de calibración cada 24 meses. El mantenimiento solo debe ser realizado por expertos. Deben emplearse únicamente repuestos originales para el mantenimiento. Limpieza ATENCIÓN Daños en el instrumento. ►... -
Page 90: Eliminación
Mantenimiento Eliminación Desechar solamente como residuos especiales de acuerdo con la normativa de eliminación de residuos local. Eliminación del instrumento Este producto no se debe eliminar como basura doméstica. Esto se indica con el símbolo adyacente. Se puede devolver este producto a Dräger gratuitamente. Para más información al respecto, contactar con las organizaciones de marketing nacionales o con Dräger. -
Page 91: Características Técnicas
Características técnicas Características técnicas Principio de medición Sensor electroquímico Condiciones ambientales Durante el funcionamiento -15 °C a +50 °C / +5 °F a +122 °F 10 al 100 % hum. rel. (sin condensación) 600 a 1300 hPa Durante el almacenamiento -20 °C a +70 °C / -4 °F a +158 °F Resultados de medición 0 mg/L a 0,029 mg/L... - Page 92 Características técnicas 3 pilas alcalinas AA de 1,5 V Pilas para unas 5000 mediciones Almacenamiento de datos Se guardarán los 500 últimos resultados. Interfaz Entrada USB solo para servicio técnico Marcados CE Compatibilidad electromagnética (Directiva 2014/30/UE). Este dispositivo cumple con la parte 15 de las normas de la FCC. El funcionamiento está...
-
Page 93: Lista De Referencias
Lista de referencias los ruidos de interferencia tomando una o varias de las siguientes medidas: Reorientar o recolocar la antena receptora. Aumentar la separación entre el aparato y el receptor. Conectar el aparato a una salida de otro circuito distinto al que ... - Page 94 Lista de referencias Nombre y descripción N.º de referencia Juego de láminas reflectantes, naranja, 83 27 743 ® Alcotest 5000 ® Adaptador de calibración, Alcotest 5000 83 27 741...
- Page 95 Conteúdo Conteúdo Informações sobre segurança ..... 93 Convenções neste documento ..... 94 Descrição .
- Page 96 Conteúdo Resolução de problemas ......108 Manutenção ........109 Limpeza .
-
Page 97: Informações Sobre Segurança
Informações sobre segurança Informações sobre segurança Antes de usar o produto, leia atentamente as instruções de utilização. Os trabalhos de verificação, reparo e manutenção do produto é vedado somente ao pessoal técnico treinado. A Dräger recomenda que seja estabelecido um contrato de assistência técnica com a Dräger e que todas as manutenções sejam também por ela realizadas. -
Page 98: Convenções Neste Documento
Convenções neste documento Convenções neste documento Os seguintes símbolos de aviso são utilizados neste documento para assinalar e realçar os respetivos textos de atenção, que requerem maior atenção por parte do usuário. Os significados dos símbolos de atenção são definidos do seguinte modo: CUIDADO Indica uma situação potencialmente perigosa que, se não evitada, poderá... -
Page 99: Descrição
Descrição Descrição O que há na caixa? ® Dräger Alcotest 5000 (incluindo 3 baterias alcalinas AA) Funil sem contato (3 unidades) Faixa para o pulso... - Page 100 Descrição Funil LED (vermelho, verde) Visor Botão PARA BAIXO/MENU Botão OK Botão PARA CIMA Tomada de comunicações USB somente para manutenção Olhal da faixa para o pulso...
-
Page 101: Botões
Botões Botão Função Ligar e desligar o instrumento e confirmar entradas ou funções selecionadas. No restante do texto, OK. Acessar o menu, navegar para baixo no menu e alternar entre posições de dígitos. No restante do texto, PARA BAIXO ou MENU. Navegar para cima no menu e alternar entre posições de dígitos. -
Page 102: Pré-Requisitos
Pré-requisitos NOTA Evite obter amostras com corrente de vento. O resultado do teste poderá ser afetado. 00833785 4.1.1 Amostra adequada da respiração A pessoa a ser testada deverá respirar de forma regular e calma antes da obtenção da amostra. A pessoa a ser testada deverá... -
Page 103: Configuração Inicial
4.1.3 Configuração inicial Um assistente de configuração é aberto quando o instrumento é ligado pela primeira vez. As seguintes configurações são feitas usando o assistente de configuração: Idioma Data Formato da hora Hora Todas as configurações podem ser alteradas posteriormente via Menu. -
Page 104: Para Realizar A Medição
Para realizar a medição HIGIENE Não toque no funil no topo. É obrigatório manter uma distância de 2-3 cm do objeto ou da pessoa a ser testado. Em um teste de pele, não toque em secreções nem superfícies com o funil. Também evite o contato direto com as substâncias a serem testadas. -
Page 105: Resultados
CUIDADO Distorção dos resultados A condensação poderá se acumular dentro do funil depois de vários ► testes em um tempo curto. Troque o funil antes que a condensação entre no instrumento. Resultados Depois de 2 a 7 segundos (dependendo da concentração medida e da temperatura do instrumento), o resultado do teste é... -
Page 106: Testes Passivos E Manuais
No menu, é possível configurar a confirmação dos resultados do teste Álcool e Sem álcool da seguinte forma: Confirme os resultados do teste pressionando OK os resultados do teste são confirmados automaticamente depois de 2 segundos. Testes passivos e manuais 4.5.1 Teste passivo O teste passivo pode ser realizado se uma pessoa é... -
Page 107: Configuração Do Instrumento
Configuração do instrumento 4.5.3 Teste manual O teste manual pode ser realizado se uma pessoa a ser testada não pode fornecer o volume necessário do teste de respiração. 1. Ligue o instrumento. 2. Segure o instrumento a 2-3 cm da boca da pessoa a ser testada. 3. -
Page 108: Para Montar Uma Barra Telescópica
Configuração do instrumento Para montar uma barra telescópica Para alcançar pessoas distantes a serem testadas (por exemplo, o motorista de um caminhão no interior do veículo), é possível prender ao instrumento uma barra telescópica com um conector de 1/4 pol. A barra telescópica não está... -
Page 109: Funil
Menu Funil O instrumento é fornecido com três funis. É obrigatório manter uma distância de 2-3 cm do objeto ou da pessoa a ser testado. Por motivos higiênicos, em um teste de pele, secreções e superfícies não devem entrar em contato com o funil. Também evite o contato direto com as substâncias a serem testadas. - Page 110 Menu Tela de informação Mostra o número de série e o número de peça do instrumento, bem como o número de série do sensor de EC. Próxima revisão Mostra o tempo remanescente para ajuste e verificação de precisão, em dias. Data/hora A data e a hora podem ser ajustadas acessando o submenu.
-
Page 111: Para Sair Do Submenu Ou Do Menu
Menu Efetuar login Somente para manutenção. Insira o código de 4 dígitos para acessar o menu de manutenção. Autom. no próx. teste Acesse pressionando OK e escolha Sem álcool ou Álcool usando PARA CIMA e PARA BAIXO. Acesse com OK e configure desativado ou ativado pressionando OK. -
Page 112: Resolução De Problemas
Resolução de problemas Resolução de problemas Uma mensagem de erro é exibida em caso de falha do instrumento. O número que aparece abaixo da mensagem é usado para funções de manutenção. Se a falha permanecer depois de ligar e desligar várias vezes, entre em contato com o DrägerService. -
Page 113: Manutenção
Manutenção Manutenção Se necessário: Troque as baterias. É recomendada uma verificação da calibragem a cada 24 meses. A manutenção só deve ser realizada por técnicos. Somente peças de reposição originais podem ser usadas para manutenção. Limpeza CUIDADO Danos ao instrumento. -
Page 114: Descarte
Dados técnicos Descarte Somente descarte como resíduo especial, conforme as regulamentações locais de descarte. Descarte do instrumento Este produto não deve ser descartado como lixo residencial. Isso é indicado pelo símbolo adjacente. Você pode devolver este produto à Dräger sem custo. Para obter informações, entre em contato com as organizações de marketing nacionais ou com a Dräger. - Page 115 Dados técnicos Resultados da medição 0 mg/L a 0,029 mg/L nenhum álcool ( ) indicado 0,030 mg/L a 2,5 mg/L álcool ( ) indicado mais de 2,51 mg/L intervalo de medição excedido ↑↑↑ ) indicado Desvio da sensibilidade Normalmente 0,4 % do valor medido por mês Tempo de espera para a prontidão de medição depois de uma medição anterior com: 0,025 mg/100 mL...
-
Page 116: Lista De Encomenda
Lista de encomenda Lista de encomenda Nome e descrição Nº de peça ® Alcotest 5000 V1 83 27 701 Idiomas: de, en, fr, es, nl, it, ca, pt ® Alcotest 5000 V2 83 27 702 Idiomas: en, pl, fi, sv, da, no, et, lt, lv ®... - Page 117 Indice Indice Informazioni relative alla sicurezza....115 Convenzioni del presente documento ....116 Descrizione .
-
Page 118: Indice
Indice Risoluzione dei problemi ......129 Manutenzione ........131 Pulizia . -
Page 119: Informazioni Relative Alla Sicurezza
Informazioni relative alla sicurezza Informazioni relative alla sicurezza Prima dell'utilizzo del prodotto leggere attentamente le istruzioni per l'uso. Solo personale addestrato ed esperto può ispezionare, riparare e sottoporre a manutenzione il prodotto. Si consiglia di stipulare un contratto di assistenza con Dräger e di far eseguire tutti gli interventi di manutenzione da Dräger. -
Page 120: Convenzioni Del Presente Documento
Convenzioni del presente documento Convenzioni del presente documento I seguenti segnali di avvertenza vengono utilizzati in questo documento per contrassegnare ed evidenziare i corrispettivi testi di avvertenza, i quali rendono necessaria una maggiore attenzione da parte dell'utilizzatore. Il significato dei segnali di avvertenza è definito come indicato di seguito. -
Page 121: Descrizione
Descrizione Descrizione Contenuto della confezione ® Dispositivo Dräger Alcotest 5000 (incl. 3 batterie alcaline AA) Imbuto senza contatto (3 pz.) Laccio da polso... - Page 122 Descrizione Imbuto LED (rosso, verde) Display Tasto GIÙ/MENU Tasto OK Tasto SU Presa di comunicazione USB solo per la manutenzione Occhiello per il laccio da polso...
-
Page 123: Tasti
Utilizzo Tasti Tasto Funzione Accensione e spegnimento dello strumento e conferma dei dati inseriti o delle funzioni selezionate. Nel testo seguente: OK. Accesso al menu, navigazione verso il basso nel menu e passaggio dall’una all’altra delle posizioni delle cifre. Nel testo seguente: GIÙ o MENU. Navigazione verso l’alto nel menu, passaggio dall’una all’altra delle posizioni delle cifre. -
Page 124: Prerequisiti
Utilizzo Prerequisiti NOTA Evitare di acquisire campioni in presenza di spifferi di vento, perché ciò potrebbe falsare il test. 00833785 4.1.1 Campione di aria espirata adeguato La persona sottoposta a test deve respirare regolarmente e in modo rilassato prima dell’acquisizione del campione. La persona sottoposta a test deve essere in grado di esalare il ... -
Page 125: Avvio Iniziale
Utilizzo 4.1.3 Avvio iniziale Quando lo strumento viene acceso per la prima volta, viene aperta una procedura guidata di impostazione con cui si possono definire i seguenti dati: lingua data formato orario Tutte le impostazioni possono essere modificate in seguito tramite "Menu". -
Page 126: Esecuzione Della Misurazione
Utilizzo Esecuzione della misurazione IGIENE Non toccare l’imbuto nella sua parte superiore. È obbligatorio mantenere una distanza di 2-3 cm dall’oggetto o dalla persona da sottoporre a test. L’imbuto non deve entrare in contatto con la pelle della persona da sottoporre a test, eventuali secrezioni o superfici. Inoltre, evitare il contatto diretto con le sostanze da testare. -
Page 127: Risultati
Utilizzo ATTENZIONE Risultati falsati Dopo numerosi test in breve tempo può accumularsi della condensa ► all’interno dell’imbuto. Sostituire l’imbuto prima che la condensa penetri nello strumento. Risultati Dopo 2-7 secondi (in funzione della concentrazione misurata e della temperatura dello strumento) il risultato del test viene mostrato sul display e memorizzato nello strumento. -
Page 128: Test Passivo E Manuale
Utilizzo Nel menu è possibile impostare la conferma dei risultati dei test Alcool e No alcool come indicato di seguito: Confermare i risultati dei test premendo OK oppure i risultati dei test saranno confermati automaticamente dopo 2 secondi. Test passivo e manuale 4.5.1 Test passivo... -
Page 129: Test Manuale
Impostazione dello strumento 4.5.3 Test manuale Il test manuale può essere eseguito se la persona da sottoporre al test non è in grado di assicurare il volume di espirazione richiesto. 1. Accendere lo strumento. 2. Tenere lo strumento a 2-3 cm di distanza dalla bocca della persona da sottoporre a test. -
Page 130: Montaggio Di Un'asta Telescopica
Impostazione dello strumento Montaggio di un'asta telescopica Se le persone da sottoporre a test sono distanti (ad es. un conducente di un camion o un autocarro che siede in alto), per raggiungerle, è possibile collegare lo strumento a un'asta telescopica con connettore da 1/4″. -
Page 131: Imbuto
Menu Imbuto Lo strumento viene fornito con tre imbuti. È obbligatorio mantenere una distanza di 2-3 cm dall’oggetto o dalla persona da sottoporre a test. Per motivi di natura igienica, l’imbuto non deve entrare in contatto con la pelle della persona da sottoporre a test, eventuali secrezioni o superfici. - Page 132 Menu Schermata Info Mostra il numero di serie e il codice articolo dello strumento nonché il numero di serie del sensore EC. Manutenzione success. Mostra il tempo rimanente in giorni relativo al controllo della precisione e alla regolazione. Data/ora La data e l’ora possono essere regolate accedendo al sottomenu. Modifica le cifre utilizzando SU e GIÙ...
-
Page 133: Chiusura Del Sottomenu O Del Menu
Risoluzione dei problemi Login Solo per la manutenzione. Inserire il codice a 4 cifre per accedere al menu di manutenzione. Autom. al test succ. Accedere premendo OK e scegliere No alcool o Alcool utilizzando SU e GIÙ. Accedere mediante OK e impostare disattivato o attivato premendo OK. - Page 134 Risoluzione dei problemi Messaggio di Causa Rimedio errore Strumento fuori Strumento troppo Lasciare raffreddare o range di caldo o troppo freddo riscaldare lo temperatura strumento. ↑ ↑ ↑ Campo di misura È necessario prevedere (Campo di misura superato. I residui di un intervallo di almeno superato) alcool ancora presenti...
-
Page 135: Manutenzione
Manutenzione Manutenzione Se necessario: sostituire le batterie. Si raccomanda di effettuare ogni 24 mesi un controllo di calibrazione. Gli interventi di manutenzione devono essere eseguiti unicamente da esperti. Per gli interventi di manutenzione devono essere usati solo pezzi ... -
Page 136: Conservazione
Manutenzione Conservazione ® Il dispositivo Alcotest 5000 consuma una piccola quantità di corrente anche quando è spento. ATTENZIONE Danni relativi allo strumento. La perdita di acido dalla batteria può provocare danni allo strumento. ► Rimuovere le batterie se il periodo di conservazione si prolunga oltre i 6 mesi. -
Page 137: Dati Tecnici
Dati tecnici Dati tecnici Principio di misurazione Sensore elettrochimico Condizioni ambiente Durante il funzionamento Da -15 °C a +50 °C/ da +5 °F a +122 °F Dal 10 al 100% di umidità relativa (senza condensa) Da 600 a 1300 hPa Durante il periodo di Da -20 °C a +70 °C / conservazione... - Page 138 Dati tecnici Peso Circa 245 g Alimentazione 3 batterie alcaline AA da 1,5 V Batterie per circa 5000 misurazioni Memorizzazione dei dati Saranno memorizzati gli ultimi 500 risultati. Interfaccia Presa USB solo per interventi di manutenzione Marchi CE Compatibilità elettromagnetica (Direttiva 2014/30/UE)
-
Page 139: Lista Per L'ordine
Lista per l'ordine Lista per l'ordine Nome e descrizione Cod. art. ® Alcotest 5000 V1 83 27 701 Lingue: de, en, fr, es, nl, it, ca, pt ® Alcotest 5000 V2 83 27 702 Lingue: en, pl, fi, sv, da, no, et, lt, lv ®... - Page 140 Inhoud Inhoud Algemene veiligheidsaanwijzingen ....138 Aanwijzingen in dit document ..... 139 Omschrijving .
- Page 141 Inhoud Storingen oplossen......153 Onderhoud ........154 Reiniging.
-
Page 142: Algemene Veiligheidsaanwijzingen
Algemene veiligheidsaanwijzingen Algemene veiligheidsaanwijzingen Het is belangrijk om voor gebruik van dit product de gebruiksaanwijzing zorgvuldig door te lezen. Het product mag alleen worden geïnspecteerd, gerepareerd en onderhouden door opgeleid, competent en deskundig personeel. Dräger adviseert het afsluiten van een Dräger-servicecontract voor alle onderhoudsactiviteiten en om alle reparaties door Dräger uit te laten voeren. -
Page 143: Aanwijzingen In Dit Document
Aanwijzingen in dit document Aanwijzingen in dit document De volgende waarschuwingssymbolen worden in dit document gebruikt om de bijbehorende waarschuwingsteksten die een verhoogde aandacht van de gebruiker vereisen, aan te duiden en te accentueren. De betekenissen van de waarschuwingssymbolen zijn als volgt gedefinieerd: VOORZICHTIG Wijst op een potentieel gevaarlijke situatie. -
Page 144: Omschrijving
Omschrijving Omschrijving Wat zit er in de doos? ® Dräger Alcotest 5000 (incl. 3 AA Alkaline batterijen) Non-contact trechter mondstuk (3 stuks) Polsbandje... - Page 145 Omschrijving Trechter mondstuk LED (rood, groen) Display OMLAAG/MENU-toets OK-toets OMHOOG-toets USB poort, alleen voor service Oogje voor het polsband...
-
Page 146: Toetsen
Gebruik Toetsen Toets Functie Aan- en uitschakelen van het apparaat en bevestigen van invoeren of geselecteerde functies. In de verdere tekst OK. Toegang tot het menu, omlaag navigeren in het menu en heen en weer wisselen tussen cijferposities. In de verdere tekst OMLAAG of MENU. -
Page 147: Vereisten
Gebruik Vereisten AANWIJZING Neem geen monsters in de tocht of wind. Dat zou het testresultaat kunnen beïnvloeden. 00833785 4.1.1 Geschikt ademmonster De testpersoon dient regelmatig en kalm te ademen, voordat het monster wordt afgenomen. De testpersoon moet in staat zijn om het minimale ademvolume uit ... -
Page 148: Eerste Opstart
Gebruik 4.1.3 Eerste opstart Een installatiewizard opent, zodra het instrument voor de eerste keer wordt ingeschakeld. Met behulp van de installatiewizard worden de volgende instellingen uitgevoerd: Taal Datum Tijdsformaat Tijd Alle instellingen kunnen naderhand via het menu worden gewijzigd. AANWIJZING Verlies van voorinstellingen. -
Page 149: Uitvoering Van De Meting
Gebruik Uitvoering van de meting HYGIËNE Raak het trechter mondstuk niet aan de bovenkant aan. Het aanhouden van een afstand van 2-3 cm tot het testobject of de testpersoon is verplicht. De huid van de testpersoon, eventuele afscheidingen en oppervlakken mogen niet in aanraking komen met het trechter mondstuk. -
Page 150: Resultaten
Gebruik VOORZICHTIG Vertekening van de resultaten Na een aantal testen kan zich binnen korte tijd condensvocht ► ophopen binnenin het trechter mondstuk. Vervang het trechter mondstuk, voordat condensatievocht het instrument binnendringt. Resultaten Na 2 tot 7 seconden (afhankelijk van de gemeten concentratie en de instrumenttemperatuur) wordt het testresultaat in het display afgebeeld en in het instrument opgeslagen. -
Page 151: Passieve En Handmatige Testen
Gebruik In het menu kunt u de bevestiging van de testresultaten Alcohol en Geen alcohol als volgt configureren: Bevestig de testresultaten door indrukken van OK de testresultaten worden automatisch na 2 sec. bevestigd. Passieve en handmatige testen 4.5.1 Passieve test De passieve test kan worden uitgevoerd, als een persoon niet in staat is een geschikt ademmonster te verstrekken (voor een beschrijving zie... -
Page 152: Handmatige Test
Het instrument instellen 4.5.3 Handmatige test De handmatige test kan worden uitgevoerd, als een testpersoon niet in staat is om het vereiste ademtestvolume te blazen. 1. Schakel het instrument in. 2. Houd het instrument op een afstand van 2-3 cm dicht bij de mond van de testpersoon. -
Page 153: Montage Van Een Telescoopstang
Het instrument instellen Montage van een telescoopstang Om testpersonen op afstand te bereiken (bijv. Een hoog zittende bestuurder van een vrachtwagen) kunt u het instrument bevestigen aan een telescoopstang met behulp van een 1/4″ aansluiting. Een telescoopstang is niet inbegrepen in het leveringspakket van ... -
Page 154: Trechter Mondstuk
Het instrument instellen Trechter mondstuk Het instrument wordt geleverd met drie trechter mondstukken.. Het aanhouden van een afstand van 2-3 cm tot het testobject of de testpersoon is verplicht. Om hygiëneredenen mogen de huid van de testpersoon, eventuele afscheidingen en oppervlakken niet in aanraking komen met het trechter mondstuk. -
Page 155: Menu
Menu Menu Open het menu door indrukken van OMLAAG/MENU. Navigeer door de menulijst met OMHOOG en OMLAAG. Selecteer een menupunt door indrukken van OK. Menupunten Het menu bevat de volgende menupunten: Resultaten Toont alle opgeslagen resultaten met datum en tijd en een testnummer en de indicatie, of de test handmatig of passief werd uitgevoerd. -
Page 156: Softwareversie
Menu Taal Om de taal te wijzigen navigeert u met OMHOOG en OMLAAG en bevestigt u met OK. Softwareversie Toont het softwareversie-nummer en het onderdeelnummer. Korte-term.tell. De testteller kan opnieuw worden ingesteld vanuit het submenu. Na bevestiging met OK toont het display een lege balk en het testnummer #00001. -
Page 157: Storingen Oplossen
Storingen oplossen Storingen oplossen In het geval van een instrumentstoring wordt een storingsmelding afgebeeld. Het nummer dat onder de melding verschijnt wordt gebruikt voor servicedoeleinden. Neem contact op met DrägerService, als deze fout ook na verschillende keren in- en uitschakelen blijft optreden. -
Page 158: Onderhoud
Onderhoud Onderhoud Indien nodig: Batterijen vervangen. Een kalibratiecontrole om de 24 maanden wordt aanbevolen. Onderhoudsactiviteiten mogen uitsluitend worden uitgevoerd door opgeleid, competent en deskundig personeel. Gebruik voor service en onderhoud uitsluitend originele onderdelen. Reiniging VOORZICHTIG Beschadiging van het instrument. ►... -
Page 159: Afvoeren
Onderhoud Afvoeren Voer de batterijen uitsluitend af als chemisch afval volgens de geldende voorschriften. Het instrument afvoeren Dit product mag niet als huishoudelijk afval worden afgevoerd. Dit wordt aangegeven door het hiernaast afgebeelde symbool. U kunt dit product kosteloos aan Dräger opsturen. -
Page 160: Technische Gegevens
Technische gegevens Technische gegevens Meetprincipe Elektrochemische sensor Omgevingscondities Tijdens gebruik -15 °C tot +50 °C 10 tot 100 % rel. vochtigh. (niet condenserend) 600 tot 1300 hPa Tijdens opslag -20 °C tot +70 °C Meetresultaten 0 mg/L tot 0,029 mg/L geen alcohol ( ) aangegeven 0,030 mg/L tot 2,5 mg/L... - Page 161 Technische gegevens Voedingsspanning 3 x 1,5 V AA Alkaline batterijen Batterijen voor ca. 5000 metingen Gegevensopslag De laatste 500 resultaten worden opgeslagen. Aansluiting USB poort, alleen voor service CE-markering Elektromagnetische compatibiliteit (Richtlijn 2014/30/EU).
-
Page 162: Bestellijst
Bestellijst Bestellijst Benaming en beschrijving Onderdeelnr. ® Alcotest 5000 V1 83 27 701 Talen: de, en, fr, es, nl, it, ca, pt ® Alcotest 5000 V2 83 27 702 Talen: en, pl, fi, sv, da, no, et, lt, lv ® Alcotest 5000 V3 83 27 703... - Page 163 Índex Índex Informació de seguretat ......161 Convencions emprades en aquest document ..162 Descripció...
- Page 164 Índex Resolució de problemes ......176 Manteniment........177 Neteja .
-
Page 165: Informació De Seguretat
Informació de seguretat Informació de seguretat Abans de fer servir aquest producte, llegiu atentament les instruccions d'ús. Les revisions, les reparacions i el manteniment del producte han de deixar-se sempre en mans de personal especialitzat i format. Dräger recomana disposar d'un contracte de serveis amb Dräger per a totes les activitats de manteniment i que totes les reparacions siguin realitzades per Dräger. - Page 166 Convencions emprades en aquest document Convencions emprades en aquest document En aquest document es fan servir els següents missatges d'alerta per destacar els textos que requereixen una atenció especial per part de l’usuari. A continuació es defineix el significat de cadascun dels missatges d'alerta: PRECAUCIÓ...
- Page 167 Descripció Descripció Contingut del paquet ® Dräger Alcotest 5000 (inclou 3 piles alcalines AA) Embut sense contacte (3 unitats) Corretja per al canell...
- Page 168 Descripció Embut LED (vermell, verd) Pantalla Botó BAIXAR/MENÚ Botó OK Botó PUJAR Connexió USB només per a servei tècnic Orifici per a la corretja...
- Page 169 Ús Botons Botó Funció Encendre i apagar l’aparell i confirmar els valors o les funcions seleccionades. En endavant, OK. Accedir al menú, baixar en la navegació pel menú i passar a la següent posició numèrica. En endavant, BAIXAR o MENÚ. Pujar en la navegació...
-
Page 170: Mostra D'alè Adequada
Ús Requisits previs ATENCIÓ Eviteu prendre les mostres en un corrent d'aire. Els resultats de la prova es podrien veure afectats. 00833785 4.1.1 Mostra d'alè adequada La persona a la qual es realitzarà la prova ha de respirar de manera regular i relaxada abans de prendre la mostra. -
Page 171: Preparació Per A L'ús
Ús 4.1.3 Configuració inicial La primera vegada que s'encén l’aparell s'obre un assistent de configuració. Mitjançant l'assistent es configuren les opcions següents: Idioma Data Format d'hora Hora Totes aquestes opcions es poden canviar posteriorment a través del menú. -
Page 172: Realització De La Mesura
Ús Realització de la mesura HIGIENE No toqueu la part superior de l'embut. És obligatori mantenir una distància de 2-3 cm entre l'embut i l'objecte o la persona a la qual es farà la prova. L'embut no ha d'entrar en contacte amb la pell de la persona ni amb cap mena de secreció... - Page 173 Ús PRECAUCIÓ Distorsió dels resultats Es pot acumular condensació a l'interior de l'embut si es realitzen ► diverses proves en un període curt de temps. Canvieu l'embut abans que la condensació entri a l’aparell. Resultats Passats de 2 a 7 segons (en funció de la concentració mesurada i de la temperatura de l’aparell), el resultat de la prova apareix a la pantalla i s'emmagatzema a l’aparell.
- Page 174 Ús els resultats de les proves es confirmen automàticament passats dos segons. Proves passives i manuals 4.5.1 Prova passiva Es pot realitzar una prova passiva si la persona no és capaç de proporcionar una mostra d'alè adequada (si voleu saber què vol dir això, consulteu consulteu la pàgina 166, secció...
-
Page 175: Encendre I Apagar L'aparell
Configuració de l’aparell 4.5.3 Prova manual La prova manual es pot realitzar si una persona no és capaç de proporcionar el volum d'aire necessari per a la prova. 1. Enceneu l’aparell. 2. Subjecteu l’aparell a 2-3 cm de la boca de la persona a la qual es farà... -
Page 176: Inserció O Canvi De Les Piles
Configuració de l’aparell Col·locació de la barra telescòpica Si la persona a la qual es farà la prova es troba a certa distància (per exemple, el conductor d'un camió dins de la cabina) es pot fixar una barra telescòpica a l’aparell amb un connector d'1/4″. ®... - Page 177 Configuració de l’aparell Embut L’aparell se subministra amb tres embuts. És obligatori mantenir una distància de 2-3 cm entre l'embut i l'objecte o la persona a la qual es farà la prova. Per raons d'higiene, l'embut no ha d'entrar en contacte amb la pell de la persona ni amb cap mena de secreció...
- Page 178 Menú Menú Obriu el menú prement el botó BAIXAR/MENÚ. Navegueu per les opcions del menú fent servir els botons PUJAR i BAIXAR. Seleccioneu una de les opcions del menú prement el botó OK. Elements del menú El menú conté les opcions següents: Resultats Mostra tots els resultats emmagatzemats amb la data i l'hora, així...
- Page 179 Menú Altaveu Es pot silenciar el so de l’aparell o modificar el volum accedint a aquest submenú. Idioma Per canviar l'idioma, navegueu per aquest submenú fent servir els botons PUJAR i BAIXAR i confirmeu la selecció prement OK. Versió programari Mostra el número de versió...
-
Page 180: Sortir D'un Submenú O Menú
Resolució de problemes Sortir d'un submenú o menú 1. Navegueu fins a la primera opció prement PUJAR diverses vegades. La primera opció pot ser Mesurar o Enrere. 2. Trieu l'opció prement el botó OK. Resolució de problemes En cas d’avaria de l’aparell, apareix un missatge d’error a la pantalla. El número que apareix sota el missatge es fa servir per a les funcions de servei tècnic. - Page 181 Manteniment Avaria / missatge Causa Solució Número d'error Error a l’aparell. Apagueu i torneu a encendre l’aparell. Si l'error persisteix, poseu-vos en contacte amb DrägerService o amb el vostre proveïdor. Manteniment Si és necessari: Canvieu les piles. Es recomana fer una comprovació del calibratge cada 24 mesos. ...
- Page 182 Manteniment Emmagatzematge ® L'Alcotest 5000 consumeix petites quantitats d'energia fins i tot quan està apagat. PRECAUCIÓ Danys a l’aparell. Les fugues d'àcid de les piles poden causar danys al l’aparell. ► Retireu les piles si us disposeu a guardar el dispositiu durant més de 6 mesos.
-
Page 183: Dades Tècniques
Dades tècniques Dades tècniques Principi de mesura Sensor electroquímic Condicions ambientals Durant el funcionament -15 °C a +50 °C / +5 °F a +122 °F 10 a 100 % hum. rel. (sense condensació) 600 a 1300 hPa Durant l'emmagatzematge -20 °C a +70 °C / -4 °F a +158 °F Resultats de la mesura 0 mg/L a 0,029 mg/L s'indica que no hi ha alcohol (... - Page 184 Dades tècniques Subministrament elèctric 3 piles alcalines AA d'1,5 V Les piles permeten realitzar aproximadament 5000 mesures Emmagatzematge de dades S'emmagatzemaran els últims 500 resultats Interfície Connexió USB només per a servei tècnic Marques CE Compatibilitat electromagnètica (Directiva 2014/30/UE).
- Page 185 Llista de comandes Llista de comandes Núm. de Nom i descripció component ® Alcotest 5000 V1 83 27 701 Idiomes: de, en, fr, es, nl, it, ca, pt ® Alcotest 5000 V2 83 27 702 Idiomes: en, pl, fi, sv, da, no, et, lt, lv ®...
- Page 186 Dräger Safety AG & Co. KGaA Revalstraße 1 23560 Lübeck, Germany +49 451 882 0 Fax +49 451 882 20 80 www.draeger.com 90 33 785 - IFU MUL490 © Dräger Safety AG & Co. KGaA Edition 01 - July 2017 Subject to alteration...