Canon WP-DC31 Guide D'utilisation
Table des Matières
Les langues disponibles
Les langues disponibles
Liens rapides
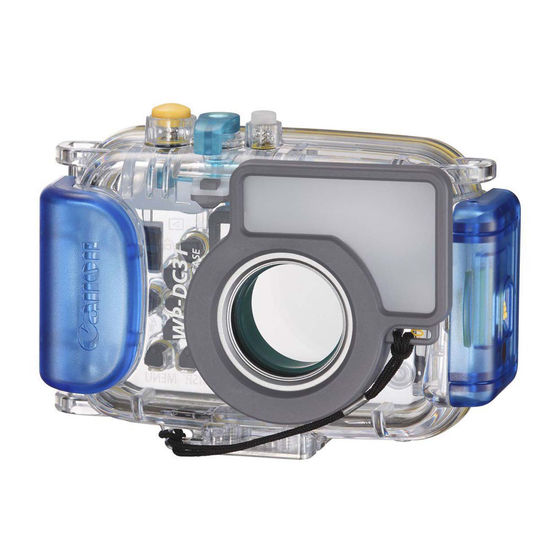
WP-DC31
キヤノンデジタルカメラ ウォータープルーフケース
ユーザーガイド
Canon Digital Camera Waterproof Case
User Guide
Wasserdichtes Gehäuse für Canon Digitalkamera
Benutzerhandbuch
Canon Funda impermeable para cámara digital
Guía del usuario
Boîtier étanche pour appareils photo numériques Canon
Guide d'utilisation
Canon Custodia Impermeabile per Fotocamera Digitale
Guida dell'utente
日本語
ENGLISH
DEUTSCH
ESPAÑOL
FRANÇAIS
ITALIANO
中文
Table des Matières

Manuels Connexes pour Canon WP-DC31


Sommaire des Matières pour Canon WP-DC31
- Page 1 Canon Digital Camera Waterproof Case User Guide DEUTSCH Wasserdichtes Gehäuse für Canon Digitalkamera Benutzerhandbuch ESPAÑOL Canon Funda impermeable para cámara digital Guía del usuario FRANÇAIS Boîtier étanche pour appareils photo numériques Canon Guide d’utilisation ITALIANO Canon Custodia Impermeabile per Fotocamera Digitale Guida dell’utente 中文...
- Page 19 MEMO...
- Page 39 MEMO...
-
Page 80: Clause De Non-Responsabilité
écrite préalable de Canon. • Canon n’offre aucune garantie pour les dommages résultant de la perte ou de l’altération des données par suite d’une erreur ou d’un dysfonctionnement de l’appareil, des cartes mémoire, des ordinateurs personnels, des périphériques, ou de l’utilisation de cartes mémoire provenant d’autres... - Page 81 étanche, vous pouvez utiliser votre appareil En cas de fuite, contactez le service clientèle photo numérique Canon sous la pluie, à la plage Canon. ou sur les pistes de ski. Vous pourrez même l’utiliser sous l’eau jusqu’à 40 mètres •...
-
Page 82: Contenu De L'emballage
Contenu de l’emballage Produits vendus séparément Le boîtier étanche est fourni avec les articles • Poids pour boîtier étanche Canon WW-DC1 suivants. Veuillez vérifier qu’ils figurent dans l’emballage et contactez votre revendeur Canon si Le poids empêche le boîtier étanche de flotter l’un d’entre eux devait manquer. -
Page 83: Précautions De Sécurité
Précautions de sécurité Le boîtier pourrait ne pas fonctionner correctement, être endommagé ou subir des Avant d’utiliser le boîtier étanche, lisez infiltrations d’eau. attentivement ces précautions afin d’en faire un • N’appuyez pas trop fort sur les boutons et le usage correct. -
Page 84: Précautions D'emploi
Précautions d’emploi d’étanchéité. Recouvrez le boîtier d’une serviette, par exemple, si vous devez le laisser • Ne faites pas tomber ni ne jetez le boîtier au soleil. étanche. • Utilisez uniquement la graisse au silicone fournie, car l’emploi d’autres produits d’étanchéité... -
Page 85: À Propos Des Infiltrations D'eau
Faites extrêmement attention à ce que le étanche et l’appareil photo jusqu’à ce qu’ils soient joint d’étanchéité soit placé à l’horizontale secs et contactez le service clientèle Canon. sur toute la rainure de montage. Assurez- vous que le joint d’étanchéité remplit bien sa... -
Page 86: Entretien Du Boîtier
Essuyez aussi peut provoquer une infiltration d’eau dans le l’intérieur du boîtier avec un chiffon doux et sec. boîtier. Contactez le service clientèle Canon. Ne le lavez pas à l’eau. Pour que le boîtier reste toujours bien étanche, il est recommandé... -
Page 87: Désignations
Face arrière Désignations Sélecteur de mode Face avant Attaches de bandoulière Bouton d’alimentation Levier du zoom Déclencheur Bouton b (Exposition)/ (saut)/ Cliquet/ Bouton de verrouillage (flash)/ Bouton Plaque de Bouton (retardateur)/ diffusion (effacement image par image )/ Fenêtre d’objectif Poignée Filetage pour trépied Bouton (affichage) -
Page 88: Préparation De L'appareil Photo
Préparations Préparation de l’appareil photo Insérez la batterie et la carte mémoire. • Pour les méthodes d’installation de la batterie et de la carte mémoire, veuillez vous reporter au Guide d’utilisation de l’appareil photo. • Utilisez une batterie qui est correctement chargée. -
Page 89: Préparation Du Boîtier Étanche
Préparation du boîtier étanche Retirez la bandoulière de l’appareil photo. Fixez les deux extrémités du collier aux attaches comme indiqué, et ajustez-le à la longueur adéquate. Bandoulière Si elle n’est pas retirée, la bandoulière de l’appareil photo peut se coincer dans le joint d’étanchéité... - Page 90 un chiffon doux et sec pour éviter Utilisez le collier quand vous portez l’appareil d’endommager le boîtier étanche. à la plage. Enlevez le collier et fixez la dragonne avant d’utiliser l’appareil sous l’eau. Le collier pourrait s’enchevêtrer et donner ainsi lieu à un risque d’étranglement ou autre accident.
-
Page 91: Installation De L'appareil Photo Dans Le Boîtier Étanche
Installation de l’appareil photo Pour éviter l’usure du joint d’étanchéité, dans le boîtier étanche enduisez toute la surface du joint d’une fine couche de graisse. Installez l’appareil photo dans le Pour de plus amples informations concernant boîtier étanche, comme illustré. les précautions de manipulation du joint d’étanchéité, reportez-vous à... - Page 92 Refermez le boîtier étanche. Tournez la sélecteur de mode dans le sens de la flèche pour • Assurez-vous que le joint d’étanchéité et ses utiliser la molette de sélection des surfaces de contact ne sont pas souillés par des saletés (grains de sable, poussières, modes de l’appareil.
-
Page 93: Prise De Vue
Prise de vue Appuyez sur le bouton Voyant Déclencheur d’alimentation pour mettre l’appareil photo sous tension. Levier du zoom Tournez la sélecteur de mode Bouton jusqu’au mode souhaité. d’alimentation Appuyez sur le bouton l (affichage) pour allumer l’écran. Sélecteur de •... -
Page 94: Réglage Du Mode De Prise De Vue Sur S (Sous-Marin)
• Assurez-vous de ne pas mettre vos doigts Réglage du mode de prise de vue devant la fenêtre de l’objectif, la fenêtre du sur S (Sous-marin) flash ou la plaque de diffusion pendant la Le mode de prise de vue S permet d’obtenir prise de vue. -
Page 95: Utilisation Du Flash
Utilisation du flash Fixation de la plaque de diffusion Afin que la lumière du flash soit répartie Attachez la plaque de diffusion à uniformément, fixez la plaque de diffusion. l’aide du cordon comme illustré. • Ne rayez pas la surface de la plaque de diffusion car cela pourrait empêcher le flash d’être diffusé... -
Page 96: Retrait De La Plaque De Diffusion
Retrait de la plaque de diffusion Fixez la plaque de diffusion sur le boîtier étanche. Saisissez la plaque de diffusion et détachez-la en tirant dans le sens indiqué par la flèche. -
Page 97: Retrait De L'appareil Photo
Lecture Retrait de l’appareil photo Appuyez sur le bouton 1 (Lecture). Prenez soin d’enlever toute trace d’eau du boîtier étanche. Déclencheur • Éliminez les saletés, le sable, les cheveux ou autres particules du boîtier étanche et lavez- Bouton 1 (Lecture) le à... - Page 98 Stockage • Rangez soigneusement le boîtier étanche en le laissant entrouvert pour éviter une déformation de son joint d’étanchéité et pour préserver ses performances d’étanchéité. • Protégez le joint d’étanchéité contre la poussière et les éraflures pendant les périodes d’inactivité. •...
-
Page 99: Fiche Technique
* Incluant la plaque de diffusion verre transparente, EPDM, etc. • Toutes les données indiquées ici reposent sur Température de fonctionnement de l’appareil les normes d’essai de Canon. photo : • Les caractéristiques techniques et l’aspect sont 0 à 40 °C (32 à 104 °F) susceptibles d’être modifiés sans préavis. - Page 138 MEMO...
- Page 139 MEMO...
- Page 140 MEMO...
- Page 141 MEMO...
- Page 142 MEMO...
- Page 143 MEMO...
- Page 144 MEMO...
- Page 145 MEMO...
- Page 146 PRINTED IN JAPAN CDI-M439-010 XXXXXXX © CANON INC. 2009 IMPRIMÉ AU JAPON...