TESTO 810 Mode D'emploi
Masquer les pouces Voir aussi pour 810:
Table des Matières

Publicité

Les langues disponibles
  • FR

Les langues disponibles

  • FRANÇAIS, page 23

Liens rapides

Bedienungsanleitung
Instruction manual
Mode d'emploi
Manual de instrucciones
Manuale di istruzioni
Manual de instruções
Ðóêîâîäñòâî ïîëüçîâàòåëÿ
testo 810
de
en
fr
es
it
pt
ru

Publicité

Table des Matières
loading

Sommaire des Matières pour TESTO 810

  • Page 1 810 Bedienungsanleitung Instruction manual Mode d’emploi Manual de instrucciones Manuale di istruzioni Manual de instruções Ðóêîâîäñòâî ïîëüçîâàòåëÿ...
  • Page 3 Kurzanleitung testo 810 Kurzanleitung testo 810  Schutzkappe: Parkposition  Infrarotsensor  Luft-Temperatur-Sensor  Display  Bedientasten  Batteriefach (Rückseite) Grundeinstellungen vornehmen Gerät ist aus > 2s gedrückt halten > Mit ( ) auswählen, ) bestätigen: Temperatureinheit: °C, °F > Differenztemperatur t: OFF (aus), ON (an) >...
  • Page 4: Sicherheit Und Umwelt

    Doku mentation beschrieben sind. Dabei die vor gegebenen Handlungs schritte einhalten. Nur Original-Ersatzteile von Testo ver wenden. Umwelt schützen > Defekte Akkus und leere Batterien an den dafür vorgesehenen Sammelstellen abgeben. > Produkt nach Ende der Nutzungszeit an Testo senden. Wir sorgen für eine umwelt schonende Entsorgung.
  • Page 5: Funktionen Und Verwendung

    Leistungsbeschreibung Leistungsbeschreibung Funktionen und Verwendung Das testo 810 ist ein Infrarot-Messgerät. Üblicher Verwendungs- zweck ist das Messen der Oberflächentemperatur zum Beispiel an Heizungen und Kühlern und das gleichzeitige Messen der Umgebungstemperatur. Technische Daten Messtechnische Daten Weitere Gerätedaten · Sensoren: · Schutzart: IP40 Infrarotsensor, ·...
  • Page 6: Auf Einen Blick

    6 Produktbeschreibung Produktbeschreibung Auf einen Blick  Schutzkappe: Parkposition  Infrarotsensor  Luft-Temperatur-Sensor  Display  Bedientasten  Batteriefach (Rückseite) Erste Schritte  Batterien einlegen: 1 Batteriefach öffnen: Batteriedeckel nach unten schieben. 2 Batterien (2x 1,5V Typ AAA) einlegen. Polung beachten! 3 Batteriefach schließen: Batteriedeckel aufschieben.
  • Page 7 Erste Schritte Blanke Metalle und Metalloxide sind aufgrund ihres niedri- gen bzw. uneinheitlichen Emissionsfaktors nur bedingt für die Infrarot-Messung geeignet: Emissionsfaktor erhöhen de Beschichtungen wie z. B. Lack oder Emissions-Klebeband (0554 0051) auf das Messobjekt aufbringen. Emissionsfaktoren verschiedener Materialien (typische Werte): ...
  • Page 8: Produkt Verwenden

    8 Produkt verwenden Produkt verwenden  Gerät einschalten: > drücken. - Der Messmodus wird geöffnet.  Displaybeleuchtung einschalten  Gerät ist eingeschaltet. > drücken. - Displaybeleuchtung erlischt automatisch 10s nach letzter Tastenbetätigung.  IR-Messung durchführen: Laserstrahlung! Nicht in den Laserstrahl blicken. Laserklasse 2.
  • Page 9 Produkt verwenden  Displayansicht wechseln: Einstellbare Ansichten · Hold: Messwerte werden gehalten · Max: Maximalwerte seit letztem Einschalten bzw. seit letztem Zurücksetzen. · Min: Minimalwerte seit letztem Einschalten bzw. seit letztem Zurücksetzen. > mehrmals drücken, bis gewünschte Ansicht erscheint.  Max-/ Min-Werte zurücksetzen: mehrmals drücken, bis gewünschte Ansicht erscheint.
  • Page 10: Produkt Instand Halten

    10 Produkt instand halten Produkt instand halten  Batterien wechseln: 1 Batteriefach öffnen: Batteriedeckel nach unten schieben. 2 Verbrauchte Batterien entnehmen und neue Batterien (2x 1,5V Typ AAA) einlegen. Polung beachten! 3 Batteriefach schließen: Batteriedeckel aufschieben.  Gehäuse reinigen: > Gehäuse bei Verschmutzung mit einem feuchten Tuch (Seifen lauge) reinigen.
  • Page 11: Tipps Und Hilfe

    Hi oder Lo · Messwerte außerhalb des Messbereichs (zu hoch, zu niedrig): Zulässigen Messbereich einhalten. · Restkapazität <10min: Batterien wechseln. Falls wir Ihre Frage nicht beantworten konnten: Wenden Sie sich bitte an Ihren Händler oder den Testo-Kundendienst. Kontakt- daten siehe Internetseite www.testo.com/service-contact...
  • Page 12 12 Notizen...
  • Page 13 Short manual testo 810 Short manual testo 810  Protection cap: Park position  Infrared sensor  Air/temperature sensor  Display  Control keys  Battery compartment (on rear) Basic settings Instrument off >press and hold 2s > select with...
  • Page 14: Safety And The Environment

    > Take faulty rechargeable batteries as well as spent batteries to the collection points provided for them. > Send the product back to Testo at the end of its useful life. We will ensure that it is disposed of in an environmentally friendly...
  • Page 15: Technical Data

    Specifications Specifications Functions and use The testo 810 is an infrared measuring instrument. It is normally used to measure surface temperature, e.g. on heaters and radiators, and to measure the ambient temperature at the same time. Technical data Measurement data Further instrument data ·...
  • Page 16: Product Description

    16 Product description Product description At a glance  Protection cap: Park position  Infrared sensor  Air/temperature sensor  Display  Control keys  Battery compartment (on rear) First steps  Inserting batteries: 1 To open the battery compartment, push the battery cover down.
  • Page 17 Product description Because of their low or non-uniform emission factor, bright metals and metal oxides are of only limited use for infrared measurement. Coatings that increase the emission factor, e.g. paint or emission adhesive (0554 0051) must be applied to the object being measured. Emission factors of various materials (typical values): ...
  • Page 18: Using The Product

    18 Using the product Using the product  Switching the instrument on: > Press - Measuring mode is opened.  Switching the display light on:  The instrument is switched on. > Press - The display light goes out automatically if no key is pressed for 10 seconds.
  • Page 19 Using the product  Changing the display view: Adjustable views · Hold: Readings are held. · Max: Maximum values since the instrument was last switched on or last reset. · Min: Minimum values since the instrument was last switched on or last reset. >...
  • Page 20: Maintaining The Product

    20 Maintaining the product Maintaining the product  Changing batteries: 1 To open the battery compartment, push the battery cover down. 2 Remove used batteries and insert new batteries (2x 1.5 V type AAA). Observe the polarity! 3 To close the battery compartment, push the battery cover back on.
  • Page 21: Tips And Assistance

    · Readings outside the measuring range (too high, too low): Keep to the permitted measuring range. · Residual capacity <10 min: Change batteries. If we could not answer your question, please contact your dealer or Testo Customer Service. For contact details, please visit www. testo.com/service-contact...
  • Page 22 22 Notes...
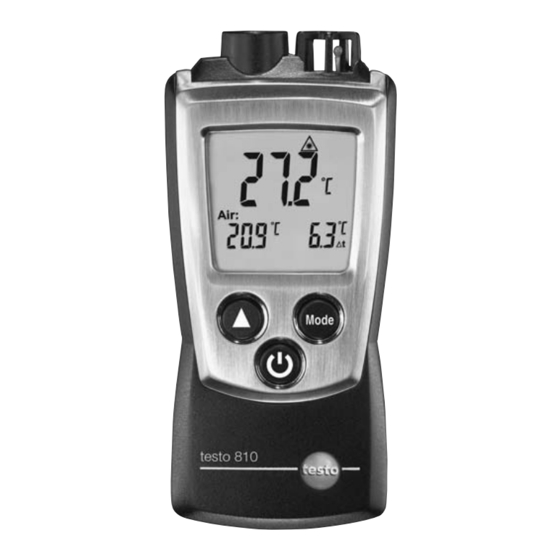
  • Page 23 Instructions succinctes testo 810 Instructions succinctes testo 810  Capot de protection: position de rangement  Capteur infrarouge  Capteur de température d’air  Affichage  Touches de fonction  Compartiment pile (au dos) Paramétrage L’appareil est éteint > Maintenez la touche enfoncée pendant...
  • Page 24: Sécurité Et Environnement

    Utilisez seulement des pièces de rechange d‘origine Testo. Protéger l‘environnement > Déposez les accus défectueux/les piles vides aux endroits prévus à cet effet (points de collecte). > Renvoyez le produit chez Testo au terme de sa durée d‘utilisation. Nous assurons une élimination respectueuse de l‘environnement.
  • Page 25: Description Des Appareils

    Description des appareils Description des appareils Fonctions et utilisation prévue Le testo 810 est un thermomètre infrarouge. Il est généralement prévu pour mesurer la température superficielle d‘appareils de chauffage ou de radiateurs, par exemple, en même temps que la température environnante.
  • Page 26: Description Du Produit

    26 Description du produit Description du produit Aperçu  Capot de protection: position de rangement  Capteur infrarouge  Capteur de température d’air  Affichage  Touches de fonction  Compartiment pile (au dos) Prise en main  Insérer les piles : 1 Ouvrez le compartiment pile : faites glisser le couvercle vers le bas.
  • Page 27 Prise en main que sous réserve à la mesure par infrarouge. Appliquez par conséquent sur l‘objet de mesure un revêtement qui augmente le facteur d‘émission, tel que du vernis ou une bande autocollante émissive (0554 0051). Facteurs d‘émission de différents matériaux (valeurs types) : ...
  • Page 28: Utilisation Du Produit

    28 Utilisation du produit Utilisation du produit  Allumer l’appareil : > Appuyez brièvement sur - Le mode mesure s’ouvre.  Allumer l’éclairage de l’écran  L’appareil est allumé. > Appuyez sur - L’éclairage de l’écran s’éteint automatiquement 10 s après le dernier actionnement de touche.
  • Page 29 Utilisation du produit > Maintenez la touche enfoncée. clignote sur l‘écran. Le point laser définit le point central de la surface à mesurer. - Une fois la mesure infrarouge terminée (relâchez la Hold touche ), l‘appareil passe en mode d‘affichage les valeurs sont conservées.
  • Page 30: Entretien Du Produit

    30 Entretien du produit Entretien du produit  Changer les piles : 1 Ouvrez le compartiment pile : faites glisser le couvercle vers le bas. 2 Retirez les piles vides et insérez-en des nouvelles (2 piles 1,5 V type AAA). Attention à la polarité ! 3 Fermez le compartiment pile : faites glisser le couvercle vers le haut.
  • Page 31: Conseils Et Dépannage

    · Capacité restante <10 min : Changer les piles. Si nous ne pouvons pas répondre à vos questions : veuillez vous adresser à votre revendeur ou au service après-vente Testo. Vous trouverez nos coordonnées sur Internet, à l’adresse www.testo.com/service-contact.
  • Page 32 32 Notes...
  • Page 33 Instrucciones breves del testo 810 Instrucciones breves del testo 810  Cubierta de protección: posición de reposo  Sensor de infrarrojos  Sensor de temperatura del aire  Visualizador  Teclas de función  Compartimento para pilas (parte posterior) Efectuar los ajustes básicos El instrumento está...
  • Page 34: Seguridad Y Medio Ambiente

    > Llevar las baterías averiadas y las pilas agotadas a los puntos de recogida previstos al efecto. > Enviar el producto a Testo al término de su vida útil. Nosotros nos ocuparemos de eliminarlo ecológicamente. Atención: su producto está marcado con este símbolo.
  • Page 35: Funciones Y Aplicación

    Descripción de los instrumentos Funciones y aplicación El testo 810 es un instrumento de medición por infrarrojos. Se utiliza generalmente para medir la temperatura superficial de determinados sistemas, como, por ejemplo, sistemas de calefacción, radiadores... Al mismo tiempo, el testo 810 también mide la temperatura ambiente.
  • Page 36: Descripción Del Producto

    36 Descripción del producto Descripción del producto Vista general  Cubierta de protección: posición de reposo  Sensor de infrarrojos  Sensor de temperatura del aire  Visualizador  Teclas de función  Compartimento para pilas (parte posterior) Primeros pasos ...
  • Page 37 Primeros pasos barniz o cinta adhesiva (0554 0051) sobre el objeto que se va a medir. Valores de emisividad de diferentes materiales (valores típicos):  Material (temperatura) Aluminio, laminado brillante (170 °C) 0,04 Algodón (20 °C) 0,77 Hormigón (25 °C) 0,93 Hielo, suave (0 °C) 0,97...
  • Page 38: Utilizar El Producto

    38 Utilizar el producto Utilizar el producto  Encender el instrumento: > Pulsar - Se inicia el modo de medición.  Encender la iluminación del visualizador:  El instrumento está encendido. > Pulsar - La iluminación del visualizador se apaga automáticamente 10 segundos después de la última pulsación de cualquier tecla.
  • Page 39 Utilizar el producto > Mantener presionado. parpadea en el visualizador. El indicador láser marca el centro de la superficie de medición. - Tras finalizar la medición por infrarrojos (soltar ), el Hold instrumento cambia al modo de visualización ; los valores de medición se mantienen.
  • Page 40: Mantenimiento Del Producto

    40 Mantenimiento del producto Mantenimiento del producto  Cambiar las pilas: 1 Abrir el compartimento para pilas: deslizar hacia abajo la tapa. 2 Retirar las pilas agotadas e insertar pilas nuevas (2 de 1,5 V, tipo AAA). Respetar la polaridad. 3 Cerrar el compartimento para pilas: deslizar hacia arriba la tapa.
  • Page 41: Consejos Y Ayuda

    Capacidad restante <10 min: cambiar las pilas. Si no hemos podido resolver sus dudas, por favor, póngase en contacto con su distribuidor más cercano o con el Servicio Técnico de Testo. Encontrará los datos de contacto en la página de internet www.testo.com/service-contact.
  • Page 42 42 Notes...
  • Page 43 Guida rapida testo 810 Guida rapida testo 810  Coperchio di protezione: posizione aperta  Sensore a infrarossi  Sensore di temperatura dell’aria  Display  Tasti di comando  Vano batteria (lato posteriore) Regolazioni base Lo strumento è spento > mantenere premuto 2s >...
  • Page 44: Sicurezza E Ambiente

    Utilizzare solo parti di ricambio originali Testo. Proteggere l‘ambiente > Smaltire le batterie ricaricabili difettose o le batterie esaurite negli appositi contenitori. > Rispedire lo strumento direttamente a Testo al termine della sua vita operativa. Testo provvederà a smaltirlo nel rispetto dell‘ambiente.
  • Page 45: Descrizione Delle Prestazioni

    Descrizione delle prestazioni Descrizione delle prestazioni Funzioni e utilizzo Testo 810 è uno strumento di misura della temperatura a infrarossi. Lo scopo di utilizzo più diffuso è la misurazione senza contatto della temperatura di superfici, ad esempio di impianti di riscaldamento e radiatori nonché...
  • Page 46: Descrizione Del Prodotto

    46 Descrizione del prodotto Descrizione del prodotto Panoramica  Coperchio di protezione: posizione aperta  Sensore a infrarossi  Sensore di temperatura dell’aria  Display  Tasti di comando  Vano batteria (lato posteriore) Prima di utilizzare lo strumento  Inserire le batterie: 1 Aprire il vano batterie: spingere verso il basso il coperchio della batteria.
  • Page 47 Prima di utilizzare lo strumento Metalli brillanti e ossidi di metallo sono adatti solo parzialmente al tipo di misurazione a infrarossi, a causa della loro bassa e non uniforme emissività: per aumentare l‘emissività, ricoprire la superficie degli oggetti da misurare con vernice o l‘apposito nastro adesivo (0554 0051).
  • Page 48: Utilizzare Il Prodotto

    48 Utilizzare il prodotto Utilizzare il prodotto  Accendere lo strumento: > Premere - La modalità di misura si attiva.  Accendere l’illuminazione del display  Lo strumento è acceso. > Premere - L’illuminazione del display si spegne automaticamente dopo 10 secondi dall’ultima attivazione di un tasto. ...
  • Page 49 Utilizzare il prodotto  Cambiare la modalità del display: Modalità regolabili · Hold: I valori misurati rimangono visualizzati · Max: Valori massimi dall’ultima accensione o dall’ultimo reset. · Min: Valori minimi dall’ultima accensione o dall’ultimo reset. > Premere ripetutamente , fino a visualizzare la modalità desiderata.
  • Page 50: Manutenzione Del Prodotto

    50 Manutenzione del prodotto Manutenzione del prodotto  Sostituzione delle batterie: 1 Aprire il vano batterie: spingere verso il basso il coperchio della batteria. 2 Smaltire le batterie usate e inserire le batterie nuove (2x 1,5 V tipo AAA). Fare attenzione alle polarità! 3 Chiudere il vano batteria: chiudere il coperchio.
  • Page 51 · fuori del campo di misura (troppo alti, troppo bassi): rispettare i valori consentiti. · capacità residua <10 min: sostituire le batterie: Se la sua domanda non ha ricevuto risposta: rivolgersi al proprio rivenditore o al servizio assistenza Testo. Per le informazioni di contatto vedere il sito internet www.testo.com/service-contact.
  • Page 52 52 Notes...
  • Page 53 Breve introdução testo 810 Breve introdução testo 810  Tampa de protecção: posição de encaixe  Sensor de infravermelhos  Sensor de ar/temperatura  Visor  Botões de comando  Compartimento para as pilhas (na parte de trás) Ajustes de funcionamento básicos O instrumento está...
  • Page 54: Segurança E Meio Ambiente

    > Deitar fora as pilhas recarregáveis avariadas e as pilhas gastas nos pontos de recolha previstos para tal. > Enviar o produto à Testo após este ter chegado ao fim da sua vida útil. Nós nos encarregaremos da sua eliminação...
  • Page 55: Especificações

    Especificações Especificações Funções e uso O testo 810 é um instrumento de medição por infravermelhos. Este instrumento utiliza-se normalmente para a medição da temperatura de superfícies, p. ex., em aquecimentos e radiadores, e para a medição simultânea da temperatura do ambiente circundante.
  • Page 56: Descrição Do Produto

    56 Descrição do produto Descrição do produto Breve descrição  Tampa de protecção: posição de encaixe  Sensor de infravermelhos  Sensor de ar/temperatura  Visor  Botões de comando  Compartimento para as pilhas (na parte de trás) Os primeiros passos ...
  • Page 57 Os primeiros passos baixa ou pouco consistente. Aplique ao objecto que deseja medir um revestimento que aumente a emissividade, como por exemplo tinta ou fita adesiva de emissão (0554 0051). Tabela de emissividade de vários materiais (valores típicos):  Material (Temperatura) Alumínio, não tratado (170 °C) 0,04 Algodão (20 °C)
  • Page 58: Utilizar O Produto

    58 Utilizar o produto Utilizar o produto  Ligar o instrumento: > Carregar em - Inicia-se o modo de medição.  Ligar a iluminação do visor  O instrumento encontra-se ligado. > Carregar em - A iluminação do visor apaga-se automaticamente depois de 10 segundos sem carregar numa tecla.
  • Page 59 Utilizar o produto > Manter a tecla carregada. - O símbolo pisca no visor. O ponto de laser marca o centro da superfície a ser medida. - Após ter finalizado a medição por infravermelhos (soltar a tecla ) o instrumento passa para o modo de Hold visualização e os valores de medição podem ser...
  • Page 60: Manutenção Do Produto

    60 Manutenção do produto Manutenção do produto  Substituir as pilhas: 1 Abrir o compartimento para as pilhas: empurrar a tampa para baixo. 2 Retirar as pilhas gastas e colocar as novas (2x 1,5 V tipo AAA). Tenha em conta a polaridade correcta. 3 Fechar o compartimento para as pilhas: fechar a tampa.
  • Page 61 (demasiado elevados, demasiado baixos): respeitar a gama de medição permitida. · Capacidade residual <10 minutos: substituir a pilha Se não respondermos às suas questões, por favor contacte oseu distribuidor ou o Serviço Técnico da Testo.Para detalhes de contactos, por favor visite www.testo.com/service-contact...
  • Page 62 Notes...
  • Page 63 Êðàòêàÿ èíñòðóêöèÿ testo 810 Êðàòêàÿ èíñòðóêöèÿ testo 810  Çàùèòíûé ÷åõîë: Ðàáî÷åå ïîëîæåíèå  ÈÊ-ñåíñîð  Cåíñîð òåìïåðàòóðû âîçäóõà  Äèñïëåé  Êíîïêè óïðàâëåíèÿ  Îòñåê áàòàðåé (ñçàäè) Áàçîâûå íàñòðîéêè Ïðèáîð âûêëþ÷åí >íàæàòü è äåðæàòü 2ñåê. > âûáðàòü ( ), ïîäòâåðäèòü...
  • Page 64 ðàçðåøåííûì äàííîé èíñòðóêöèåé. Cîáëþäàéòå ïîðÿäîê îáñëóæèâàíèÿ. Èñïîëüçóéòå òîëüêî îðèãèíàëüíûå çàïàñíûå ÷àñòè Testo. Çàùèòà îêðóæàþùåé ñðåäû > Óòèëèçèðóéòå èñïîëüçîâàííûå áàòàðåéêè/àêêóìóëÿòîðû òîëüêî â ñïåöèàëüíî ïðåäíàçíà÷åííûõ äëÿ ýòîãî ìåñòàõ. > Îòïðàâüòå îòñëóæèâùèé ñâîé ñðîê ïðèáîð îáðàòíî ïðîèçâîäèòåëþ Testo, ãäå ïîçàáîòÿòñÿ î åãî áåçîïàñíîé óòèëèçàöèè.
  • Page 65 Cïåöèôèêàöèÿ Cïåöèôèêàöèÿ Îáëàñòü ïðèìåíåíèÿ testo 810 - ïðèáîð äëÿ ÈÊ-èçìåðåíèÿ òåìïåðàòóðû. Ïðèáîð ïðåäíàçíà÷åí äëÿ èçìåðåíèÿ òåìïåðàòóðû ïîâåðõíîñòè, íàïðèìåð íàãðåâàòåëåé è ðàäèàòîðîâ, à òàêæå èçìåðåíèÿ òåìïåðàòóðû îêðóæàþùåãî âîçäóõà. Òåõíè÷åñêèå äàííûå Äàííûå èçìåðåíèé Äîïîëíèòåëüíûå äàííûå · Cåíñîðû: ·Êëàññ çàùèòû: IP40 ÈÊ-ñåíñîð, · Âíåøíèå óñëîâèÿ: NTC ñåíñîð...
  • Page 66: Îïèñàíèå Ïðèáîðà

    Îïèñàíèå ïðèáîðà Îïèñàíèå ïðèáîðà Âíåøíèé âèä  Çàùèòíûé ÷åõîë: Ðàáî÷åå ïîëîæåíèå  ÈÊ-ñåíñîð  Cåíñîð òåìïåðàòóðû âîçäóõà  Äèñïëåé  Êíîïêè óïðàâëåíèÿ  Îòñåê áàòàðåé (ñçàäè) Ïîäãîòîâêà ê ðàáîòå  Óñòàíîâêà áàòàðååê: 1 Îòêðîéòå îòñåê áàòàðååê, ñäâèíóâ êðûøêó îòñåêà âíèç. 2 óñòàíîâèòå...
  • Page 67 Îïèñàíèå ïðèáîðà Îãðàíè÷åíî ÈÊ-èçìåðåíèå òåìïåðàòóðû ïîâåðõíîñòè áëåñòÿùèõ ìåòàëëîâ è îêñèäîâ èç-çà èõ íèçêîãî è íåîäíîðîäíîãî êîýôôèöèåíòà ýìèññèè.  ýòîì ñëó÷àå íàíåñèòå íà ïîâåðõíîñòü ñïåöèàëüíóþ êðàñêó èëè ñïåö. íàêëåéêó ñ ïîñòîÿííûì êîýôôèöèåíòîì (êàò. ¹0554 0051). Êîýôôèöèåíò ýìèññèè äëÿ ìàòåðèàëîâ (òèï÷íûå çíà÷åíèÿ): ...
  • Page 68 Pàáîòà ñ ïðèáîðîì Pàáîòà ñ ïðèáîðîì  Âêëþ÷åíèå ïðèáîðà: > Íàæìèòå - Ïðèáîð â ðåæèìå èçìåðåíèé.  Âêëþ÷åíèå ïîäñâåòêè äèñïëåÿ: - Ïðèáîð âêëþ÷åí. > Íàæìèòå - Ïîäñâåòêà àâòîìàòè÷åñêè âûêëþ÷èòñÿ, åñëè íå íàæèìàòü íà êíîïêè, ÷åðåç 10 ñåêóíä.  ÈÊ-èçìåðåíèÿ: Ëàçåðíîå èçëó÷åíèå! Íå íàïðàâëÿéòå ëàçåðíûé ëó÷ â ãëàçà. Êëàññ...
  • Page 69 –àáîòà ñ ïðèáîðîì Âûáîð ðåæèìà îòîáðàæåíèÿ ïàðàìåòðîâ: Âûáèðàåìûå ðåæèìû îòîáðàæåíèÿ · Hold: Ôèêñàöèÿ èçìåðåííûõ çíà÷åíèé. · Max: Îòîáðàæåíèå ìàêñèìàëüíûõ èçìåðåííûõ çíà÷åíèé( ïîñëå ïîñëåäíåãî âêëþ÷åíèÿ ïðèáîðà). · Min: Îòîáðàæåíèå ìèíèìàëüíûõ èçìåðåííûõ çíà÷åíèé( ïîñëå ïîñëåäíåãî âêëþ÷åíèÿ ïðèáîðà). > Íàæìèòå íåñêîëüêî ðàç, ïîêà íå âûáåðèòå íåîáõîäèìûé ðåæèì îòîáðàæåíèÿ.
  • Page 70 Îáñëóæèâàíèå ïðèáîðà Îáñëóæèâàíèå ïðèáîðà  Çàìåíà áàòàðååê: 1 Îòêðîéòå îòñåê áàòàðååê, ñäâèíóâ êðûøêó îòñåêà âíèç. 2 óñòàíîâèòå áàòàðåéêè (2x 1.5  òèï AAA). Cîáëþäàéòå ïîëÿðíîñòü! 3 Çàêðîéòå îòñåê áàòàðååê, çàäâèíóâ êðûøêó.  Î÷èñòêà êîðïóñà: ‡ Ïðè çàãðÿçíåíèè, î÷èñòèòå êîðïóñ âëàæíûì òàìïîíîì (ìûëüíûì ðàñòâîðîì).
  • Page 71 Hi èëè Lo Çíà÷åíèå çà ïðåäåëîì èçìåðåíèÿ (âûøå èëè íèæå): Cîáäþäàéòå ïðåäåëû èçìåðåíèÿ. Ïèòàíèÿ îñòàëîñü <10 ìèí: Çàìåíèòå áàòàðåéêè. Ïðè íåâîçìîæíîñòè ïîëó÷èòü îòâåòû íà âîçíèêàþùèå âîïðîñû îáðàòèòåñü ê îôèöèàëüíîìó ïàðòí¸ðó Testo èëè â Ñåðâèñíóþ ñëóæáó Testo. Êîíòàêòíûå ñâåäåíèÿ ïðèâåäåíû íà ñàéòå www.testo.ru/service/contact...
  • Page 72 SE & Co. KGaA Postfach 11 40, 79849 Lenzkirch Testo-Straße 1, 79853 Lenzkirch Telefon: (0 76 53) 6 81 - 0 Fax: (0 76 53) 6 81 - 1 00 E-Mail: info@testo.de Internet: http://www.testo.com 0973 8100 de en fr es it pt ru 05...

Table des Matières