Hatco IRNG Série Manuel D'installation Et D'utilisation
Masquer les pouces
Voir aussi pour IRNG Série:
- Manuel d'installation et d'utilisation (36 pages) ,
- Manuel d'installation et d'utilisation (56 pages)
Table des Matières
Publicité
Les langues disponibles
Les langues disponibles
Liens rapides
hatcocorp.com
Register Online!
(see page 2)
S'inscrire en ligne !
(voir page 18)
Rapide Cuisine
IRNG Series/Série, P Type/Type P
Installation and Operating Manual
Manuel d'installation et d'utilisation
WARNING
Do not operate this equipment unless you
have read and understood the contents
of this manual! Failure to follow the
instructions contained in this manual
may result in serious injury or death.
This manual contains important safety
information concerning the maintenance,
use, and operation of this product. If
you're unable to understand the contents
of this manual, please bring it to the
attention of your supervisor. Keep this
manual in a safe location for future
reference.
English = p 2
P/N 07.04.762.00
Induction Range
Cuisinière à induction
ADVERTENCIA
No opere este equipo al menos que haya
leído y comprendido el contenido de este
manual! Cualquier falla en el seguimiento
de las instrucciones contenidas en
este manual puede resultar en un serio
lesión o muerte. Este manual contiene
importante información sobre seguridad
concerniente al mantenimiento, uso y
operación de este producto. Si usted
no puede entender el contenido de
este manual por favor pregunte a su
supervisor. Almacenar este manual en
una localización segura para la referencia
futura.
®
AVERTISSEMENT
Ne pas utiliser cet équipement sans avoir
lu et compris le contenu de ce manuel ! Le
non-respect des instructions contenues
dans ce manuel peut entraîner de
graves blessures ou la mort. Ce manuel
contient des informations importantes
concernant l'entretien, l'utilisation et le
fonctionnement de ce produit. Si vous ne
comprenez pas le contenu de ce manuel,
veuillez le signaler à votre supérieur.
Conservez ce manuel dans un endroit
sûr pour pouvoir vous y référer plus tard.
Français = p 18
© 2020 Hatco Corporation
Publicité
Chapitres
Table des Matières
Dépannage

Manuels Connexes pour Hatco IRNG Série


Sommaire des Matières pour Hatco IRNG Série
- Page 1 Almacenar este manual en sûr pour pouvoir vous y référer plus tard. reference. una localización segura para la referencia Français = p 18 futura. English = p 2 P/N 07.04.762.00 © 2020 Hatco Corporation...
-
Page 2: Table Des Matières
“Warranty”. This device complies with Part 18 of the FCC Rules. INTRODUCTION Hatco Induction Ranges offer a safe, quick, efficient, and attractive way to prepare foods in commercial kitchens as well as display cooking locations (omelet bars, buffets, etc...). -
Page 3: Important Safety Information
124°F (51°C). This unit has no “user-serviceable” parts. If service is required on this unit, contact an Authorized Hatco • Do not steam clean or use excessive water on the unit. Service Agent or contact the Hatco Service Department at •... -
Page 4: Model Description
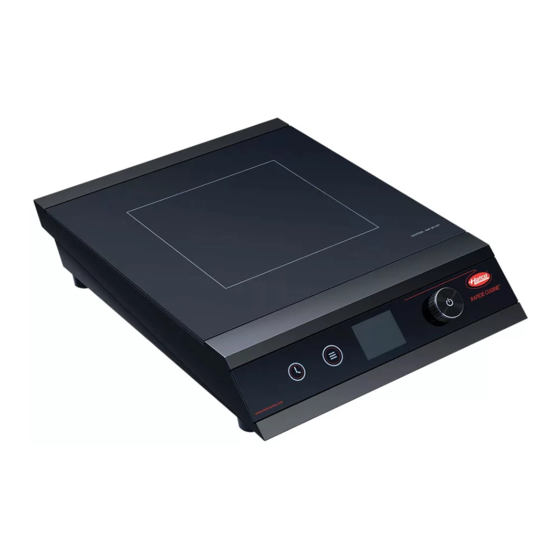
MODEL DESCRIPTION All Models Built-In Models Hatco P Type Induction Ranges are equipped with a single Built-In P Type Induction Ranges are designed to be installed induction coil underneath a ceramic glass cooking surface. into a variety of solid material countertops. The unit includes a... -
Page 5: Model Designation
NOTE: The specification label is located on the bottom of the NEMA 6-20P unit. See label for serial number and verification of unit electrical information. Plug Configurations NOTE: Receptacle not supplied by Hatco. All units must be connected to a dedicated circuit. Electrical Rating Chart — Countertop Models Model Voltage... -
Page 6: Dimensions
SPECIFICATIONS English Dimensions — Countertop Models Footprint Footprint Cooking Surface Cooking Surface Model Width (A) Depth (B) Height (C) Width (D) Depth (E) Width (F) Depth (G) 13ʺ 17ʺ 3-7/16ʺ 12ʺ 13-3/8ʺ 13ʺ 12ʺ IRNG-PC1-14 (330 mm) (431 mm) (86 mm) (304 mm) (339 mm) (330 mm) -
Page 7: Installation
SPECIFICATIONS English Dimensions — Built-In Models Cooking Surface Cooking Surface Unit Under-Counter Under-Counter Model Width (A) Depth (B) Height (C) Height (D) Width (E) Depth (F) IRNG-PB1-14 13-1/2ʺ 14-1/2ʺ 3ʺ 2-7/8ʺ 12-5/8ʺ 13-5/8ʺ (343 mm) (368 mm) (88 mm) (72 mm) (320 mm) (346 mm) IRNG-PB1-18... -
Page 8: Installing Built-In Models
INSTALLATION English Installing Built-In Models Ventilation Requirements Proper ventilation of the cabinet below a built-in unit is required Built-In models require installation into a countertop before to prevent over-heating the electronics in the unit. Proper operation. Two types of built-in installation are available, flush ventilation provides cool, intake air to the front of the unit and mount and trim ring. - Page 9 INSTALLATION English Flush Mount Installation 5. Carefully lower the unit into the opening, making sure the power cord and control cable do not get pinched. Flush mount installation requires a prepared, solid material countertop and provides a seamless transition between the Silicone countertop and the induction range.
-
Page 10: Installing The Control Panel
INSTALLATION English Installing the Control Panel 2. Cut and drill the appropriate holes in the vertical surface where the control enclosure will be installed. Refer to Use the following procedure to install the control panel. the “Installing the Control Panel” procedure for cutout dimensions. -
Page 11: Operation
OPERATION English General Operation Modes Two operation modes are available on the Induction Range: Use the following information and procedures to operate both Standard Mode and Advanced Programming Mode. Review countertop and built-in P Type Induction Ranges. NOTICE: Do the information below to determine which operation mode is not move a countertop unit during operation. -
Page 12: Changing Cooking Control Method
Temperature Control. and a percentage of power General Setting Information setting. The Induction Range is Hatco recommends adjusting the Power or Temperature now operating in Power Control. Power Control—Standard settings up or down while cooking to find the best setting for See “Changing Cooking Control Method”... -
Page 13: Using The Timer
OPERATION English Cooking with Menu Items To use the Remote Temperature Probe: Use the following procedure to cook using programmed menu 1. Plug the probe into the probe port on items in Advanced Programming Mode. Refer to “Changing Probe the unit. Operation Mode”... -
Page 14: Changing Operation Mode
OPERATION English 6. Turn the Control Knob until BKSP is highlighted in red, 4. Turn the Control Knob to highlight either MODE S or MODE then push the Control Knob until all text in the name field is A-ß in red, then push the Control Knob to select the desired deleted. -
Page 15: Updating Firmware
This unit has no “user-serviceable” parts. If service • Do not steam clean or use excessive water on the unit. is required on this unit, contact an Authorized Hatco Service Agent or contact the Hatco Service Department at • This unit is not “jet-proof” construction. Do not use jet- 800-558-0607 or 414-671-6350. -
Page 16: Daily Cleaning
Troubleshooting Questions? If you continue to have problems resolving an issue, please contact the nearest Authorized Hatco Service Agency or Hatco for assistance. To locate the nearest Service Agency, log onto the Hatco website at www.hatcocorp.com, select the Support pull- down menu, and click on “Find A Service Agent”;... -
Page 17: Limited Warranty
Hatco’s option, to repair or replacement Drawer Warmer Drawer Rollers and Slides using new or refurbished parts or Product by Hatco or a Hatco- Strip Heater Elements (metal sheathed) authorized service agency (other than where Buyer is located... - Page 18 Des renseignements supplémentaires sont disponibles sur Remplissez la garantie en ligne pour éviter les retards notre site Web à www.hatcocorp.com. pour faire jouer la garantie. Accédez au site Web Hatco www.hatcocorp.com, sélectionnez le menu déroulant Support (Assistance), puis cliquez sur « Warranty » (Garantie).
-
Page 19: Consignes De Sécurité Importantes
Cet appareil ne contient aucune pièce réparable par d’alimentation. Celui-ci devra être remplacé par Hatco, l’utilisateur. Si cet appareil doit être réparé, contactez un un agent de service agréé par Hatco ou une personne réparateur Hatco agréé ou le Service après-vente Hatco au possédant des qualifications similaires. -
Page 20: Désignation Du Modèle
Les modèles de la gamme de cuisinières à induction de Type d’une bobine d’induction unique située sous la plaque en P d’Hatco sont portables et se posent sur un plan de travail. vitrocéramique. Chaque modèle est doté d’un panneau de... -
Page 21: Caractéristiques Techniques
Configuration des fiches NOTA: La plaque signalétique est située sur la partie inférieure NOTA: La prise murale n’est pas fournie par Hatco. L’appareil de l’appareil. Consultez la plaque signalétique doit être connecté à un circuit dédié. -
Page 22: Dimensions
CARACTÉRISTIQUES TECHNIQUES Français Tableau des valeurs nominales électriques — Modèles encastrés Configuration de Poids Modèle Tension Watts Ampères Fiches d’embarquement IRNG-PB1-14 1440 NEMA 5-15P 8 kg (18 lbs.) IRNG-PB1-18 1800 NEMA 5-15P* 8 kg (18 lbs.) 208–240 † IRNG-PB1-36 3120–3600 NEMA 6-20P 10 kg (23 lbs.) †... -
Page 23: Installation
CARACTÉRISTIQUES TECHNIQUES Français Vue de face Vue de côté 62 mm (2-7/16") 302 mm (11-15/16") 115 mm (4-9/16") Panneau de commande à distance INSTALLATION Généralités Les cuisinières à induction sont expédiées intégralement montées et prêtes à l’emploi. Les éléments encastrés doivent être installés N’obstruez pas l’air entrant ou sortant des grilles de dans un plan de travail (consultez les procédures d’installation ventilation situées sur la partie inférieure de l’appareil. -
Page 24: Installation Des Modèles Encastrés
INSTALLATION Français Installation des modèles encastrés • Assurez-vous qu’une distance minimale de 152 mm (6″) sera respectée entre l’arrière de l’élément et toute surface Les éléments encastrés doivent être installés dans un plan de interne. travail avant utilisation. Deux types d’installation encastrée sont disponibles, à... - Page 25 INSTALLATION Français Installation à fleur 3. Découpez les ouvertures nécessaires dans le meuble afin d’assurer une ventilation adéquate de la cuisinière L’installation à fleur nécessite un plan de travail massif préparé à induction. Consultez la procédure « Exigences de et permet un assemblage parfait entre la cuisinière et le plan de ventilation »...
- Page 26 INSTALLATION Français Installation avec cadre 5. Appliquez un cordon d’un produit d’étanchéité à base de silicone approuvé par la NSF sur le matériau du plan de L’installation avec un cadre nécessite l’achat du cadre vendu travail et autour de l’ouverture. en option.
-
Page 27: Installation Du Panneau De Commande
INSTALLATION Français Installation du panneau de commande 4. Placez le panneau de commande dans l’ouverture par l’avant du meuble. Assurez-vous quele cadre sur le Appliquez la procédure suivante pour installer le panneau de panneau de commande est bien enfoncée dans le joint en commande. -
Page 28: Mode D'emploi
MODE D’EMPLOI Français Généralités Modes de fonctionnement Deux modes de fonctionnement sont disponibles sur la cuisinière Utilisez les informations et procédures suivantes pour commander à induction : le mode Standard et le mode Programmation les cuisinières à induction Type P posées ou encastrées. AVIS: avancée. -
Page 29: Modification De La Méthode De Commande De Cuisson
Informations générales sur les réglages récipient compatible est placé sur la plaque en Hatco recommande d’ajuster les réglages de la puissance et vitrocéramique et qu’il est chauffé. Si la puissance est de la température vers les niveaux supérieurs ou inférieurs réglée sur «... -
Page 30: Utilisation Du Minuteur
NOTA: N’utilisez que la sonde de température à distance fournie par Hatco pour les plaques à induction de Hatco. • Lorsque le minuteur atteint zéro, il clignote en affichant « DONE » (TERMINÉ) et « 0:00:00 ». Le réglage de la Pour utiliser la sonde de température à... -
Page 31: Programmation Des Rubriques De Menu
MODE D’EMPLOI Français Programmation des rubriques de menu 9. Programmez la rubrique de menu. RICE SAVE Respectez la procédure suivante pour cuisiner à l’aide des a. Tournez le bouton de commande rubriques programmées en une ou deux étapes du menu dans pour placer POWER1 ou TEMP1 le mode Programmation avancée. -
Page 32: Passer Des Degrés Fahrenheit Aux Degrés Celsius Et Inversement
Internet des cuisinières à Les éléments de réglage de La fonction Menu apparaît en induction Hatco: www.hatcocorp.com/rapide_cuisine la température sont séparés mode Programmation en mode Standard. avancée. -
Page 33: Maintenance
• N’essayez jamais de réparer ou de remplacer un cordon gouttes de vinaigre blanc et un papier absorbant. d’alimentation. Celui-ci devra être remplacé par Hatco, un agent de service agréé par Hatco ou une personne AVIS possédant des qualifications similaires. -
Page 34: Guide De Dépannage
Vous avez des questions en ce qui concerne les pannes? Si le problème persiste, veuillez contacter l’agence d’entretien agréée Hatco la plus proche ou Hatco pour obtenir une assistance. Pour trouver l’agence d’entretien la plus proche, rendez-vous sur le site Internet de Hatco (www.hatcocorp.com) et cliquez sur Find Service Agent (trouver un agent d’entretien), ou contactez l’équipe chargée de l’entretien et des pièces de Hatco :... -
Page 35: Garantie Limitée
à l’aide de pièces ou de Produits nouveaux (enveloppe métallique, air chauffant) ou remis à neuf par Hatco ou un centre de réparation agréé Éléments des armoires de stockage par Hatco (sauf si l’Acheteur se situe hors des États-Unis, (enveloppe métallique, air chauffant) - Page 36 Duffy’s - AIS Sauquoit 800-836-1014 J.B. Brady, Inc. Syracuse 315-422-9271 Register your unit online! See IMPORTANT OWNER INFORMATION HATCO CORPORATION section for details. P.O. Box 340500 Milwaukee, WI 53234-0500 U.S.A. 800-558-0607 414-671-6350 Enregistrez votre appareil en ligne ! support@hatcocorp.com www.hatcocorp.com Lisez la section INFORMATIONS IMPORTANTES POUR LE PROPRIETAIRE pour plus d’informations.