Publicité

Les langues disponibles
  • FR

Les langues disponibles

Liens rapides

Publicité

Table des Matières
loading

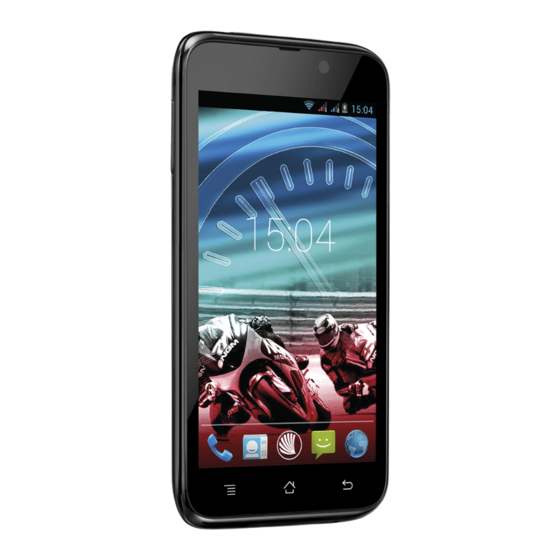
Sommaire des Matières pour NGM Dynamic Racing 2

  • Page 3: Table Des Matières

    Guida rapida - Italiano ... 5 Quick guide - English ... 21 Kurzanleitung - Deutsch ..37 Guía rápida - Español ... 53 Guide rapide - Français ..69...
  • Page 4 ITALIANO...
  • Page 5: Guida Rapida - Italiano

    Guida rapida - Italiano ITALIANO...
  • Page 6 Attenzione: la connessione Dati di NGM Dynamic Racing 2 è attiva al momento della prima accensione del telefono (oppure dopo ciascun eventuale ripristino delle impostazioni di fabbrica).
  • Page 7 USIM nei rispettivi slot con i contatti dorati rivolti verso il basso. Inserire la scheda di memoria: Per sfruttare tutte le funzioni di NGM Dynamic Racing 2, si consiglia l'utilizzo di una micro-SD che va collocata nella parte posteriore del telefono.
  • Page 8 Il vostro apparecchio è fornito con una batteria a ioni di litio ed è progettato per l’uso esclusivo di batterie e accessori originali NGM. La batteria va collocata nella parte posteriore del telefono. Inserite la batteria nel vano batteria con i contatti rivolti verso l’alto, in corrispondenza di quelli del telefono.
  • Page 9 Attenzione: Non collegate il telefono ad un computer che si sta accendendo o spegnendo per evitare sbalzi di tensione. Per preservare la corretta funzionalità del prodotto e l'integrità della garanzia si raccomanda l'utilizzo di caricabatterie originali NGM. Procedete alla ricarica esclusivamente al coperto e in luoghi asciutti. Un leggero riscaldamento del telefono durante il processo di ricarica è...
  • Page 10: Schermata Di Standby

    Schermata di Standby La schermata principale Usate il touch screen toccando, tenendo premuto o trascinando un dito sullo schermo. La schermata principale è il punto di partenza per l'utilizzo di tutte le applicazioni del telefono cellulare. Altre pagine si trovano affiancate rispetto a quella principale, alle quali si può...
  • Page 11: Schermata Principale

    Menu Principale Schermata Principale Intensità segnale USIM e livello batteria Pannello di notifica Intensità segnale WiFi Telefono Rubrica Menu Principale Messaggi Barra indicatore pagine Internet Scorrimento menu Scorrimento schermate HOME ITALIANO...
  • Page 12 Sensori di Fotocamera Ingresso luminosità Fotocamera frontale Flash auricolare e prossimità Ricevitore Tasto Volume On/Off “+”/“-“ Touch standby screen capacitivo Tasto menu Tasto Tasto contestuale Home indietro Microfono Speaker Connettore Micro USB 12 ITALIANO...
  • Page 13 SCELTE RAPIDE Pannello di notifica: per aprire il pannello di notifica, toccate l’area delle icone nella parte alta dello schermo e trascinate il dito in basso. Toccate l’icona in alto a destra passare dalle notifiche ai pulsanti di impostazione rapida oppure toccate l’icona impostazioni per aprire il menu Impostazioni del telefono.
  • Page 14 Gestire le due USIM Dal menu principale, selezionare Impostazioni > Gestione SIM. Selezionare o deselezionare on/off accanto agli operatori telefonici corrispondenti a “USIM1” e “USIM2” per attivare o disattivare selettivamente le USIM in qualsiasi momento. Da questo menu è anche possibile personalizzare il colore e nome da attribuire all’icona di ciascuna USIM e decidere quale USIM usare come predefinita per chiamate, videochiamate, messaggi e connessione dati oppure scegliere “chiedi sempre”...
  • Page 15 Richiamare un numero dal registro chiamate Dal menu principale, selezionare l’icona Telefono, quindi l’icona con l’orologio al centro per visualizzare il registro chiamate con le chiamate perse, ricevute e in uscita. Selezionare il numero desiderato e scegliere con quale USIM avviare la chiamata. GESTIRE CONTATTI Note: Nel menu contestuale della rubrica si ha accesso alle funzioni di Aggiungere un nuovo contatto...
  • Page 16 E’ possibile associare i contatti in rubrica ad una delle due SIM per chiamare automaticamente i contatti con la SIM attribuita; per associare un contatto ad una delle due SIM inserite, premete il menu contestuale del contatto e scegliete Associa scheda SIM oppure da Impostazioni > Gestione SIM, scegliere Associazione Contatti, selezionare la SIM e scegliere dalla Rubrica i contatti da associare a quella SIM.
  • Page 17 Per utilizzare al meglio le potenzialità offerte dal terminale e dal suo sistema operativo, è necessario avere una connessione dati attiva; la connessione Dati di NGM Dynamic Racing 2 è attiva al momento della prima accensione del telefono. Se non previsto in abbonamento, il traffico dati implica dei costi;...
  • Page 18 Connettersi a un dispositivo Bluetooth®: accendere il dispositivo Bluetooth al quale si desidera collegarsi. Riferirsi alla documentazione del dispositivo. Dal menu principale, scegliere Impostazioni > Bluetooth on/off per attivare il Bluetooth. Nel menu contestuale trovate ulteriori funzioni ed impostazioni. Scegliere Cerca dispositivi per avviare automaticamente la ricerca di dispositivi Bluetooth Tra i dispositivi rilevati, selezionare il nome del dispositivo da associare.
  • Page 19 Per cambiare i parametri di inserimento del testo, selezionare Impostazioni > Lingua e input > SwiftKey for NGM. Sincronizzazione La sincronizzazione è il modo più efficace per gestire i propri dati utili perché permette di effettuare un backup di tali dati presenti sul dispositivo con l’account internet. In caso di cambio, smarrimento o danneggiamento del telefono non si verificheranno perdite di questi dati.
  • Page 20 NGM Italia. Bluetooth® è un marchio commerciale registrato in tutto il mondo della Bluetooth SIG, Inc.
  • Page 21: Quick Guide - English

    Quick Guide - English ENGLISH...
  • Page 22 Warning: Data Connection of NGM Dynamic Racing 2 is active as soon as you first turn on the phone (or after every factory data reset). If you do not have a special or "flat" rate for data connection with your USIM card, you are recommended to turn off data traffic and set up a Wi-Fi connection, in order to avoid additional costs.
  • Page 23 Remove the battery and insert the USIM cards into the slots with their gold contacts facing downwards. Inserting the memory card: to better manage all the functions of NGM Racing 2, you are recommended to use a micro-SD card: insert it into the back side of the phone. After turning off the phone, remove the back cover and the battery and lift up the metallic grid of the SD card slot by pushing it towards OPEN.
  • Page 24 Your device is provided with a lithium-ion battery and is designed to be used exclusively with original NGM batteries and chargers. The battery must be inserted into the backside of the phone. Insert the battery into the battery compartment with the contacts facing up, matching with those of the phone.
  • Page 25 To preserve the functionality of the product and the integrity of the warranty, we recommend the use of original NGM chargers. Please charge the battery indoors, in a dry and favorable environment. It’s normal for the battery to get slightly warm during the charging process.
  • Page 26: Standby Screen

    Standby screen Main Screen Use the touch screen by tapping, holding or dragging a finger across the screen. The main screen is the starting point for using all the applications on your phone. Other main screen pages are available, just swipe the screen left or right. These pages can be customized with shortcuts to the favorite applications;...
  • Page 27: Home Screen

    Main Menu Home Screen USIM signal intensity and battery level Notification panel WiFi Signal Intensity Phone Phoneboo k Main Menu Messaging Page Indicator Bar Browser Scroll menu Scroll HOME pages ENGLISH...
  • Page 28 Brightness Camera Earphone Flash Front camera Plug Proximity Sensors Receiver On/Off Volume "+" / "-" Capacitive Standby Touch Screen Contextual Home Back key menu key Microphon Speaker Micro USB connector 28 ENGLISH...
  • Page 29 RAPID ACCESS Notification panel to open the Notification Panel, touch the upper bar containing the battery and signal- intensity icons and drag it downwards. Tap the icon in the upper right corner to switch between notifications and Quick Setup buttons or tap the settings icon to open the Phone Settings menu.
  • Page 30: Managing Calls

    Managing the two USIM cards From the main menu, select Settings > SIM Management. Select on/off keys next to the phone operators corresponding to "USIM1" and "USIM2" to activate or deactivate selectively the USIM at any time. From this menu you can also customize the color and name for each USIM icon and decide which USIM to use as default for calls, video calls, messages and data connection or choose "always ask"...
  • Page 31: Manage Contacts

    Call a number from the call log From the main menu, first select the phone icon and then the icon with the clock to display the call logs with the missed, received and outgoing calls. Select the number you want to call and choose the USIM card start the call. MANAGE CONTACTS Note: In the contextual menu of the phonebook you can access Import/Export functions and several other settings.
  • Page 32 It is possible to associate contacts to one of the SIM cards in order to automatically call those contacts with the associated SIM card; to associate a contact to one of the inserted SIM cards, press the contextual menu and choose Associate SIM card or from Settings > SIM Manager, choose Contact Association, select the SIM card and choose the contacts you want to associate with the SIM card, from the phonebook.
  • Page 33 To better use the potentiality provided by the device and its operating system, you must have an active data connection; data connection of NGM Dynamic Racing 2 is active when you first power ON the phone. If it is not included into your mobile phone plan, data traffic may cause you extra costs, so it is recommended to configure Internet connection via WiFi.
  • Page 34 Connecting to a Bluetooth device® Turn ON the Bluetooth device to connect with. Refer to the device documentation. From the main menu, choose Settings > Bluetooth on/off to turn on Bluetooth. In the contextual menu you will find additional functions and settings. Choose Search for devices to automatically find other Bluetooth devices.
  • Page 35 To change the text input parameters, select Settings > Language and input > SwiftKey for NGM . Synchronization Synchronization is the most efficient approach to manage your useful data because it allows you to make a backup of the data on your device with an internet account. In case of replacement, loss or damage of the phone you will not experience loss of data.
  • Page 36 NGM reserves the right to modify any of the content in this user guide without previous public announcement. The content of this manual may vary from the actual content displayed in the mobile phone.
  • Page 37: Kurzanleitung - Deutsch

    Kurzanleitung - Deutsch DEUTSCH...
  • Page 38 Besuchen Sie unsere Webseite www.ngm.eu um unsere gesamte NGM Telefonkollektion und Zubehöre zu sehen, zum After-Sales Service Zugang zu haben, Software Aktualisierungen herunterzuladen und um in das technische Assistenz- Forum einzutreten. Warnung: die Datenverbindung von NGM Dynamic Racing 2 ist bei der ersten Einschaltung Handys aktiv...
  • Page 39 Entfernen Sie den Akku und setzen Sie die USIM-Karten in die entsprechenden Slots mit den goldenen Kontaktflächen nach unten gerichtet ein. Speicherkarte einfügen: Um alle Funktionen von NGM Dynamic Racing 2 zu verwenden, verwenden Sie eine Micro-SD-Karte, die in die Rückseite des Telefons eingelegt werden kann.
  • Page 40 Ihr Gerät wird mit einem Lithium Akku geliefert und ist dazu entworfen worden, ausschließlich mit originalen NGM Akkus und Zubehör betrieben zu werden. Der Akkufach für den Akku befindet sich in der Rückseite des Telefons. Legen Sie den Akku so ein, das es mit den Kontaktflächen des Telefons ausgerichtet ist.
  • Page 41 Achtung: Verbinden Sie das Telefon nicht mit einem ein-oder ausschaltenden PC, um Spannungssprünge zu vermeiden. Um die korrekte Funktion und die Produkt-Garantie zu bewahren, verwenden Sie immer originale NGM Ladegeräte. Laden Sie das Gerät immer in trockenen Innenräumen auf. Eine leichte Erwärmung des Gerätes während der Ladung ist normal.
  • Page 42 Standby Bildschirm Der Hauptbildschirm: Tasten und Icons im Touch Screen können mit dem Finger gedrückt, verschoben und gedrückt gehalten werden. Der Hauptbildschirm ist der Ausgangspunkt für alle Funktionen im Telefon. Weitere Seiten sind durch das Verschieben vom Bildschirm nach rechts und links verfügbar. Diese Seiten können mit Verknüpfungen zu den bevorzugten Berühren und Anwendungen angepasst werden;...
  • Page 43 Hauptbildschirm Hauptmenü USIM Signalstärke und Akku Niveau Hinweistafel WiFi-Signalstärke Telefon Telefonbuch Hauptmenü Mitteilung Bildschirmindikator Leiste Internet Hauptmenü durchblättern HOME Bildschirme durchblättern DEUTSCH...
  • Page 44 Helligkeit und Kopfhörer Kamera Lautstärke Nähe Sensoren Buchse Vordere Kamera “+”/“-“ Blitz Hörer Ein/Aus Taste Kapazitives Standby Touch Screen Kontextmenü Home- Zurück- Taste Taste Taste Mikrofon Lautsprecher Micro USB Buchse 44 DEUTSCH...
  • Page 45 Abkürzungen Hinweistafel: um die Hinweistafel zu öffnen, berühren Sie die schwarze Leiste auf der oberen Seite des Bildschirmes und ziehen Sie sie nach unten. Berühren Sie das Icon oben rechts um von den Hinweisen zu den Schnelltasten zu schalten oder berühren Sie das Icon um das Einstellungen Menü...
  • Page 46: Anrufe Verwalten

    USIM Verwaltung: aus dem Hauptmenü wählen Sie Einstellungen > SIM-Verwaltung. Um in jedem Moment beliebig die USIM Karten zu aktivieren oder deaktivieren, wählen Sie das Kontrollkästchen neben der gewünschten USIM Karte aus. Von diesem Menü aus können auch die Farbe und den Namen für jede USIM entscheiden, eine der beiden als Standard für Anrufe, Videoanrufe, Nachrichten und Datenverbindung einstellen oder "immer fragen"...
  • Page 47 Eine Nummer aus den Anrufprotokollen zurückrufen Aus Home, wählen Sie vorerst Telefon und dann das Symbol mit der Uhr, um die Anrufprotokolle mit den verpassten, empfangenen und eingewählten Anrufen anzuzeigen. Wählen Sie die gewünschte Nummer und die USIM mit der Sie anrufen möchten. KONTAKTE VERWALTEN Hinweis: Im Kontextuellen Menü...
  • Page 48 Es ist möglich, einzelne Kontakte mit einer der beiden SIM Karten zu assoziieren, um automatisch diese Kontakte mit einer bestimmten SIM anzurufen; um einen Kontakt mit einer der eingelegten SIM Karten zuzuordnen, drücken Sie das Kontextmenü des Kontakts im Telefonbuch und wählen Sie Mit SIM-Karte assoziieren oder in Einstellungen >...
  • Page 49 KONNEKTIVITÄT Zur besseren Nutzung des Telefon-Potentials und des Betriebssystems, müssen Sie über einer aktiven Datenverbindung verfügen; die Datenverbindung von NGM Dynamic Racing 2 ist zum Zeitpunkt der ersten Einschaltung auf dem Handy aktiv. Falls Ihr Telefonvertrag keine Datenverbindung enthält, könnten zusätzliche Kosten auftreten; es ist daher ratsam eine Wi-Fi Internetverbindung zu konfigurieren.
  • Page 50 Verbindung zu einem Bluetooth-Gerät®: schalten Sie das Bluetooth-Gerät ein, das Sie anschließen möchten. Folgen Sie eventuell die Anleitungen des Gerätes. Einstellungen > Bluetooth ein/aus um Bluetooth Aus dem Hauptmenü wählen Sie einzuschalten. Im Kontextmenü finden Sie zusätzliche Funktionen und Einstellungen. Wählen Sie dann Nach Geräten Suchen um die Suche nach neuen Bluetooth Geräten zu starten.
  • Page 51 Micro-SD Speicherkarte korrekt im Telefon installiert worden sein. Um die Parameter der Texteingabe zu ändern, wählen Sie Einstellungen > Sprache und Eingabe > SwiftKey for NGM. Synchronisation die Synchronisierung ist die einfachste Art, die eigenen nützlichen Dateien zu verwalten weil sie eine Datensicherung auf Ihrem Internet-Konto vollbringt. Falls Sie das Telefon verlieren sollten, es beschädigt wird oder falls Sie es wechseln, werden Sie diese Dateien...
  • Page 52 Betriebssystemen abhängig; der Hersteller übernimmt keine Verantwortung für die Nicht-Einhaltung der angegebenen Richtlinien oder den nicht ordnungsgemäßen Gebrauch des Mobiltelefons. NGM behält sich das Recht vor, Änderungen am Inhalt dieser Bedienungsanleitung auch ohne öffentliche Bekanntgabe vorzunehmen. Der Inhalt dieser Anleitung kann vom tatsächlichen, im Mobiltelefon angezeigten, Inhalt abweichen. In diesem Fall gilt das, was im Mobiltelefon angezeigt ist.
  • Page 53: Guía Rápida - Español

    Guía rápida - Español ESPAÑOL...
  • Page 54 NGM, acceder al forum de ayuda técnica y descargar actualizaciones software. Atención: la conexión Datos de NGM Dynamic Racing 2 se activa cuando se enciende por primera vez el teléfono (o después de restablecer las configuraciones de fábrica). Si usted no tiene una tarifa especial o "plano"...
  • Page 55 Introducir la tarjeta de memoria: para utilizar todas las funciones de NGM Dynamic Racing 2, se recomienda el uso de una micro-SD: la tarjeta se coloca en la parte posterior del teléfono después de haber quitado la carcasa y la batería.
  • Page 56 Este móvil está dotado de una batería de iones de litio y diseñado para un uso exclusivo de batería y accesorios originales NGM. La batería se coloca en la parte posterior del teléfono. Alinear las placas doradas de la batería con los conectores situados en la parte superior del hueco de la batería, a continuación, deslizar la batería en esta posición.
  • Page 57 Para conservar la correcta funcionalidad del producto y la integridad de la garantía se recomienda el uso del cargador original NGM. Proceder con la carga exclusivamente en un lugar abierto y seco. Un ligero calentamiento del teléfono durante el proceso de carga es normal.
  • Page 58 Pantalla de Standby La pantalla principal La pantalla principal es el punto de partida para la utilización de todas las aplicaciones del teléfono móvil. Las otras páginas se encuentran al lado de la principal, para acceder a ellas, desplazar la pantalla hacia la derecha/izquierda. Tales páginas son personalizables con los accesos a las aplicaciones preferidas: para colocar un acceso en las páginas principales, pulsar el acceso deseado del menú...
  • Page 59: Pantalla Principal

    Menú Principal Pantalla Principal Intensidad señal USIM y nivel batería Panel de notificación Intensidad señal WiFi Teléfono Contactos Menú Principal Mensajes Barra indicador páginas Navegador Desplazamiento Menú Desplazamiento pantalla HOME ESPAÑOL...
  • Page 60 Sensores Cámara Entrada luminosidad y Cámara frontal Flash auricular proximidad Receptor Tecla Volumen On/Off "+" / "-" Touch Standby screen capacitivo Tecla Tecla menú Tecla contextual Home Atrás Micrófono Altavoz Conector Micro USB 60 ESPAÑOL...
  • Page 61 Accesos Directos Panel de notificación: para abrir el panel de notificación, tocar el área de los iconos situados en la parte alta de la pantalla y arrastrar el dedo hacia abajo. Tocar el icono situado en la parte superior derecha para pasar de las notificaciones a los botones de configuraciones rápidas o tocar el icono configuraciones...
  • Page 62 Gestionar las dos USIMs Desde el menú principal, seleccionar Ajustes > Ajustes Dual SIM. Seleccionar las teclas on/off al lado de los operadores telefónicos correspondientes a “USIM1” y “USIM2” para activar o desactivar selectivamente las USIMs en cualquier momento. Desde este menú se puede personalizar el color y nombre del icono de cada USIM y decidir qué...
  • Page 63 Llamar un número del registro llamadas Desde el menú Teléfono, seleccionar el icono con el reloj para mostrar el registro de llamadas con las llamadas perdidas, recibidas y realizadas. Seleccionar el número que desee y elegir con que USIM iniciar la llamada. GESTIONAR CONTACTOS Nota: En el menú...
  • Page 64 e puede asociar los contactos en agenda a una de las dos tarjetas SIM para llamar automáticamente a los contactos con la SIM atribuida; para asociar un contacto a una de las tarjetas SIM introducidas, pulsar el menú contextual del contacto y elegir Asocia tarjeta SIM o desde Ajustes >...
  • Page 65 Para utilizar mejor la potencialidad ofrecida por el terminal y su sistema operativo, es necesario tener una conexión datos activa; la conexión Datos de NGM Dynamic Racing 2 se activa en el momento que se enciende el teléfono la primera vez. Si no se ha realizado un contrato, el tráfico datos implicará...
  • Page 66 Conectarse a un dispositivo Bluetooth ®: activar el dispositivo Bluetooth al que se quiere conectar. Consultar la documentación del dispositivo. Desde el menú principal, seleccionar Ajustes > Bluetooth on/off para activar el Bluetooth. En el menú contextual encontraréis más informaciones y configuraciones. Elegir Buscar dispositivos para activar automáticamente la búsqueda de los dispositivos Bluetooth.
  • Page 67 Para cambiar los parámetros de introducción del texto, seleccionar Ajustes > Idioma y entrada > SwiftKey for NGM. Sincronización La sincronización es el modo más eficaz para gestionar los propios datos útiles porque permite realizar un backup de tales datos presentes en el dispositivo con la cuenta Internet.
  • Page 68 Copyright © 2013 NGM Italia Ninguna parte de esta publicación puede ser extraída, reproducida, traducida o utilizada de cualquier forma o en cualquier medio, electrónico o mecánico, incluido fotocopias y microfilm, sin previa autorización escrita por la NGM Italia. Bluetooth® es una marca comercial registrada en todo el mundo del Bluetooth SIG, Inc.
  • Page 69: Guide Rapide - Français

    Guide rapide - Français FRANÇAIS...
  • Page 70 à jour logicielles. Attention: la connexion de données de NGM Dynamic Racing 2 est active au premier allumage du téléphone (ou après chaque éventuel rétablissement des paramètres d'usine).
  • Page 71 Introduire la carte mémoire: pour utiliser toutes les fonctions de NGM Dynamic Racing 2 , nous conseillons d’utiliser une micro-SD qui doit être placée dans la partie postérieure du téléphone.
  • Page 72: Insérez La Batterie

    Votre appareil est fourni avec une batterie au ion de lithium-et est conçu pour être utilisé uniquement avec des batteries et des accessoires originaux NGM. La batterie doit être placée dans la partie postérieure du téléphone. Insérez la batterie dans son compartiment avec les contacts retournés vers le haut, en correspondance avec ceux du téléphone.
  • Page 73 Attention: Ne connectez pas votre téléphone à un ordinateur que vous allumez ou éteignez pour éviter les surtensions. Afin de préserver le bon fonctionnement du produit et l'intégrité de la garantie, nous vous recommandons l'utilisation de chargeurs originaux NGM. Procédez à la Charge exclusivement dans des endroits couverts et secs. Un léger réchauffement du téléphone pendant la charge est normal.
  • Page 74: Écran De Standby

    Écran de standby L'écran principal Utiliser votre écran tactile en le touchant, appuyant ou glissant un doigt sur l'écran. L'écran principal est le point de départ pour l'utilisation de toutes les applications sur votre téléphone. D'autres pages sont situées sur le côte par rapport à celle principale, celles-ci sont accessibles en faisant défiler l'écran de droite à...
  • Page 75: Affichage Principal

    Menu principal Affichage principal intensité du signal USIM et niveau de batterie Panneau de notification Intensité du signal WI FI Téléphone Rubrique Menu principal Messages Barre indicatrice de page Internet Parcourir menu Parcourir écran HOME FRANÇAIS...
  • Page 76 Capteurs Appareil-photo Entrée Flash luminosité Appareil photo avant écouteur et proximité Receveur Volume ON / "+"/"-" OFF et standby Écran tactile capacitif Touche Touche Touche menu accueil retour contextuel Microphone Haut parleur Connecteur micro USB 76 FRANÇAIS...
  • Page 77 Choix rapide Panneau de notification: pour ouvrir le panneau de notification, touchez le champs des icônes en haut de l'écran et faites glisser votre doigt vers le bas. Appuyez sur l'icône en haut à droite pour passer des notifications aux touches de configurations rapides appuyez sur l'icône Paramètres pour ouvrir le menu Paramètres du téléphone.
  • Page 78 Gérer les deux cartes USIM: du menu principal, sélectionnez Paramètres > Gestion SIM. Sélectionnez ou désélectionnez on/off près des opérateurs téléphoniques correspondants à "USIM1" et "USIM2" pour activer ou désactiver de manière sélective les USIM à tout moment. Vous pouvez également y personnaliser la couleur et le nom de chaque icône USIM et décider laquelle utiliser comme prédéfinie pour les appels, les messages et la connexion de données choisissant "toujours demander"...
  • Page 79 Rappeler un numéro du registre des appels Du menu principal , sélectionnez Téléphone, puis l'icone horloge pour afficher le registre des appels manqués, reçus et effectués. Sélectionnez le numéro désiré et choisissez la USIM avec laquelle lancer l'appel. Gérer les contacts Notes: Dans le menu contextuel de la rubrique vous accéder aux fonctions Ajouter un nouveau contact importation/exportation des contacts et des différents paramètres utiles.
  • Page 80 Il est possible d'associer les contacts en rubrique à une des deux SIM pour appeler automatiquement les contacts avec la SIM attribuée, pour associer un contact à l'une des SIM, appuyez sur le menu contextuel du contact et choisissez Associer carte SIM ou de Paramètres > Gestion SIM, choisir Association contacts, sélectionner la SIM et choisir dans la rubrique les contacts à...
  • Page 81: Connectivité

    NGM Dynamic Racing 2 est active au moment du premier allumage du téléphone. S'il n'est pas prévu par votre abonnement, le trafic de données implique des frais, nous vous conseillons donc de configurer l'accès Internet par le WiFi.
  • Page 82 Se connectez à un dispositif Bluetooth®: allumer le dispositif Bluetooth auquel vous désirez vous connecter. Se référer à la documentation. Paramètres > Bluetooth on/ off pour l’activer. Dans le Du menu principal, sélectionnez menu contextuel, vous trouverez les fonctions et paramètres supplémentaires. Choisir Rechercher les appareils pour démarrer automatiquement la recherche de dispositifs Bluetooth.
  • Page 83 Pour modifier les paramètres d'insertion du texte, sélectionnez Paramètres > Langue et saisie > SwiftKey pour NGM Synchronisation: la synchronisation est le moyen le plus efficace pour gérer vos propres données utiles car cela permet de faire une sauvegarde de données de votre appareil avec le compte Internet.
  • Page 84: Géolocalisation Gps

    Aucune partie de ce manuel peut être reproduite, distribuée, traduite, transmise sous aucune forme ou moyen électronique ou mécanique, y compris photocopie, enregistrement ou sauvetage dans un système de stockage et de récupération, sans l'autorisation écrite par NGM Italia. Bluetooth® est une marque commerciale déposée dans le monde de Bluetooth SIG, Inc Wi-Fi®et le symbole Wi-Fi sont des marques commerciales déposées de Wi-Fi Alliance.
  • Page 86 www.ngm.eu...

Ce manuel est également adapté pour:

Dynamic racing

Table des Matières