Table des Matières
Publicité
Les langues disponibles
Les langues disponibles
Liens rapides
Publicité
Chapitres
Table des Matières

Manuels Connexes pour Ecler NPA2500T


Sommaire des Matières pour Ecler NPA2500T
- Page 1 USER MANUAL MANUAL DE INSTRUCCIONES NOTICE D'EMPLOI BEDIENUNGSANLEITUNG...
-
Page 3: Table Des Matières
5. CLEANING 6. FUNCTION LIST 7. FUNCTION DIAGRAM 8. TECHNICAL CHARACTERISTICS 9. BLOCK DIAGRAM All numbers subject to variation due to production tolerances. ECLER S.A. reserves the right to make changes or improvements in manufacturing or design which may affect specifications. -
Page 4: Important Note
There are no user serviceable parts inside the amplifier. 2. INTRODUCTION With the PAM amplification series, ECLER introduced in early 90's a new concept to the world of professional audio: The use of switching field effect transistors. The integration of these parts for audio applications represents a firm and spectacular enhancement comparing to conventional amplifiers. -
Page 5: Installation
ENVIRO, allows for very high output power without the use of bridge configurations. The NPA2500T/4000T keeps its "All the Power All the Time" philosophy, even when driving 4 ohm speakers with a musical programme at maximum level. -
Page 6: Signal Input Connections
3.3. Signal input connections NPA Series rear panel has analog and digital inputs. Input selection is performed from the front panel menu or from EclerNet Manager control software. Please refer to the EclerNet Manager software manual for more information. • Analog inputs: The signal input connectors are of XLR-3 type (19), electronically balanced. -
Page 7: Operation And Usage
4. OPERATION AND USAGE 4.1. Start up If the POWER (17) switch is operated on the rear panel, the amplifier receives mains power and can be turned on locally or remotely (see Control panel section). In a complete audio installation, it is important to start up the equipment in the following sequence: sound sources, mixer, equalizers, active filters and finally power amplifiers. -
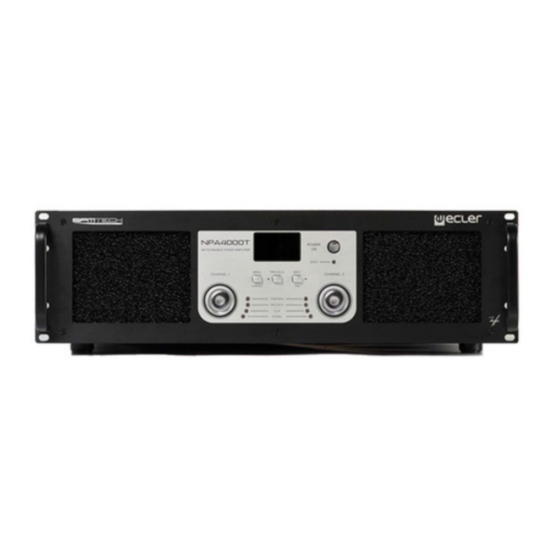
Page 8: Front Panel Handling
4.3. Front panel handling The front panel includes a series of controls and indicators: Backlit LCD display for displaying menus, settings and amplifier parameters. On / Off key (POWER ON). Menu navigation keys (MENU / PREVIOUS / NEXT). Rotary/push controls for adjusting parameters (CHANNEL 1 / CHANNEL 2). LED indicators (see section 4.2). - Page 9 • Activate / deactivate a channel muting (by pressing and holding the CHANNEL 1 or CHANNEL 2 rotary knob): A label with the text "MUTE" is displayed when this feature is activated. • Show text labels assigned to the unit and to its amplification channels (by clicking on the TAG button): This window, named TAGS, disappears after a short time, and the main window returns.
- Page 10 All other amplifier functions and settings are accessed through the menu structure as described in the following diagram:...
-
Page 11: Input Source
• MONITOR menu VU-meters monitoring scale selection: Output power (Watts), RMS or peak. Output voltage (Volts), peak or RMS. Input signal voltage, RMS. Display through dedicated screens: Load impedance, in ohms. Temperature, in % of the alarm triggering temperature. AC power supply voltage. Cumulative operating time of the amplifier, in hours: minutes. -
Page 12: Cleaning
• ADVANCED menu Amplifier advanced features: LCD CONTRAST: adjusts the LCD contrast. FINDER: enables / disables the display backlight flashing, useful to identify a physical unit with its virtual equivalent in EclerNet Manager software (see EclerNet Manager manual for more information). -
Page 13: Function List
6. FUNCTION LIST 1. Input attenuator 2. Thermal protection indicator, THERMAL 3. Protection indicator, PROTECT 4. Clip indicator, CLIP 5. Signal present indicator, SIGNAL 6. Display 7. Navigation key, MENU / CANCEL 8. Navigation key, PREVIOUS 9. Navigation key, NEXT / TAG 10. - Page 14 8. CARACTERÍSTICAS TÉCNICAS 9. DIAGRAMA DE BLOQUES Todos los datos están sujetos a variación debida a tolerancias de producción. ECLER S.A. se reserva el derecho de realizar cambios o mejoras en la fabricación o diseño que pudieran afectar las especificaciones.
-
Page 15: Nota Importante
En el interior del amplificador no existen elementos manipulables por el usuario. 2. INTRODUCCIÓN Con los PAM, ECLER introdujo a principios de los 90 un nuevo concepto en el audio profesional: el empleo de los transistores de efecto de campo de conmutación (MOSFET). Su incorporación a la amplificación de audio significa una firme y espectacular mejora en relación a los sistemas convencionales. -
Page 16: Instalación
En las NPA2500T / 4000T Ecler incorpora doble fuente de alimentación y MOSFETs de canal N. El uso de esta nueva tecnología sobradamente probada en la línea de producto industrial ENVIRO posibilita la obtención de muy altas potencias sin necesidad de emplear configuraciones en puente. En las NPA2500T / 4000T se continúa manteniendo la Filosofía "All the Power All the time", toda la potencia todo el tiempo, incluso a máxima potencia y... -
Page 17: Conexiones De Entrada De Señal
3.3. Conexiones de entrada de señal La serie NPA dispone de entradas analógicas y digitales en su panel posterior. La selección de una u otra entrada se realiza desde el menú del panel frontal o desde la aplicación de control EclerNet Manager. Consulte el manual de la Aplicación EclerNet Manager para obtener más información. -
Page 18: Funcionamiento
4. FUNCIONAMIENTO 4.1. Puesta en marcha Accionando el interruptor de puesta en marcha POWER (17), en el panel posterior, el amplificador recibe suministro eléctrico de la red y queda en condiciones de ser encendido local o remotamente (ver sección Panel de Control). -
Page 19: Manejo Del Panel Frontal
4.3. Manejo del panel frontal El panel frontal integra una serie de controles e indicadores: Pantalla LCD retroiluminada para la visualización de menús, ajustes y lecturas de parámetros del amplificador. Tecla de encendido / apagado (POWER ON). Teclas de navegación de menús (MENU / PREVIOUS / NEXT). Controles rotatorios con pulsación para el ajuste de parámetros (CHANNEL 1 / CHANNEL 2). - Page 20 • Activar / desactivar el enmudecimiento de un canal (manteniendo pulsado el control giratorio CHANNEL 1 o CHANNEL 2): Aparece una etiqueta mostrando el texto “MUTE” en caso de activación de esta función. • Visualizar las etiquetas de texto asignadas al dispositivo y a sus canales de amplificación (pulsando sobre la tecla TAG): Dicha ventana, denominada TAGS, desaparece tras un breve lapso de tiempo, regresando a la vista de la ventana principal.
- Page 21 Al resto de funciones y ajustes del amplificador se accede mediante la estructura de menús que se describe en el gráfico siguiente:...
- Page 22 • Menú MONITOR Selección de la escala de monitorización mediante vu-metros en: Vatios de salida, RMS o pico. Voltios de salida, RMS o pico. Voltios de señal de entrada, RMS. Visualización mediante pantalla dedicada de: Impedancia de carga, en ohms. Temperatura, en % sobre la temperatura de disparo de alarma.
-
Page 23: Limpieza
• Menú ADVANCED Funciones avanzadas del amplificador: LCD CONTRAST: ajuste del contraste de la pantalla LCD. FINDER: activa / desactiva el parpadeo de la retroiluminación de la pantalla, útil para la identificación de un dipositivo físico con su equivalente virtual en la aplicación EclerNet Manager (ver manual de EclerNet Manager para más información). -
Page 24: Lista De Funciones
6. LISTA DE FUNCIONES 1. Atenuador de entrada 2. Indicador de protección térmica, THERMAL 3. Indicador de funcionamiento de las protecciones, PROTECT 4. Indicador de recorte, CLIP 5. Indicador de presencia de señal en la entrada, SIGNAL 6. Pantalla 7. Tecla de navegación, MENU / CANCEL 8. - Page 25 4.3. Maniement de la face avant 5. ENTRETIEN 6. LISTE DE FONCTIONS 7. SCHEMA DE FONCTIONNEMENT 8. CARACTERISTIQUES TECHNIQUES 9. BLOCS DE DIAGRAMMES ECLER se réserve le droit d’apporter des modifications de toute sorte sur ses produits qui peuvent altérer leurs spécifications.
-
Page 26: Note Importante
2. INTRODUCTION Avec les PAM, ECLER a introduit, au début des années 90, un nouveau concept dans le domaine de l’audio professionnel : l’emploi des transistors à effet de champ de commutation ; leur incorporation à l’audio représente une nette et spectaculaire amélioration par rapport aux systèmes conventionnels. Les avantages que présentent ces mosfets de commutation peuvent se résumer comme suit :... -
Page 27: Installation
ECLER utilise double alimentation et des mosfets de canal N pour le nouvel amplificateur de puissance NPA2500T/4000T. L’incorporation de cette nouvelle technologie qui a déjà été utilisé avec succès sur la ligne de produits industriels ENVIRO, permet d’obtenir des hauts niveaux de puissance sans avoir recours à une configuration en "bridge". -
Page 28: Branchement De L'entrée Du Signal
3.3. Branchement de l'entrée du signal La gamme NPA dispose d'entrées analogiques et numériques en face arrière. La sélection de l'une ou l'autre des entrées se fait dans le menu de la face avant ou depuis l'application de contrôle EclerNet Manager. Consultez le mode d’emploi de l'application EclerNet Manager pour obtenir davantage d'informations. -
Page 29: Mise En Marche Et Utilisation. Fonctionnement
4. MISE EN MARCHE ET UTILISATION. FONCTIONNEMENT 4.1. Mise en marche. En actionnant l'interrupteur de mise en marche POWER (17), en face arrière, l'amplificateur reçoit l'alimentation électrique du secteur et est dans un mode lui permettant d'être allumé localement ou à distance (voir la section Panneau de commande). -
Page 30: Maniement De La Face Avant
4.3. Maniement de la face avant La face avant comprend une série de commandes et de témoins : Écran LCD rétroéclairé pour la visualisation des menus, le réglage et la lecture des paramètres de l'amplificateur. Interrupteur d’alimentation (POWER ON). Touches de navigation dans les menus (MENU / PREVIOUS / NEXT). Commandes mixtes (rotatives et boutons poussoirs) pour le réglage des paramètres (CHANNEL 1 / CHANNEL 2). - Page 31 • Activer/désactiver la coupure d'un canal (en maintenant pressée la commande rotative CHANNEL 1 ou CHANNEL 2) : Une bulle apparaît avec le texte “MUTE” en cas d'activation de cette fonction. • Visualiser les bulles de texte assignées à l’appareil et à ses canaux d'amplification (en pressant la touche TAG) : Cette fenêtre, appelée TAGS, disparaît après un bref laps de temps, laissant la place à...
- Page 32 On accède au reste des fonctions et réglages de l'amplificateur par la structure en menus décrite dans le schéma suivant :...
- Page 33 • Menu MONITOR Sélection de l’échelle de monitoring par les VU-mètres en : Watts en sortie, RMS ou crête. Volts en sortie, RMS ou crête. Volts du signal d’entrée, RMS. Visualisation par écran dédié de : Impédance de charge, en ohms. Température, en % de la température de déclenchement d’alarme.
-
Page 34: Entretien
• Menu ADVANCED Fonctions avancées de l'amplificateur : LCD CONTRAST : réglage du contraste de l'écran LCD. FINDER : active/désactive le clignotement du rétroéclairage de l'écran, utile pour l'identification d'un appareil physique avec son équivalent virtuel dans l'application EclerNet Manager (voir le mode d’emploi d’EclerNet Manager pour plus d’informations). -
Page 35: Liste De Fonctions
6. LISTE DE FONCTIONS 1. Atténuateurs d’entrée 2. Indicateur de protection thermique, THERMAL 3. Indicateur de protection, PROTECT 4. Voyant d'écrêtage, CLIP 5. Indicateur de présence du signal, SIGNAL 6. Ecran 7. Touche de navigation, MENU / CANCEL 8. Touche de navigation, PREVIOUS 9. - Page 36 4.3. Bedienung der vorderen Bedientafel 5. REINIGUNG 6. FUNKTIONSLISTE 7. FUNKTIONSÜBERSICHT 8. TECHNISCHE DATEN 9. BLOCKSCHATBILD Alle Angaben sind ohne Gewähr. Messwerte können produktionsbedingten Schwankungen unterliegen. ECLER S.A. nimmt sich das Recht heraus Veränderungen am Gerät vorzunehmen, die zur Verbesserung des Produktes beitragen.
-
Page 37: Wichtige Vorbemerkung
Inneren der Endstufe befinden sich keine für den Benutzer gedachte Bedienelemente. 2. EINFÜHRUNG Mit der PAM Verstärker-Serie führte ECLER Anfang der 90er Jahre ein neues Konzept in die Welt des professionellen Audio ein: Die Benutzung schaltender Feld-Effekt Transistoren, deren Gebrauch in Audioanwendungen einen soliden und spektakulären Fortschritt hingegen herkömmlichen Systemen bedeutete. -
Page 38: Installation
Die Ecler NPA2500T/4000T basiert auf ein Dual-Netzteil un N-channel mosfets. Diese Technologie hat sich bei der industriellen Produktlinie ENVIRO höchst effizient erwiesen, da eine extrem hohe Ausgangsleistung ohne Bridge-Konfigurationen ermöglicht wird. Sogar bei maximaler Austeuerung eines Musiksignals an 4 Ohm Lastimpedanzen bleibt die "All the Power All the Time"... -
Page 39: Anschluß Der Signaleingänge
3.3. Anschluß der Signaleingänge Die NPA-Serie verfügt an der Rückseite über analoge und digitale Eingänge. Die Auswahl der Eingänge erfolgt entweder vom Menü an der vorderen Bedientafel aus oder mit Hilfe der Fernsteuerungs-Applikation EclerNet Manager. Nähere Information hierzu finden Sie im Handbuch der Applikation EclerNet Manager. •... -
Page 40: Inbetriebnahme
4. INBETRIEBNAHME 4.1. Inbetriebnahme Durch Betätigung des Netzschalters POWER (17) an der Rückseite des Verstärkers wird dieser mit Strom vom Netz versorgt und kann somit vor Ort oder durch Fernbedienung eingeschaltet werden (siehe Abschnitt "Bedientafel"). In einer kompletten Audio -Installation ist es wichtig, die einzelnen Geräte in folgender Reihenfolge einzuschalten: Signalquellen, Mixer, Equalizer, aktive Filter und schließlich die Endverstärker. -
Page 41: Bedienung Der Vorderen Bedientafel
4.3. Bedienung der vorderen Bedientafel Die vordere Bedientafel weist eine Reihe von Bedienelementen und Anzeigen auf: LCD-Display, hinterleuchtet, zur Anzeige von Menüs, Einstellungen und Parameter-Ablesung des Verstärkers. Ein-/Aus-Taste (POWER ON). Navigationstasten der Menüs (MENU / PREVIOUS / NEXT). Dreh-/Druckschalter für Parametereinstellung (CHANNEL 1 / CHANNEL 2). LED-Anzeigen (siehe Abschnitt 4.2.) Zum Einschalten des Geräts muss die POWER-Taste bis zum Beginn der Hochfahr-Sequenz gedrückt gehalten werden. - Page 42 • Stummschaltung eines Kanals aktivieren / deaktivieren (Drehregler CHANNEL 1 oder CHANNEL 2 gedrückt halten): Bei Aktivierung dieser Funktion erscheint ein Label mit dem Text „MUTE“ . • Anzeige der Textlabels, die dem Gerät und seinen Verstärkerkanälen zugewiesen sind (TAG-Taste drücken): Dieses TAGS-Fenster schliesst sich nach kurzer Zeit wieder, so dass die Hauptmaske wieder sichtbar wird.
- Page 43 Der Zugriff auf die übrigen Funktionen und Einstellungen des Verstärkers geschieht über die Menü- Struktur, die in der folgenden Grafik dargestellt wird:...
- Page 44 • Menü MONITOR Auswahl der Monitoring-Scala mittels VU-Meter in: Ausgangswatt, RMS oder PEAK. Ausgangsvolt, RMS oder PEAK. Volt Eingangssignal, RMS. Visualisierung, mittels dediziertem Display, von: Lastimpedanz in Ohm. Temperatur in % von der Temperatur, bei der ein Alarm ausgelöst wird. Betriebsspannung AC.
-
Page 45: Lcd Contrast
• Menü ADVANCED Weitergehende Funktionen des Verstärkers: LCD CONTRAST: Einstellung des Kontrasts des LCD-Displays. FINDER: Aktiviert / deaktiviert das Blinken der Display-Hinterleuchtung. Dies ist nützlich für die Identifizierung eines physisch vorhandenen Systems und seines virtuellen Gegenstücks in der Applikation EclerNet Manager (für nähere Information siehe Handbuch EclerNet Manager). INFO: Zeigt Modell und Version der Verstärker-Firmware. -
Page 46: Funktionsliste
6. FUNKTIONSLISTE 1. Eingangsregler 2. Übertemperaturschutz –Anzeige, TERMAL 3. Schutzanzeige, PROTECT 4. Clip Anzeige, CLIP 5. Signalanzeige, SIGNAL 6. Bildschirm 7. Navigationstaste, MENÜ 8. Navigationstaste, PREVIOUS 9. Navigationstaste, NEXT / TAG 10. Ein-/Aus-Taste (POWER ON) 11. Datentransfer-Anzeige DATA 12. RS-232-Port 13. -
Page 47: Technische Daten
8. TECHNICAL CHARACTERISTICS 8. CARACTERÍSTICAS TÉCNICAS 8. CARACTERISTIQUES TECHNIQUES 8. TECHNISCHE DATEN POWER AUDIO NPA2500T NPA4000T POWER 20Hz-20kHz 1% THD 1650 WRMS 2840 WRMS 2Ω Stereo 1150 WRMS 1910 WRMS 4Ω Stereo 695 WRMS 1120 WRMS 8Ω Stereo 2290 WRMS 3800 WRMS 8Ω... - Page 48 DIGITAL Processing: A/D & D/A 24 bit, 96kHz. S/N:110dB/115dB AKM 32/64 bits Latency 824μs Analog Input headroom: +18 dBV = +21dBu Digital Input attenuator: Stepless from –∞ to +0dB Input Impedance: Balanced, 22kΩ Maximum Delay: 1s (343.4m) total for all 2 channels. Delay resolution: 10.4µs (3mm) Compressor / Limiter:...
- Page 49 SOFTWARE - Realtime full GUI of all functions and controls thru Ethernet eclernet Software with interactive graphical display - Grouping mode channels or devices - Automated report generation - Remote power on with programmable delay. - Up to 256 devices on same net. - Autodiscovery devices feature - Routing capability through NAT gateways.
-
Page 50: Blockschatbild
9. BLOCK DIAGRAM 9. DIAGRAMA DE BLOQUES 9. BLOCS DE DIAGRAMMES 9. BLOCKSCHATBILD... - Page 52 ECLER Laboratorio de electro-acústica S.A. Motors 166-168, 08038 Barcelona, Spain INTERNET http://www.ecler.com E-mail: info@ecler.es 50.0168.01.00...