
Manuels Connexes pour Red Sea MAX C Série


Sommaire des Matières pour Red Sea MAX C Série
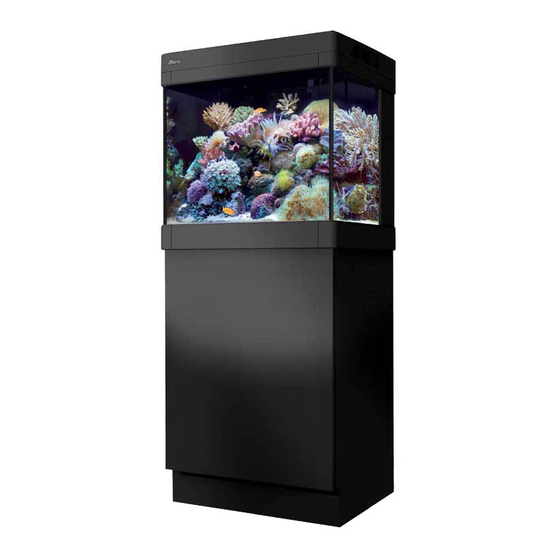
- Page 1 Red Sea MAX ® C-Series Complete Coral Reef Systems Installation and Operation Manual...
- Page 3 2-24 28-51 54-77...
- Page 5 ® Red Sea MAX C-Series Complete Coral Reef Systems Installation and Operation Manual...
-
Page 6: Table Des Matières
Red Sea MAX C-Series ® C Installation & Operation Manual Safety ..............4 Location ..............5 ® Unpacking the MAX C System .......6 Components ............7 Assembly ..............8 Installation of Sump Components.........10 Installation of optional Chiller .......15 Installation of Lighting Hood .........16 Operation of Power Center ........18 Initial Fill ..............18... - Page 7 ® Red Sea MAX C-Series complete reef system. ® Red Sea developed the MAX to provide a complete reef spec system so that from the beginning, you can focus on the aquarium's inhabitants rather than the hardware. ® The Red Sea MAX...
-
Page 8: Safety
Red Sea MAX C-Series 1 Safety Please read and follow all safety instructions. d. To avoid injury, do not contact moving parts. e. Always unplug an appliance from an outlet when not in use, before DANGER: To avoid possible electric shock, special care should be putting on or taking off parts, and before cleaning. -
Page 9: Location
2 Location Accessibility ® The first step in setting up the MAX C is to choose a suitable location. • Back: Ensure that there is at least 10cm (4") of clearance behind the Electric Supply ® to allow for sufficient air circulation for a chiller and general ease of operation. -
Page 10: Unpacking The Maxc System
Red Sea MAX C-Series ® 3 Unpacking the MAX C System Please read this section carefully before proceeding. NOTE: Every precaution has been taken to ensure the safe arrival of the ® C aquarium system, however before installing a new glass 1. -
Page 11: Components
4 Components C system main components C-130 C-250 ® ® C type glass aquarium with integral rear sump 130L 250L ® C Cabinet Self-assembly Self-assembly Power Center Cabinet Unit Cabinet Unit ® C T5 closed top lighting hood with timer 2 x 55W 6 x 39W Color trim pack for aquarium... -
Page 12: Assembly
Red Sea MAX C-Series 5 Assembly Perform the assembly and installation of all of the components in the PTO. The door should spring open. If the door does not spring open order described below before adding the water to the system. - Page 13 5.3 Cable Channels 5.5 Color Trim Attach the 2 cable channels to the rear wall The color trim pack contains a set of plastic parts for the upper and lower of the aquarium. rim of the aquarium that are painted to the designated color. The color trim for the upper and lower trim are fitted by sliding them on 5.4 Placing Aquarium to their corresponding black rim that is located along top and bottom...
-
Page 14: Installation Of Sump Components
Red Sea MAX C-Series 6 Installation of Sump Components ® The MAX C-Series aquariums are divided into 2 parts, Aquarium and the Rear Sump that houses all of the filtration and circulation systems. 1. Detachable Surface Skimmer 2. Protein Skimmer 3. - Page 15 C-250 sump component assembly diagram shows position of optional chiller pump and piping...
- Page 16 Red Sea MAX C-Series ® Overview of the MAX C rear sump filtration and Water loss due to evaporation will cause a drop in the water level of the rear sump which can be monitored through the viewing slot at the top circulation system of the side panels on both sides.
- Page 17 Assemble the skimmer as shown in the diagram. 6.2 Surface Skimmer: 1. Set the skim adjuster to its lowest position. The comb sections of the surface 2. Connect the air pipe from the venturi inlet of the skimmer pump to skimmer are easily removed for the outlet of the silencer.
- Page 18 Red Sea MAX C-Series 6.5 Circulation Pumps: Familiarize yourself with the multidirectional 4. Screw the outlet onto the threaded connector and tighten against the outlet by disassembling and reassembling it a glass. Initially adjust the nozzle to the downward position.
-
Page 19: Installation Of Optional Chiller
The water cooling fan will be most effective to maintain the correct temperature for a reef aquarium by evaporative cooling if the ambient For the long-term safety and vitality of reef inhabitants Red Sea temperature around the aquarium is between 23-25°C / 73-77°F. -
Page 20: Installation Of Lighting Hood
Red Sea MAX C-Series 8 Installation of Lighting Hood 4. Insert the accessory pipe unit into the window in the hinge bracket and click it into position. Make sure that pump cables are positioned in the recess provided on the sides of the pipe unit. - Page 21 7. Make sure that the hood fits securely around the rim of the tank; it supports together and position the hole at the top of the upper arm may be necessary to adjust the position of the hood support to do in the recess provided in the hood.
-
Page 22: Operation Of Power Center
Red Sea MAX C-Series 9 Operation of Power Center Lighting and Fan control The timer has a 3-position switch: With all of the electrical components now installed and plugged into the “I” (ON position) – daylights on, moonlights off Power Center, slide the Splash cover along the length of the sockets, allowing the recess in the bottom of the cover to collect the cables and “O”... -
Page 23: Operation Of The Protein Skimmer
Add the seawater to the main tank, rear sump and directly into the gradually raise the Skim Adjuster until the desired foam consistency is skimmer (to prevent it floating instead of filling with water) until the achieved. If the foam is too wet, lower the Skim Adjuster. water is at the level of the circulation pump outlet nozzles. -
Page 24: General Aquarium Maintenance
Red Sea MAX C-Series 12 General Aquarium Feeding and Supplementing Skimmers are very susceptible to the effect of surface active compounds Maintenance such as foods and supplements that are added regularly to the aquarium. Such materials can significantly affect the foam production and in some ®... - Page 25 Surface Skimmer To clean the pumps: Remove and clean the combs of the surface skimmer at least once a • Unplug the power cord of the pump from the electric supply and week to allow proper water flow and stable water level differentiation remove it from the aquarium.
-
Page 26: Trouble Shooting
Red Sea MAX C-Series 13 Trouble shooting Change the carbon filter Replace the active carbon filter every two months. Q. My set up is new and the skimmer doesn’t seem to be skimming. Lighting tube replacement A. Check that the salinity of the water is within the correct range for reef aquariums. - Page 27 Q. My set up is not new and skimmer isn’t producing foam or it is too super-saturating the water with air, i.e. dissolving more gas into dry and builds on the neck. the water than is normal for the given temperature and pressure. Once the super-saturated water leaves the skimmer, it “relaxes”...
-
Page 28: Warranty
Red Sea Aquarium Products Limited Warranty. Some states do not allow the exclusion or limitation of incidental or The limited warranty sets forth all Red Sea Aquatics (HK) Ltd (Red Sea) consequential damages, or limitations on how long an implied warranty responsibilities regarding this product. - Page 31 ® Red Sea MAX C-Serie Korallenriff-Komplettsysteme Installations- und Bedienungsanleitung...
- Page 32 Red Sea MAX C-Series ® Red Sea MAX C-Serie Installations- und Bedienungsanleitung Sicherheit ................Standort ..............31 ® Das Auspacken des MAX C Systems ......32 Bauteile ..............33 Montage ..............34 Installation der Bauteile im Filterbereich .....36 Installation eines optionalen Kühlgerätes ....41 Monatge der Beleuchtungsabdeckung ....42...
- Page 33 Riffaquaristik anzubieten, das es Ihnen ermöglicht, sich von Anfang an auf die Aquarienbewohner statt auf die Technik zu konzentrieren. ® Das Erleben eines Korallenriffs mit dem Red Sea MAX bedeutet, dass eine Umgebung geschaffen wird, die speziell auf die Bedürfnisse von Korallen und allen Lebewesen in einem künstlich geschaffenen Riff abgestimmt...
-
Page 34: Sicherheit
Red Sea MAX C-Series 1 Sicherheit c. Wenn das Gerät von Kindern oder in der Nähe von Kindern benutzt wird, müssen diese gut beaufsichtigt werden. BITTE LESEN UND BEFOLGEN SIE ALLE HIER AUFGEFÜHRTEN d. Zur Vermeidung von Verletzungen keine Teile berühren, die sich in SICHERHEITSHINWEISE. -
Page 35: Standort
2 Standort ® Der erste Schritt beim Aufbau des MAX C ist die Wahl eines geeigneten Zugangsmöglichkeiten Standortes. ® • Rückseite: Stellen Sie sicher, dass hinter dem MAX ein Freiraum von mindestens 10 cm für die für ein Kühlgerät (nicht im Lieferumfang Stromversorgung enthalten) benötigte Luftzirkulation und für eine allgemein bequeme Bedienung verbleibt. -
Page 36: Das Auspacken Des Max ® C Systems
Red Sea MAX C-Series 3 Das Auspacken des ® C Systems Ungefähres Gewicht des Aquariums (leer) Bitte lesen Sie diesen Abschnitt sorgfältig durch, bevor Sie beginnen. Modell Metrisch (kg) Britisch (lb) C-130 1. Entfernen Sie die Schutzverpackung um die Abdeckung herum. -
Page 37: Bauteile
4 Bauteile Haupt-Bauteile des MAX C Systems C-130 C-250 ® ® -Glasaquarium Baureihe C mit integriertem Filterbereich 130L 250L ® -C Unterschrank Selbstmontage Selbstmontage Stromzentrale Unterschrank-Einheit Unterschrank-Einheit ® -C Beleuchtungsabdeckung mit Zeitschaltuhr 2 x 55W Power Compact 6 x 39W T5 Farbblenden-Set für das Aquarium Typ C Typ C... -
Page 38: Montage
Red Sea MAX C-Series 5 Montage geschlossene Tür. Die Tür sollte dann aufspringen. Wenn die Tür nicht aufspringt, passen Sie die Position des Drucktüröffners durch eine halbe Gehen Sie bei der Montage und Installation aller Zubehörteile in der Drehung des vorderen Endes des Einstellstabs gegen den Uhrzeigersinn unten beschriebenen Reihenfolge vor, bevor Sie das System mit Wasser an. - Page 39 Kleben Sie den Kennzeichnungs-Aufkleber für die Steckdose (dieser zeigt Prüfen Sie, nachdem Sie das Aquarium korrekt auf dem Unterschrank die Verbindung zwischen Steckdosen und Schaltern) auf die Unterschrank- ausgerichtet haben, ob sich der Unterschrank dabei bewegt hat und Innenseite über der Stromzentrale. korrigieren Sie gegebenenfalls noch einmal seine Position.
-
Page 40: Installation Der Bauteile Im Filterbereich
Red Sea MAX C-Series 6 Installation der Bauteile im Filterbereich ® Die MAX -Aquarien der Baureihe C sind in zwei Teile geteilt, nämlich in das Aquarium und den Filterbereich auf der Rückseite, in dem sich alle Filter- und Strömungssysteme befinden. - Page 41 Die Montageskizze der Filterbereich-Bauteile für das C-250 zeigt die Position der optionalen Förderpumpe und -rohre.
- Page 42 Red Sea MAX C-Series Übersicht über den Filter und das Strömungssystem im HINWEIS: Vergewissern Sie sich vor der Verbindung jedweder ® -C-Filterbereich Zubehörteile mit der Stromzentrale, dass alle Schalter auf Die Verbindung vom Aquarium zum hinteren Filterbereich erfolgt „off“ stehen, also ausgeschaltet sind.
- Page 43 Montieren Sie den Eiweißabschäumer wie weiter unten im Diagramm 6.2 Oberflächenabschäumer: gezeigt. Die Kämme des Überlaufs können 1. Stellen Sie den Durchflussregler auf die niedrigste Position zur regelmäßigen Reinigung leicht 2. Verbinden Sie den Luftschlauch des Venturi-Einlasses der abgenommen werden. Ziehen Sie den Abschäumerpumpe mit dem Auslass des Schalldämpfers.
- Page 44 Red Sea MAX C-Series 6.5 Strömungspumpen: Machen Sie sich mit der verstellbaren 4. Schrauben Sie den Auslass an den Gewindestutzen und ziehen Sie Auslassdüse vertraut, indem Sie sie einige ihn fest an das Glas. Lassen Sie die Auslass-Düse anfangs nach unten Male ab- und wieder anmontieren.
-
Page 45: Installation Eines Optionalen Kühlgerätes
Für die langfristige Sicherheit und Vitalität der Riffbewohner empfiehlt Platzieren Sie das Wasserkühlungsgebläse an der Rückwand des Red Sea für alle Riffaquarien den Einsatz eines Kühlers. Sowohl das Filterbereichs nahe der Aufhängung und ziehen Sie die Schraube so an, ®... -
Page 46: Monatge Der Beleuchtungsabdeckung
Red Sea MAX C-Series 8 Monatge der 5. Drücken Sie den Schlauchstutzen der Pumpe in eine der Anschlussstellen und sichern Sie seine Position durch Drehen der Beleuchtungsabdeckung Feststellmutter. 6. Verbinden Sie ein Stück Schlauch (Durchmesser 17 mm, ¾”) von benötigter Länge mit dem anderen Schlauchstutzen. Führen Sie das Legen Sie die Abdeckung mit der Außenseite nach unten auf... - Page 47 8. Platzieren Sie die Abdeckung der Beleuchtunszeitschaltuhr auf der Stützen mit der Abdeckung zu verbinden. Wenn dies schwierig ist, Abdeckung. überprüfen Sie die Ausrichtung der Stifte zu dem Loch und versuchen Sie es erneut. 9. Halten Sie die Abschäumerabdeckung in der „Open”-Position (geöffnet) über dem Abschäumerbehälter, wobei Sie die Gelenke mit 4.
-
Page 48: Betrieb Der Stromzentrale
Red Sea MAX C-Series 9 Betrieb der Stromzentrale Steuerung der Beleuchtung und des Gebläses: Die Zeitschaltuhr hat einen Schalter, der sich in 3 Positionen stellen lässt: Wenn nun alle elektrischen Bauteile installiert und mit der Stromzentrale “I” (AN-Position) – Tagesbeleuchtung ein, Mondlicht aus verbunden sind, schieben Sie die Spritzschutzabdeckung an den Steckplätzen entlang, sodass sich die Kabel in der Einkerbung unten an... -
Page 49: Betrieb Des Eiweißabschäumers
den Einweißabschäumer (damit dieser nicht schwimmt, statt sich mit Bereich des Abschäumerhalses zu verdichten, heben Sie die Höhe des Wasser zu füllen), bis der Wasserstand die Höhe der Auslassdüsen der Durchflussreglers allmählich an, bis Sie die gewünschte Schaumkonsistenz erhalten. Wenn der Schaum zu nass ist, senken Sie die Höhe des Strömungspumpe erreicht hat. -
Page 50: Allgemeine Wartungsarbeiten Am Aquarium
Red Sea MAX C-Series 12 Allgemeine Wartungsarbeiten Einlaufphase von einigen Tagen, bevor sie effizient funktionieren. Während der Neutralisierung harmloser chemischer Rückstände, welche am Aquarium die Oberflächenspannung des Wassers beeinflussen, kommt es häufig zu einer Überabschäumung. ® Der dauerhafte Erfolg Ihres MAX -Aquariums und die Gesundheit seiner Bewohner hängen von Ihrem Einsatz ab. - Page 51 Überlauf Reinigung der Pumpen: Nehmen Sie mindestens einmal pro Woche die Kämme vom Überlauf • Trennen Sie das Netzkabel der Pumpe von der Stromversorgung und ab und säubern Sie sie, damit das Wasser ungehindert strömen kann nehmen Sie die Pumpe aus dem Aquarium. und der Wasserstandsunterschied zwischen Aquarium und Filterbereich •...
-
Page 52: Hinweise Zur Fehlerbehebung
Red Sea MAX C-Series 13 Hinweise zur Fehlerbehebung Auswechseln des Kohlefilters Erneuern Sie den Aktivkohlefilter alle zwei Monate. F. Mein Aquarium ist neu eingerichtet und der Eiweißabschäumer Auswechseln der Leuchten scheint nicht abzuschäumen. A. Überprüfen Sie, ob der Salzgehalt des Wassers sich innerhalb des für Über 6-12 Monate nimmt die Intensität der Leuchtstoffröhren um etwa... - Page 53 F. Mein Aquarium ist nicht neu eingerichtet und der und zu erwarten. Intensive Abschäumung ist wichtig für gute Eiweißabschäumer produziert keinen Schaum oder zu trockenen Wasserqualität, weil sie zum einen organischen Schmutz beseitigt, Schaum, der sich im Abschäumerhals absetzt. bevor er sich zersetzen kann UND zum anderen ein hohes Redox- Niveau erhält.
-
Page 54: Garantie
Diese beschränkte Garantie legt sämtliche Haftung dar, die Red Sea entstehen. Alle ausdrücklichen und abgeleiteten Garantien, einschließlich Aquatics (HK) Ltd (Red Sea) für dieses Produkt übernimmt. Es existieren der Garantie der Gängigkeit und Zweckdienlichkeit, beschränken sich auf keine darüber hinausgehenden ausdrücklichen oder abgeleiteten den vorstehend angeführten Garantiezeitraum. - Page 57 ® Red Sea MAX C-Series Système récifal complet Manuel d’installation et d’utilisation...
- Page 58 Red Sea MAX C-Series Red Sea MAX C-Series ® C Manuel d’installation et d’utilisation Consignes de sécurité ..........56 Emplacement ............57 ® Déballage du MAX C ..........58 Composants ............59 Montage ..............60 Installation des éléments de la décantation ....62 Installation du groupe froid ........67 Installation du capot ............68...
- Page 59 ® stable et une bonne qualité de l’eau. Le système Red Sea MAX C permet de maintenir un récif aussi beau que prospère à la maison.
-
Page 60: Consignes De Sécurité
Red Sea MAX C-Series Red Sea MAX C-Series 1 Consignes de sécurité d. Pour éviter toutes blessures, ne jamais toucher des pièces en MERCI DE LIRE ET DE SUIVRE TOUTES LES INSTRUCTIONS DE SECURITE mouvement. e. Toujours débrancher un appareil lorsqu’il n’est pas utilisé, avant de DANGER: pour éviter tout choc électrique, des précautions particulières... -
Page 61: Emplacement
2 Emplacement Accessibilité ® La première étape pour installer un MAX C est de choisir le bon emplacement. • Arrière du bac: s'assurer qu’il y a au moins 10 cm entre le mur et l’arrière du bac pour la libre circulation de l’air (encore plus important Electricité... -
Page 62: Déballage Du Max ® C
Red Sea MAX C-Series Red Sea MAX C-Series ® 3 Déballage du MAX Merci de lire attentivement cette section avant de commencer. NOTE: toutes les précautions ont été prises pour assurer le bon état ® de livraison de votre MAX C, cependant avant d’installer tout... -
Page 63: Composants
4 Composants Système MAX C composants principaux C-130 C-250 ® ® Type MAX C: aquarium en verre avec décantation arrière intégrale 130L 250L ® Meuble MAX A monter A monter Power Center Dans le meuble Dans le meuble ® C T5 : Capot fermé avec minuteur 2 x 55W 6 x 39W Kit couleur... -
Page 64: Montage
Red Sea MAX C-Series Red Sea MAX C-Series 5 Montage Suivre le montage et l’installation de tous les composants dans l’ordre Procéder de même jusqu’à obtenir le bon réglage. décrit ci-dessous avant de remplir l’aquarium. Après le montage placer le meuble à son emplacement définitif NOTE: Gauche et Droite s’entendent positionné... - Page 65 5.3 Guide-câbles 5.5 Kit couleur Fixer les 2 guide-câbles à la cloison arrière Le kit couleur contient un kit de profilés plastiques peints. Ils doivent être du meuble. glissés sur les rails noirs collés sur l’aquarium. Assembler en premier les côtés haut et bas en les glissant de l’avant vers 5.4 Mise en place de l’arrière et en les faisant dépasser d’environ 7,5 cm à...
-
Page 66: Installation Des Éléments De La Décantation
Red Sea MAX C-Series Red Sea MAX C-Series 6 Installation des éléments de la décantation ® Les MAX C sont divisés en deux parties : l’aquarium réservé au vivant et la décantation arrière contenant tout le matériel technique. 1. Surverse amovible 2. - Page 67 C-250 Montage des éléments de décantation – L’illustration montre le positionnement des tubes et de la pompe de groupe froid optionnels.
- Page 68 Red Sea MAX C-Series Red Sea MAX C-Series Vue d'ensemble de la décantation arrière et du NOTE: avant de connecter les différents éléments au Power Center, ® système de circulation du MAX s'assurer que tous les interrupteurs sont en position « OFF ».
- Page 69 Assembler l’écumeur comme montré sur l’illustration ci-dessous. 6.2 Surverse: 1. Placer l’ajusteur d’écume sur sa position la plus basse. Les peignes de la surverse sont 2. Relier la prise venturi de la pompe à la sortie du silencieux grâce au facilement démontables pour le tuyau à...
- Page 70 Red Sea MAX C-Series Red Sea MAX C-Series 6.5 Pompes de circulation: Se familiariser avec la buse multi-directionnelle 4. Visser la partie externe sur le connecteur contre le verre. Par défaut, en la démontant et la remontant plusieurs fois. orienter la buse vers le bas 5.
-
Page 71: Installation Du Groupe Froid
23 et 25°C. Le rafraichissement se fait par Pour la sécurité et la vitalité à long terme des habitants de l’aquarium, évaporation. Red Sea recommande d’utiliser un groupe froid avec TOUS les aquariums Placer l’unité de ventilation de surface sur la cloison arrière de la ®... -
Page 72: Installation Du Capot
S’assurer de pouvoir ajouter de l’eau de mer reconstituée soient correctement fixés dans les douilles. avec du sel Red Sea à la même densité, au même pH et à la même 3. Replacer la plaque transparente, en s’assurant que le joint qui fait le température que celle de votre système. - Page 73 7. S’assurer que le capot s’ajuste bien avec le tour de l’aquarium, il peut Cette position intermédiaire donne un bon accès à l’aquarium tout en être nécessaire de bouger un peu le capot pour y parvenir. préservant un bon éclairage. 8.
-
Page 74: Fonctionnement Du Power Center
Red Sea MAX C-Series Red Sea MAX C-Series 9 Fonctionnement du Contrôle de l’éclairage et des ventilateurs Power Center Le minuteur à un interrupteur à 3 positions : ”I”(Position ON) - Eclairage de jour allumé, leds moonlight éteintes. Maintenant que tous les dispositifs électriques sont reliés au Power ”O”(position OFF) –... -
Page 75: Fonctionnement De L'écumeur
Ajouter l’eau de mer au bac principal, à la décantation et dans l’écumeur l’écumeur, monter graduellement l’Ajusteur d’Ecume jusqu’à atteindre pour ne pas qu’il se mette à flotter. Monter le niveau jusqu’aux buses de la consistance désirée. Si l’écume est trop humide ou trop claire, baisser sortie de pompes. -
Page 76: Maintenance Générale De L'aquarium
Red Sea MAX C-Series Red Sea MAX C-Series 12 Maintenance générale de chimiques qui affectent la tension de surface de l‘eau sont neutralisés. l’aquarium Nourrissage et supplémentation Les écumeurs sont très sensibles à la nourriture et aux additifs qui Le succès à long terme et la santé de la population de l’aquarium sont régulièrement ajoutés à... - Page 77 Surverse • Retirer le capot de turbine et sortir la turbine. • Nettoyer toutes les pièces, corps de pompe, chambre de turbine, Détacher et nettoyer les peignes de surface de la surverse au moins turbine avec un tissu doux ou une petite brosse. Faire tremper les une fois par semaine pour permettre une bonne circulation d’eau et une pièces dans une solution d’acide doux (vinaigre, acide citrique) jusqu’à...
-
Page 78: Foire Aux Questions
Red Sea MAX C-Series Red Sea MAX C-Series 13 Foire aux questions Renouvellement du Filtre charbon Remplacer le charbon actif tous les deux mois. Q. Mon installation est toute récente mais mon écumeur semble ne Remplacement des tubes d’éclairage pas écumer. - Page 79 Q. Mon installation n’est pas récente mais mon écumeur ne produit Une faible quantité de micro-bulles en aquarium marin est normale. pas d’écume ou elle est trop sèche et se colle sur le col du godet de Un écumage intense est le secret d’une qualité d’eau irréprochable l’écumeur.
-
Page 80: Garantie
En tout état de cause, la garantie légale concernant les défauts et vices cachés s’appliquera conformément à la loi. Par la présente, le droit du Red Sea garantit 24 mois votre produit, pièces et main d’œuvre, à partir consommateur n’est en aucun cas contourné. - Page 84 U.S.A UK & Ireland Europe Germany & Austria Hong Kong Red Sea U.S.A Red Sea Aquatics (UK) Ltd Red Sea Europe Red Sea Deutschland Red Sea Aquatics Ltd 18125 Ammi Trail PO Box 1237 ZA de la St-Denis Büro Deutschland...