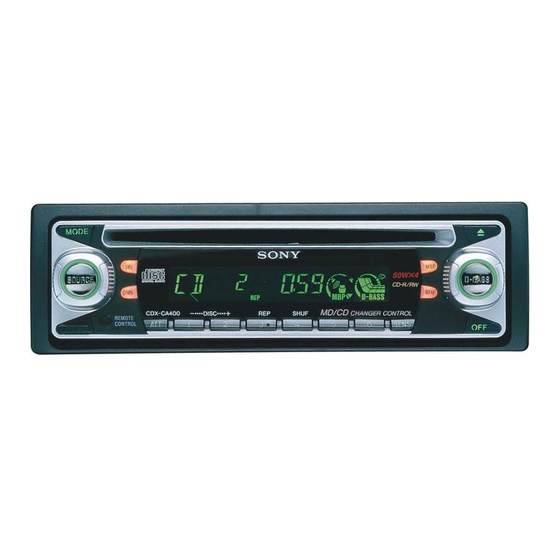
Sony CDX-CA400 Mode D'emploi
Masquer les pouces
Voir aussi pour CDX-CA400:
- Installation (4 pages) ,
- Installation/connexions (5 pages) ,
- Mode d'emploi (41 pages)
Table des Matières
Les langues disponibles
Les langues disponibles
Liens rapides
FM/AM
Compact Disc
Player
Operating Instructions
Mode d'emploi
Owner's Record
The model and serial numbers are located on the bottom of the unit.
Record these numbers in the space provided below.
Refer to these numbers whenever you call upon your Sony dealer regarding this
product.
Model No. CDX-CA400 Serial No.
For installation and connections, see the supplied installation/connections
manual.
En ce qui concerne l'installation et les connexions, consulter le manuel
d'installation/raccordement fourni.
CDX-CA400
© 2002 Sony Corporation
3-238-719-11 (1)
US
FR
Chapitres
Table des Matières
Dépannage

Manuels Connexes pour Sony CDX-CA400


Sommaire des Matières pour Sony CDX-CA400
- Page 20 à l’aide des accessoires ci-dessous: •Lecteurs CD/MD en option (changeurs et lecteurs)*. •Accessoire de commande fourni Télécommande à carte RM-X115 * Un seul lecteur CD/MD de Sony en option peut être raccordé.
- Page 21 Table des matières Emplacement des commandes ....... 4 Autres fonctions Précautions ..............6 Réglage des caractéristiques du son ....13 Remarques sur les disques ........6 Mise en sourdine rapide du son ...... 13 Désactivation du bip sonore ......13 Préparation Sélection de la position du son Réinitialisation de l’appareil .......
-
Page 22: Emplacement Des Commandes
D-BASS – DISC SHUF SENS RELEASE CDX-CA400 Référez-vous aux pages indiquées pour plus de détails. 1 Touche SOURCE (Mise sous tension/ qf Touches numériques 12, 13 Radio/CD/MD) 9, 10, 11, 12 (1) DISC – 10 2 Touche MODE 10, 11, 12 (2) DISC + 10 3 Touche SEL (sélection) 9, 13, 14... - Page 23 Télécommande à carte RM-X115 Les touches correspondantes de la télécommande à carte remplissent la DSPL MODE même fonction que celles de l’appareil. 1 Touche DSPL 2 Touche SOURCE PRESET 3 Touches SEEK (–/+) 4 Touche OFF SOURCE – SEEK SEEK 5 Touches VOL (+/–) PRESET 6 Touche MODE...
-
Page 24: Précautions
Sony. Condensation d’humidité Par temps de pluie ou dans des régions très humides, de l’humidité risque de se condenser sur les lentilles et dans la fenêtre d’affichage de... -
Page 25: Préparation
•Avant la lecture, nettoyez les disques avec un chiffon de nettoyage disponible dans le commerce. Essuyez chaque disque en partant Préparation du centre vers l’extérieur. N’utilisez pas de solvants tels que la benzine, les diluants, les produits de nettoyage vendus dans le commerce ou les sprays antistatiques destinés aux disques analogiques. -
Page 26: Dépose De La Façade
Fixation de la façade Dépose de la façade Fixez la partie A de la façade à la partie B de l’appareil comme illustré et poussez le côté Vous pouvez retirer la façade de cet appareil gauche en position jusqu’à ce qu’il émette un pour le protéger contre le vol. -
Page 27: Réglage De L'horloge
Lecteur CD Réglage de l’horloge Appareil CD/MD L’horloge à affichage numérique fonctionne (en option) suivant un cycle de 12 heures. Exemple : Pour régler l’horloge sur 10:08 En plus de la lecture d’un CD avec cet appareil Appuyez sur (DSPL) pendant 2 secondes. seul, vous pouvez également commander des L’indication des heures se met à... -
Page 28: Rubriques D'affichage
(Avec l’appareil en option) Lecture de plages répétée Appuyez plusieurs fois sur (SOURCE) — Lecture répétée pour sélectionner “CD” ou “MD”. La lecture du disque ou d’une plage du disque Appuyez plusieurs fois sur (MODE) de l’appareil principal se répète jusqu’à... -
Page 29: Radio
Mémorisation Radio automatique des stations — Best Tuning Memory (BTM) L’appareil peut mémoriser jusqu’à 6 stations L’appareil sélectionne les stations émettant les pour chaque bande (FM1, FM2, FM3, AM1 et signaux les plus puissants pour la bande AM2). sélectionnée et les mémorise selon l’ordre des fréquences. -
Page 30: Mémorisation Des Stations De Votre Choix Uniquement
Si l’accord prédéfini ne fonctionne Mémorisation des stations de votre choix — Syntonisation automatique/Mode recherche locale uniquement Syntonisation automatique : Vous pouvez présélectionner manuellement Recherchez la station en tournant la les stations souhaitées sur n’importe quelle commande rotative SEEK/AMS. touche de votre choix. Le balayage s’interrompt lorsque l’appareil capte une station. -
Page 31: Autres Fonctions
Mise en sourdine rapide Autres fonctions du son Appuyez sur (ATT). L’indication “ATT” s’affiche. Réglage des Pour restaurer le niveau précédent du volume, caractéristiques du son appuyez à nouveau sur (ATT). Vous pouvez régler les graves, les aigus ainsi que la balance gauche-droite et la balance avant-arrière. -
Page 32: Sélection De La Position Du Son
Sélection de la position du Renforcement des graves — D-bass — “My Best sound Position (MBP)” Vous pouvez exploiter des graves claires et puissantes. La fonction D-bass renforce les Lorsque vous conduisez sans passager, vous signaux de basse fréquence et les signaux de pouvez profiter de l’environnement sonore le haute fréquence avec une courbe plus plus agréable avec “My Best sound Position”. -
Page 33: Informations Complémentaires
Dans ce cas, consultez un détaillant Sony. Fusible (10 A) Avertissement N’utilisez jamais de fusible dont l’intensité côté + vers le haut dépasse celle du fusible fourni avec l’appareil,... -
Page 34: Démontage De L'appareil
Démontage de l’appareil Démontage du panneau avant 1 Enlevez la façade (page 8). 2 Appuyez sur l’attache du panneau avant à l’aide d’un tournevis fin. 3 Répétez l’étape 2 pour l’autre côté. Démontez l’appareil 1 Utilisez un fin tournevis pour enfoncer l’attache du côté... -
Page 35: Caractéristiques Techniques
Caractéristiques techniques Lecteur CD Caractéristiques générales Rapport signal-bruit 90 dB Sorties Sorties audio Réponse en fréquence 10 – 20.000 Hz Fil de commande de relais Pleurage et scintillement En dessous du seuil d’antenne électrique mesurable Fil de commande d’amplificateur de puissance Radio Commandes de tonalité... -
Page 36: Dépannage
L’appareil n’est pas alimenté. Dépannage •Vérifiez le raccordement. Si tout est en ordre, vérifiez le fusible. La liste de contrôle suivante vous aidera à •La voiture ne possède pas de position ACC. remédier aux problèmes que vous pourriez t Appuyez sur (SOURCE) (ou insérez un rencontrer avec cet appareil. -
Page 37: Affichages D'erreur
L’appareil est en mode de réception t Appuyez sur la touche RESET de monaural. l’appareil. t Désactivez le mode de réception monaural (page 12). Si ces solutions ne permettent pas d’améliorer la situation, consultez votre détaillant Sony le plus proche.