
Manuels Connexes pour ZIBRO CLIMA D901


Sommaire des Matières pour ZIBRO CLIMA D901
-
Page 1: Table Des Matières
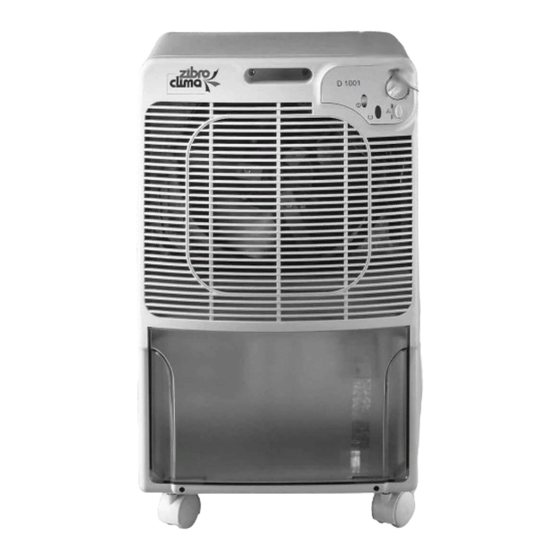
D901 / D1001 MANUEL D'UTILISATION GEBRAUCHSANWEISUNG BRUGSANVISNING INSTRUCCIONES DE USO OPERATING MANUAL ISTRUZIONI D’USO > GEBRUIKSAANWIJZING... - Page 2 PIÈCES PRINCIPALES ¶ ³ » ³ ¿ · tableau de contrôle · bouton de réglage/humidistat » témoin lumineux ´ rouge ‘réservoir plein’ º témoin lumineux de fonctionnement ¾ ´ régulateur de ² vitesse du ventilateur ² sortie pour air sec µ...
-
Page 3: Mise En Route
MODE D’EMPLOI DÉSHUMIDIFICATEUR Pour pouvoir garantir une sécurité maximale et un rendement optimal, il est fortement conseillé de lire attentivement ce mode d’emploi, avant d’installer et de faire fonctionner l’appareil LE DÉSHUMIDIFICATEUR L’appareil a pour fonction de réduire le taux d’humidité dans la pièce où il est installé. -
Page 4: Remarques
Tournez le bouton de réglage · vers: Position ‘Normal’ pour un fonctionnement automatique basé sur un taux d’humidité normal (entre 45% et 60%). Lorsqu’un pourcentage d’humidité de 50% est atteint, l’appareil s’éteint automatiquement, pour se remettre à nouveau en route lorsque le taux d’humidité... -
Page 5: Entretien
La tuyau sort de l’appareil par l’ouverture placée sous le déshumidificateur. Replacez le réservoir dans l’appareil. Si vous souhaitez ensuite réutiliser l’appareil sans tuyau d’évacuation, refermer l’embouchure de sortie avec le bouchon approprié. ENTRETIEN Avant tout entretien ou nettoyage de l’appareil, retirez d’abord la fiche de la prise de contact. -
Page 6: Conditions De Garantie
Pour éviter des dépendes inutiles, nous vous conseillons de toujours consulter en premier le mode d’emploi. Si celui-ci ne donne pas de résultat, emmenez le déshumidificateur à réparer chez votre distributeur. SPÉCIFICATION TECHNIQUES D901 D1001 Tension secteur (V,Hz) 230V-50Hz 230V-50Hz Puissance absorbée (W) -
Page 7: Pannes, Causes Et Remèdes
PANNES, CAUSES ET REMÈDES Avant de demander une assistance technique, prière d’effectuer les contrôles suivants: PANNES CAUSES REMÈDES L'appareil ne L'appareil n'est pas Branchez l'appareil. fonctionne pas. branché. Le bouton de réglage est Tournez le bouton de réglage en position '0'. jusqu'à... -
Page 8: Wichtige Teile
WICHTIGE TEILE ¶ ³ » ³ ¿ · Bedienfeld · Regelknopf/ Humidistat » rote Kontrollleuchte ´ ‘Behälter voll‘ ein/aus Leuchte º ´ Wahlschalter für ¾ Ventilator- geschwindigkeit ² ² Ablass für trockene Luft ¶ Griff µ º Einlass für feuchte Luft ¾... - Page 9 BEDIENUNGSANLEITUNG FÜR DEN ENTFEUCHTER Zur Gewährleistung der maximalen Sicherheit und eines optimalen Ergebnisses empfehlen wir Ihnen ausdrücklich, vor der Installation und Inbetriebnahme des Gerätes diese Bedienungsanleitung genau zu lesen. DER ENTFEUCHTER Das Gerät hat die Funktion, den Feuchtigkeitsgehalt der Luft in dem Raum, in dem es installiert wird, zu senken.
- Page 10 Stellen Sie den Regelknopf · auf eine der folgenden Positionen: Position ’Normal‘ dies ist die Position für automatischen Betrieb auf der Grundlage normaler Luftfeuchtigkeit (zwischen 45% und 60%). Wenn ein Feuchtigkeitsgehalt von 50% erreicht ist, schaltet sich das Gerät automatisch aus, und schaltet sich erst wieder ein, wenn der Feuchtigkeitsgehalt wieder ansteigt.
- Page 11 Lagern Sie das Gerät staubfrei, zum Beispiel in einem Plastikbeutel. TIPPS ZUR SICHEREN VERWENDUNG Damit Sie optimal von Ihrem Zibro Clima profitieren können, darf das Gerät nicht in unmittelbarer Nähe der Heizung oder einder anderen Wärmequelle aufgestellt werden. Dies würde andernfalls die Trocknungsleistung Ihres Geräts beeinträchtigen.
-
Page 12: Technische Daten
Zur Vorbeugung von unnötigen Kosten empfehlen wir Ihnen, zunächst immer erst genau in der Bedienungsanleitung nachzulesen. Finden Sie darin keine Lösungsmöglichkeit, wenden Sie sich bitte an Ihren Händler. TECHNISCHE DATEN D901 D1001 Netzspannung (V, Hz) 230V-50Hz 230V-50Hz Leistungsaufnahme (W) Stromstärke (A) - Page 13 STÖRUNGEN, URSACHEN UND LÖSUNGEN Bevor Sie den technischen Kundendienst hinzuziehen, sollten Sie folgende Punkte kontrollieren: STÖRUNGEN URSACHEN LÖSUNGEN Das Gerät Der Stecker steckt nicht in Stecken Sie den Stecker in funktioniert nicht. der Steckdose. die Steckdose. Der Regelknopf steht in Stellen Sie den Regelknopf der niedrigsten Position.
-
Page 14: Vigtige Dele
VIGTIGE DELE ¶ ³ » ³ ¿ · kontrolpanel · reguleringsknap/ humidistat » rød signallampe ´ ‘beholder fuld’ tænd/sluk-lampen º ´ vælgerknap, ¾ ventilatorhastighed ² ² udstrømnings- åbning tør luft ¶ håndtag µ º indsugningsåbning fugtig luft ¾ luftfilter µ udtagelig beholder ¸... -
Page 15: Brugsanvisning
BRUGSANVISNING TIL AFFUGTER For at kunne garantere maksimal sikkerhed og optimal ydelse, tilråder vi på det kraftigste at læse denne brugsanvisning omhyggeligt, før apparatet installeres og tages i brug. AFFUGTEREN Dette apparats funktion er at reducere indholdet af fugtighed i luften i det rum, hvor det installeres. - Page 16 Drej reguleringsknappen · til: Stillingen ‘Normal’ for automatisk funktion baseret på en normal luftfugtighed (mellem 45% og 60%). Når der er nået et fugtindhold på 50%, slår apparatet automatisk fra, hvorefter det igen går automatisk i gang når fugtindholdet stiger igen. Stillingen ‘Maks’...
-
Page 17: Vedligeholdelse
Slangen føres bort via hullet på apparatets underside. Sæt beholderen tilbage i apparatet. Ønsker du at bruge apparatet normalt igen, uden afløbsslange, lukkes afløbstuden med den tilhørende prop. VEDLIGEHOLDELSE Før der foretages vedligeholdelse eller rengøring, skal stikket trækkes ud af stikkontakten (kobles fra det elektriske system). -
Page 18: Tekniske Data
For at forhindre unødige udgifter, råder vi dig til altid først omhyggeligt at konsultere brugsanvisningen. Hvis dette ikke fører til noget resultat, indleveres affugteren til reparation hos forhandleren. TEKNISKE DATA D901 D1001 Netspænding (V,Hz) 230V-50Hz 230V-50Hz Tilført effekt (W) - Page 19 FUNKTIONSFEJL, ÅRSAGER OG LØSNINGER Før du beder om teknisk support, bør du kontrollere følgende: FUNKTIONSFEJL ÅRSAGER LØSNINGER Apparatet Stikket sidder ikke i Stik stikket i stikkontakten. fungerer ikke. stikkontakten. Reguleringsknappen står i Drej reguleringsknappen til den laveste stilling. den ønskede position. Beholderen er fuld.
-
Page 20: Componentes Importantes
COMPONENTES ¶ ³ » IMPORTANTES ³ ¿ · panel de mando · botón regulador/ humedestato » testigo rojo ´ ‘depósito lleno’ testigo conectado/ º desconectado ¾ ´ selector velocidad de ventilación ² ² evacuación para aire seco ¶ µ º entrada para aire húmedo ¾... -
Page 21: Instrucciones De Uso
INSTRUCCIONES DE USO DEL DESHUMIDIFICADOR A fin de poder garantizar una seguridad y rendimiento máximos, le recomendamos encarecidamente lea con detenimiento estas instrucciones de uso antes de proceder a la instalación del aparato. EL DESHUMIDIFICADOR La función de este aparato es reducir el grado de humedad del aire en la habitación donde está... -
Page 22: Evacuación Del Agua
Ponga el botón regulador · en: Posición ‘Normal’ para el funcionamiento automático basado en una humedad de aire normal (entre el 45% y el 60%). Una vez alcanzado un grado de humedad del 50%, el deshumidificador se parará automáticamente para volver a funcionar en el momento que el grado de humedad vuelva a aumentar. -
Page 23: Almacenamiento
La goma sale por el agujero en la parte inferior del aparato. Coloque el depósito de nuevo en el aparato. Si desea usar el deshumidificador sin la goma de evacuación, tape el tubo de evacuación con el correspondiente tapón. MANTENIMIENTO Antes de efectuar un trabajo de mantenimiento o de limpieza, desenchufe el aparato. -
Page 24: Especificaciones Técnicas
A fin de evitar costes innecesarios, le recomendamos siempre consulte las instrucciones de uso. Si no ofrecen ninguna solución, lleve el deshumidificador al distribuidor para su reparación. ESPECIFICACIONES TÉCNICAS D901 D1001 VCorriente de red (V,Hz) 230V-50Hz 230V-50Hz... -
Page 25: Fallos, Causas Y Soluciones
FALLOS, CAUSAS Y SOLUCIONES Antes de solicitar asistencia técnica, verifique los siguientes puntos: FALLOS CAUSAS SOLUCIÓNES El aparato no El aparato no está Enchufar el aparato. funciona. enchufado. El botón de regulación está Situar el botón en la posición en la posición más baja. deseada. -
Page 26: Important Components
IMPORTANT ¶ ³ » COMPONENTS ³ ¿ · control panel · control button/ moisture meter » red warning light ´ ‘reservoir full’ on/off light º ´ ventilator speed ¾ selector knob ² ² dry air exhaust ¶ handle º inlet for humid air µ... - Page 27 DEHUMIDIFIER INSTRUCTIONS FOR USE To guarantee maximum safety and optimum efficiency, we strongly recommend that you read these instructions carefully before installing and operating the dehumidifier. THE DEHUMIDIFIER The function of the machine is to reduce the level of humidity in the room where it is installed.
-
Page 28: Water Drainage
Turn the control button · to: ‘Normal’ setting for automatic operation based on a normal humidity level (between 45% and 60%). The machine will switch off automatically when a humidity level of 50% is reached, and switch on again when the humidity level increases. ‘Max’... - Page 29 Store the machine in a dust-free environment, e.g. in a plastic bag. TIPS FOR SAFE OPERATION To ensure that you get the best service from your Zibro Clima do not place the dehumidifier next to a radiator or other heat source as this will reduce the performance of your dehumidifier.
-
Page 30: Guarantee Conditions
To prevent unnecessary expenses, we recommend that you always first carefully read the instructions for use. If this does not provide a solution, take the dehumidifier to your distributor for repairs. TECHNICAL SPECIFICATIONS D901 D1001 Mains voltage (V,Hz) 230V-50Hz 230V-50Hz... - Page 31 MALFUNCTION, CAUSES AND SOLUTIONS Check the following before requesting technical assistance: MALFUNCTION CAUSES SOLUTIONS The machine does The plug is not in the Put the plug in the socket. not operate. socket. The control button is at Turn the control button to the lowest setting.
-
Page 32: Componenti Principali
COMPONENTI ¶ ³ » PRINCIPALI ³ ¿ · pannello di controllo · pulsante di regolazione/ umidostato ´ » spia luminosa rossa di avvertimento º ‘serbatoio pieno’ ¾ spia d’accensione/ spegnimento ² ´ pulsante di selezione della velocità del ventilatore µ ²... -
Page 33: Messa In Funzione
ISTRUZIONI RELATIVE AL DEUMIDIFICATORE Per poter garantire la massima sicurezza ed un rendimento ottimale, si consiglia caldamente di leggere attentamente le istruzioni prima dell’installazione e della messa in funzione dell’apparecchio. IL DEUMIDIFICATORE La funzione dell’apparecchio è di ridurre la percentuale d’umidità dell’aria nello spazio in cui il deumidificatore è... -
Page 34: Scarico Dell'acqua
Ruotare il pulsante di regolazione · nella: Posizione ‘Normal’ per un funzionamento automatico basato su un’umidità normale dell’aria (fra il 45% ed il 60%). Se si è raggiunta una percentuale d’umidità del 50%, l’apparecchio si spegne automaticamente e rientra in funzione quando la percentuale d’umidità... - Page 35 Conservare l’apparecchio in un locale senza polvere, ad esempio in un sacco di plastica. CONSIGLI PER UN USO SICURO Per ottenere un risultato ottimale del Vostro Zibro Clima, è necessario non porre il deumidificatore accanto ad un radiatore o ad un’altra fonte di calore, perché riduce il funzionamento.
-
Page 36: Termini Di Garanzia
Per prevenire costi inutili, si consiglia di leggere dapprima sempre attentamente le istruzioni. Qualora nelle istruzioni non vi sia alcun suggerimento in merito, portare il deumidificatore al rivenditore per la riparazione. SPECIFICHE TECNICHE D901 D1001 Tensione di rete (V,Hz) 230V-50Hz... - Page 37 GAUSTI, CAUSE E SOLUZIONI Prima di richiedere assistenza tecnica, occorre effettuare i seguenti controlli: GAUSTI CAUSE SOLUZIONI L'apparecchio non La spina non è inserita Inserire la spina nella presa. funziona. nella presa. Il pulsante di regolazione Ruotare il pulsante di si trova nella posizione più...
-
Page 38: Belangrijke Onderdelen
BELANGRIJKE ¶ ³ » ONDERDELEN ³ ¿ · controlepaneel · regelknop/ humidistaat » waarschuwings- ´ lampje ‘reservoir vol’ º aan/uit lampje ¾ ´ keuzeknop ventilatorsnelheid ² ² afvoer voor droge lucht ¶ handvat µ º inlaat voor vochtige lucht ¾ luchtfilter µ... -
Page 39: Installatie
GEBRUIKSAANWIJZING ONTVOCHTIGER Teneinde een maximale veiligheid en een optimaal rendement te kunnen garanderen, raden we u ten zeerste aan, vóórdat u het apparaat installeert en in gebruik neemt, zorgvuldig deze gebruiksaanwijzing te lezen. DE ONTVOCHTIGER Het apparaat heeft als functie het vochtigheidsgehalte van de lucht te reduceren in de ruimte waar het geïnstalleerd wordt. - Page 40 Draai de regelknop · naar: Stand ‘Normal’ voor automatische werking gebaseerd normale luchtvochtigheid (tussen 45% en 60%). Als er een vochtigheidsgehalte van 50% bereikt is, slaat het apparaat automatisch af, om opnieuw in werking te treden wanneer het vochtigheidsgehalte weer stijgt. Stand ‘Max’...
- Page 41 Berg het apparaat op in een stofvrije ruimte, bijvoorbeeld in een plastic zak. TIPS VOOR EEN VEILIG GEBRUIK Om ervoor te zorgen dat u een optimaal resultaat van uw Zibro Clima verkrijgt, dient u uw ontvochtiger niet naast een radiator of een andere warmtebron te plaatsen omdat dit de werking van uw ontvochtiger zal veranderen.
-
Page 42: Garantiebepalingen
Om onnodige kosten te voorkomen, raden wij u aan eerst altijd zorgvuldig de gebruiksaanwijzing te raadplegen. Wanneer deze geen uitkomst biedt, geef de ontvochtiger dan ter reparatie bij de distributeur. TECHNISCHE SPECIFICATIES D901 D1001 Netspanning (V,Hz) 230V-50Hz 230V-50Hz... -
Page 43: Storingen, Oorzaken En Oplossingen
STORINGEN, OORZAKEN EN OPLOSSINGEN Voordat u om technische ondersteuning vraagt, dient u de volgende zaken te controleren: STORINGEN OORZAKEN OPLOSSINGEN Het apparaat De stekker zit niet in het Steek de stekker in het werkt niet. stopcontact. stopcontact. De regelknop staat op de Draai de regelknop naar de laagste stand. - Page 44 DISTRIBUTED IN EUROPE BY PVG INTERNATIONAL b.v. 3 FRANCE 4 UNITED KINGDOM PVG France SARL Lister Gases 4, Rue Jean Sibélius Bridge Street B.P. 185 - 76410 Holloway Bank, Wednesbury SOTTEVILLE SOUS LE VAL West Midlands WS10 OAW tel: +33 2 32 96 07 47 Tel.: +44 121 506 1818 fax:...