Table des Matières

Publicité

Les langues disponibles
  • FR

Les langues disponibles

Liens rapides

LCD Monitor
LCD Farbmonitor
Moniteur LCD
Monitor LCD
Monitor LCD
LL-172A
LL-172G
OPERATION MANUAL
BEDIENUNGSANLEITUNG
MODE D'EMPLOI
MANUALE D'USO
MANUAL DE FUNCIONAMIENTO
LL-172A

Publicité

Table des Matières
loading

Sommaire des Matières pour Sharp LL-172A

  • Page 1 LCD Monitor LCD Farbmonitor Moniteur LCD Monitor LCD Monitor LCD LL-172A LL-172G OPERATION MANUAL BEDIENUNGSANLEITUNG MODE D'EMPLOI MANUALE D'USO MANUAL DE FUNCIONAMIENTO LL-172A...
  • Page 2 Table of Contents/Inhaltsverzeichnis/Table des matières/Indice/Índice Notice for Users in the USA ............3 Notice for Users in Europe .
  • Page 3: Fcc Statement

    ® ® * As an NERGY Partner, SHARP has determined that this product meets the NERGY guidelines for energy efficiency. This product utilizes tin-lead solder, and fluorescent lamp containing a small amount of mercury. Disposal of these materials may be regulated due to environmental considerations. For disposal or recycling information, please contact your local authorities or the Electronics Industries Alliance: www.eiae.org...
  • Page 4 Notice for Users in Europe This equipment complies with the requirements of Directives 89/336/EEC and 73/23/EEC as amended by 93/68/EEC. Dieses Gerät entspricht den Anforderungen der EG-Richtlinien 89/336/EWG und 73/23/EWG mit Änderung 93/68/EWG. Ce matériel répond aux exigences contenues dans les directives 89/336/CEE et 73/23/CEE modifiées par la directive 93/68/CEE.
  • Page 5 "WARNING: THIS APPARATUS MUST BE EARTHED." Notice for Users in Australia Service Inquiries Please contact your dealer for service if required or contact Sharp Corporation of Australia on 1 300 13 50 22 for referral to your nearest Sharp authorized Service Center.
  • Page 6 This makes for a high performance product, designed with the user in focus that also minimizes the impact on our natural environment. LL-172A-W LL-172G-W Some of the features of the TCO'03 Display requirements: Ergonomics •...
  • Page 7 LL-172A-B LL-172G-B Congratulations! You have just purchased a TCO'99 approved and labelled product! Your choice has provided you with a product developed for professional use. Your purchase has also contributed to reducing the burden on the environment and also to the further development of environmentally adapted electronics products.
  • Page 8 Environmental requirements Flame retardants Flame retardants are present in printed circuit boards, cables, wires, casings and housings. Their purpose is to prevent, or at least to delay the spread of fire. Up to 30% of the plastic in a computer casing can consist of flame retardant substances.
  • Page 9: Table Des Matières

    Troubleshooting ..............25 Information for customers on environmentally friendly disposal of this SHARP product ..26 Specifications .
  • Page 10: Tips And Safety Precautions

    - Never rub or tap the monitor with hard objects. equipment or anywhere else where there is - Please understand that Sharp Corporation bears likelihood of high temperature, as this may lead no responsibility for errors made during use by...
  • Page 11 Tips and safety precautions Monitor and accessory checklist Manual Scope - Please check that the following items are - This manual is written for use with the LL-172A included in the package. and the LL-172G. When describing a different - LCD monitor (1)
  • Page 12: Product Description

    Product description [LL-172A] [LL-172G] 1. AUTO button [LL-172A] ... This button is used to perform automatic adjustment of the screen (CLOCK, PHASE, H-POS and V-POS). (p.21) INPUT button [LL-172G] ..To switch between the signal's input terminals. 2. MENU button ......This button is used to pop-up, select and close the OSD (On Screen Display) Menu.
  • Page 13: Angle Adjustment, Height Adjustment

    - Be careful not to allow your fingers to be pinched. Angle adjustment approx. 25° [LL-172A] approx. 5° CAUTION! - Be sure to release the lock before adjusting the height of the stand. Extending/contracting the stand when it's locked may result in damage to the product.
  • Page 14: Connecting The Monitor And Turning The Monitor On And Off

    Connecting the monitor to a computer - When connecting, ensure that both the monitor and computer are switched off. Analog connection [LL-172A] - Be careful not to over bend the cable or add Connect the accessory analog signal cable to the extension cords as this could lead to a analog RGB output terminal of the computer.
  • Page 15 Connecting the monitor and turning the monitor on and off Analog connection [LL-172G] Digital connection [LL-172G] Connect the accessory analog signal cable, or Connect the accessory digital signal cable to the separately-sold analog signal cable (model name: digital RGB output terminal of the computer. NL-C02E) to the analog RGB output terminal of - The monitor has an input for connecting to a the computer.
  • Page 16 Connecting the monitor and turning the monitor on and off When connecting using a separately sold Notes: 2-input cable [LL-172G] - When using the 2-input cable, set the The separately sold 2-input cable (model name: connecting input terminal [INPUT-2] to [2LINES] NL-C03J) enables connection between the DVI-I under the MODE SELECT-2 Menu.
  • Page 17: Connection Of Headphones (Commercially Available)

    Connecting the monitor and turning the monitor on and off Connection of headphones Turning the power on (commercially available) 1. Turn on the main power of the monitor. Headphones (commercially available) can be connected. Main power switch Headphone terminal Headphones - When switching the main power switch on and off, always wait for an interval of at least 5 Notes:...
  • Page 18: Changing Between Input Terminals [Ll-172G]

    Connecting the monitor and turning the monitor on and off Changing between input terminals Turning the power off [LL-172G] 1. Turn the computer off. 2. Press the monitor's power button. Use the INPUT button to switch between signal The power LED will disappear. input terminals.
  • Page 19: Adjusting The Screen Display And Speaker Volume

    Adjusting the screen display and speaker volume For analog signal Adjustment lock function 1. First perform an automatic adjustment. (p.21) By disabling the control buttons (i.e. setting the 2. Perform manual adjustment where necessary. lock) any attempted changes to adjusted values (p.22) will be voided.
  • Page 20: Adjusting The Speaker Volume

    Adjusting the screen display and speaker volume Adjusting the speaker volume Setting display mode 1. Without the OSD Menu being displayed, press Color tone or brightness can be changed with one command. or the button. 2. Check that [VOLUME] is selected. If it is not selected, press the / MODE button Displays image with the color tone results from...
  • Page 21: Adjusting The Screen Display

    Automatic adjustment can be performed using (When using an analog signal) either the AUTO button or the MENU button. Options in the ADJUSTMENT Menu can be AUTO button [LL-172A] adjusted automatically (CLOCK, PHASE, H-POS, 1. Press the AUTO button. V-POS).
  • Page 22: Manual Screen Adjustment

    Adjusting the screen display ADJUSTMENT Menu Manual screen adjustment When the LL-172G is used with a digital connection, this menu adjustment is not 1. Display an image that makes the entire screen necessary. light. (p.21) 2. Display the OSD Menu by pressing the MENU AUTO button.
  • Page 23 Adjusting the screen display GAIN CONTROL Menu COLOR CONTROL Menu When the LL-172G is used with a digital connection, this menu adjustment is not WHITE BALANCE necessary. 1. After selecting [WHITE BALANCE], press the button. AUTO The WHITE BALANCE menu will be displayed. When [AUTO] is selected with the button, the [BLACK LEVEL] and [CONTRAST] settings are...
  • Page 24 Adjusting the screen display MODE SELECT-1 Menu MODE SELECT-2 Menu Note: INFORMATION - Depending on the resolution of the input signal, A model name (MODEL), a serial no. (S/N), and even if menu options can be selected, the usage time (USAGE TIME) of the monitor can be display may not change.
  • Page 25: Monitor Care

    Use a soft dry cloth to lightly wipe away dirt and Please inquire at the shop where you dust from the surface of the LCD panel. (A soft purchased the monitor or your nearest Sharp cloth such as gauze or that used for lens cleaning authorized Service Center.
  • Page 26: Information For Customers On Environmentally Friendly Disposal Of This Sharp Product

    YOUR HOUSEHOLD WASTE OR MIXED WITH OTHER WASTES! YOU MIGHT ENDANGER THE ENVIRONMENT! Sharp Corporation is committed to protecting the environment and conserving energy. Our goal is to minimize the environmental impact of our products by continually implementing and improving product technologies, designs, and customer information aimed at environmental conservation.
  • Page 27: Specifications

    [LL-172G] VESA: based on DPMS DVI: based on DMPM Speaker output 1 W + 1 W Input signal terminal [LL-172A] Mini D-sub 15 pin, 3 row [LL-172G] Analog: Mini D-sub 15 pin, 3 row Digital/Analog: DVI-I 29 pin Audio input terminal Mini stereo jack...
  • Page 28 - 2-input cable, NL-C03J (purchased separately): approx. 0.25 m Note: - As a part of our policy of continuous improvement, SHARP reserves the right to make design and specification changes for product improvement without prior notice. The 57.5 performance specification figures indicated are nominal values of production units.
  • Page 29 Specifications Relevant signal timings (analog) Relevant signal timings (digital) [LL-172G] Display mode Display mode Hsync Vsync Hsync Vsync frequency frequency VESA VESA US text - Recommended resolution is 1280 x 1024. US text - All are compliant only with non-interlaced. Power - A computer with an output terminal conforming to Macintosh...
  • Page 30 The analog RGB input connector pin Power management (Mini D-sub connector with 15 pins) The LL-172A is based on VESA DPMS. The LL- 172G is based on both VESA DPMS and DVI DMPM. To activate the power management function, the video card and the computer used with it must also conform to these standards.
  • Page 31: Installing Set-Up Information And The Icc Profile (For Windows)

    Installing set-up information and the ICC profile (For Windows) Depending on the type of computer or OS, you For Windows 98 may need to install the monitor set-up information Installing monitor set-up information into on your system. If so, follow the steps below to Windows 98, and setting the monitor's ICC profile install the monitor set-up information.
  • Page 32 Installing set-up information and the ICC profile (For Windows) For Windows 2000 For Windows Me Installing monitor set-up information into Installing monitor set-up information into Windows Windows 2000, and setting the monitor's ICC Me, and setting the monitor's ICC profile as a profile as a predetermined value.
  • Page 33 Installing set-up information and the ICC profile (For Windows) For Windows XP Installing the ICC profile Installing the monitor's ICC profile. (If the set-up Installing monitor set-up information into Windows information has already been installed, so too has XP, and setting the monitor's ICC profile as a the profile, and there is no need to install it.) predetermined value.
  • Page 34: Information About The Colorsync Profile (For Macos)

    Information about the ColorSync profile (For MacOS) About the ColorSync profile ColorSync is Apple Computer's color management system and enables color reproduction characteristics to be realized when used with a compatible application. A ColorSync profile describes the color characteristics of the LCD monitor.
  • Page 35: Instructions For Attaching A Vesa-Compliant Arm

    - The screws used to attach the arm should be M4 screws with a length of 4-5 mm protruding from [LL-172A] the surface to be attached. Using different screws could cause the monitor to fall off or to be internally damaged.
  • Page 37 Fehlersuche ..............53 Informationen für Kunden über umweltfreundliche Entsorgung dieses SHARP-Produkts ..54 Technische Daten .
  • Page 38: Tipp Und Sicherheitsvorkehrungen

    Gegenständen abgerieben oder berührt werden. - Stellen Sie den Monitor nicht an Stellen auf, die - Wir bitten um Ihr Verständnis, dass Sharp direkter Sonneneinstrahlung ausgesetzt sind, Corporation über die gesetzlich anerkannte und nicht in der Nähe von Heizungen oder an Leistungshaftung hinaus keine Haftung für...
  • Page 39 "Windows XP" bezeichnet, Microsoft Windows Millennium als "Windows Me", Hinweise: Microsoft Windows 2000 als "Windows 2000", - [LL-172A] Nur die mit dem Monitor Microsoft Windows 98 als "Windows 98", mitgelieferten Kabel verwenden. Microsoft Windows 95 als "Windows 95" und - [LL-172G] Stellen Sie sicher, dass Kabel mit Microsoft Windows Version 3.1 als "Windows...
  • Page 40: Produktbeschreibung

    Produktbeschreibung [LL-172A] [LL-172G] 1. Taste AUTO [LL-172A] .... Diese Taste dient zum Ausführen automatischer Einstellung des Bildschirms (CLOCK, PHASE, H-POS und V-POS). (S.49) Taste INPUT [LL-172G] ... Für die Umschaltung zwischen den Signaleingangsanschlüssen. 2. Taste MENU ......Mit dieser Taste öffnen, wählen und schließen Sie das OSD (On Screen Display) -Menü.
  • Page 41: Winkeleinstellung, Höheneinstellung

    Hand auf das LCD-Panel können Schäden hervorgerufen werden. - Vorsichtig vorgehen und darauf achten, dass die Finger nicht eingeklemmt werden. Winkeleinstellung [LL-172A] Ca. 25° Ca. 5° ACHTUNG! - Stellen Sie sicher, dass die Sperre aufgehoben ist, bevor Sie die Höhe des Fußes einstellen.
  • Page 42: Anschließen Des Monitors Und Ein- Und Ausschalten Des Monitors

    - Bevor Sie den Monitor anschließen, müssen Sie den Monitor und den Computer ausschalten. - Achten Sie darauf, dass Sie das Kabel nicht Analoger Anschluss [LL-172A] überdehnen, und schließen Sie kein Schließen Sie das als Zubehör mitgelieferte Verlängerungskabel an, da dies Analogsignalkabel am analogen RGB- Funktionsstörungen hervorrufen kann.
  • Page 43 Anschließen des Monitors und Ein- und Ausschalten des Monitors Analoger Anschluss [LL-172G] Digitaler Anschluss [LL-172G] Schließen Sie das als Zubehör mitgelieferte Schließen Sie das als Zubehör mitgelieferte Analogsignalkabel oder das getrennt erhältliche Digitalsignalkabel an den digitalen RGB- Analogsignalkabel (Modellbezeichnung: NL-C02E) Ausgangsanschluss des Computers an.
  • Page 44 Anschließen des Monitors und Ein- und Ausschalten des Monitors Beim Anschluss eines getrennt erhältlichen Hinweise: 2-Eingangskabels [LL-172G] - Bei Verwendung des 2-Eingangskabels stellen Das getrennt erhältliche 2-Eingangskabel Sie den Eingangsanschluss für den Anschluss (Modellbezeichnung: NL-C03J) ermöglicht die [INPUT-2] unter dem Menü MODE SELECT-2 auf [2LINES] ein.
  • Page 45: Anschluss Von Kopfhörern (Im Handel Erhältlich)

    Anschließen des Monitors und Ein- und Ausschalten des Monitors - Beim Aus- und Einschalten des Monitors mit Anschluss von Kopfhörern dem Hauptnetzschalter sollten Sie mindestens (im Handel erhältlich) fünf Sekunden warten. Durch ein schnelles Umschalten können Fehlfunktionen auftreten. Kopfhörer (im Handel erhältlich) können angeschlossen werden.
  • Page 46: Umschalten Zwischen Eingangsanschlüssen [Ll-172G]

    Anschließen des Monitors und Ein- und Ausschalten des Monitors Umschalten zwischen Ausschalten des Monitors Eingangsanschlüssen [LL-172G] 1. Schalten Sie den Computer aus. 2. Drücken Sie den Netzschalter am Monitor. Mit der Taste INPUT schalten Sie die Die Betriebs-LED erlischt. Signaleingangsanschlüsse um. Analoger RGB-Eingangsanschluss DVI-I-Eingangsanschluss...
  • Page 47: Einstellen Der Hintergrundbeleuchtung

    Einstellen der Bildschirmanzeige und der Einstellen der Bildschirmanzeige Lautsprecher-Lautstärke Analogsignal Einstellungssperrfunktion 1. Führen Sie zunächst eine automatische Wenn Sie die Steuertasten deaktivieren (d. h. die Einstellung durch. (S.49) Sperre setzen), können keine Werte eingestellt 2. Führen Sie bei Bedarf eine manuelle Einstellung werden.
  • Page 48: Einstellen Der Bildschirmanzeige Und Der Lautsprecher-Lautstärke

    Einstellen der Bildschirmanzeige und der Lautsprecher-Lautstärke Einstellen der Lautsprecher-Lautstärke Überprüfen der Geräteinformationen 1. Wenn das OSD-Menü nicht angezeigt wird, Die Modellbezeichnung (MODEL), die Seriennummer (S/N) und die Verwendungszeit drücken Sie die Taste oder die Taste (USAGE TIME) des Monitors kann überprüft 2.
  • Page 49: Einstellen Der Bildschirmanzeige

    Automatische Bildschirmeinstellung Automatische Einstellung kann entweder mit der Taste (bei Verwendung eines Analogsignals) AUTO oder der Taste MENU ausgeführt werden. Taste AUTO [LL-172A] Die Optionen im Menü ADJUSTMENT können 1. Drücken Sie die Taste AUTO. automatisch eingestellt werden (CLOCK, PHASE, 2.
  • Page 50: Manuelle Bildschirmeinstellung

    Einstellen der Bildschirmanzeige - Das OSD-Menü wird ca. 30 Sekunden nach dem Manuelle Bildschirmeinstellung letzten Befehl automatisch ausgeblendet. - In diesem Kapitel wird die Vorgehensweise zum 1. Zeigen Sie zunächst ein Bild an, das den Einstellen des Bildschirms mit Hilfe des gesamten Bildschirm sehr hell erscheinen lässt.
  • Page 51 Einstellen der Bildschirmanzeige Menü GAIN CONTROL Menü COLOR CONTROL Wenn der LL-172G mit einer digitalen Verbindung WHITE BALANCE verwendet wird, ist dise Menüeinstellung nicht 1.Nach der Wahl von [WHITE BALANCE] drücken nötig. Sie die Taste Das Menü WHITE BALANCE erscheint. AUTO Wenn [AUTO] mit der Taste gewählt ist, werden...
  • Page 52 Einstellen der Bildschirmanzeige Menü MODE SELECT-1 Menü MODE SELECT-2 Hinweis: INFORMATION - Abhängig von der Auflösung des Die Modellbezeichnung (MODEL), die Seriennummer Eingangssignals ändert sich die Anzeige (S/N) und die Verwendungszeit (USAGE TIME) des eventuell selbst dann nicht, wenn die Monitors kann überprüft werden.
  • Page 53: Pflege Des Monitors

    Sie sich an das Geschäft, in dem Sie den (S.44) Monitor gekauft haben, oder an die - Regeln Sie die Lautstärke. (S.48) nächstgelegene autorisierte Sharp- - Sind die Kopfhörer angeschlossen? Kundendienstzentrale. - Es kommt kein Ton von den Lautsprechern, wenn der Monitor im Stromsparmodus ist (die Betriebs-LED leuchtet orangefarben auf).
  • Page 54: Informationen Für Kunden Über Umweltfreundliche Entsorgung Dieses Sharp-Produkts

    ANDEREM MÜLL! DABEI BESTEHT GEFAHR werden. FÜR DIE UMWELT! (3) Für unsere Kunden in den USA Sharp Corporation ist zum Umweltschutz und zur In diesem Produkt ist Zinn-Blei-Lötmaterial und Einsparung von Energie entschlossen. Unser Ziel eine Fluoreszenzlampe mit einer geringen ist, die Umweltbelastung durch unsere Produkte Menge Quecksilber verwendet.
  • Page 55: Technische Daten

    (Ohne Kabel) (Kontrastverhältnis > 5) Bildschirmanzeigegröße Horizontal 337,9 mm x vertikal 270,3 mm Videosignal [LL-172A] Analog RGB (0,7 Vp-p) [75Ω] [LL-172G] Analog: Analog RGB (0,7 Vp-p) [75Ω] Digital: DVI-Standard basiert auf 1.0 Sync-Signal Separate Sync (TTL-Pegel: +/-), Sync on Green, Composite Sync (TTL-Pegel: +/-) Erweiterungskompensation Digitaler Skalierungsgrad (Vergrößerung von...
  • Page 56 2,0 m - 2-Eingangskabel, NL-C03J (separat erhältlich): ca. 0,25 m Hinweis: - Bedingt durch fortlaufende technische Verbesserungen behält sich SHARP das Recht vor, das Design und die Spezifikationen ohne vorherige Ankündigung ändern zu können. Die 57,5 angegebenen Leistungswerte stellen die Nennwerte einer in Serienherstellung produzierten Einheit dar.
  • Page 57 Technische Daten Relevante Signaltakte (analog) Relevante Signaltakte (digital) [LL-172G] Anzeigemodus Vsync Anzeigemodus Hsync Vsync Punktfrequenz Hsync Punktfrequenz VESA VESA US-Text - Die empfohlene Auflösung ist 1280 x 1024. US-Text - Alle nur mit Non-Interlace. Power - Ein Computer mit einem Ausgangsanschluss Macintosh- Serie gemäß...
  • Page 58 Technische Daten Pinbelegung des Analogsignal- Power Management Eingangsstecker Der LL-172A basiert auf VESA DPMS. Der LL- 172G basiert auf sowohl VESA DPMS und DVI (15-poliger Mini-D-Sub-Stecker) DMPM. Zum Aktivieren der Energiesparfunktion müssen die Videokarte und der verwendete Computer ebenfalls diesen Normen entsprechen.
  • Page 59: Installieren Der Setup-Informationen Und Des Icc-Profils (Für Windows)

    Installieren der Setup-Informationen und des ICC-Profils (Für Windows) Je nach dem verwendeten Computer oder Für Windows 98 Betriebssystem muss die Installation der Monitor- Installieren der Monitor-Setup-Informationen unter Setup-Informationen usw. eventuell über den Windows 98 und Festlegen des Monitor-ICC- Computer erfolgen. Führen Sie in diesem Fall die Profils als vorbestimmter Wert.
  • Page 60 Installieren der Setup-Informationen und des ICC-Profils (Für Windows) Für Windows 2000 Für Windows Me Installieren der Monitor-Setup-Informationen unter Installieren der Monitor-Setup-Informationen unter Windows 2000 und Festlegen des Monitor-ICC- Windows Me und Festlegen des Monitor-ICC- Profils als vorbestimmter Wert. Die in den Profils als vorbestimmter Wert.
  • Page 61 Installieren der Setup-Informationen und des ICC-Profils (Für Windows) Für Windows XP Installieren des ICC-Profils Installieren des Monitor-ICC-Profils. (Wenn die Installieren der Monitor-Setup-Informationen unter Setup-Informationen bereits installiert wurden, ist Windows XP und Festlegen des Monitor-ICC- auch das Profil bereits installiert. Es braucht dann Profils als vorbestimmter Wert.
  • Page 62: Informationen Zum Profil Colorsync (Für Macos)

    Informationen zum Profil ColorSync (Für MacOS) Informationen zum Profil ColorSync ColorSync ist das Farbverwaltungssystem von Apple Computers. Mit dieser Funktion erkennt das System die Farbwiedergabeeigenschaften bei Verwendung mit einer kompatiblen Anwendung. Ein ColorSync-Profil beschreibt die Farbeigenschaften des LCD-Monitors. Hinweise: - Das ColorSync-Profil dieses Monitors kann zusammen mit MacOS 8.5 oder höher eingesetzt werden.
  • Page 63: Anweisungen Zum Anbringen Eines Vesa-Kompatiblen Monitorarms

    Schrauben verwendet werden, die in einer den Fuß vom Monitor ab. Länge von 4 - 5 mm über die Fläche, an der [LL-172A] sie befestigt werden, hervorstehen. Wenn Sie eine andere Schraubenart verwenden, kann der Monitor herunterfallen oder im Inneren beschädigt werden.
  • Page 65 Dépannage ..............81 Informations pour les clients à propos de l'environnement pour ce produit SHARP ... . 82 Caractéristiques techniques .
  • Page 66: Conseils Et Mesures De Sécurité

    à des dégagements excessifs de chaleur des objets durs. et conduire à un début d'incendie. - Il faut savoir que la Sharp Corporation décline toute responsabilité en cas d'erreur survenue Le cordon d'alimentation électrique durant l'utilisation par le client ou une tierce...
  • Page 67 Moniteur et liste des accessoires - Ce mode d'emploi a été rédigé pour l'utilisation - S'assurer que les éléments suivants sont bien des modèles LL-172A et LL-172G. Lorsqu'il est présents dans l'emballage : décrit des caractéristiques différentes entre les - Moniteur LCD (1) modèles, le nom du modèle est également cité.
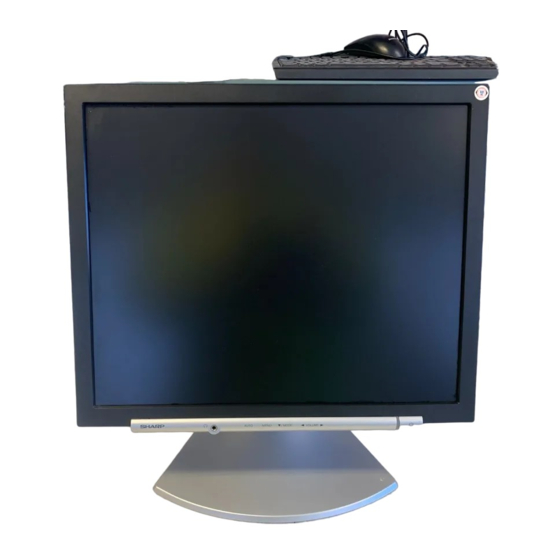
  • Page 68: Description Du Produit

    Description du produit [LL-172A] [LL-172G] 1. Bouton AUTO [LL-172A] ..Ce bouton est utilisé pour effectuer le réglage automatique sur l'écran (CLOCK, PHASE, H-POS et V-POS). (p.77) Bouton INPUT [LL-172G] ..Pour passer d'une borne d'entrée du signal à l'autre.
  • Page 69: Réglage De L'inclinaison Et De La Hauteur

    Appuyer les mains sur le panneau LCD peut approx. 70 mm provoquer son endommagement. - Prendre garde de ne pas se coincer les doigts. Réglage de l'inclinaison [LL-172A] approx. 25° approx. 5° ATTENTION ! - Assurez-vous bien de relâcher le verrouillage avant d'ajuster la hauteur du support.
  • Page 70: Raccordement, Activation Et Désactivation Du Moniteur

    - Lors du raccordement, s'assurer que ordinateur l'alimentation tant du moniteur que de l'ordinateur est désactivée. Connexion analogique [LL-172A] - Ne pas courber le câble de manière excessive Raccorder le câble de signal analogique fourni à ni y ajouter de rallonge car cela peut provoquer la borne de sortie analogique RVB de l'ordinateur.
  • Page 71 Raccordement, activation et désactivation du moniteur Connexion analogique [LL-172G] Connexion numérique [LL-172G] Raccorder le câble de signal numérique (fourni en Raccorder le câble de signal analogique fourni ou accessoire) à la borne de sortie numérique RVB un câble de signal analogique vendu séparément de l'ordinateur.
  • Page 72 Raccordement, activation et désactivation du moniteur Lors du raccordement au moyen d'un câble Remarques : - Pour utiliser un câble à 2 entrées, régler la à 2 entrées vendu séparément [LL-172G] borne d'entrée de connexion [INPUT-2] à Le câble à 2 entrées (nom du modèle : NL-C03J), [2LINES] avec le menu de MODE SELECT-2 vendu séparément, permet la connexion entre la (p.80).
  • Page 73: Raccordement D'un Casque Audio (En Vente Dans Le Commerce)

    Raccordement, activation et désactivation du moniteur - Pour allumer et éteindre avec l'interrupteur Raccordement d'un casque audio principal, toujours laisser un intervalle d'au (en vente dans le commerce) moins 5 secondes. Une manœuvre trop rapide risque de causer des dysfonctionnements. Un casque audio (en vente dans le commerce) peut être raccordé.
  • Page 74: Inversion Entre Les Bornes D'entrée [Ll-172G]

    Raccordement, activation et désactivation du moniteur Inversion entre les bornes d'entrée Désactivation de l'alimentation [LL-172G] 1. Mettre l'ordinateur hors tension. 2. Appuyer sur le bouton d'alimentation du Utiliser le bouton INPUT pour basculer entre les moniteur. bornes d'entrée. La diode d'alimentation s'éteind. Borne d'entrée analogique RVB Borne d'entrée DVI-I...
  • Page 75: Réglage De L'affichage Du Moniteur Et Du Volume Des Haut-Parleurs

    Réglage de l'affichage du moniteur et du volume des haut-parleurs Pour le signal analogique Fonction de verrouillage des réglages 1. Effectuer tout d'abord un réglage automatique. En désactivant les boutons de commande (c'est-à- (p.77) dire en les verrouillant), toute tentative de 2.Effectuer au besoin un réglage manuel.
  • Page 76: Réglage Du Volume Des Haut-Parleurs

    Réglage de l'affichage du moniteur et du volume des haut-parleurs Réglage du volume des haut-parleurs Confirmation des informations sur l'appareil 1. Sans que le menu OSD ne soit affiché, appuyer sur le bouton ou le bouton Le nom du modèle (MODEL), le numéro de série 2.
  • Page 77: Réglage De L'affichage Du Moniteur

    Le réglage automatique peut être effectué en (avec un signal analogique) utilisant soit le bouton AUTO ou le bouton MENU. Les options CLOCK, PHASE, H-POS, V-POS du Bouton AUTO [LL-172A] menu ADJUSTMENT peuvent être ajustées 1. Appuyez sur le bouton AUTO. automatiquement.
  • Page 78: Réglage Manuel De L'écran

    Réglage de l'affichage du moniteur Menu ADJUSTMENT (AJUST) Réglage manuel de l'écran Quand le LL-172G est utilisé avec une connexion numérique, ce réglage de menu n'est pas 1. D'abord afficher une image qui rend la totalité nécessaire. de l'écran du moniteur très lumineuse. (p.77) 2.
  • Page 79 Réglage de l'affichage du moniteur Menu GAIN CONTROL Menu COLOR CONTROL (CTRL. DES COULEURS) (CTRL. LUMINOSIT) WHITE BALANCE Quand le LL-172G est utilisé avec une connexion 1. Après avoir sélectionné [WHITE BALANCE], numérique, ce réglage de menu n'est pas nécessaire. appuyer sur le bouton Le menu WHITE BALANCE sera affiché.
  • Page 80 Réglage de l'affichage du moniteur Menu MODE SELECT-1 Menu MODE SELECT-2 (MODE SÉLECTION-1) (MODE SÉLECTION-2) INFORMATION Remarque : Le nom du modèle (MODEL), le numéro de série - En fonction de la résolution du signal d'entrée, (S/N) et la durée d'utilisation (USAGE TIME) du même si les options peuvent être sélectionnées, moniteur peuvent être vérifiés.
  • Page 81: Entretien Du Moniteur

    Si après cela, il ne fonctionne toujours pas - Le câble audio est-il raccordé correctement? correctement, contacter le magasin où il a été (p.72) acheté ou votre réparateur agréé Sharp le plus - Exécutez la procédure de réglage du volume. proche. (p.76) - Le casque audio est-il branché...
  • Page 82: Informations Pour Les Clients À Propos De L'environnement Pour Ce Produit Sharp

    DECHETS. VOUS RISQUEZ DE DEGRADER propriétaire de l'équipement électronique L'ENVIRONNEMENT. concerné. La société Sharp s'implique dans la protection de (3) Pour notre clientèle aux Etats Unis l'environnement et la sauvegarde de l'énergie. d'Amérique Notre but est de minimiser l'impact sur...
  • Page 83: Caractéristiques Techniques

    VGA/SVGA/XGA, etc. à la taille plein écran.) Plug & Play VESA : DDC2B compatible Gestion de l'alimentation [LL-172A] VESA : basé sur le DPMS [LL-172G] VESA : basé sur le DPMS DVI : basé sur le DMPM Sortie des haut-parleurs 1 W + 1 W Borne d'entrée signal...
  • Page 84 - Câble à 2 entrées, NL-C03J (à acheter séparément) : approx. 0,25 m Remarque : - SHARP se réserve le droit d'apporter des modifications à la présentation et aux caractéristiques des appareils à fin d'amélioration. Les valeurs indiquées dans ce...
  • Page 85 Caractéristiques techniques Fréquences des signaux (analogique) Fréquences des signaux (numérique) [LL-172G] Bande Bande Mode affichage Hsync Vsync Hsync Vsync Mode affichage passante passante VESA VESA Saisie de texte US - La résolution recommandée est 1280 x 1024. Saisie de texte US - Toutes les fréquences sont non entrelacées.
  • Page 86 La broche du connecteur d'entrée Gestion de l'alimentation analogique RVB Le modèle LL-172A est basé sur le système VESA DPMS. Le modèle LL-172G est basé sur les deux (Mini connecteur de type D-sub 15 broches) systèmes VESA DPMS et DVI DMPM. Pour activer la fonction de gestion de l'alimentation du moniteur, la carte vidéo et l'ordinateur utilisés...
  • Page 87: Installation Des Fichiers Relatifs Au Paramétrage Du Moniteur Et Au Profil Icc (Pour Windows)

    Installation des fichiers relatifs au paramétrage du moniteur et au profil ICC (Pour Windows) En fonction du type d'ordinateur ou du système 7. S'assurer que le moniteur affiche une image, d'exploitation, il peut parfois s'avérer nécessaire ensuite cliquer sur [Apply]. d'installer des fichiers relatifs au paramétrage du 8.
  • Page 88 Installation des fichiers relatifs au paramétrage du moniteur et au profil ICC (Pour Windows) Pour Windows 2000 Pour Windows Me Installation des fichiers relatifs au paramétrage du Installation des fichiers relatifs au paramétrage du moniteur sous Windows 2000, et au réglage du moniteur sous Windows Me, et au réglage du profil ICC du moniteur en tant que valeur par profil ICC du moniteur en tant que valeur par...
  • Page 89 Installation des fichiers relatifs au paramétrage du moniteur et au profil ICC (Pour Windows) Pour Windows XP Installation du profil ICC Installation du profil ICC du moniteur. (Si le ficher Installation des fichiers relatifs au paramétrage du relatif au paramétrage a déjà été installé, alors le moniteur sous Windows XP, et au réglage du profil profil l'a été...
  • Page 90: Informations Sur Le Profil Colorsync (Pour Macos)

    Informations sur le profil ColorSync (Pour MacOS) A propos du profil ColorSync ColorSync est le système de gestion des couleurs de Apple Computer et il permet de réaliser les caractéristiques de l'affichage de couleurs lors d'une utilisation avec une application compatible. Un profil ColorSync décrit les caractéristiques de couleur du moniteur LCD.
  • Page 91: Instructions Relatives À L'installation D'un Bras Conforme Vesa

    4. Retirer les quatre vis et ensuite le support du types de vis peut provoquer la chute du moniteur. moniteur ou un endommagement des pièces internes. [LL-172A] Vis de fixation du bras Bras Partie du moniteur à laquelle vient se fixer le bras...
  • Page 93 Ricerca ed eliminazione di inconvenienti ..........109 Le informazioni per i clienti sull'eliminazione di questo prodotto SHARP in condizioni di protezione ambientale . . . 110 Specifiche .
  • Page 94: Suggerimenti E Precauzioni Per La Sicurezza

    - Per favore abbiate comprensione per il fatto che - Non danneggiate il cavo di alimentazione rete, la Sharp Corporation non si assume nessuna non mettete degli oggetti pesanti su di esso, non responsabilità per errori fatti nell'uso da parte tiratelo e non piegatelo eccessivamente.
  • Page 95 Lista di controllo del monitor e degli accessori Presentazione del manuale - Per favore controllate che la confezione - Questo manuale è relativo ai modelli LL-172A e contenga i seguenti articoli. LL-172G. Quando si descrive una caratteristica - Monitor LCD (1) diversa tra i modelli, sarà...
  • Page 96: Descrizione Del Prodotto

    Descrizione del prodotto [LL-172A] [LL-172G] 1. Tasto AUTO [LL-172A] .... Questo tasto si usa per eseguire la regolazione automatica dello schermo (CLOCK, PHASE, H-POS e V-POS). (p.105) Tasto INPUT [LL-172G] ... Per commutare tra i terminali di ingresso del segnale.
  • Page 97: Regolazione Dell'angolazione, Regolazione Dell'altezza

    - Fare attenzione a non rimanere con le dita incastrate. Regolazione dell'angolazione circa 25° [LL-172A] circa 5° ATTENZIONE! - Assicurarsi di liberare il fermo prima di regolare l'altezza del supporto. Se si estende o si contrae il supporto quando è bloccato, si rischia di danneggiare il prodotto.
  • Page 98: Collegamento Del Monitor Ed Accensione E Spegnimento Del Monitor

    Collegamento del monitor ad un computer - Quando eseguite i collegamenti, assicuratevi che sia il monitor che il computer siano spenti. Collegamento analogico [LL-172A] - Fate attenzione a non piegare eccessivamente il Collegare il cavo accessorio del segnale cavo oppure nell'aggiungere dei cavi di analogico al terminale di uscita RGB analogica prolunga, in quanto ciò...
  • Page 99 Collegamento del monitor ed accensione e spegnimento del monitor Collegamento digitale [LL-172G] Collegamento analogico [LL-172G] Collegare il cavo accessorio del segnale digitale Collegare il cavo accessorio del segnale al terminale di uscita RGB digitale del computer. analogico, o il cavo segnale analogico venduto - Il monitor ha un ingresso per il collegamento a separatamente (nome del modello: NL-C02E) al un computer con un connettore di uscita...
  • Page 100 Collegamento del monitor ed accensione e spegnimento del monitor Note: Per il collegamento usare un cavo a 2 - Quando si utilizza il cavo a 2 ingressi, regolare il ingressi, venduto separatamente terminale di ingresso di connessione [INPUT-2] [LL-172G] a [2LINES] nel menu MODE SELECT-2. Il cavo a 2 ingressi venduto separatamente (nome (p.108) del modello: NL-C03J) consente il collegamento...
  • Page 101: Collegamento Delle Cuffie (Da Acquistare In Commercio)

    Collegamento del monitor ed accensione e spegnimento del monitor - Per accendere e spegnere l'interruttore Collegamento delle cuffie principale rete, attendere sempre un tempo di (da acquistare in commercio) almeno 5 secondi fra le due operazioni. Farlo rapidamente potrebbe essere causa di Le cuffie (da acquistare in commercio) possono malfunzionamento.
  • Page 102: Commutare Tra I Terminali Di Ingresso [Ll-172G]

    Collegamento del monitor ed accensione e spegnimento del monitor Commutare tra i terminali di ingresso Spegnimento [LL-172G] 1. Spegnete il computer. 2. Premete il tasto di alimentazione del monitor. Utilizzate il tasto INPUT per commutare tra i Il LED di alimentazione si spegnerà. terminali di ingresso del segnale.
  • Page 103: Regolazione Della Visualizzazione Sullo Schermo E Volume Dell'altoparlante

    Regolazione della visualizzazione sullo schermo e volume dell'altoparlante Per il segnale analogico Funzione del blocco di regolazioni 1. Prima di tutto eseguite una regolazione Disattivando i tasti di controllo (cioè settando il automatica. (p.105) blocco) si impedirà ogni tentativo di cambiare i 2.
  • Page 104: Regolazione Del Volume Dell'altoparlante

    Regolazione della visualizzazione sullo schermo e volume dell'altoparlante Predisposizione Regolazione del volume dell'altoparlante A menu OSD non visualizzato agire sul tasto / MODE . 1. Senza che il menu OSD sia visualizzato premete Ad ogni successiva pressione del tasto compare il tasto oppure il tasto la voce successiva del menù...
  • Page 105: Regolazione Della Visualizzazione Sullo Schermo

    La regolazione automatica può essere effettuata (quando si usa un segnale analogico) usando il tasto AUTO o il tasto MENU. Le opzioni nel menu ADJUSTMENT si possono Tasto AUTO [LL-172A] regolare automaticamente (CLOCK, PHASE 1. Premere il tasto AUTO. (FASE), H-POS, V-POS).
  • Page 106: Regolazione Manuale Dello Schermo

    Regolazione della visualizzazione sullo schermo Menu ADJUSTMENT (REGOL) Regolazione manuale dello schermo Quando il LL-172G è usato con un collegamento digitale, questa impostazione del menu non è 1. Prima di tutto visualizzate un'immagine che necessaria. rende chiaro l'intero schermo. (p.105) 2.
  • Page 107 Regolazione della visualizzazione sullo schermo Menu GAIN CONTROL (CTRL. GUADAGNO) Menu COLOR CONTROL (CONTROLLO COLORE) Quando il LL-172G è usato con un collegamento digitale, questa impostazione del menu non è WHITE BALANCE necessaria. 1. Dopo aver selezionato [WHITE BALANCE], premere il tasto AUTO Il menu WHITE BALANCE sarà...
  • Page 108 Regolazione della visualizzazione sullo schermo Menu MODE SELECT-1 (SELEZ. MODO-1) - Notare che l'indicazione dalla durata di uso al momento dell'acquisto può risultare diversa da 0 Nota: (zero), a seguito dei controlli effettuati in fabbrica - A seconda della risoluzione del segnale di e di altre simili attività...
  • Page 109: Cura Del Monitor

    Centro del Servizio Tecnico Assistenza Clienti controllo. della Sharp più vicino a voi. Se sono molto sporchi, applicate del detersivo - Nel periodo iniziale del loro uso, a causa delle neutro ad un panno morbido inumidito, strizzatelo caratteristiche dei tubi fluorescenti, lo schermo bene, e portate via la sporcizia, detergendo.
  • Page 110: Le Informazioni Per I Clienti Sull'eliminazione Di Questo Prodotto Sharp In Condizioni Di Protezione Ambientale

    Se questo prodotto non può più essere usato, La SHARP suggerisce i servizi di riciclaggio dovrebbe essere dato via ed essere eliminato in della MIREC, e le informazioni generali della modo legalmente corretto ed in condizioni MIREC possono essere ottenute facendo clic ambientali sane.
  • Page 111: Specifiche

    Uscita altoparlanti 1 W + 1 W Terminale del segnale di ingresso [LL-172A] D sub mini a 15 pin in 3 file [LL-172G] Analogico: D sub mini a 15 pin in 3 file Digitale/Analogico: DVI-I a 29 pin Terminale di ingresso audio...
  • Page 112 - Cavo a 2 ingressi, NL-C03J (da acquistato separatamente): circa 0,25 m Nota: - Per facilitare una politica di miglioramenti continui, la SHARP si riseva il diritto di cambiare il disegno e le caratteristische per perfezionamenti senza preavviso. Le 57,5 caratteristiche di prestazioni numericamente indicate sono valori nominali delle unità...
  • Page 113 Specifiche Sincronizzazioni rilevanti del segnale Sincronizzazioni rilevanti del segnale (analogico) (digitale) [LL-172G] Modalità di Modalità di Sincronismo Sincronismo Frequenza Sincronismo Sincronismo Frequenza verticale punti visualizzazione orizzontale visualizzazione orizzontale verticale punti VESA VESA Testo US - La risoluzione consigliata è 1280 x 1024. Testo US - Tutti sono conformi solo al non interlacciamento.
  • Page 114 Pin del connettore di ingresso del segnale Gestione dell'energia analogico Il modello LL-172A si basa sul VESA DPMS. Il modello LL-172G si basa sia sul VESA DPMS che (Connettore D sub mini a 15 pin) sul DVI DMPM. Per attivare la funzione di gestione energetica, è...
  • Page 115: Installazione Delle Informazioni Di Setup E Del Profilo Icc (Per Windows)

    Installazione delle informazioni di setup e del profilo ICC (Per Windows) A seconda del computer oppure del sistema Per Windows 98 operativo può essere necessario usare il Installazione delle informazioni di setup del computer per eseguire l'installazione delle monitor in Windows 98, e impostazione del profilo informazioni di setup del monitor, ecc.
  • Page 116 Installazione delle informazioni di setup e del profilo ICC (Per Windows) Per Windows 2000 Per Windows Me Installazione delle informazioni di setup del Installazione delle informazioni di setup del monitor in Windows 2000, e impostazione del monitor in Windows Me, e impostazione del profilo profilo ICC del monitor come valore ICC del monitor come valore predeterminato.
  • Page 117 Installazione delle informazioni di setup e del profilo ICC (Per Windows) Per Windows XP Installazione del profilo ICC Installazione del profilo ICC del monitor. (Se le Installazione delle informazioni di setup del informazioni di setup sono già installate, lo è monitor in Windows XP, e impostazione del profilo anche il profilo e non occorre installarlo.) ICC del monitor come valore predeterminato.
  • Page 118: Informazioni Sul Profilo Colorsync (Per Macos)

    Informazioni sul profilo ColorSync (Per MacOS) Il profilo ColorSync ColorSync è il sistema di gestione dei colori della Apple Computer e consente di realizzare la riproduzione dei colori, quando lo si usa con un'applicazione compatibile. Un profilo ColorSync descrive le caratteristiche cromatiche del monitor LCD.
  • Page 119: Istruzioni Per Collegare Un Braccio Compatibile Vesa

    4. Rimuovete le quattro viti e rimuovete quindi il sporgenti dalla superficie da collegare. Usando supporto dal monitor. qualsiasi altro tipo di viti può dare luogo alla [LL-172A] caduta del monitor oppure a danni alla parte interna del monitor. Viti usate per attaccare il...
  • Page 121 Solución de problemas ............137 Información para clientes acerca del desecho de este producto SHARP de forma de proteger el medio ambiente ..138 Especificaciones .
  • Page 122: Sugerencias Y Precauciones De Seguridad

    El cable de alimentación duros. - No deteriore el cable de alimentación ni - Sharp Corporation no asume responsabilidad coloque objetos pesados sobre el mismo ni lo alguna por las faltas cometidas durante el uso estire o doble excesivamente. No utilice por parte del usuario o de terceros, ni por tampoco cables de prolongación.
  • Page 123 (nombre del modelo: NL-C03J) - Guarde la caja de cartón por si necesita transportar el monitor. - Sharp Corporation es titular de los derechos de autor del programa del Disquete de utilidades. No lo reproduzca sin previa autorización. - La forma de los accesorios suministrados puede no coincidir totalmente con la mostrada en este manual.
  • Page 124: Descripción Del Producto

    Descripción del producto [LL-172A] [LL-172G] 1. Botón AUTO [LL-172A] ... Este botón se utiliza para hacer un ajuste automático de la pantalla (CLOCK, PHASE, H-POS y V-POS). (p.133) Botón INPUT [LL-172G] ..Para conmutar entre los bornes de entrada de la señal.
  • Page 125: Ajuste De Ángulo Y Ajuste De Altura

    - Tenga cuidado para que sus dedos no queden atrapados. Ajuste de ángulo aprox. 25° [LL-172A] aprox. 5° ¡PRECAUCIÓN! - Asegúrese de soltar el seguro antes de ajustar la altura del pedestal. Si alarga/contrae el pedestal cuadno está bloqueado puede pdañar el producto.
  • Page 126: Conexión Del Monitor Y Encendido/Apagado Del Mismo

    Conexión del monitor a un ordenador - Antes de realizar la conexión, asegúrese de que tanto el monitor como el ordenador están Conexión analógica [LL-172A] apagados. Conecte el cable de señal analógica accesoria en - Tenga cuidado de no doblar excesivamente el el borne de salida RGB analógica del ordenador.
  • Page 127 Conexión del monitor y encendido/apagado del mismo Conexión analógica [LL-172G] Conexión digital [LL-172G] Conecte el cable de señal analógica accesoria o Conecte el cable de señal digital accesoria en el cable de señal analógica vendido separadamente borne de salida RGB digital del ordenador. (nombre del modelo: NL-C02E) en el borne de - El monitor tiene una entrada para conectar a un salida RGB analógica del ordenador.
  • Page 128 Conexión del monitor y encendido/apagado del mismo Cuando haga la conexión utilizando un Notas: cable de 2 entradas vendido separadamente - Cuando utilice el cable de 2 entradas, configure [LL-172G] la conexión del borne de entrada [INPUT-2] a El cable de 2 entradas vendido separadamente [2LINES] en el menú...
  • Page 129: Conexión De Auriculares (De Venta En El Comercio)

    Conexión del monitor y encendido/apagado del mismo - Cuando conecte y desconecte la Interruptor Conexión de auriculares primario, espere siempre durante un intervalo (de venta en el comercio) de 5 segundos. El cambio rápido puede causar un fallo en el funcionamiento. Se pueden conectar auriculares (de venta en el 2.
  • Page 130: Alternar Entre Bornes De Entrada [Ll-172G]

    Conexión del monitor y encendido/apagado del mismo Alternar entre bornes de entrada Apagado [LL-172G] 1. Apague el ordenador. 2. Pulse el botón de encendido/apagado del Utilizar el botón de ENTRADA (INPUT) para monitor. conmutar entre bornes de entrada de señal. El LED indicador de conexión se apagará.
  • Page 131: Ajuste De La Pantalla Y Volumen Del Altavoz

    Ajuste de la pantalla y volumen del altavoz Para la señal analógica Función de bloqueo de ajuste 1. En primer lugar, lleve a cabo un ajuste Si deshabilita los botones de control (es decir, automático. (p.133) activa el bloqueo) no podrá cambiar los valores 2.
  • Page 132: Ajuste Del Volumen Del Altavoz

    Ajuste de la pantalla y volumen del altavoz Ajuste del volumen del altavoz Comprobación de la información del producto 1. Sin el menú OSD a la vista, pulse el botón 2. Compruebe que esté seleccionado [VOLUME]. Se puede comprobar el nombre del modelo Si no está...
  • Page 133: Ajuste De La Pantalla

    El ajuste automático puede hacerse utilizando el (cuando se utiliza una señal analógica) botón AUTO o el botón MENU. Las opciones del Menú ADJUSTMENT ( CLOCK, Botón AUTO [LL-172A] PHASE, H-POS, V-POS) se pueden ajustar 1. Pulse el botón AUTO. automáticamente.
  • Page 134: Ajuste De Pantalla Manual

    Ajuste de la pantalla Menú ADJUSTMENT Ajuste de pantalla manual Cuando se utiliza LL-172G con una conexión digital, no es necesario este ajuste de menú. 1. En primer lugar aparece una imagen que pone toda la pantalla muy clara. (p.133) AUTO 2.
  • Page 135 Ajuste de la pantalla Menú GAIN CONTROL Menú COLOR CONTROL Cuando se utiliza LL-172G con una conexión digital, no es necesario este ajuste de menú. WHITE BALANCE 1. Después de seleccionar [WHITE BALANCE], AUTO pulse el botón Cuando se selecciona [AUTO] con el botón , se Aparecerá...
  • Page 136 Ajuste de la pantalla Menú MODE SELECT-1 Menú MODE SELECT-2 Nota: INFORMATION (INFORMACIÓN) - Según sea la resolución de la señal de entrada, Se puede comprobar el nombre del modelo la pantalla puede no cambiar incluso si pueden (MODEL), el número de serie (S/N) y tiempo de seleccionarse las opciones del menú.
  • Page 137: Conservación Del Monitor

    útil. Consulte a su proveedor o al servicio autorizado Caja y sector del panel de control de asistencia técnica de Sharp más cercano. Utilice un paño suave y seco para limpiar, sin - Debido a las características de los tubos apretar demasiado, la caja y el panel de control.
  • Page 138: Información Para Clientes Acerca Del Desecho De Este Producto Sharp De Forma De Proteger El Medio Ambiente

    AMBIENTE! (3) Fara nuestros clientes en los EE.UU. Sharp Corporation está comprometida a proteger Este producto utiliza la soldadura en plomo y el medio ambiente y a la conservación de energía. una lámpara fluorescente con una pequeña Nuestra meta es reducir el impacto sobre el medio cantidad de mercurio.
  • Page 139: Especificaciones

    DVI: basada en DMPM Salida de altavoces 1 W + 1 W Borne de señales de entrada [LL-172A] Mini D-sub 15 contactos 3 hileras [LL-172G] Analógica: Mini D-sub 15 contactos 3 hileras Digital/Analógica: DVI-I de 29 contactos Borne de entrada de audio Clavija estéreo mini...
  • Page 140 - Cable de 2 entradas, NL-C03J (que debe adquirir aparte): aprox. 0,25 m Nota: - Como parte de la política de mejoras continuas, SHARP se reserva el derecho de realizar cambios en el diseño y especificaciones para la mejora del producto sin previo aviso. Las figuras 57,5...
  • Page 141 Especificaciones Sincronizaciones de las señales Sincronizaciones de las señales correspondientes (analógica) correspondientes (digital) [LL-172G] Hsync Vsync Frecuencia Modo display Modo display Hsync Vsync Frecuencia VESA VESA US text - La resolución recomendada es de 1280 x 1024. US text - Todos son compatibles únicamente con «non- Series interlace».
  • Page 142 Contactos del conector de entrada RGB analógica Gestión de energía (Conector Mini D-sub de 15 contactos) LL-172A está basado en VESA DPMS. LL-172G está basado tanto en VESA DPMS como en DVI DMPM. Para activar la función de administrador de electricidad, la placa de video y el ordenador utilizado con ésta deben ajustarse a estos...
  • Page 143: Instalación De La Información De Configuración Y Del Perfil Icc (Para Windows)

    Instalación de la información de configuración y del perfil ICC (Para Windows) Según sea el tipo de ordenador o de sistema 7. Compruebe que el monitor está funcionando y operativo, puede que sea necesario utilizar el a continuación haga clic en [Apply]. ordenador para llevar a cabo la instalación de la 8.
  • Page 144 Instalación de la información de configuración y del perfil ICC (Para Windows) Para Windows 2000 Para Windows Me Instalación de la información de configuración del Instalación de la información de configuración del monitor en Windows 2000 y configuración del monitor en Windows Me y configuración del perfil perfil ICC del monitor como valor predeterminado.
  • Page 145 Instalación de la información de configuración y del perfil ICC (Para Windows) Para Windows XP Instalación del perfil ICC Instalación del perfil ICC del monitor. (Si ya ha Instalación de la información de configuración del instalado la información de configuración, se monitor en Windows XP y configuración del perfil habrá...
  • Page 146: Información Acerca Del Perfil Colorsync (Para Macos)

    Información acerca del perfil ColorSync (Para MacOS) Acerca del perfil ColorSync ColorSync es el sistema de gestión del color de Apple Computer y permite obtener características de reproducción cromática cuando se utiliza con una aplicación compatible. Un perfil ColorSync describe las características cromáticas del monitor LCD.
  • Page 147: Instrucciones Para Acoplar Un Brazo De Compatibilidad Vesa

    M4 con un saliente pedestal del monitor. de 4-5 mm desde el plano sobre el que debe [LL-172A] acoplarse. El uso de diferentes tornillos puede provocar la caída del monitor o causar daños en la parte interior.
  • Page 152 SHARP CORPORATION Printed in China Gedruckt in China Imprimé en Chine Stampato in Cina Impreso en China 0NW170184304A (1)

Ce manuel est également adapté pour:

Ll-172g

Table des Matières