Table des Matières
Publicité
Les langues disponibles
Les langues disponibles
Liens rapides
A3 1 0 0 8 - G4 0 0 0 - B0 0 7 - 1 - 6 4 1 9
Issued by
Information and Communication mobile
Haidenauplatz 1
D-81667 München
© Siemens AG 2002
All rights reserved. Subject to availability.
Right of modification reserved.
Printed in Germany. (03/2002)
Siemens Aktiengesellschaft
http://www.my-siemens.com
Best.-Nr.: A31008-G4000-B007-1-6419
s
Be inspired
Bedienungsanleitung
Istruzioni d'uso
Mode d'emploi
Instrucciones de manejo
Operating Instrucions
Publicité
Chapitres
Table des Matières

Manuels Connexes pour Siemens Gigaset Comfort 4000i


Sommaire des Matières pour Siemens Gigaset Comfort 4000i
- Page 1 A3 1 0 0 8 - G4 0 0 0 - B0 0 7 - 1 - 6 4 1 9 Issued by Information and Communication mobile Haidenauplatz 1 D-81667 München © Siemens AG 2002 All rights reserved. Subject to availability. Right of modification reserved. Printed in Germany. (03/2002) Siemens Aktiengesellschaft http://www.my-siemens.com...
- Page 2 Be inspired Bedienungsanleitung und Sicherheitshinweise...
-
Page 3: Kurzübersicht
Kurzübersicht Das Display ist durch eine Folie geschützt. Bitte Schutzfolie abziehen! Ladezustand Status-LED (Leuchtdiode) leer leuchtet im Gespräch; voll blinkt bei: blinkt: Warnung – Ankommendem Ruf Display-Tasten – Neuen Nachrichten Mit den Display- – Weckruf, Termine, Tasten haben Jahrestage Sie Zugriff auf die im Display Empfangsstärke dargestellten... -
Page 4: Wichtige Menüs
Wichtige Menüs © Textmeldung* <Neuer Eintrag> T-Net-LM Anna Familie/Freizeit Barbara © Claus Termine/Uhr Audio OKƒ Kosten Nr. verwenden Einstellungen Eintrag löschen Basis einstellen Eintrag senden Anrufbeantw. Liste löschen Liste senden Telefonlautst. Speicherplatz Rufton einst. Hinweistöne Display-Symbole Je nach Bediensituation sehen Sie über den Display-Tasten folgende Symbole: Bedeutung Display-... -
Page 5: Sicherheitshinweise
Sicherheitshinweise Verwenden Sie nur das mitgelieferte Ste- ckernetzgerät, wie auf der Unterseite des Gerätes gekennzeichnet. Legen Sie nur zugelassene, aufladbare Akkus des gleichen Typs ein! D. h. niemals herkömmliche (nicht-aufladbare) Batterien, da sie zu Gesundheits- und Personenschäden füh- ren können. ‹... -
Page 6: Table Des Matières
Inhaltsverzeichnis Kurzübersicht ......2 Steuer-Taste und Display-Tasten ....2 Wichtige Menüs . -
Page 7: Mobilteil Vorbereiten
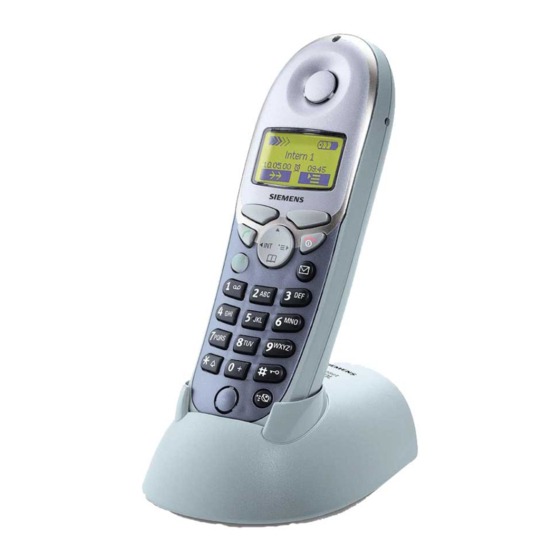
Mobilteil vorbereiten Verpackungsinhalt Mobilteil Gigaset 4000i Comfort, zwei Akkus, Ladeschale, Gürtelclip, Bedienungsanleitung. Akkus einlegen (automat. Anmeldung) Akkus richtig gepolt einlegen – siehe linkes Bild. Deckel auflegen und nach oben schieben bis er einrastet. Zum Öffnen auf die Riffelung drücken und nach un- ten schieben. -
Page 8: Gürtelclip Befestigen
Eine Übersicht der empfohlenen Akkutypen finden Sie im Anhang. Nach dem ersten Ladevorgang können Sie Ihr Mo- bilteil nach jedem Gespräch wieder in die Basis/ Ladeschale zurücklegen. Das Laden wird elektro- nisch gesteuert. Dadurch wird ein optimales und schonendes Laden der Akkus gewährleistet. Die Akkus erwärmen sich während des Aufladens;... -
Page 9: Datum Und Uhrzeit Einstellen
Datum und Uhrzeit einstellen Die Datums- und Uhrzeiteinstellung ist notwendig, da- mit der Zeitpunkt des Eingangs von Nachrichten/ An- rufen korrekt angezeigt wird. © Menü öffnen. Auswählen und bestätigen. Termine/Uhr Auswählen und bestätigen. Datum/Uhrzeit Die aktuelle Einstellung wird an- gezeigt. Datum eingeben Tag/Monat/Jahr eingeben. -
Page 10: Tastensperre Ein-/Ausschalten
Tastensperre ein-/ausschalten Sie können die Tastatur des Mobilteils „sperren“. Bei einem Anruf wird die Tastatursperre automatisch aus- geschaltet und nach Gesprächsende wieder einge- schaltet. ª Zum Ein-/Ausschalten Taste lang drücken Anruf annehmen: Abheben-Taste drücken. Display-Sprache ändern © Menü öffnen. Funktion bestätigen. Einstellungen Die aktive Sprache ist mit mar-... -
Page 11: Mobilteil Anmelden
Mobilteil anmelden Damit Sie mit Ihrem Mobilteil telefonieren können, müssen Sie dieses mit der Basis „bekannt machen“ (anmelden): wenn Ihr Mobilteil bereits an einer anderen Basis angemeldet worden ist (Schritt 1, 2 und 3), wenn Ihr Mobilteil an einer Gigaset Basis der Vorserien neu angemeldet werden soll (Schritt 1, 2 und 3). -
Page 12: Telefonieren
Telefonieren Extern anrufen Rufnummer eingeben. Ggf. mit der Display-Taste einzelne Zeichen korrigieren. Abheben-Taste drücken. Auflegen-Taste drücken, um das Gespräch zu beenden. Sie können auch zuerst die Abheben-Taste drücken und dann die Rufnummer eingeben - jede Ziffer wird sofort gewählt. Mit der Auflegen-Taste können Sie das Wählen abbrechen. -
Page 13: Anruf Annehmen
Anruf annehmen Ihr Telefon klingelt (Rufton) und die Status-LED blinkt. Abheben- oder Freisprech-Taste drücken. oder das Mobilteil nur aus der Basis/ Ä Ö Ladeschale nehmen (Lieferzu- stand: „Automatische Rufan- nahme“). Anrufer-/Nachrichtenliste aufrufen Neue Anrufe/Nachrichten werden durch einen Hin- weis im Display und das Blinken der Status-LED ange- zeigt. -
Page 14: Externes Gespräch Verbinden, Rückfrage
Freisprechen während des Gesprächs Freisprechen einschalten. Lautstärke einstellen: Freisprech-Taste u nochmals drücken. Lautstärke einstellen. Sichern Eingestellte Lautstärke spei- chern. Von Freisprechen in den Hörerbe- trieb wechseln. Gespräch beenden. Externes Gespräch verbinden, Rückfrage Sie können ein externes Gespräch an ein anderes Mobilteil verbinden oder intern eine Rückfrage halten. - Page 15 Automatische Wahlwiederholung Diese Funktion ist nicht in allen Ländern verfügbar! Die Freisprech-Taste blinkt und Lauthören ist einge- schaltet. Die Funktion schaltet sich nach zehn er- folglosen Wahlversuchen oder nach einem zwi- schenzeitlich geführten Gespräch aus. Wenn Ihr Gesprächspartner nicht erreichbar ist, drü- cken Sie oder eine beliebige Taste.
-
Page 16: Telefonbuch Und Netzanbieterliste
Telefonbuch und Netzanbieterliste Das Telefonbuch erleichtert Ihnen das Wählen von bis zu 200 Rufnummern. In der Netzanbieterliste können Sie die Vorwahl- nummern (Call-by-Call ) von Telefongesellschaften speichern. Die Bedienung von Telefonbuch und Netzan- bieterliste ist identisch. Eintrag speichern Telefonbuch/Netzanbieterliste öff- nen. -
Page 17: Schnellwahl Aus Der Netzanbieterliste
Mit Netzanbieterliste wählen (Call-by-Call) Netzanbieterliste aufrufen. © Call-by-Call-Nummer auswählen und Menü öffnen. Auswählen und bestätigen. Nr. verwenden Rufnummer des gewünschten Teilnehmers eingeben. oder Rufnummer aus Telefonbuch aus- wählen und bestätigen. Abheben-Taste drücken. Die Ruf- nummer wird gewählt. Schnellwahl aus der Netzanbieterliste Sie können sich in der Netzanbieterliste 8 Nummern für die Schnellwahl speichern. - Page 18 Zeichentabelle Entsprechende Taste mehrmals bzw. lang drücken: 1 x 2 x 3 x 4 x 5 x 6 x 7 x 8 x 9 x 10 x â Leer- £ ¥ ¤ zei- chen Ÿ ä á à â ã ç...
- Page 19 Eintrag anzeigen, ändern oder löschen Telefonbuch/Netzanbieterliste öff- nen. Gewünschten Eintrag auswählen. Ansehen Alle Informationen zum Eintrag anzeigen. Ändern Das Eingabefeld öffnen und die gewünschten Änderungen vor- nehmen. Ggf. Rufnummer ändern. Ins Namensfeld springen und Name ändern. Eingabe von Buchstaben und Zei- chen, s.
- Page 20 Weiteren Eintrag senden: Drücken. Gewünschten Eintrag auswählen. Senden Sendevorgang einleiten. Telefonbuch/Netzanbieterliste senden: Sie können das ganze Telefonbuch/Netzanbieterliste an ein anderes Comfort-Mobilteil übertragen. Siehe „Eintrag an ein anderes Mobilteil senden“ . Die Übertragung wird abgebrochen, wenn: der Speicher des Empfänger-Mobilteils voll ist Sie angerufen werden.
- Page 21 Jahrestage (z. B. Geburtstage) eingeben Sie können Datum und Uhrzeit für Jahrestage abspeichern und sich daran erinnern lassen. Telefonbuch öffnen. DAnsehen Eintrag auswählen und anzeigen. Ändern Das Eingabefeld öffnen. Schreibmarke ins Feld für den Geburtstag/Jahrestag bewegen. Ändern Bestätigen. Datum (Tag/Monat) eingeben oder ändern.
-
Page 22: Einstellungen
Einstellungen Wecker einstellen Sie können Ihr Mobilteil als Wecker nutzen. Wecker aktivieren Ist an Ihrem Mobilteil eine Weckzeit eingestellt ¼ (Symbol ), klingelt es täglich zur gleichen Uhrzeit. Das Mobilteil befindet sich im Ruhezustand: © Menü öffnen. Auswählen und bestätigen. Termine/Uhr Auswählen und bestätigen. -
Page 23: Weckruf Ausschalten
Weckruf ausschalten Ein Weckruf wird wie ein ankommender Ruf signali- siert. Drücken Sie eine beliebige Taste, um den Weck- ruf auszuschalten. Termin einstellen Sie können sich von Ihrem Mobilteil an einen Termin erinnern lassen. Ein eingestellter Termin wird mit dem ¼... -
Page 24: Hörer- Und Lautsprecher-Lautstärke
Nicht angenommene Termine und Jahrestage Ein Termin und Jahrestage, die vom Mobilteil signali- siert aber nicht angenommen wurden, werden in ei- ner Liste gespeichert Ein neuer nicht angenommener Termin/Jahrestag Termin wird mit angezeigt. Drücken Sie die rechte Dis- play-Taste, die Liste der Ereignisse wird angezeigt. ¼... -
Page 25: Rufton-Lautstärke/-Melodie Einstellen
Rufton-Lautstärke/-Melodie einstellen Sie können zwischen fünf Rufton-Lautstärken, „Cre- scendo“-Ruf (Lautstärke wird lauter), Rufton aus, und zehn Rufton-Melodien wählen: © Menü öffnen. Auswählen und bestätigen. Audio Die aktuelle Rufton-Lautstärke Rufton einst. ertönt und wird angezeigt. Rufton-Lautstärke auswählen. Eine Zeile nach unten springen. Sichern Gewünschte Rufton-Melodie (1–10) auswählen und bestätigen. -
Page 26: Warn- Und Signalltöne Ein-/Ausschalten
Warn- und Signalltöne ein-/ausschalten Tastenklick: Jeder Tastendruck wird bestätigt. Quittungstöne: Bestätigungston (aufsteigende Tonfolge) am Ende von Eingaben/Einstellungen und beim Einlegen des Mobilteils in die Basis; Fehlerton (absteigende Tonfolge) bei Fehleingaben. Akkuwarnton: Der Akku muss geladen werden. © Menü öffnen. Auswählen und bestätigen. Audio Auswählen und bestätigen. -
Page 27: In Den Lieferzustand Zurücksetzen
In den Lieferzustand zurücksetzen Das Telefonbuch, die Netzanbieterliste und die Anru- ferliste werden beim Zurücksetzen nicht gelöscht. Die Anmeldung an der Basis bleibt erhalten. © Menü öffnen. Auswählen und bestätigen. Einstellungen Auswählen und bestätigen. Mobilteil-Reset Sicherheitsabfrage bestätigen. Funktion Lieferzustand Hörer-Lautstärke Rufton-Lautstärke Rufton-Melodie Automatische Rufannahme... -
Page 28: Babyfon Einstellen
Babyfon einstellen © Menü öffnen. Auswählen und bestätigen. Familie/Freizeit Auswählen und bestätigen. Babyfon oder wählen. Eine Zeile nach unten springen. Ändern Eingabefeld für Rufnummer öff- nen. Eine bereits vorhanden externe Rufnummer mit löschen. Eine bereits vorhanden interne Rufnummer mit löschen (Si- cherheitsabfrage). -
Page 29: Walkie-Talkie-Modus
Walkie-Talkie-Modus Mit dieser Funktion wird die kostenlose Kommunika- tion zwischen Mobilteilen (nur Gigaset 4000i Comfort) außerhalb der Reichweite der Basis ermöglicht. Im Walkie-Talkie-Modus sind die Mobilteile für kommen- de Rufe nicht mehr erreichbar. Voraussetzung: Die Mobilteile haben die selben Basiseinstellungen (z. -
Page 30: Anhang
Anhang Betrieb an Basen der Gigaset-Familie Gigaset 1000/2000/3000 Folgende Funktionen Ihres 4000i Comfort-Mobilteil werden nicht von Basen dieser Gigaset-Familie unter- stützt. Uhrzeiteinstellung (nach Ausschalten des Mobilteils wird die Uhrzeit nicht mehr übermittelt) Sprachwahl Babyfon (kann von extern nicht ausgeschaltet wer- den) SMS Übermittlung (nur SMS-fähige Basen)* Gigaset 4010/4015 Classic... -
Page 31: Pflege
Pflege Wischen Sie Basis und Mobilteil mit einem feuchtem Tuch oder einem Antistatiktuch ab. Benutzen Sie nie ein trockenes Tuch! Es besteht die Gefahr der stati- schen Aufladung! Kontakt mit Flüssigkeit Sollte das Mobilteil mit Flüssigkeit in Kontakt gekom- men sein, auf keinen Fall das Gerät einschalten. -
Page 32: Reichweite
Einfache und unkomplizierte Unterstützung bei Fragen zur Technik und zur Bedienung Ihres Gerätes erhalten Sie über unseren Online Support im Internet: www.my-siemens.com/customercare Im Falle einer notwendigen Reparatur wenden Sie sich bitte an eines unserer Service Centren. Service-Telefonnummern s. Umschlagseite hinten. -
Page 33: Display-Sprachen
Display-Sprachen Bei Anmeldung des Mobilteils an die Basisstation Gigaset 4010i können die mit * gekennzeichneten Sprachen eingestellt werden: Einstellungen Sprache Deutsch H/Set Settings Language English Réglages comb. Langue Français Impostazioni Lingua Italiano Ajuste terminal Idioma Español... - Page 34 Be inspired Istruzioni d’uso e di sicurezza...
-
Page 35: Breve Descrizione
Breve descrizione Il display è protetto da una pellicola. Toglierla! Livello di carica LED di stato scarica acceso in conversaz.; carica lampeggia in caso di: lampeggia: avviso – chiamate entranti Tasti display – nuovi messaggi con i tasti del – sveglia, appunta- display potete menti, anniversari accedere alle... - Page 36 Menu importanti © Msg.testo/SMS* Nuova voce Servizi di rete Anna Barbara BabyC o WalkieT © Appuntam/ora Claus Audio OKƒ Addebiti* Utilizza Numero Impostazioni Cancellazione Impost.base Trasferisci Segreteria Cancella Tutto Trasfer.Tutto Volume telefono Memoria Libera Impost.suoneria Toni di avviso Attenzione: I „Servizi di rete“ devono essere suppor- tati dalla rete del vostro operatore ed in alcuni casi soggetti ad abbonamento con l’operatore stesso.
-
Page 37: Simboli Del Display
Simboli del display A seconda dello stato operativo in cui vi trovate, sopra i tasti del display possono apparire i seguenti simboli: Significato Tasti del display ¨ Tasto del menu: aprire il menu generale in stand by. Aprire un menu dipendente dallo stato ope- rativo durante la conversazione. -
Page 38: Istruzioni Di Sicurezza
Istruzioni di sicurezza Utilizzare soltanto l’alimentatore in dota- zione, come indicato sul lato inferiore dell’apparecchio. Utilizzare soltanto batterie consigliate ricari- cabili dello stesso tipo. Ciò significa, non uti- lizzare in nessun caso batterie comuni (non ricaricabili), poiché possono causare danni alla salute e alle persone. - Page 39 Indice Breve descrizione ......2 Tasto di navigazione e tasti del display ... 2 Menu importanti .
-
Page 40: Preparare Il Portatile
Preparare il portatile Contenuto della confezione Portatile Gigaset 4000i Comfort, due batterie, carica- batterie, clip da cintura, istruzioni d’uso. Inserire le batterie (registrazione automatica) Inserire le batterie con la polarità indicata – vedi figura a sinistra. Appoggiare il coperchio e farlo scorrere verso l’alto fino ad incastrarlo. -
Page 41: Applicare La Clip Da Cintura
La tabella dei tipi di batterie raccomandate è riportata nell’appendice Una volta eseguita la prima carica potete riporre il portatile nella base/caricabatterie dopo ogni chia- mata. La carica è controllata elettronicamente. Ciò garantisce una gestione ottimale delle batterie. Durante la carica, le batterie si riscaldano; ciò è nor- male e non comporta pericoli. -
Page 42: Impostare La Data E L'ora
Impostare la data e l’ora L ’impostazione della data e dell’ora serve per vedere quando sono giunti i messaggi/le chiamate. © Aprire il menu. Scegliere e confermare. Appuntam/ora Scegliere e confermare. Impostare ora Viene visualizzata l’impostazione corrente. Inserire la data Inserire giorno/mese/anno. -
Page 43: Bloccare/Sbloccare La Tastiera
Bloccare/sbloccare la tastiera La tastiera del portatile può essere “bloccata“. Quan- do giunge una chiamata la tastiera si sblocca automa- ticamente e una volta terminata la conversazione si blocca di nuovo. ª Per bloccare/sbloccare la tastiera premere a lungo il tasto cancel- letto Per rispondere alle chiamate premere il tasto Cambiare la lingua del display... -
Page 44: Registrare Il Portatile
Registrare il portatile Per poter telefonare con il portatile, esso va dapprima “reso noto“ alla sua stazione base (registrato). Se il vostro portatile era già registrato su un’altra base (eseguire i passi 1, 2 e 3), se il vostro portatile deve essere registrato su una base Gigaset della serie precedente (eseguire i passi 1, 2 e 3). -
Page 45: Telefonare
Telefonare Telefonare sulla linea esterna Comporre il numero di telefono. Se necessario correggere con il tasto del display Premere il tasto di impegno linea. Per terminare la conversazione, premere il tasto di fine chiamata. Potete anche premere dapprima il tasto di impe- gno linea e comporre poi il numero di telefono –... -
Page 46: Rispondere Alle Chiamate
Rispondere alle chiamate Il vostro telefono squilla e il LED di stato lampeggia. Premere il tasto di impegno linea o quello del viva voce. opp. Ä Sollevare il portatile dalla base/ Ö caricabatterie (impostazione all’acquisto: “Risposta automa- tica“). Aprire la lista delle chiamate/messaggi La presenza di nuove chiamate viene segnalata da un simbolo del display e dal lampeggiamento del LED di stato. -
Page 47: Trasferire Le Chiamate Esterne, Consultazione
Viva voce durante la conversazione Attivare il viva voce. Per regolare il volume premere di nuovo il tasto viva voce U. Regolare il volume. Salvare il volume impostato. Salva Passare dal viva voce all’aurico- lare. Terminare la chiamata. Trasferire le chiamate esterne, consultazione Il telefono consente di trasferire le chiamate esterne ad un altro portatile o effettuare consultazioni interne. - Page 48 Ripetizione automatica della selezione Questa funzione non è disponibile in tutti i Paesi. Il tasto viva voce lampeggia e si attiva l’altoparlante. La funzione si disattiva dopo dieci tentativi non riu- sciti o se nel frattempo viene svolta una conversa- zione telefonica.
-
Page 49: Rubrica E Rubrica Speciale
Rubrica e rubrica speciale La rubrica vi facilita e rende più rapida la selezione di 200 numeri di telefono. Nella rubrica speciale C potete registrare i prefissi (Call-by-Call)* degli operatori di rete e telefonare così a tariffe più convenienti. L ’uso delle due rubriche è ugua- Registrare un numero Aprire la rubrica/rubrica speciale. -
Page 50: Selezione Rapida Dalla Rubrica Speciale
Selezionare i prefissi dalla rubrica speciale (Call-by-Call) Aprire la rubrica speciale. D© Scegliere il numero Call-by-Call e aprire il menu. Scegliere e confermare. Utilizza Numero Comporre il numero di telefono desiderato. oppure Scegliere il numero dalla rubrica e confermare. Premere il tasto di impegno linea Il numero viene selezionato. - Page 51 Tabella dei caratteri Premere più volte o a lungo il tasto corrispondente: 1 x 2 x 3 x 4 x 5 x 6 x 7 x 8 x 9 x 10 x â spazio £ ¥ Ÿ ä á à â...
- Page 52 Visualizzare, modificare o cancellare una voce Aprire la rubrica/rubrica speciale. Scegliere la voce desiderata. Visualiz. Visualizzare tutte le informazioni riguardanti la voce. Cambia Aprire l’area da modificare. Eventualmente modificare il numero di telefono. Passare al campo del nome e modificare il nome. Per inserire lettere e segni, v.
- Page 53 Per trasferire un’altra voce: Premere. Scegliere la voce desiderata. Invio Avviare il trasferimento. Trasferire la rubrica/rubrica speciale Ad un altro portatile comfort può essere trasferita an- che l’intera rubrica/rubrica speciale. Vedi “Trasferire voci ad un altro portatile“ . Il trasferimento viene interrotto se la memoria del portatile di destinazione è...
- Page 54 Inserire anniversari (per esempio compleanni) Il telefono vi consente di memorizzare date da ricorda- re che vi verranno segnalate al momento impostato. Aprire la rubrica. Visualiz. Scegliere e visualizzare la voce. Cambia Aprire il numero a cui associare la data da ricordare. Spostare il cursore nel campo del compleanno/anniversario (il cur- sore scompare).
-
Page 55: Impostazioni
Impostazioni Impostare la sveglia Il portatile è dotato anche della funzione di sveglia. Attivare la sveglia ¼ Se nel portatile è impostata la sveglia (simbolo essa suonerà tutti i giorni alla stessa ora. Il portatile è in stand by © Aprire il menu. -
Page 56: Spegnere La Sveglia
Spegnere la sveglia La sveglia viene segnalata come una chiamata in en- trata. Per spegnerla premere un tasto a piacere. Impostare un appuntamento Nel portatile potete anche impostare un appunta- ¼ mento. Esso viene indicato dal simbolo Il portatile è in stand by. ©... -
Page 57: Volume Di Auricolare E Altoparlante
Spegnere la segnalazione dell’appuntamento L ’appuntamento viene segnalato come una chiamata in entrata. Lo squillo può essere interrotto premendo un tasto qualsiasi. Appuntamenti e anniversari scaduti Appuntamenti e anniversari segnalati dal telefono in vostro assenza, vengono salvati in una lista. Un nuovo appuntamento/anniversario scaduto in vostra Appunt. - Page 58 Impostare il volume/la melodia della suoneria Potete scegliere tra cinque volumi della suoneria, “Crescendo“ (aumento progressivo del volume), Suoneria spenta e tra dieci melodie: © Aprire il menu. Scegliere e confermare. Audio La suoneria si attiva sul volume Impost.suoneria impostato e viene visualizzato il livello attuale.
-
Page 59: Attivare/Disattivare I Toni Di Avviso E Di Segnalazione
Attivare/disattivare i toni di avviso e di segnalazione Tono tasti: la pressione dei tasti viene confermata acusticamente. Toni di conferma: tono di conferma (sequenza cre- scente) che viene emesso alla fine di un’operazio- ne/impostazione e quando viene riposto il portatile nella base. -
Page 60: Ripristinare I Parametri Iniziali
Ripristinare i parametri iniziali La rubrica, la rubrica speciale e la lista delle chiamate non vengono cancellate. Il portatile resta registrato nella base. © Aprire il menu. Scegliere e confermare. Impostazioni Scegliere e confermare. Reset Portatile Confermare la richiesta. Funzione Parametri iniziali Volume dell’auricolare Volume della suoneria... -
Page 61: Impostare Il Babycall
Impostare il Babycall © Aprire il menu. Scegliere e confermare. BabyC o WalkieT Scegliere e confermare. Baby Call Scegliere oppure Passare alla riga successiva. Cambia Aprire il campo di inserimento del numero di telefono a cui inviare l’allarme. Cancellare con eventuali nu- meri esterni già... -
Page 62: Modalità Walkie-Talkie
Modalità Walkie-Talkie Questa funzione consente di comunicare tra portatili (solo Gigaset 4000i Comfort) fuori dall’area di copertu- ra della base. Le comunicazioni non comportano adde- biti. Nella modalità Walkie-Talkie i portatili non possono ricevere chiamate. Premessa: I portatili hanno le stesse impostazioni della base (per esempio Staz.Migliore), o non sono registrati su nes- suna stazione (la modalità... -
Page 63: Appendice
Appendice Funzionamento con le basi della gamma Gigaset Gigaset 1000/2000/3000 Le basi di questa gamma Gigaset non supportano le seguenti funzioni del portatile 4000i Comfort. Impostazione dell’ora (se l’ora e’ inserita viene persa spegnendo il portatile) Impostazione della lingua Babycall (non può essere disattivato dall’esterno) Trasmissione SMS (solo le basi con funzione SMS)* Gigaset 4010/4015 Classic Queste basi non supportano le seguenti funzioni del... -
Page 64: Cura
Cura Pulire la base e il telefono portatile con un panno umi- do o antistatico. Non utilizzare in nessun caso un pan- no asciutto poichè creando cariche elettrostatiche po- trebbe danneggiare l’apparato. Contatto con liquidi Se il portatile dovesse essere venuto a contatto con dei liquidi, non accenderlo in nessun caso. -
Page 65: Portata
Internet: www.my-siemens.com/customercare Nel caso sia necessaria una riparazione, rivolgetevi ad uno dei nostri centri di servizio. Numeri di telefono del servizio clienti: vedi la coper- tina di fondo. -
Page 66: Lingue A Display
Lingue a display Durante la registrazione del portatile sulla stazione di base del Gigaset 4010i si possono impostare le lingue identificate con *. Einstellungen Sprache Deutsch H/Set Settings Language English Réglages comb. Langue Français Impostazioni Lingua Italiano Ajuste terminal Idioma Español... - Page 67 Be inspired Mode d’empoi et consignes de sécurité...
-
Page 68: Présentation
Présentation L ’écran est protégé par un film. Retirez le film ! LED état (DEL) Niveau de charge = vide e 1/3 Fixe : U pleine V 2/3 – en communication clignotante : Clignotante : attention – Appel entrant Touches écran –... -
Page 69: Menus Importants
Menus importants © SMS/Messg. txt * <Nouv. entrée> Services réseau Anna Famille/Loisirs Barbara RDV/Heure © Claus Sons / Audio OKƒ Coûts Utiliser le N° Réglages comb. Effacer entrée Réglages base Copier entrée Répondeur Effacer liste Copier liste Volume écoute Mémoire dispo. Régl. -
Page 70: Consignes De Sécurité
Consignes de sécurité Utiliser exclusivement le bloc-secteur fourni comme indiqué sous la base par le symbole. Utiliser uniquement des batteries homolo- guées (rechargables)! Ne jamais utiliser des piles normales (non rechargeables) qui peuvent endommager l'appareil, représenter un risque pour la santé et provoquer des blessures. Placer les batteries en respectant la polarité... - Page 71 Sommaire Présentation ......2 Touche de navigation et touches écran ..2 Menus importants .
- Page 72 Annexe........30 Utilisation sur les bases de la gamme Gigaset ..30 Entretien .
-
Page 73: Préparer Le Combiné
Préparer le combiné Contenu de l’emballage Combiné Gigaset 4000i Comfort, deux batteries, char- geur, clip ceinture, mode d’emploi. Insérer les batteries (déclaration automatique) Placer les batteries en respectant la polarité – voir figure de gauche. Positionner le couvercle en le décalant vers le haut jusqu’à... -
Page 74: Fixer Le Clip Ceinture
Une liste des batteries préconisées figure en annexe. Une fois la première charge effectuée, vous pouvez reposer votre combiné sur la base/le chargeur après chaque communication. La charge est gérée électroniquement. Cela garantit une charge optima- le et sans risque de la batterie. Les batteries s’échauffent durant la charge ;... -
Page 75: Régler La Date Et L'heure
Régler la date et l’heure Vous devez régler la date et l’heure afin que soit affi- ché correctement le moment de réception des mes- sages/appels. © Ouvrir le menu. Sélectionner et valider. RDV/Heure Sélectionner et valider. Date/Heure Le réglage actuel s’affiche. Entrer la date Entrer le jour/le mois/l’année. -
Page 76: Affichage : Choisir La Langue
Affichage : choisir la langue Les combinés supplémentaires sont universels et identiques quel que soit le pays de destination. ils sont configurés d'origine en langue Anglaise et doi- vent de ce fait être localement réglés lors de la mise en service. Pour ce faire suivre les instructions suivan- tes en s'aidant du tableau de correspondance. -
Page 77: Déclarer Le Combiné
Déclarer le combiné Pour pouvoir téléphoner avec un combiné, il faut préa- lablement "l’inscrire" sur la base (déclaration). Si votre combiné est déjà déclaré sur une autre base, (étapes 1, 2 et 3), si votre combiné doit être déclaré une nouvelle fois sur une base Gigaset des gammes antérieures (étapes 1, 2 et 3). -
Page 78: Téléphoner
Téléphoner Appel externe Cette fonction n'est possible que pour une configura- tion système multi-combinés (maxi 6 combinés décla- rés sur la même base). Entrer le numéro. Si nécessaire, corriger certains caractères avec la touche écran Appuyer sur la touche "Décrocher". Pour mettre fin à... -
Page 79: Accepter Un Appel Entrant
Accepter un appel entrant Votre téléphone sonne (sonnerie) et la LED d’état clignote. Appuyer sur la touche "Décro- cher" ou "Mains-libres". Ä Ö Soulever uniquement le combiné de la base/du chargeur (configuration usine : "Décroché automatique"). Journal des appelants/messages Les nouveaux appels/messages sont signalés à l'écran par le pictogramme et par le clignotement de la LED d’état. -
Page 80: Double Appel Interne/Transfert
Mains-libres en cours de communication Activer la fonction Mains-libres. Régler le volume : Appuyer de nouveau sur la touche Mains-libres u. F / G Régler le volume. Enregistrer le volume réglé. Sauver Passer de l’écoute Mains-libres à l’écoute sur le combiné Mettre fin à... -
Page 81: Répétition Automatique De La Numérotation
Répétition automatique de la numérotation Cette fonction n’est pas disponible dans tous les pays ! A chaque tentative, la touche Mains libres clignote et l’écoute amplifiée est activée. La fonction se désac- tive au bout de dix tentatives de numérotation in- fructueuses ou si une communication est établie entre-temps. -
Page 82: Annuaire Et Annuaire Spécial
Annuaire et Annuaire spécial L ’ Annuaire vous permet d’appeler de façon sim- plifiée jusqu’à 200 numéros (nombre fonction de la taille des entrées et des noms associés ou non dans le partage de la capacité mémoire). Dans l’annuaire spécial vous pouvez enregistrer au choix des numéros spéciaux tels que des numéros de services réseau, des numéros de têtes de ligne... -
Page 83: Annuaire Spécial : Touches De Raccourci
Numéroter à partir de l’ A nnuaire spécial (sélection appel par appel) Afficher l’ A nnuaire spécial. D© Sélectionner le numéro spécial et ouvrir le menu. Sélectionner et valider. Utiliser le N° Compléter en entrant le numéro du correspondant souhaité. Compléter avec un numéro sélec- tionné... -
Page 84: Editeur De Texte Et Numéros : Tableau Des Caractères
Editeur de texte et numéros : tableau des caractères Appuyer sur la touche correspondante plusieurs fois ou de manière prolongée : 1 x 2 x 3 x 4 x 5 x 6 x 7 x 8 x 9 x 10 x â... - Page 85 Afficher, modifier ou effacer l’entrée Ouvrir l’ A nnuaire/l’ A nnuaire spécial. Sélectionner l’entrée souhaitée. Afficher Afficher toutes les informations concernant l’entrée. Modifier Ouvrir le champ de saisie et effectuer les modifications sou- haitées. Si nécessaire, modifier le numéro. Passer dans le champ de saisie du nom et modifier ce dernier.
- Page 86 Copier une autre entrée : Appuyer sur la touche. Sélectionner l’entrée souhaitée. Envoi Activer la copie. Copier l’ A nnuaire/Annuaire spécial Vous pouvez copier l’ A nnuaire ou l’ A nnuaire spécial complet sur un autre combiné de confort. Voir "Copier l’entrée sur un autre combiné". Sélection- ner "Copier liste "...
-
Page 87: Dates Anniversaires
Dates anniversaires Pour chaque entrée de l'annuaire, vous pouvez enre- gistrer la date et l'heure anniversaire pour qu'elles vous soient rappelées. Ouvrir l’annuaire. Afficher Sélectionner l’entrée et l’afficher. Modifier Ouvrir la zone de saisie. Placer le curseur dans la zone correspondant à... -
Page 88: Réglages
Réglages RDV/Heure Réveil : régler Vous pouvez utiliser votre combiné comme réveil (ou alarme). Réveil : activer Si une heure de réveil est programmée sur votre com- ¼ biné (symbole ), celui-ci sonne tous les jours à la même heure. Le téléphone est en mode veille: ©... -
Page 89: Réveil : Arrêt De La Sonnerie
Réveil : arrêt de la sonnerie Appuyer sur une touche quelconque pour interrompre la sonnerie du réveil. Rendez-vous (RDV) : activer Vous pouvez paramétrer le combiné de manière à ce qu’il vous rappelle un RDV. Si vous avez réglé un RDV, ¼... -
Page 90: Dates Échues Non Acquittées (Rdv/Anniversaires)
Dates échues non acquittées (RDV/Anniversaires) Les RDV ou anniversaires signalés à échéance par le combiné, mais que vous n'avez pas acquittés (en cas d'absence par exemple), sont enregistrés dans une liste de dates échues. Un nouveau RDV/Anniversaire non acquitté est notifié Dates ! sur l'afficheur par . - Page 91 Volume de la sonnerie Mélodie de la sonnerie Vous avez le choix entre cinq volumes de sonnerie, la sonnerie "Crescendo" (augmentation progressive du volume), la coupure de la sonnerie, et dix mélo- dies de sonnerie : © Ouvrir le menu. Sélectionner et valider.
-
Page 92: Tonalités D'avertissement
Tonalités d'avertissement Clic clavier : chaque appui sur une touche est confirmé. Tonalités d’acquittement : signal de confirmation (séquence de tons ascendante) à la fin des entrées/ réglages et lorsque l’on pose le combiné sur la base ; signal d’erreur (séquence de tons descen- dante) en cas d’entrée incorrecte. -
Page 93: Réinitialisation Du Combiné (Retour À La Configuration Usine)
Réinitialisation du combiné (retour à la configuration usine) L ’annuaire, l’annuaire spécial et la liste des appelants ne sont pas effacés lors de la réinitialisation. Les décla- rations effectuées sur la base sont conservées. © Ouvrir le menu. Sélectionner et valider. Réglages comb. -
Page 94: Famille/Loisirs
Famille/Loisirs Surveillance de pièce A l’aide de votre combiné, vous pouvez surveiller les bruits d'ambiance d'une pièce à partir d'une autre pièce ou à distance depuis l'extérieur.Si un certain niveau de bruit est atteint, le combiné sélectionne automatique- ment le numéro (interne /externe) enregistré par vous. -
Page 95: Mode Talkie-Walkie
Mode Talkie-Walkie Cette fonction permet la communication gratuite entre combinés (Gigaset 4000i Comfort uniquement) à l’ex- térieur de la zone de couverture de la base. En mode Talkie-Walkie, les combinés ne sont plus joignables pour les appels entrants. Condition: Les combinés possèdent les mêmes réglages de base (p. -
Page 96: Annexe
Annexe Utilisation sur les bases de la gamme Gigaset Gigaset 1000/2000/3000 Les fonctions suivantes de votre combiné de confort 4000i ne sont pas supportées par les bases Gigaset 1000/2000/3000. Réglage de l’heure (après mise à l’arrêt du combi- né, l’heure n’est plus transmise) Sélection de la langue Surveillance de pièce (désactivation en externe im- possible) -
Page 97: Entretien
Entretien Essuyer la base et le combiné avec un chiffon humi- de ou un chiffon antistatique. Ne jamais utiliser de chiffon sec ! Risque de charge statique ! Contact avec les liquides Si le poste mobile a été mis en contact avec un liquide, il ne faut en aucun cas le mettre en marche. -
Page 98: Temps D'utilisation/Temps De Charge Du Combiné
Si vous avez des questions techniques ou d'utilisation de votre appareil, le moyen le plus simple est de solli- citer l'assistance de notre site Internet: www.my-siemens.com/customercare Dans le cas où une réparation s'avérerait nécessaire, adressez-vous à l'un de nos centres de SAV. -
Page 99: Langues D'affichage
Langues d'affichage Lors de l'enregistrement du combiné portatif sur la base Gigaset 4010i, vous pouvez paramétrer les langues marquées d'un *: Einstellungen Sprache Deutsch H/Set Settings Language English Réglages comb. Langue Français Impostazioni Lingua Italiano Ajuste terminal Idioma Español... - Page 100 Be inspired Instrucciones de manejo e indicaciones de seguridad...
-
Page 101: Esquema General
Esquema general El display está protegido con una lámina de plástico. Retire la lámina de protección. Estado de carga LED de estado (diodo luminiscente) vacía Iluminado en llamada; llena intermitente para: Intermitente: aviso – Llamada entrante Teclas de display – Mensajes nuevos Mediante las te- –... -
Page 102: Símbolos Del Display
Menús importantes © Texto mensaje* Nuevo registro Servicios red Familia/ocio Bárbara © Claus Citas/hora Ajuste audio OKƒ Tasas Utilizar número Ajuste terminal Borrar registro Ajustes base Enviar registro Contestador Borrar lista Enviar lista Vol. teléfono Memoria libre Ajustar timbre Tonos de aviso Símbolos del display Según la situación aparecen sobre las teclas de display los siguientes símbolos:... -
Page 103: Indicaciones De Seguridad
Indicaciones de seguridad Utilice exclusivamente el alimentador enchufable incluido en el suministro, tal y como se indica en la parte inferior del equipo. Utilice sólo baterías recargables homologa- das y del mismo tipo. No utilice en ningún caso pilas normales (no recargables), ya que estas podrían dañar la salud y causar daños personales. - Page 104 Indice Esquema general ......2 Tecla de control y teclas de display ... . . 2 Menús importantes .
-
Page 105: Preparar El Terminal
Preparar el terminal Contenido del embalaje Terminal Gigaset 4000i Comfort, 2 baterías, soporte cargador, clip para cinturón, instrucciones de manejo. Colocar las baterías (registro automático) Coloque las baterías con la polaridad correcta – véase imagen izquierda. Coloque la tapa y empújela hacia arriba hasta que encaje. -
Page 106: Sujeción Del Clip Para El Cinturón
Tras el primer proceso de carga, puede colocar el terminal en la estación base/soporte cargador des- pués de cada comunicación. La carga se controla de forma electrónica, lo que garantiza una carga óptima y duradera de las baterías. Las baterías se calientan durante el proceso de car- ga;... -
Page 107: Ajustar Fecha Y Hora
Ajustar fecha y hora El ajuste de la fecha y la hora es necesario para obte- ner una indicación correcta de la hora de entrada de las llamadas/los mensajes. © Abrir el menú. Seleccionar y confirmar. Citas/hora Seleccionar y confirmar. Fecha/hora Se visualiza el ajuste actual. -
Page 108: Activar/Desactivar Bloqueo Del Teclado
Activar/desactivar bloqueo del teclado El teclado del terminal se puede "bloquear“. Al entrar una llamada, el bloqueo del teclado se desactiva au- tomáticamente, activándose de nuevo al terminar la comunicación. ª Pulsar prolongadamente para activar/desactivar Contestar llamada: Pulsar la tecla de descolgar Modificar el idioma del display ©... -
Page 109: Dar De Alta El Terminal
Dar de alta el terminal Para poder realizar llamadas con su terminal inalámbri- co debe "identificarlo" (darlo de alta) en la estación base. Si el terminal inalámbrico ya está dado de alta en otra estación base (paso 1, 2 y 3), si desea dar de alta el terminal en una estación base Gigaset de un modelo anterior (paso 1, 2 y Paso 1: En la estación base o el teléfono base:... -
Page 110: Realizar Llamadas
Realizar llamadas Llamadas externas Introducir el número de teléfono. Si es necesario, corregir dígitos con la tecla de display Pulsar la tecla de descolgar. Pulsar la tecla de colgar para final- izar la comunicación. También es posible pulsar primero la tecla de descolgar e introducir a continuación el núme- ro de teléfono, las cifras se marcarán entonces de... -
Page 111: Contestar Llamadas
Contestar llamadas El teléfono suena (timbre de llamada) y el LED de estado parpadea. Pulsar la tecla de descolgar o de manos libres. o bien Ä retirar simplemente el terminal Ö de la estación base/soporte car- gador (estado suministro: "Acep- tación automática de llamadas“). -
Page 112: Transferir Una Llamada Externa, Consulta
Manos libres durante la llamada Activar manos libres. Ajustar volumen: Pulsar nuevamente la tecla manos libres u. Ajustar volumen. Guardar volumen ajustado. Guardar Conmutar de manos libres al servicio con microteléfono Finalizar la llamada. Transferir una llamada externa, consulta Es posible transferir llamadas externas a otro terminal inalámbrico o realizar llamadas internas de consulta. - Page 113 Rellamada automática Esta función no está disponible en todos los países. La tecla de manos libres parpadea y se activa la escu- cha por altavoz. La función se desactiva tras diez in- tentos sin resultado o bien si entretanto se realiza una llamada.
-
Page 114: Listín Telefónico Y Lista De Proveedores De Red
Listín telefónico y lista de proveedores de red El listín telefónico le facilita la marcación de hasta 200 números de teléfono. En la lista de proveedores de red se pueden pro- gramar los prefijos (call-by-call)* de diferentes compa- ñías telefónicas. El manejo del listín telefónico y de la lista de proveedores de red es idéntico. -
Page 115: Marcación Rápida De La Lista De Proveedores De Red
Marcar con la lista de proveedores de red (call-by-call) Abrir la lista de proveedores de red. D© Seleccionar número call-by-call y abrir el menú. Seleccionar y confirmar. Utilizar número Introducir el n° de teléfono del usuario deseado. o bien Seleccionar el número de telé- fono del listín telefónico y confer- mar. - Page 116 Tabla de símbolos Pulsar la tecla correspondiente varias veces o de for- ma prolongada: 1 x 2 x 3 x 4 x 5 x 6 x 7 x 8 x 9 x 10 x â £ ¥ ¤ Espa- cios blan- Ÿ...
- Page 117 Mostrar, modificar o borrar registro Abrir el listín telefónico/la lista de proveedores de red. Seleccionar el registro deseado. Mostrar todos los datos relativos al registro. Cambiar Abrir el campo de entrada y efec- tuar los cambios necesarios. Modificar el número de teléfono. Saltar al campo de nombre y cambiar el nombre.
- Page 118 Enviar registros adicionales: Sí Pulsar. Seleccionar el registro deseado. Enviar Iniciar proceso de transmisión. Enviar listín telefónico/lista de proveedores de red También puede transmitir el listín telefónico comple- to o la lista de proveedores de red a otro terminal Comfort. Véase "Enviar registro a otro terminal inalámbrico“...
- Page 119 Introducir aniversarios (p.ej. cumpleaños) Puede introducir la fecha y la hora para los datos de cumpleaños/aniversarios y hacer que el teléfono le avi- Abrir el listín telefónico. Seleccionar el registro deseado y mostrar. Cambiar Abrir campo de entrada. Mover el cursor al campo del cumpleaños/aniversario.
-
Page 120: Ajustes
Ajustes Ajustar alarma El terminal inalámbrico se puede utilizar como desper- tador. Activar el despertador Si ha ajustado una hora en el despertador de su termi- ¼ nal inalámbrico (símbolo ), el timbre sonará todos los días a la misma hora. El teléfono se encuentra en estado de reposo: ©... -
Page 121: Desactivar La Llamada De Alarma
Desactivar la llamada de alarma La llamada de alarma se indica como una llamada entrante. Pulse cualquier tecla para apagar el timbre de alarma. Ajustar cita Puede ajustar su terminal móvil para que le recuerde una cita. Si ha ajustado una cita, ésta se visualizará ¼... -
Page 122: Volumen Del Microteléfono Y Del Altavoz
Indicar citas y aniversarios no aceptados Las citas y aniversarios que el terminal inalámbrico ha indicado pero que Ud. no ha aceptado se guardan en una lista. Las citas/aniversarios nuevos no aceptados se indican Cita . Pulsar la tecla derecha del display, se mues- tra la lista de aniversarios. - Page 123 Ajustar volumen del timbre/melodía Puede elegir entre cinco niveles de volumen de timbre, la llamada "progresiva" (volumen en au- mento), timbre desactivado, y diez melodías de timbre: © Abrir el menú. Seleccionar y confirmar. Ajuste audio Se reproduce el volumen del Ajustar timbre timbre actual y se visualiza.
-
Page 124: Activar/Desactivar Tonos De Aviso Y Señales Acústicas
Activar/desactivar tonos de aviso y señales acústicas Tono de confirmación de teclas: se confirma cada pulsación de tecla. Tonos de confirmación: Tono de confirmación (se- cuencia de tonos ascendente) al final de las entra- das/ajustes y al depositar el terminal en la estación base;... -
Page 125: Reposición Del Estado De Suministro
Reposición del estado de suministro El listín telefónico, la lista de proveedores de red y la lista de llamantes no se borran en la reposición. El re- gistro en la estación base se mantiene. © Abrir el menú. Seleccionar y confirmar. Ajuste terminal Seleccionar y confirmar. -
Page 126: Ajustar Babyphone
Ajustar babyphone © Abrir el menú. Seleccionar y confirmar. Familia/ocio Seleccionar y confirmar. Vigilan. habit. Seleccionar Sí Saltar una línea hacia abajo. Cambiar Abrir campo de entrada para el n° de teléfono. Borrar un número externo ya programado. Borrar un número externo ya pro- gramado con Borrar un número interno ya pro- Sí... -
Page 127: Modo Walkie-Talkie
Modo walkie-talkie Esta función permite la comunicación gratuita entre terminales inalámbricos (sólo Gigaset 4000i Comfort) fuera del alcance de la estación base. En el modo wal- kie-talkie, los terminales no pueden recibir llamadas entrantes. Requisito: Los terminales tienen los mismos ajustes de estación base (p. -
Page 128: Anexo
Anexo Operación con estaciones base de la gama Gigaset Gigaset 1000/2000/3000 Las siguientes funciones de su teléfono inalámbrico 4000i Comfort no se ofrecen en las estaciones base de esta gama Gigaset. Ajuste de la hora (tras apagar el terminal inalámbri- co, la hora deja de visualizarse) Marcación por voz Babyphone (no puede desactivarse desde el exte-... -
Page 129: Cuidados
Cuidados Limpie la estación base y el terminal inalámbrico con un paño húmedo o un paño antiestático. No utilice en ningún caso un paño seco. Existe peligro de que se forme carga estática. Contacto con líquido Contacto con líquido: Si el terminal inalámbrico entrara en contacto con líqui- no conectar en ningún caso el aparato. -
Page 130: Alcance
Internet www.my-siemens.com/customercare En caso de ser necesaria una reparación, sírvase diri- girse a uno de nuestros centros de servicio. - Page 131 Idiomas de display Al registrarse en la estación base 4010i pueden ajus- tarse los idiomas marcados con *. Einstellungen Sprache Deutsch H/Set Settings Language English Réglages comb. Langue Français Impostazioni Lingua Italiano Ajuste terminal Idioma Español...
- Page 132 Be inspired Operating Instructions and safety precaution...
-
Page 133: Brief Overview
Brief overview The display is protected by a plastic film. Remove the plastic film. Charging status Status LED flat Lights up during a call; full flashes for: flashes: Caution – incoming calls Display keys – new messages The display keys –... -
Page 134: Display Symbols
Important menus © Text Message* New Entry Select Services Anne Add. Features Barbara © Chris Calendar/Clock Sound Settings OKƒ Call Charges Display Number H/Set Settings Delete Entry Base Settings Copy Entry Voice Mail Delete List Send List Handset Volume Available Memory Ringer Settings Advisory Tones Display symbols... -
Page 135: Safety Precautions
Safety precautions Only use the power supply unit supplied as indicated on the underside of the device. Only insert approved rechargeable batteries of the same type. Never use ordinary (non- rechargeable) batteries as they may pose a health hazard or cause injury. ‹... - Page 136 Contents Brief overview ......2 Control key and display keys ....2 Important menus .
-
Page 137: Preparing The Handset
Preparing the handset Delivery package Gigaset 4000i Comfort handset, two batteries, charg- ing unit, belt clip, operating instructions. Inserting the batteries (automatic registration) Make sure you insert the batteries the right way round – see diagram on the left. Replace the cover and push gently upwards until it clicks into place. -
Page 138: Attaching The Belt Clip
See the appendix for a list of recommended batteries. Once the initial charging process is completed you can replace your handset in the base station/ charging unit after each call. Charging is controlled electronically. This ensures optimum charging and prolongs battery life. The batteries heat up during charging. -
Page 139: Setting The Date And Time
Setting the date and time You need to set the date and time so that the time that messages and calls are received is shown correctly. © Open the menu. Select and confirm. Calendar/Clock Select and confirm. Date/Time The current setting is shown. Enter the date Enter the day/month/year. -
Page 140: Activating/Deactivating The Keypad Lock
Activating/deactivating the keypad lock You can disable the handset keypad. If there is an in- coming call, the key lock is automatically deactivated and re-activated after the call has ended. ª To activate/deactivate, hold down key Accepting a call: Press the talk key Changing the display language ©... -
Page 141: Registering The Handset
Registering the handset To make calls with your handset, you must “intro- duce” it to its base station (registering) if your handset has already been registered at a dif- ferent base station (steps 1, 2 and 3) or if you want to register the handset as a new hand- set at a Gigaset base station of an older Gigaset range (steps 1, 2 and 3). -
Page 142: Making Calls
Making calls Making an external call Enter the telephone number. If you make a mistake use the key to correct individual digits. Press the talk key. Press the end call key to end the call. You can also press the talk key first and then enter the telephone number - each digit will be di- alled immediately. -
Page 143: Answering A Call
Answering a call Your telephone will ring (ringing tone) and the status LED will flash. Press the talk key or handsfree key. ÖÄk Simply remove the handset from the base station/charging unit (factory setting: “Auto talk”). Open caller list/message list A message appears in the display and the status LED flashes to indicate that there are new calls/messages. -
Page 144: Forwarding An External Call, Enquiry Call
Handsfree talking during a call Activate handsfree talking. To set the volume: Press the handsfree key u once more. Raise or lower the volume. Save the volume level. Save Change from handsfree talking to the handset End the call. Forwarding an external call, enquiry call You can forward an external call to another handset or make an internal enquiry call. - Page 145 Automatic redial This function is not available in all countries. The handsfree key flashes and open listening is acti- vated. The function is deactivated after ten unsuc- cessful call attempts or if a call was made in the meantime. Press or any key if the person you called is not avail- able.
-
Page 146: Directory And Network Access List
Directory and network access list With the directory you can store up to 200 tele- phone numbers and then dial them at the push of a button. You can save the prefixes (Call-by-Call) of telephone companies in the network access list . -
Page 147: Dialling With Speed Dialling
Dialling with the network access list (Call-by-Call) Open the network access list. D© Select call-by-call number and open the menu. Select the menu item and Display Number confirm. Enter the telephone number of the person you want to call. Select the telephone number in directory and confirm. -
Page 148: Character Map
Character map Press the relevant key repeatedly or hold down: 1 x 2 x 3 x 4 x 5 x 6 x 7 x 8 x 9 x 10 x â blank £ ¥ ¤ Ÿ ä á à â ã... - Page 149 Displaying, changing or deleting an entry Open the directory/network access list. Select the entry you want. View View all the information for the entry. Change Open the input field and make the necessary changes. Change the number if necessary. Go to the name field and change the name.
- Page 150 Copying a further entry: Press. Select the required number. Copy Initiate the copy process. Copying the directory/network access list You can copy the entire directory/network access list to another Comfort handset. See “Copying an entry to another handset” . Transmission is interrupted: if the memory of the receiving handset is full.
- Page 151 Entering anniversaries (birthdays and so on) You can store the date and time of anniversaries so you can be reminded of them. Open the directory. View Select and display the entry. Change Open the input field. Move the cursor into the birth- day/anniversary field.
-
Page 152: Settings
Settings Setting the alarm clock You can use your handset as an alarm clock. Activating the alarm clock ¼ If activated, the alarm clock ( icon) on your handset will ring every day at the time entered. With the handset idle: ©... -
Page 153: Turning Off The Alarm Call
Turning off the alarm call An alarm call is signalled like an incoming call. Press any key to turn it off. Setting an appointment Your handset is able to remind you of one appoint- ment. If you have set an appointment, this is indicated ¼... -
Page 154: Handset And Loudspeaker Volume
Missed appointments and anniversaries An appointment and anniversaries that have been sig- nalled on the handset but not been accepted are saved in a list. A new missed appointment/anniversary is indicated Appt. . Press the right display key to display the list ¼... - Page 155 Setting the ringer volume/melody You can choose from five ringer volumes, “crescen- do” ring (increasing volume), ringer off and any of ten ringer melodies: © Open the menu. Select the menu item and Sound Settings confirm. You will hear the current Ringer Settings ringer volume and its level will be displayed.
-
Page 156: Activating/Deactivating Warning And Signal Tones
Activating/deactivating warning and signal tones Key beeps: Every keystroke is confirmed. Confirmation beeps: Confirmation beep (a rising tone sequence) when you make entries/settings and when you replace the handset in the base sta- tion. Battery low beep: The battery must be recharged. ©... -
Page 157: Resetting To The Factory Defaults
Resetting to the factory defaults The directory, the network access list and the caller list are not deleted when you reset the handset. Reg- istration at the base station is not affected. © Open the menu. Select the menu item and H/Set Settings confirm. -
Page 158: Setting The Room Monitor
Setting the room monitor © Open the menu. Select the menu item and Add. Features confirm. Select the menu item and Room Monitor. confirm. Select Scroll forward one line. Change Open the entry field for the tele- phone number. Delete an existing external num- ber with Delete an existing internal num- ber with... -
Page 159: Walk And Talk Mode
Walk and Talk mode This function enables handsets (Gigaset 4000i Com- fort only) to communicate free of charge outside the range of the base station. In Walk and Talk mode, handsets are not available for incoming calls. Requirements: The handsets must have the same base settings (e.g. best base station) or they must not be registered at any base station. -
Page 160: Operating On Base Stations In The Gigaset Family
Appendix Operating on base stations in the Gigaset family Gigaset 1000/2000/3000 The following functions on your 4000i Comfort hand- set are not supported by base stations in this Gigaset family: Setting the time (the time is not transferred after the handset has been switched off) Changing the display language Room monitoring (cannot be switched off externally) -
Page 161: Contact With Liquid
Looking after your phone Wipe the base station and handset with a damp cloth or an antistatic wipe. Never use a dry cloth as this can cause static discharge. Contact with liquid If the handset should come into contact with liquid, on no account switch the device on. -
Page 162: Range
– Repairs or other work done by persons not authorised by us. – Devices fitted with accessories not authorised by Siemens. G Any further claims due to damage are excluded, such as damage arising outside the device, provided this was not due to gross negligence and/ or intent on our part. -
Page 163: Customer Care (Service)
G Any further claims are excluded. Siemens is not liable in any circum- stances for downtime, loss of profits, loss of data or loss of any other information. -
Page 164: Display Languages
Display languages When registering the handset with the Gigaset 4010i base station, the languages marked with an * can be set: Einstellungen Sprache Deutsch H/Set Settings Language English Réglages comb. Langue Français Impostazioni Lingua Italiano Ajuste terminal Idioma Español... - Page 165 We, Siemens AG, declare, that the above mentioned product is ma- nufactured according to our Full Quality Assurance System certified by CETECOM ICT Services GmbH with the registration number „Q810820M“ in compliance with ANNEX V of the R&TTE-Directive 99/ 05/EC. The presumption of conformity with the essential require- ments regarding Council Directive 99/05/EC is ensured.