Table des Matières
Publicité
Les langues disponibles
Les langues disponibles
Liens rapides
Publicité
Chapitres
Table des Matières

Manuels Connexes pour Pioneer SUPER TUNER III DEH-P9400MP


Sommaire des Matières pour Pioneer SUPER TUNER III DEH-P9400MP
- Page 1 Multi-CD/DAB control DSP high power CD/MP3/WMA player with FM/AM tuner Syntoniseur FM/AM et lecteur de CD/MP3/WMA, “Puissance élevée”, processeur de signal numérique (DSP) et contrôleur CD/DAB Operation Manual DEH-P9400MP Mode d’emploi...
-
Page 2: Table Des Matières
Pausing MP3/WMA playback ......24 Important ............5 Precaution ............5 Multi-CD Player ......25 After-sales service for Pioneer products .... 6 Display and indicators ........25 About WMA ............6 50-disc multi-CD player ........25 Switching the DSP setting mode ......7 Basic operation .......... - Page 3 XM Tuner ........ 35 Initial Settings ......52 Display and indicators ........35 Initial settings menu ........52 Basic operation ..........35 Using reverse mode ........52 Storing and recalling channels ......35 Using the feature demo ........52 Changing band ..........36 Switching the auxiliary setting ......
- Page 4 Selecting fine audio equipment such as the unit you’ve just purchased is only the start of your musical enjoyment. Now it’s time to consider how you can maximize the fun and excitement your equipment offers. This manufacturer and the Electronic Industries Association’s Consumer Electronics Group want you to get the most out of your equipment by playing it at a safe level.
-
Page 5: Key Finder
Key Finder Head unit VOLUME RESET button 5/∞/2/3 buttons EJECT button SOURCE button Multi-function buttons BAND button BACK button NEXT button Steering remote controller A steering remote controller that enables remote operation of the head unit is supplied. Operation is the same as when using buttons on the head unit. -
Page 6: Before Using This Product
Before Using This Product eatures recaution CAUTION: USE OF CONTROL OR CD playback ADJUSTMENT OR PERFOR- MANCE OF PROCEDURES It is possible to play back music stored on OTHER THAN THOSE SPECI- CD/CD-R/CD-RW formats. FIED HEREIN MAY RESULT IN HAZARDOUS RADIATION MP3/WMA file playback EXPOSURE. -
Page 7: After-Sales Service For Pioneer Products
Microsoft Corporation in the United States and/or other countries. CANADA Note: Pioneer Electronics of Canada, Inc. • Depending on the application which has performed CUSTOMER SATISFACTION DEPARTMENT the encoding of the WMA files, the operation may 300 Allstate Parkway not be normal. -
Page 8: Switching The Dsp Setting Mode
• To reset the microprocessor, press The “XM READY” mark printed on the front RESET on the head unit with a pen tip or panel of this product indicates that the Pioneer other pointed instrument. XM tuner (sold separately) can be controlled using this product. -
Page 9: About The Demo Modes
bout the demo modes bout basic displays This product features two demonstration This product is equipped with two forms of modes. One is the reverse mode and the other basic display. You can select the desired dis- is the feature demo mode. play. -
Page 10: Remote Controller And Care
Before Using This Product emote controller and care WARNING: • Keep the lithium battery out of the reach of Installing the lithium battery children. Should the battery be swallowed, immediately consult a doctor. • Remove the cover on the back of the CAUTION: steering remote controller and insert the battery with the (+) and (–) poles pointing... -
Page 11: Using The Steering Remote Controller
FUNCTION button operation sing the steering remote con- • Press FUNCTION to select the desired troller mode (e.g., built-in CD player). Press FUNCTION repeatedly to switch Precaution: between the following modes: • Do not operate this unit while manipulating the RPT = RDM = SCAN = T.LIST = PAUSE steering wheel as this might result in a traffic acci- = TTLin... -
Page 12: Detaching And Replacing The Front Panel
Before Using This Product 3. Use the protective case provided to etaching and replacing the front store/carry the detached front panel. panel Theft protection The front panel of the head unit is detachable to discourage theft. Precaution: Replacing the front panel •... -
Page 13: Basic Operation
In this manual, for operations using the multi- Note: function buttons the function displayed is used • External unit refers to a Pioneer product (such as as the name of the function button. one available in the future) that, although incompat- ible as a source, enables control of basic functions by this product. - Page 14 Basic Operation Switching the function of the multi-func- 3. Press RDM to select the random mode. tion buttons The “3” indicator shows that the multi-function buttons have functions other than those current- ly displayed. When this indicator is visible, press NEXT to switch through the functions of 4.
-
Page 15: Key Guidance Indicator
Display example (e.g., built-in CD player) ey guidance indicator This product’s display features key guidance indicators. These light to indicate which of the 5/∞/2/3 buttons you can use. When you’re in the function menu, audio menu or the other menus, they also make it easy to see which 5/∞/2/3 buttons you can use to switch func- tions on/off, switch repeat selections and per- form other operations. -
Page 16: Tuner
Tuner 4. Press BAND to select the desired band. isplay and indicators Press BAND repeatedly to switch between the following bands: FORM 1 FM-1 = FM-2 = FM-3 = AM 5. Press 2 2 or 3 3 to tune in to a station. The frequencies move up or down step by step. -
Page 17: Tuner Function Menu
Recalling broadcast stations electing stations from the pre- 1. Press NEXT to display “1” – “6”. set channel list Press NEXT until “1” – “6” appears. The preset channel list lets you see the list of 2. Press any of the buttons 1 – 6 to recall a preset stations and select one of them to station preset under that button. -
Page 18: Built-In Cd Player
Built-in CD Player 3. Press VOLUME to extend the VOLUME isplay and indicators outward. • When you press VOLUME, it extends out- FORM 1 ward so that it becomes easier to turn. To retract VOLUME, press it again. 4. Turn VOLUME to adjust the volume. 5. -
Page 19: Switching And Scrolling The Title
witching and scrolling the title uilt-in CD player function menu When playing a CD TEXT disc, you can switch The built-in CD player function menu has the text display such as artist name and track title. following functions: With text longer than 32 letters, you can scroll to see the rest of the text. -
Page 20: Playing Tracks In Random Order
Built-in CD Player laying tracks in random order electing tracks from the track title list Random play lets you play back tracks on the CD in random order. The track title list lets you see the list of track 1. Press FUNC and then press RDM to titles on a CD TEXT disc and select one of select the random mode. -
Page 21: Pausing Cd Playback
ausing CD playback Pause lets you temporarily stop playback of the 1. Press FUNC and then press PAUSE to select the pause mode. 2. Press PAUSE to turn the pause on. The light illuminates. Play of the current track pauses. •... -
Page 22: Mp3/Wma Play
MP3/WMA Play 3. Press VOLUME to extend the VOLUME isplay and indicators outward. • When you press VOLUME, it extends out- FORM 1 ward so that it becomes easier to trun. To retract VOLUME, press it again. 4. Turn VOLUME to adjust the volume. 5. -
Page 23: Switching And Scrolling The Title
• Do not insert anything other than a CD into the CD witching and scrolling the title loading slot. • A CD left partially inserted after ejection may incur You can switch text display such as artist name damage or fall out. and track title. -
Page 24: Repeating Play
MP3/WMA Play MP3/WMA function menu laying tracks in random order The MP3/WMA function menu has the following Random play lets you play back tracks in ran- functions: dom order within the repeat range: folder repeat and disc repeat. 1. Select the repeat range. Refer to “Repeating play”... -
Page 25: Scanning Folders And Tracks
canning folders and tracks ausing MP3/WMA playback When you select folder repeat, scan play lets Pause lets you temporarily stop playback of the you hear the first 10 seconds of each track in MP3/WMA. the selected folder. When you select disc 1. -
Page 26: Multi-Cd Player
Multi-CD Player 3. Turn VOLUME to adjust the volume. isplay and indicators 4. Press 5 5 or ∞ ∞ to select a disc. FORM 1 A disc number for which there is no disc will be skipped. • You can use the buttons 1 – 6 (or 7 – 12) to select a disc directly. -
Page 27: Switching And Scrolling The Title
witching and scrolling the title ulti-CD player function menu When playing a CD TEXT disc on a CD TEXT The multi-CD player function menu has the fol- compatible multi-CD player, you can switch text lowing functions: display such as artist name and track title. With text longer than 32 letters, you can scroll to see the rest of the text. -
Page 28: Playing Tracks In Random Order
Multi-CD Player 4. When you find the desired track (or disc), laying tracks in random order press SCAN to turn scan play off. Random play lets you play back tracks in ran- The light goes off. The track (or disc) will continue to play. -
Page 29: Selecting Discs From The Disc Title List
2. Press PAUSE to turn pause on. electing discs from the disc The light illuminates. Play of the current title list track pauses. • Press PAUSE again to turn pause off. The disc title list lets you see the list of disc •... -
Page 30: Using Compression And Dynamic Bass Emphasis
Multi-CD Player 5. Press 3 3 to move the cursor to the next Note: • If the multi-CD player does not support these func- character position. tions, “No COMP” is displayed when you attempt to • Press 2 to move backwards in the display. select it. - Page 31 Playback from ITS memory 5. Press BAND to cancel the ITS memory mode. ITS play lets you listen to the tracks that you have entered into ITS memory. When you turn Note: on ITS play, tracks from ITS memory in the •...
-
Page 32: Dab Tuner
DAB Tuner Indications that light when function is switched The following explains how to use this product to control a DAB tuner, which is sold separately. For details of DAB tuner-specific operation/fea- Indicator Function tures, see your DAB tuner’s manual. W (THR)* Area weather flash (weather) •... -
Page 33: Storing And Recalling Services
toring and recalling services witching the display • Press DISP to select the desired display. Storing services Press DISP repeatedly to switch between the following displays: 1. Press NEXT to display “1” – “6”. Press NEXT until “1” – “6” appears. FORM 1 SERVICE (service label) = COMPONENT 2. -
Page 34: Dynamic Label Function
DAB Tuner Recalling a dynamic label ynamic label function 1. Press NEXT to display “D.TEXT”. Displaying dynamic labels Press NEXT until “D.TEXT” appears. 2. Press D.TEXT to switch to the dynamic 1. Press NEXT to display “D.TEXT”. label mode Press NEXT until “D.TEXT” appears. 3. -
Page 35: Setting The Announcement Support Interruption
1. Press FUNC and then press S.LIST to etting the announcement sup- select the available service list mode. port interruption 2. Press 2 2 or 3 3 to select the desired ser- vice. 1. Press FUNC and then press AS to select the announcement support mode. - Page 36 XM Tuner asic operation The following explains how to use this product to control a XM tuner (e.g., GEX-P900XM), which is sold separately. For details of XM 1. Press SOURCE to select the XM tuner. tuner-specific operation/features, see your XM Press SOURCE until “XM”...
- Page 37 hanging band witching the channel in the channel category • Press BAND to select the desired band. Press BAND repeatedly to switch between 1. Press FUNC to select channel mode. the following bands: XM-1 = XM-2 = XM-3 2. Press chMODE to select the channel cat- egory select mode.
-
Page 38: Storing And Recalling Broadcast Stations
TV Tuner asic operation The following explains how to use this product to control a TV tuner, which is sold separately. For details of TV tuner-specific operation/fea- 1. Press SOURCE to select the TV tuner. tures, see your TV tuner’s manual. Press SOURCE until “Television”... -
Page 39: Changing Band
Recalling broadcast stations electing channels from the pre- 1. Press NEXT to display “1” – “6” (or “7” – set channel list “12”). The preset channel list lets you see the list of Press NEXT until “1” – “6” (or “7” – “12”) preset channels and select one of them to appears. -
Page 40: Audio Adjustments
Audio Adjustments peration modes -way network mode This product features two operation modes: the By carrying out the following settings/adjust- 3-way network mode (NW) and the standard ments in order, you can create a finely-tuned mode (STD). You can switch between modes sound field effortlessly. -
Page 41: Extra Functions
xtra functions sing position selector These functions are helpful in adjusting the One way to assure a more natural sound is to sound to suit your system or your personal pref- clearly position the stereo image, putting you erences. right in the center of the sound field. •... -
Page 42: Using Time Alignment
Audio Adjustments 1. Press AUDIO to select the fader/balance sing time alignment mode. The time alignment lets you adjust the distance 2. Press 5 5 or ∞ ∞ to adjust the front/rear between each speaker and the listening posi- speaker balance. tion to match the type of car. -
Page 43: About The Network Function
3. Press 2 2 or 3 3 to select the speaker to be bout the network function adjusted. Each press of 2 or 3 selects speakers in The network function lets you divide the audio signal into different frequency bands, and then the following order: reproduce each of them through separate speaker units. - Page 44 Audio Adjustments Level Slope adjustment The difference in reproduced levels between • If you set a small absolute value for the slope speaker units can be corrected. (for a gentle slope), interference between adjacent speaker units can easily result in Slope degraded frequency response.
- Page 45 4. Press 5 5 or ∞ ∞ to adjust the level of the 2. Press the corresponding button to select the speaker unit (filter) to be adjusted. selected speaker unit (filter). Each press of 5 or ∞ increases or decreas- Button Speaker unit (filter) es the level of the selected speaker unit (fil-...
-
Page 46: Using Subwoofer Output
Audio Adjustments sing subwoofer output sing the high pass filter This product is equipped with a subwoofer out- When the subwoofer is connected and you do put which can be switched on or off. When a not want low sound to play from the front or rear subwoofer is connected to this product, turn the speakers, turn the high pass filter on. -
Page 47: Using The Auto-Equalizer
• “CUSTOM1” and “CUSTOM2” are adjusted sing the auto-equalizer equalizer curves that you can create for yourself. (Refer to “Adjusting 13-band The auto-equalizer is the equalizer curve creat- graphic equalizer” on page 47.) ed by auto-equalizing. (Refer to “Creating the •... -
Page 48: Adjusting 13-Band Graphic Equalizer
Audio Adjustments djusting 13-band graphic equal- sing octaver and BBE sound izer For “CUSTOM1” and “CUSTOM2” equalizer Octaver makes the bass sound louder. curves, you can adjust the level of each band. With BBE, playback very close to the original •... -
Page 49: Using Loudness
2. Press the corresponding button to select sing loudness the desired sound field program. Loudness compensates for deficiencies in the Button Effect low- and high-sound ranges at low volume. STUDIO Studio 1. Press AUDIO and then press NEXT to dis- CLUB Club play “LOUD”. -
Page 50: Using Automatic Sound Levelizer
Audio Adjustments 4. Press 5 5 or ∞ ∞ to adjust the source vol- sing automatic sound levelizer ume. Each press of 5 or ∞ increases or decreas- While driving, the noise in the car changes according to the driving speed and the road es the source volume. -
Page 51: Creating The Auto-Equalizer Curve
• Be sure to carry out auto-equalizing using the reating the auto-equalizer curve supplied microphone. Using another micro- phone may prevent measurement, or result in incorrect measurement of the car interior The auto-equalizer automatically measures the acoustic characteristics. car interior acoustic characteristics, and then •... - Page 52 Audio Adjustments 2. Fix the supplied microphone in the center 7. Plug the microphone into the microphone of the headrest of the driver’s seat, facing input jack on this product. forward, using the belt (sold separately). The auto-equalizer curve may differ depend- ing on where you place the microphone.
-
Page 53: Initial Settings
Initial Settings 1. With the source turned off, press and nitial settings menu hold 1 to select the reverse mode. The initial settings menu has the following func- 2. Press REV to turn the reverse mode on. tions: “ON” appears in the display. •... -
Page 54: Switching The Telephone Muting/Attenuation Setting
Initial Settings witching the telephone etting the warning tone muting/attenuation setting The warning tone sounds to remind you to detach the front panel. (Refer to page 11.) When a call is made or received using a cellular You can turn the warning tone function on or phone connected to this product, the product off. -
Page 55: Other Functions
Other Functions Off clock display ttenuating volume When the time display is turned on, the calen- dar display appears with the time display when The attenuator lets you lower the volume level sources and the feature demo are off. quickly (by about 90%). •... -
Page 56: Changing The Display Form
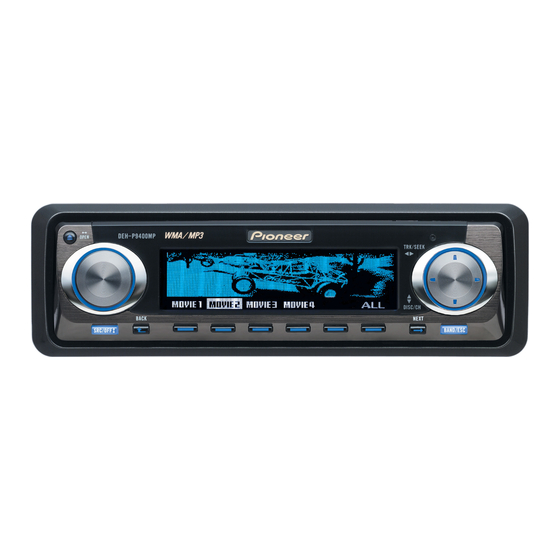
Other Functions Matching the time to a time signal witching the dimmer setting 1. Press NEXT to display “CLK”. To prevent the display from being too bright at Press NEXT until “CLK” appears. night, the display is automatically dimmed when the car’s headlights are turned on. - Page 57 1. Press ENT and then press MOVIE to Setting the background visual select the movie mode. The background visuals are only for display form 1 “FORM1”. There are five stored back- 2. Press any of the buttons MOVIE1 – ground visuals to select from. MOVIE4 or ALL to select the desired •...
-
Page 58: Using The Aux Source
Other Functions sing the AUX source sing the telephone muting/ attenuation An IP-BUS-RCA interconnector such as the CD-RB20 or CD-RB10 (sold separately) lets Sound from this product is muted or attenuated you connect this product to auxiliary equipment automatically when a call is made or received featuring RCA output. -
Page 59: Additional Information
Additional Information CD-R and CD-RW discs player and care • CD-R/CD-RW discs that have not been sub- • Use only CDs that carry either of the two ject to the “finalize process” (a process that Compact Disc Digital Audio marks shown allows them to be played back on a conven- below. -
Page 60: Mp3 And Wma Files
Additional Information Precaution: and WMA files • When naming an MP3 or a WMA file, add the corre- sponding filename extension (.mp3 or .wma). • MP3 is short for MPEG Audio Layer 3 and • This product plays back files with the filename refers to an audio compression technology extension (.mp3 or .wma) as an MP3 or a WMA file. - Page 61 About folders and MP3/WMA files • An outline of a CD-ROM with MP3/WMA files on it is shown below. Subfolders are shown as folders in the folder currently selected. First Second Third level level level Note: • This product assigns folder numbers. The user can not assign folder numbers.
-
Page 62: Understanding Built-In Cd Player Error Messages
If the error cannot be corrected, contact your dealer or your near- est Pioneer service center. Display... -
Page 63: Terms
erms Playlists created using the “WINAMP” software have a playlist file extension (.m3u). Bit rate This expresses data volume per second, or bps units (bits per second). The higher the rate, the MP3 is short for MPEG Audio Layer3. It is an more information is available to reproduce the audio compression standard set by a working sound. -
Page 64: Specifications
Additional Information MID HPF/LPF pecifications Frequency (LPF) ....1.6/2/2.5/3.15/4/5/6.3/8/10/12.5/16 kHz General Frequency (HPF) ....31.5/40/50/63/80/100/125/160/200 Hz Power source ....14.4 V DC (10.8 – 15.1 V allowable) Slope (LPF) ....0 (Pass)/–6/–12 dB/oct. Grounding system .......... Negative type Slope (HPF) .... 0 (Pass)/–6/–12/–18 dB/oct. Max. -
Page 65: Dsp Adjustment Value Record Sheet
SP adjustment value record sheet 3-way network mode (NW) Network setting Filter L LPF M HPF M LPF H HPF Cutoff frequency Level Slope Phase Time alignment setting Speaker unit High Left High Right Mid Left Mid Right Low Left Low Right Distance Standard mode (STD) - Page 66 Examen du contenu des dossiers et des plages Précaution ............5 musicales ..........24 Service après-vente des produits PIONEER ..6 Pause de la lecture d’un MP3/WMA ....24 A propos de WMA ..........6 Commutation du mode de réglage du DSP ..7 Lecteur de CD à...
- Page 67 Syntoniseur de télévision ....35 Autres fonctions ......52 Affichages et témoins ........35 Atténuation du niveau sonore ......52 Opérations de base .......... 35 Affichage et réglage de l’heure ......52 Mise en mémoire et rappel de la fréquence Choix de la présentation d’affichage ....
-
Page 68: Cher Client
Cher Client: La sélection d’un équipement audio de qualité comme l’unité que vous venez d’acheter n’est que le début de votre plaisir musical. Maintenant, il est temps de penser à la manière de profiter au maximum des plaisirs que vous offre votre équipement. Ce fabricant et le Groupe “Consumer Electronics Group”... -
Page 69: Disposition Des Touches
Disposition des touches Appareil central Bouton Volume Bouton RESET Touches 5/∞/2/3 Touche EJECT Touche SOURCE Touches multifonctions Touche BAND Touche BACK Touche NEXT Boîtier de télécommande de volant Un boîtier de télécommande qui se monte sur le volant est fourni avec l’appareil. Les touches de ce boîtier de télécommande jouent le même rôle que celles de l’appareil lui-même. -
Page 70: Avant D'utiliser Cet Appareil
Avant d’utiliser cet appareil aractéristiques récaution Lecture de CD • Conservez ce mode d’emploi à portée de main pour vous y référer pour ce qui touche L’appareil peut lire la musique enregistrée sur les modes opératoires et les précautions. des disques au format CD/CD-R/CD-RW. •... -
Page 71: Service Après-Vente Des Produits Pioneer
(et les conditions de garantie) ou tout autre information. En cas de nécessité ou lorsque l’in- formation recherchée n’est pas disponible, veuillez contacter Pioneer aux adresses suiv- antes; Le logo Windows Media™ imprimé sur le carton N’envoyez pas le produit à réparer sans avoir, indique que cet appareil est capable de lire les au préalable, contacté... -
Page 72: Commutation Du Mode De Réglage Du Dsp
Pioneer (vendu séparément) peut être com- mandé à l’aide de cet appareil. Veuillez vous renseigner auprès de votre reven- deur ou du centre de service autorisé Pioneer le plus proche en ce qui concerne le tuner XM pouvant être connecté à cet appareil. -
Page 73: Quelques Mots Sur Les Modes Démonstration
uelques mots sur les modes uelques mots sur les pages démonstration écran de base Cet appareil possède deux modes de démon- Cet appareil peut afficher deux pages écran de stration. Un mode inverse et un mode de base. Vous pouvez choisir celle que vous démonstration des possibilités. -
Page 74: Présentation Et Soin Du Boîtier De Télécommande
Avant d’utiliser cet appareil résentation et soin du boîtier de AVERTISSEMENT: télécommande • Conservez la pile au lithium hors de portée des enfants. En cas d’ingestion de la pile, consultez immédiatement un médecin. Installation de la pile au lithium ATTENTION: •... -
Page 75: Volant
Utilisation de la touche FUNCTION tilisation du boîtier de télécom- • Appuyez sur la touche FUNCTION pour mande de volant choisir le mode de fonctionnement désirée (par exemple, le lecteur de CD Précaution: intégré). • Ne faites pas fonctionner le boîtier de télécom- Appuyez de manière répétée sur la touche mande tandis que vous tournez le volant car cela FUNCTION pour passer d’un mode à... -
Page 76: Dépose Et Pose De La Face Avant
Avant d’utiliser cet appareil 3. Rangez la face avant dans le boîtier de épose et pose de la face avant protection fourni. Protection contre le vol Le panneau de commande de cet appareil peut être déposé dans le but de décourager le vol de l’appareil. -
Page 77: Opérations De Base
4. Maintenez la pression d’un doigt sur la touche SOURCE pour mettre hors service la source. Remarque: • “Appareil extérieur” désigne un appareil Pioneer (qui pourra être disponible dans le futur) qui n’est pas à proprement parler une source mais dont la gestion des fonctions de base peut être assurée par... - Page 78 Opérations de base Choix du rôle des touches multifonctions 3. Appuyez sur la touche RDM pour choisir le mode de lecture au hasard. L’indication “3” signale que les touches multi- fonctions jouent des rôles autres que ceux indiqués sur l’écran. Lorsque ce témoin est affiché, appuyez sur la touche NEXT pour faire défiler la liste des rôles joués par les touches multifonction.
-
Page 79: Témoins D'utilisation Des Touches
Exemple d’écran (par exemple, le lecteur de CD intégré) émoins d’utilisation des touches Cet appareil affiche des témoins d’utilisation des touches. Ces témoins s’éclairent pour sig- naler celles des touches 5/∞/2/3 que vous pouvez employer. Grâce à ces témoins, vous savez aisément quelles touches 5/∞/2/3 utiliser quand est affiché... -
Page 80: Syntoniseur
Syntoniseur 4. Appuyez sur la touche BAND pour ffichages et témoins choisir la gamme d’onde désirée. Appuyez de manière répétée sur la touche FORM 1 (Ecran type 1) BAND pour passer d’une gamme d’onde à une autre, comme ceci: FM-1 = FM-2 = FM-3 = AM 5. -
Page 81: Menu Des Fonctions Du Syntoniseur
Rappel d’une station dont la fréquence élection d’une station sur la est en mémoire liste des canaux en mémoire 1. Appuyez sur la touche NEXT pour affich- La liste des canaux en mémoire vous permet er “1” – “6”. de connaître les stations préréglées et de Appuyez sur la touche NEXT jusqu’à... -
Page 82: Lecteur De Cd Intégré
Lecteur de CD intégré 3. Appuyez sur le bouton VOLUME pour ffichages et témoins qu’il fasse saillie. • Quand vous appuyez sur le bouton VOLUME, il FORM 1 (Ecran type 1) fait saillie de manière que vous puissiez le saisir et le tourner. Pour repousser le bouton VOLUME dans l’appareil, appuyez une nouvelle fois sur ce bouton. -
Page 83: Affichage Et Défilement Du Titre
ffichage et défilement du titre enu des fonctions du lecteur de CD intégré Lors de la lecture d’un disque CD TEXT, vous pouvez afficher diverses informations telles que Le menu du lecteur de CD intégré propose les le nom de l’interprète ou le titre de la plage fonctions suivantes: musicale. -
Page 84: Sélection D'un Plage Musicale Par Son Titre Sur La Liste Des Plages
Lecteur de CD intégré ecture des plages musicales élection d’un plage musicale dans un ordre quelconque par son titre sur la liste des plages Les plages musicales du CD sont jouées dans un ordre quelconque. Vous pouvez choisir une plage musicale sur la 1. -
Page 85: Pause De La Lecture D'un Cd
ause de la lecture d’un CD La pause est un arrêt momentané de la lecture du CD. 1. Appuyez sur la touche FUNC puis sur la touche PAUSE pour choisir la pause. 2. Appuyez sur la touche PAUSE pour met- tre en service la pause. -
Page 86: Lecture Mp3/Wma
Lecture MP3/WMA 3. Appuyez sur le bouton VOLUME pour ffichages et témoins qu’il fasse saillie. • Quand vous appuyez sur le bouton VOLUME, il FORM 1 (Ecran type 1) fait saillie de manière que vous puissiez le saisir et le tourner. Pour repousser le bouton VOLUME dans l’appareil, appuyez une nouvelle fois sur ce bouton. -
Page 87: Affichage Et Défilement Du Titre
• Les touches multifonctions sont indisponibles ffichage et défilement du titre lorsque la face avant est ouverte. • N’introduisez rien d’autre qu’un CD dans la fente Vous pouvez changer l’affichage du texte, par pour CD. exemple avec le nom de l’artiste et le titre de la •... -
Page 88: Menu Des Fonctions Mp3/Wma
Lecture MP3/WMA enu des fonctions MP3/WMA ecture des plages musicales dans un ordre quelconque Le menu des fonctions MP3/WMA propose les fonctions suivantes: La lecture au hasard vous permet de lire les plages musicales dans un ordre quelconque dans le mode de répétition choisi: répétition d’un dossier et répétition d’un disque. -
Page 89: Pause De La Lecture D'un Mp3/Wma
xamen du contenu des dossiers ause de la lecture d’un et des plages musicales MP3/WMA Si vous avez choisi la répétition d’un dossier, La pause est un arrêt momentané de la lecture les 10 premières secondes de chaque plage du MP3/WMA. musicale du dossier concerné... -
Page 90: Lecteur De Cd À Chargeur
Lecteur de CD à chargeur 3. Tournez le bouton VOLUME pour régler ffichages et témoins le niveau sonore. 4. Utilisez les touches 5 5 et ∞ ∞ pour choisir FORM 1 (Ecran type 1) un disque. Si une position n’est pas occupée par un disque, elle est ignorée. -
Page 91: Affichage Et Défilement Du Titre
ffichage et défilement du titre enu des fonctions du lecteur de CD à chargeur Lors de la lecture d’un disque CD TEXT grâce à un lecteur de CD compatible CD TEXT, vous Le menu du lecteur de CD à chargeur propose pouvez afficher diverses informations telles que les fonctions suivantes: le nom de l’interprète ou le titre de la plage... -
Page 92: Lecture Des Plages Musicales Dans Un Ordre Quelconque
Lecteur de CD à chargeur 4. Lorsque la plage musicale (ou le disque) ecture des plages musicales que vous désirez écouter se présente, dans un ordre quelconque appuyez sur la touche SCAN pour mettre hous service l’examen du disque. Les plages musicales sont jouées dans un ordre L’indication s’éteint. -
Page 93: Sélection D'un Disque Par Son Titre Sur La Liste Des Disques
2. Appuyez sur la touche PAUSE pour met- élection d’un disque par son tre en service la pause. titre sur la liste des disques L’indication s’éclaire. La lecture du disque marque une pause. Vous pouvez choisir un disque sur la liste des •... -
Page 94: Utilisation De La Compression Et De
Lecteur de CD à chargeur 5. Appuyez sur la touche 3 3 pour placer le Remarque: • Si le lecteur de CD à chargeur ne possède ni la curseur sur la position suivante. fonction de compression (COMP) ni celle d’accentu- •... - Page 95 Lecture commandée par la mémoire ITS 4. Appuyez sur la touche CLEAR pour sup- primer de la mémoire ITS la référence de La fonction ITS vous donne le moyen de n’en- la plage musicale de la liste en cours de tendre que les plages musicales qui appartien- lecture.
-
Page 96: Syntoniseur Dab
Syntoniseur DAB Indications s’affichant lorsque la fonction est en Les explications qui suivent permettent d’utilis- service er cet appareil pour commander un syntoniseur DAB, vendu séparément. Pour de plus amples Indication Fonction détails concernant le syntoniseur DAB, reportez- W (THR)* Bulletin météo pour la région vous au mode d’emploi du syntoniseur DAB. -
Page 97: Mise En Mémoire Et Rappel Des Services
FORM2 (Ecran de type 2) ise en mémoire et rappel des SERVICE (Etiquette de service) et COMPONENT services (Etiquette d’élément de service) = D.TEXT (En- tête de segment d’étiquette dynamique) = SER- Mise en mémoire des services VICE (Etiquette de service) et ENSEMBLE (Etiquette d’ensemble) = SERVICE (Etiquette de 1. -
Page 98: Fonction D'étiquette Dynamique
Syntoniseur DAB Rappel des étiquettes dynamiques onction d’étiquette dynamique 1. Appuyez sur la touche NEXT pour affich- er “D.TEXT”. Affichage des étiquettes dynamiques Appuyez sur la touche NEXT jusqu’à ce que 1. Appuyez sur la touche NEXT pour affich- “D.TEXT” apparaisse sur l’écran. er “D.TEXT”. -
Page 99: Mise En Oeuvre De L'interruption De Support D'annonce
1. Appuyez sur la touche FUNC puis sur la ise en oeuvre de l’interruption touche S.LIST pour choisir la liste des de support d’annonce services disponibles. 2. Utilisez la touche 2 2 , ou sur la touche 3 3 , 1. -
Page 100: Syntoniseur De Télévision
Syntoniseur de télévision pérations de base Les explications qui suivent permettent d’utilis- er cet appareil pour commander un syntoniseur de télévision, vendu séparément. Pour de plus 1. Appuyez sur la touche SOURCE pour amples détails concernant le syntoniseur de choisir le syntoniseur de télévision. télévision, reportez-vous au mode d’emploi du Appuyez sur la touche SOURCE jusqu’à... -
Page 101: Choix De La Gamme D'onde
Rappel de la fréquence d’une station hoix d’un canal sur la liste des 1. Appuyez sur la touche NEXT pour affich- canaux préréglés er “1” – “6” (ou “7.” – “12”). La liste des canaux préréglés vous permet de Appuyez sur la touche NEXT jusqu’à ce que connaître les canaux préréglés et de choisir la “1”... -
Page 102: Réglages Sonores
Réglages sonores odes de fonctionnement ode réseau à 3 voies L’appareil offre deux modes de fonctionnement: En procédant dans l’ordre aux réglages suiv- le mode réseau à 3 voies (NW), et le mode ants, vous pouvez créer sans trop de difficulté standard (STD). -
Page 103: Autres Fonctions
utres fonctions tilisation du sélecteur de posi- tion Voici quelques fonctions qui permettent d’agir sur les sons pour prendre en compte l’installa- Une bonne façon d’obtenir des sons très tion et vos goûts. naturels consiste à positionner très précisément • Utilisation du réducteur d’octave et d’une l’image stéréophonique et à... -
Page 104: Utilisation De La Différence De Marche
Réglages sonores 1. Appuyez sur la touche AUDIO pour tilisation de la différence de choisir le mode permettant de régler marche l’équilibre avant-arrière ou gauche-droite. 2. Appuyez sur la touche 5 5 , ou sur la La différence de marche permet de tenir touche ∞... -
Page 105: A Propos De La Fonction Réseau
3. Utilisez les touches 2 2 et 3 3 pour choisir propos de la fonction réseau le haut-parleur concerné par le réglage. Chaque pression sur la touche 2, ou sur la touche 3, permet de choisir un autre haut- La fonction réseau vous permet de diviser le parleur, comme suit: signal sonore en plusieurs bandes de fréquence, puis de reproduire chacune des... - Page 106 Réglages sonores Niveau Réglage de la pente Vous pouvez corriger la différence des niveaux • Si vous réglez une valeur absolue faible pour reproduits entre les différents haut-parleurs. la pente (pour une pente douce), les inter- férences avec le haut-parleur adjacent Pente risquent d’entraîner une détérioration de la Le réglage de la pente du filtre passe-haut/filtre...
- Page 107 3. Appuyez sur la touche 2 2 ou 3 3 pour 2. Appuyez sur la touche correspondante pour choisir le haut-parleur (filtre) que choisir la fréquence de coupure vous voulez régler. (fréquence de recouvrement) du haut- parleur (filtre) concerné. Touche Haut-parleur (filtre) L LPF: 31,5 Ô...
-
Page 108: D'extrêmes Graves
Réglages sonores Remarque: tilisation de la sortie pour haut- • L’indication “SW2” ne s’affiche pas lorsque la sortie pour le haut-parleur d’extrêmes graves n’est pas en parleur d’extrêmes graves service et que le mode de sortie pour le haut-par- Cet appareil est pourvu d’une sortie vers un haut- leur d’extrêmes graves (SW1) est actif. -
Page 109: Utilisation De L'égalisation Automatique
• Les courbes “CUSTOM1” et “CUSTOM2” tilisation de l’égalisation sont des courbes que vous pouvez person- automatique naliser. (Reportez-vous à la page 45, “Réglage de l’égaliseur graphique à 13 L’égalisation automatique produit une courbe bandes”.) de correction. (Reportez-vous à la page 48, •... -
Page 110: Technique De Traitement (Bbe)
Réglages sonores églage de l’égaliseur graphique tilisation du réducteur d’octave et d’un technique de traitement à 13 bandes (BBE) Vous pouvez régler l’amplitude de chacune des Le réducteur d’octave rend les sons plus graves. bandes des courbes d’égalisation “CUSTOM1” Avec la technique de traitement BBE, vous et “CUSTOM2”. -
Page 111: Utilisation De La Correction Physiologique
Rappel d’une correction de champ sonore tilisation de la correction physi- 1. Appuyez sur la touche AUDIO puis sur la ologique touche SFC pour choisir le mode permet- tant la commande de champ sonore. La correction physiologique a pour objet d’ac- centuer les graves et les aigus à... -
Page 112: Utilisation De La Commande Automatique Du Niveau Sonore (Asl)
Réglages sonores 4. Appuyez sur la touche 5 5 , ou sur la tilisation de la commande touche ∞ ∞ , pour régler le niveau de la automatique du niveau sonore (ASL) source. Chaque pression sur la touche 5, ou sur la Pendant la conduite, le bruit dans la voiture touche ∞, augmente ou diminue le niveau change en fonction de la vitesse de conduite et... -
Page 113: Création De La Courbe D'égalisation Automatique
• Effectuez l’égalisation automatique en vous réation de la courbe d’égalisa- servant du microphone fourni. Si vous utilisez tion automatique un autre microphone, vous ne disposerez pas de résultats corrects sur les caractéristiques L’égaliseur automatique mesure les caractéris- acoustiques de l’habitacle du véhicule. tiques acoustiques de l’habitacle du véhicule et en •... - Page 114 Réglages sonores 2. Fixez le microphone au centre de l’appui- 7. Branchez la fiche du microphone fourni tête du siège du conducteur, à l’aide dans la prise pour microphone que porte d’une sangle (vendue séparément), en cet appareil. veillant à ce qu’il soit dirigé vers l’avant. La courbe d’égaliseur automatique dépend de l’emplacement qu’occupe le microphone.
-
Page 115: Réglages Initiaux
Réglages initiaux 1. La source étant hors service, maintenez enu des réglages initiaux la pression d’un doigt sur la touche pour choisir le mode inverse. Le menu des réglages initiaux vous propose les paramètres suivants: 2. Appuyez sur la touche REV pour mettre en service le mode inverse. -
Page 116: Choix Du Silence Téléphonique Ou De L'atténuation
Réglages initiaux hoix du silence téléphonique ou tilisation du signal d’avertisse- de l’atténuation ment Quand un appel est fait ou reçu avec le Le signal d’avertissement vous rappelle de téléphone portable connecté à cet appareil, déposer la face avant. (Reportez-vous à la vous pouvez choisir la sourdine audio ou page 11.) l’atténuation téléphonique pour la sortie audio. -
Page 117: Autres Fonctions
Autres fonctions Sans affichage de l’heure tténuation du niveau sonore Lorsque l’affichage de l’heure n’est pas en ser- vice, la date est présente sur l’écran en même L’atténuateur permet d’abaisser (environ 90%) temps que l’heure si les sources et la démon- rapidement le niveau sonore. -
Page 118: Choix De La Présentation D'affichage
Autres fonctions Réglage de l’heure en fonction d’un sig- tilisation de l’atténuateur de nal horaire luminosité 1. Appuyez sur la touche NEXT pour afficher “CLK”. Pour éviter que l’afficheur ne soit trop lumineux Appuyez sur la touche NEXT jusqu’à ce que la nuit, son éclairage est automatiquement “CLK”... - Page 119 1. Appuyez sur la touche ENT puis sur la Choix du fond visuel touche MOVIE pour choisir le mode con- Le fond visuel ne concerne que l’écran de type venable. (“FORM1”). Cinq modèles de fond visuel sont disponibles. 2. Appuyez sur une des touches MOVIE1 à •...
-
Page 120: Utilisation De La Source Aux
Autres fonctions tilisation de la source AUX tilisation de la sourdine audio/atténuation téléphonique Grâce à un interconnecteur IP-BUS-RCA tel que le modèle CD-RB20 ou le modèle CD- L’appareil devient automatiquement silencieux RB10 (vendus séparément), vous pouvez relier quand vous appelez à l’aide du téléphone de cet appareil à... -
Page 121: Informations Complémentaires
Informations complémentaires Disques CD-R et CD-RW oins à apporter au lecteur de CD • L’appareil ne pourra pas lire les CD-R/CD-RW • N’utilisez que les disques portant la marque qui n’ont pas subi le “processus de finalisa- Compact Disc Digital Audio. tion”... -
Page 122: Les Fichiers Mp3 Et Wma
Informations complémentaires Précaution: es fichiers MP3 et WMA • Lorsque vous donnez un nom à un fichier MP3 ou à un fichier WMA, ajoutez l’extension de fichier corre- • MP3 est l’abréviation de “MPEG Audio Layer spondante (.mp3 ou .wma). 3”... - Page 123 A propos des dossiers et des fichiers MP3/WMA • Nous donnons ci-dessous un aperçu d’un CD- ROM renfermant des fichiers MP3/WMA. Les sous-dossiers sont indiqués comme des dossiers du dossier actuellement choisi. Premier Deuxième Troisième niveau niveau niveau Remarque: • C’est l’appareil qui assigne les numéros de dossier. L’utilisateur ne peut pas assigner lui-même les numéros de dossier.
-
Page 124: Signification Des Messages D'erreur Du Lecteur De Cd Intégré
Si l’erreur ne peut pas être corrigée, consultez le reven- deur ou le service d’entretien agréé par Pioneer. Messages Causes possibles... -
Page 125: Terminologie
erminologie Les listes de lecture créées avec le logiciel “WINAMP” ont une extension fichier de liste de Débit lecture (.m3u). Le débit représente le volume de données par seconde, ou bps (bits par seconde). Plus le débit est élevé, plus il y a d’informations pour MP3 est l’abréviation de “MPEG Audio Layer3”. -
Page 126: Caractéristiques Techniques
Informations complémentaires MID HPF/LPF aractéristiques techniques Fréquence (LPF) ....1,6/2/2,5/3,15/4/5/6.3/8/10/12,5/16 kHz Fréquence (HPF) Généralités ....31,5/40/50/63/80/100/125/160/200 Hz Alimentation ....14,4 V CC (10,8 à 15,1 V possibles) Pente (LPF) .... 0 (Passe)/–6/–12 dB/octave Mise à la masse ..........Pôle négatif Pente (HPF) ..0 (Passe)/–6/–12/–18 dB/octave Consommation maximale ........ -
Page 127: Feuille D'inscription Des Paramètres De Réglage Du Dsp
euille d’inscription des paramètres de réglage du DSP Mode réseau à 3 voies (NW) Réglage du réseau Filtre L LPF M HPF M LPF H HPF Fréquence de coupure Niveau Pente Phase Réglage de la différence de marche Haut-parleur High Left High Right Mid Left Mid Right... - Page 128 300 Allstate Parkway, Markham, Ontario L3R OP2, Canada Copyright © 2002 by Pioneer Corporation. TEL: (905) 479-4411 All rights reserved. PIONEER ELECTRONICS DE MEXICO, S.A. de C.V. Publication de Pioneer Corporation. San Lorenzo 1009 3er. Piso Desp. 302 Copyright © 2002 Pioneer Corporation.