Table des Matières
Publicité
Les langues disponibles
Les langues disponibles
Liens rapides
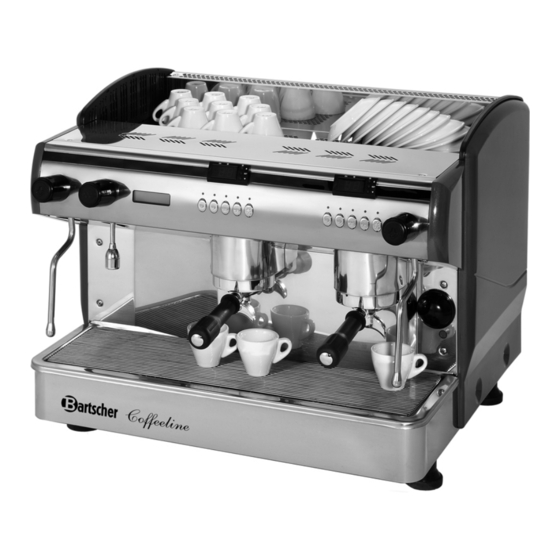
Bartscher „Coffeeline"
190.160 / 190.161 / 190.162 / 190.163 / 190.164
Bedienungsanleitung
Siebträger-Kaffeemaschinen
D/A/CH
Seite 1 bis 21
Instruction manual
Coffee machine
GB/UK
from page 23 to 43
Mode d'emploi
Machine à café haute pression
F/B/CH
de page 45 à page 65
Bedieningshandleiding
Espressomachine
NL/B
blz. 67 t/m 87
Instrukcja obsługi
PL
Ekspres ciśnieniowy do kawy
strony od 89 do 109
Publicité
Chapitres
Table des Matières

Manuels Connexes pour Bartscher 190.160


Sommaire des Matières pour Bartscher 190.160
- Page 1 Bartscher „Coffeeline“ 190.160 / 190.161 / 190.162 / 190.163 / 190.164 Bedienungsanleitung Siebträger-Kaffeemaschinen D/A/CH Seite 1 bis 21 Instruction manual Coffee machine GB/UK from page 23 to 43 Mode d’emploi Machine à café haute pression F/B/CH de page 45 à page 65...
- Page 3 Bartscher Coffeeline G1 190.160 Bartscher Coffeeline G2 190.161 Bartscher Coffeeline G2 plus 190.163...
- Page 4 Bartscher Coffeeline G3 190.162 Bartscher Coffeeline G3 plus 190.164...
-
Page 5: Table Des Matières
6. Reinigung und Wartung 6.1 Sicherheitshinweise 6.2 Reinigung und Entkalkung 18-19 6.3 Sicherheitshinweise zur Wartung 7. Mögliche Funktionsstörungen 8. Entsorgung Bartscher GmbH Franz-Kleine-Str. 28 D-33154 Salzkotten Tel.: +49 (0) 5258 971-0 Service-Hotline: 0180 5 971 197 Germany Fax: +49 (0) 5258 971-120 (14ct/Min. -
Page 6: Allgemeines
1. Allgemeines 1.1 Informationen zur Bedienungsanleitung Diese Bedienungsanleitung beschreibt die Installation, Bedienung und Wartung des Gerätes und dient als wichtige Informationsquelle und Nachschlagewerk. Die Kenntnis und Beachtung aller in ihr enthaltenen Sicherheitshinweise und Handlungsanweisungen schafft die Voraussetzung für das sichere und sachgerechte Arbeiten mit dem Gerät. -
Page 7: Haftung Und Gewährleistung
1.3 Haftung und Gewährleistung Alle Angaben und Hinweise in dieser Bedienungsanleitung wurden unter Berücksichtigung der geltenden Vorschriften, des aktuellen ingenieurtechnischen Entwicklungsstandes sowie unserer langjährigen Erkenntnisse und Erfahrungen zusammengestellt. Die Übersetzungen der Bedienungsanleitung wurden ebenfalls nach bestem Wissen erstellt. Eine Haftung für Übersetzungsfehler können wir jedoch nicht übernehmen. Maßgebend ist die beiliegende deutsche Version dieser Bedienungsanleitung. -
Page 8: Sicherheit
2. Sicherheit Dieser Abschnitt bietet einen Überblick über alle wichtigen Sicherheitsaspekte. Zusätzlich sind in den einzelnen Kapiteln konkrete Sicherheitshinweise zur Abwendung von Gefahren gegeben und mit Symbolen gekennzeichnet. Darüber hinaus sind am Gerät befindliche Piktogramme, Schilder und Beschriftungen zu beachten und in ständig lesbarem Zustand zu halten. -
Page 9: Bestimmungsgemäße Verwendung
ACHTUNG! Dieses Gerät ist nicht bestimmt, durch Personen (einschließlich Kinder) mit eingeschränkten physischen, sensorischen oder geistigen Fähigkeiten oder mangels Erfahrung und/oder mangels Wissen benutzt zu werden, es sei denn, sie werden durch eine für die Sicherheit zuständige Person beaufsichtigt oder erhielten von ihr Anweisungen, wie das Gerät zu benutzen ist. -
Page 10: Transportinspektion
3. Transport, Verpackung und Lagerung 3.1 Transportinspektion Lieferung bei Erhalt unverzüglich auf Vollständigkeit und Transportschäden prüfen. Bei äußerlich erkennbarem Transportschaden Lieferung nicht oder nur unter Vorbehalt entgegen nehmen. Schadensumfang auf Transportunterlagen/Lieferschein des Transporteurs vermerken. Reklamation einleiten. Verdeckte Mängel sofort nach Erkennen reklamieren, da Schadensersatzansprüche nur innerhalb der geltenden Reklamationsfristen geltend gemacht werden können. -
Page 11: Technische Daten
4. Technische Daten 4.1 Technische Angaben Bezeichnung Siebträger-Kaffeemaschinen „Coffeeline“ 190.160 190.161 190.162 190.163 190.164 Best.-Nr.: G2 plus G3 plus Model: 2,85 kW 3,3 kW 4,2 kW 3,3 kW 6,2 kW Anschlusswert: 230 V 230 V 3 NAC 230 V 3 NAC... -
Page 12: Baugruppenübersicht
4.2 Baugruppenübersicht ⑤ ⑥ ⑦ ④ ③ ⑧ ② ① ⑨ ⑫ ⑩ ⑪ Abb. 1 Dampfstab Heißwasserhahn Dampfregler Wasserregler Display Dosiertasten Tassen- / Untertassenablage Hauptschalter Kontrolllampe 10. Verstellbare Füße 11. Brühgruppe mit Siebträger 12. Auffangschale - 8 -... -
Page 13: Installation Und Bedienung
Z u b e h ö r • Für Mini-Modelle (190.160): 1 Siebträger für 2 Tassen + 1 Siebträger 1 Tasse + Kunststoffschlauch ½ Meter und 1 Membrane-Reinigungseinheit. • Für die folgenden Modelle: 2, 3 und 4 Brühgruppen (190.161, 190.162, 190.163, 190.164):... -
Page 14: Aufstellen Und Anschließen
• Stecken Sie keine Gegenstände in die Geräteöffnungen. • Das Gerät nicht berühren, wenn man barfuß ist, nasse oder feuchte Hände hat. • Berühren Sie niemals die Innenteile des Gerätes. • Gerät während des Betriebes nicht bewegen oder umkippen. WARNUNG! Gefahr durch elektrischen Strom! Gerät kann bei unsachgemäßer Installation Verletzungen verursachen! Vor Installation Daten des örtlichen Stromnetzes mit technischen Angaben des Gerätes vergleichen (siehe Typenschild). -
Page 15: Bedienung
5.3 Bedienung Kessel mit Wasser auffüllen Das Gerät ist mit einer automatischen Nachfüllkontrolle für den Kessel ausgestattet. Außerdem ist es mit einem Schutzmechanismus gegen abrupte Stopps der Wasser- zufuhr ausgestattet: Dabei werden automatisch das Heizelement, das Magnetventil für den Wasserzulauf und die Motorpumpe abgeschaltet. Der Fehler wird im Display angezeigt: Alarm Time-out Kessel nachfüllen... -
Page 16: Kaffee Brühen
Siebträger für zwei Siebträger für eine Tassen Tasse Einfach-Portion Doppel-Portion Filterkorb Filterkorb Abb. 3 Kaffee brühen Drehen Sie den Siebträger aus dem Brühkopf. Legen Sie den Filterkorb ein und füllen Sie ihn mit der gewünschten Menge an Kaffee. Benutzen Sie frisch gemahlenen Kaffee, um die besten Eigenschaften des Kaffees, sowie Aroma und Geschmack zu erhalten. - Page 17 Bedienfeld LED's der Ausgabetasten (weniger als 1 Sek. drücken) 1 x Espresso Dauerlauftaste Kaffee (zwischen 1 und 8 Sek. drücken) Programmierung 2 x Espresso 2 x Kaffee 1 x Kaffee (mehr als 8 Sek. drücken) Abb. 4 Modi der Kaffeemaschine Die Kaffeemaschine hat drei Modi: 1.
- Page 18 3. AUS Das Gerät ist von der Stromzufuhr getrennt. Abb. 5 Erhitzung von Flüssigkeiten • Halten Sie den Dampfstab (siehe (1) Abb. 1) über die Auffangschale und öffnen Sie den Dampfregler auf niedriger Stufe, um die Wassertropfen im Dampfstab zu entfernen.
- Page 19 Drücken Sie nun die "Dauerlauftaste" einmal für weniger als 1 Sekunde. Das heiße Wasser kommt aus dem Heißwasserhahn raus. Bei Erreichen der gewünschter Menge drücken Sie diese Taste erneut und die Teewasserdosierung wird gespeichert. Sie können die Dosierung des Wassers für Tee für jeder Brühgruppe auch unterschiedlich einstellen.
- Page 20 Selbstreinigung der Brühgruppen / Rückspülung Das Gerät muss sich im "AN"-Modus befinden. Schalten Sie das Gerät mit dem Hauptschalter aus (siehe (8) Abb. 1). Halten Sie die Taste “2 x Espresso” gedrückt und schalten Sie gleichzeitig das Gerät mit dem Hauptschalter (siehe (8) Abb. 1) ein. Zeiteinstellung Halten Sie die “Dauerlauftaste”...
- Page 21 Automatische Einschalt-/Ausschaltfunktion der Kaffeemaschine Auto An/Aus Auto An/Aus An: hh:mm Aus: hh:mm Einschalten Ausschalten • Um die automatische Einschalt-/Ausschaltfunktionen der Kaffeemaschine einzustellen, drücken Sie die Taste “2 x Espresso”. • Zum Ändern der Stundenanzeige drücken Sie die Taste “1 x Espresso” während der Stundenwert blinkt, um ihn zu erhöhen oder drücken Sie die Taste “1 x Kaffee”, um ihn zu verringern.
-
Page 22: Reinigung Und Wartung
6. Reinigung und Wartung 6.1 Sicherheitshinweise o Vor der Reinigung sowie vor der Durchführung von Reparaturen das Gerät von der Steckdose trennen (Netzstecker ziehen!). o Keine ätzenden Reinigungsmittel verwenden und darauf achten, dass kein Wasser in das Gerät eindringt. o Um sich vor Stromschlägen zu schützen, Gerät, Kabel und Stecker niemals in Wasser oder andere Flüssigkeiten eintauchen. -
Page 23: Sicherheitshinweise Zur Wartung
Schalten Sie das Gerät mithilfe des Hauptschalters aus (siehe (8) Abb. 1). Drücken Sie die Taste “2 x Espresso” der Brühgruppe, die Sie reinigen wollen, und halten Sie die Taste “2 x Espresso” gedrückt, während Sie das Gerät mit dem Hauptschalter einschalten. -
Page 24: Mögliche Funktionsstörungen
7. Mögliche Funktionsstörungen Diese Fehlfunktionen werden durch Kalk herbeigeführt: Der Kaffee tritt nicht mit einer angemessenen Temperatur aus: Die Ausflussrohre des Wärmetauschers sind von Kalk blockiert. Das Wasser kommt nicht aus allen Brühgruppen: Kalk verhindert den Ausfluss. ACHTUNG! Um Fehlfunktionen durch Kalkablagerungen zu vermeiden, muss bei Wasserhärte über 6°... -
Page 25: Entsorgung
Netzversorgung trennen und das Netzanschlusskabel vom Gerät entfernen. HINWEIS! Für die Entsorgung des Gerätes beachten Sie die in Ihrem Land und in Ihrer Kommune geltenden Vorschriften. Bartscher GmbH Franz-Kleine-Str. 28 D-33154 Salzkotten Tel.: +49 (0) 5258 971-0 Service-Hotline: 0180 5 971 197... - Page 26 - 22 -...
- Page 27 6. Cleaning and maintenance 6.1 Safety advice 6.2 Cleaning and decalcifying 40-41 6.3 Safety instructions for maintenance 7. Possible Malfunctions 8. Waste disposal Bartscher GmbH Franz-Kleine-Str. 28 D-33154 Salzkotten phone: +49 (0) 5258 971-0 Germany fax: +49 (0) 5258 971-120...
-
Page 28: General Information
1. General information 1.1 Information about the instruction manual This instruction manual contains information about the installation, operation and maintenance of the appliance and should be consulted as an important source of information and reference guide. Awareness of the safety instructions and instructions for use in this manual will ensure the safe and correct use of the appliance. -
Page 29: Liability And Warrantees
1.3 Liability and Warrantees All the information and instructions in this manual take into account standard safety regulations, current levels of technical engineering as well as the expertise and experience we have developed over the years. The instruction manual was translated with all due care and attention. However, we do not accept liability for any translation errors. -
Page 30: Safety
2. Safety This section provides an overview of all important safety aspects. In addition, every chapter provides precise safety advice for the prevention of dangers which are highlighted by the use of the above-mentioned symbols. Furthermore, attention should be paid to all pictograms, markers and labels on the device, which must be kept in a permanent state of legibility. -
Page 31: Intended Use
CAUTION! o The device is not intended for use by individuals (including children) with physical or mental disabilities, insufficient experience, and/or insufficient knowledge unless such persons are under the care of a person responsible for their safety or have received instructions regarding appropriate use of the device. -
Page 32: Delivery Check
3. Transport, packaging and storage 3.1 Delivery check Please check the delivery for completeness and transport damage immediately after receipt. In case of visible damage, do not accept or accept the delivery with reservation only. Note the extent of damage on the carrier’s bill of delivery and notify us of any recorded damage. -
Page 33: Technical Data
4. Technical data 4.1 Technical specifications Name „Coffeeline“ coffee machine 190.160 190.161 190.162 190.163 190.164 Art. No.: G2 plus G3 plus Model: 2,85 kW 3,3 kW 4,2 kW 3,3 kW 6,2 kW Power: 230 V 230 V 3 NAC 230 V... -
Page 34: Overview Of Parts
4.2 Overview of parts ⑤ ⑥ ⑦ ④ ③ ⑧ ② ① ⑨ ⑫ ⑩ ⑪ Fig. 1 Steam arm Hot water tap Steam regulator Water regulator Display Portion controls Cup & saucer storage ON/OFF switch Control light 10. Adjustable legs 11. -
Page 35: Installation And Operation
A c c e s s o r i e s • • • • For model: Mini (190.160): 1 strainer for 2 cups + 1 single-cup strainer + 1/2 meter hose from artificial materials and one membrane-cleaning device. • • • •... -
Page 36: Installation And Connection
• Never touch internal parts of the device. • Do not move or tilt the device during operation. WARNING! Hazard via electrical current! The device can cause injuries due to improper installation! Before installation the local power grid specification should be compared with that of the device (see type label). -
Page 37: Operation
5.3 Operation Filling the water reservoir The device is equipped with an automatic regulator to keep the water reservoir filled. It is also equipped with a protective mechanism to prevent sudden stops in water flow: The heating element, pump motor and magnetic water flow valve are automatically disconnected. -
Page 38: Brewing Coffee
Strainer for two cups Strainer for one cup Filter basket – single Filter basket for double portion portion Fig. 3 Brewing coffee Remove the strainer from the brewing head. Insert the filter basket and fill it with the desired amount of coffee. For the best, most aromatic and tasty coffee use freshly-ground coffee. - Page 39 Service panel LED –portion buttons (hold less than 1 sec.) 1 x espresso Constant coffee brewing (hold 1-8 seconds) Programming (hold longer than 8 seconds) 1 x coffee 2 x espresso 2 x coffee Abb. 4 Coffee machine modes The coffee maker has three modes: 1.
-
Page 40: Hot Water
3. OFF The device is disconnected from its power source. Fig. 5 Heating of liquids • Hold the steam arm (see (1) fig. 1) over the run-off tray and open the steam regulator slightly in order to receive drops of water from the steam arm. •... - Page 41 Now press the “Continuous function button” once, for less than 1 second. Hot water will flow out of the hot water spout. After the required amount of water is received, press the button again and the water portion for tea is set. The water portion for tea can also be set for every brewing assembly.
-
Page 42: Time Settings
Self-cleaning brewing assembly /initial rinsing 1. The device must be in the „ON“ mode. 2. Turn off the device using the main on/off switch (see (8) fig. 1). 3. Press and hold the button “2 x espresso” and turn the device on simultaneously via the main on/off switch (see (8) fig. - Page 43 Automatic ON/OFF function Auto ON/OFF Auto ON/OFF ON: hh:mm OFF: hh:mm Turning on Turning off • To set the automatic on/off function, press the „2 x espresso“ button. • To set the hour display, when the hour setting is flashing press the “1 x espresso” button to advance and “1 x coffee”...
-
Page 44: Cleaning And Maintenance
6. Cleaning and maintenance 6.1 Safety advice o Before beginning with repair or cleaning works make sure the device has been disconnected from power socket (pull the power plug!!!) and has cooled down. o Do not use any acid agents and make sure no water ingresses the device. o Device, cable or plug should never be dunked into water or other liquids. -
Page 45: Safety Instructions For Maintenance
Turn off the device via the main on/off switch (see (8) fig. 1). Press the “2 x espresso” button for the brewing assembly which is to be cleaned, and hold it down while turning of the device using the main on/off switch. The automatic self-cleaning process will begin and it is no longer necessary to hold the button down. -
Page 46: Possible Malfunctions
7. Possible Malfunctions The following problems with functioning are the result of calcium deposits: Coffee is not at the right temperature: Heat outflow channels are blocked by deposits. Water is not flowing from all brewing assemblies: Deposits are blocking the flow of water. ATTENTION! To prevent malfunctioning of the device due to the formation of calcium deposits, with water hardness greater than 6°... -
Page 47: Waste Disposal
For that purpose disconnect device from mains supply and remove mains connection cable from the device. NOTE! For the disposal of the device please consider and act according to the national and local rules and regulations. Bartscher GmbH Franz-Kleine-Str. 28 D-33154 Salzkotten phone: +49 (0) 5258 971-0 Germany... - Page 48 - 44 -...
- Page 49 6.1 Consignes de sécurité 6.2 Nettoyage et détartrage 62-63 6.3 Consignes de sécurité relatives à la maintenance 7. Anomalies de fonctionnement 8. Elimination des éléments usés Bartscher GmbH Franz-Kleine-Str. 28 D-33154 Salzkotten Tél.: +49 (0) 5258 971-0 Germany Fax: +49 (0) 5258 971-120...
-
Page 50: Informations Concernant La Notice D´utilisation
1. Généralités 1.1 Informations concernant la notice d´utilisation La présente notice d´utilisation décrit l´installation, la manipulation et la maintenance de l´appareil, elle sert de source d´informations et d´ouvrage de référence. La connaissance et l´observation de toutes les consignes de sécurité et des instructions mentionnées dans le mode d´emploi sont la condition sine qua non d´une utilisation sûre et correcte de l´appareil. -
Page 51: Responsabilité Et Garantie
1.3 Responsabilité et garantie Toutes les indications et consignes contenues dans la présente notice d´utilisation ont été réunies en tenant compte des prescriptions en vigueur, du niveau actuel de développe- ment technique ainsi que de nos connaissances et expériences de plusieurs années. Les traductions de la notice d´utilisation ont été... -
Page 52: Sécurité
2. Sécurité Ce chapitre donne un aperçu de tous les aspects importants de la sécurité. De plus, des consignes concrètes de sécurité visant à écarter les dangers sont mentionnées dans les chapitres individuels et caractérisées par des symboles. Veiller en outre à respecter les pictogrammes indiqués sur l´appareil, les étiquettes et les inscriptions et à... -
Page 53: Utilisation Conforme
ATTENTION ! o L’appareil n’est pas destiné à être utilisé par des personnes (y compris les enfants) aux moyens physiques, sensoriels ou intellectuels limités, ou sans expérience suffisante et/ou sans connaissances suffisantes, à moins que ces personnes se trouvent sous la surveillance d’une personne responsable de leur sécurité ou qu’elles obtiennent de cette personne les indications pour utiliser l’appareil. -
Page 54: Transport, Emballage Et Stockage
3. Transport, emballage et stockage 3.1 Inspection suite au transport Vérifier l´intégralité et l´absence de dommages dus au transport dès réception du produit. En cas de dommages identifiables extérieurement dus au transport, refuser ou accepter le produit livré uniquement sous réserve. Noter l´étendue du dommage sur les documents de transport/le bon de livraison du transporteur. -
Page 55: Caractéristiques Techniques
4. Caractéristiques techniques 4.1 Indications techniques Machine à café haute pression „Coffeeline“ 190.160 190.161 190.162 190.163 190.164 No de l'art.: G2 plus G3 plus Modèle: 3,3 kW 2,85 kW 3,3 kW 4,2 kW 6,2 kW Puissance 230 V 230 V... -
Page 56: Aperçu Des Composants
4.2 Aperçu des composants ⑤ ⑥ ⑦ ④ ③ ⑧ ② ① ⑨ ⑫ ⑩ ⑪ Des. 1 Diffuseur de vapeur Robinet d'eau bouillante Régulateur de vapeur Régulateur d'eau Ecran d'affichage Touches de dosage Rangement pour les tasses / sous-tasses Interrupteur principal Témoin de contrôle 10. -
Page 57: Installation Et Utilisation
A c c e s s o i r e s • • • • Pour les modèles Mini (190.160): 1 filtre pour 2 tasses + 1 filtre pour 1 tasse + tuyau en matière plastique d'une longueur d' ½ mètre et 1 unité de nettoyage de la membrane. -
Page 58: Installation Et Branchement
• Ne pas toucher l'appareil les pieds nus ou avec des mains mouillées ou humides. • Ne jamais toucher les éléments internes de l'appareil. • Ne pas renverser ni déplacer l’appareil pendant le fonctionnement. AVERTISSEMENT ! Risque lié au courant électrique ! L´appareil peut causer des blessures en cas d´installation non conforme. -
Page 59: Utilisation
5.3 Utilisation Remplissage du réservoir d'eau L'appareil est équipé d'un système de contrôle automatique du remplissage du réservoir d'eau. De plus, il est équipé d'un mécanisme de protection contre des interruptions soudaines d'arrivée d'eau: 1. Dans ce cas, la résistance, la valve magnétique d'arrivée d'eau et la pompe du moteur sont débranchées automatiquement. -
Page 60: Infusion Du Café
Fitre pour deux tasses Filtre pour une tasse Panier du filtre pour une Panier du filtre - simple double dose dose Des. 3 Infusion du café a) Retirer le filtre de la tête d'infusion. b) Placer le panier du filtre et le remplir d'une quantité de café adéquate. Afin d'obtenir les meilleurs arômes du café... -
Page 61: Panneau De Commande
Panneau de commande LED - touches de distribution THÉ (appuyer moins d' 1 sec.) 1 x expresso Touche de fonctionnement continu pour le café (appuyer 1-8 sec.) Programmation 1 x café 2 x expresso 2 x café (appuyer plus de 8 sec.) Des. -
Page 62: Réchauffement De Liquides
éteint L'appareil est débranché de l'alimentation électrique. Des. 5 éteint Allumé Réchauffement de liquides • Tenir le diffuseur de vapeur (voir. (1) des. 1) au-dessus du bac récupérateur et ouvrir le régulateur de vapeur à un faible niveau afin d'éliminer les gouttes d'eau du diffuseur de vapeur. -
Page 63: Programmation Du Dosage Du Café
Appuyer maintenant sur la "Touche de fonctionnement continu" une fois moins d' 1 seconde. L'eau bouillante sort du robinet. Lorsque la quantité d'eau nécessaire a été obtenue, réappuyer sur cette touche et le dosage de l'eau pour le thé a été programmé. Le dosage de l'eau pour le thé... -
Page 64: Autonettoyage Des Systèmes D'infusion / Rinçage Rétrograde
Autonettoyage des systèmes d'infusion / Rinçage rétrograde L'appareil doit être en mode " Allumé ". Eteindre l'appareil à l'aide de l'interrupteur principal (voir. (8) des. 1). Maintenir la touche “2 x expresso” appuyée et allumer l'appareil à l'aide de l'interrupteur principal (voir. (8) des. 1). Réglage de l'heure Appuyer plus de 8 secondes sur la "Touche de fonctionnement continu"... - Page 65 Fonction d'allumage/extinction automatique de la machine à café Auto ON/OFF Auto ON/OFF ON: hh:mm OFF: hh:mm Allumage Extinction • Afin de régler la fonction d'allumage/extinction automatique de la machine à café, appuyer sur la touche „2 x expresso“. • Afin de changer l'heure, appuyer sur la touche “1 x expresso” lorsque la valeur affichée clignote afin de l'augmenter ou la touche “1 x café”...
-
Page 66: Nettoyage Et Maintenance
6. Nettoyage et maintenance 6.1 Consignes de sécurité o Avant de nettoyer et de réparer de l'appareil, débrancher celui-ci en retirant la fiche de la prise de courant et laisser refroidir l´appareil. o Ne pas utiliser de détergents caustiques et veiller à ce que l’eau ne pénètre pas à l'intérieur de l'appareil. -
Page 67: Elimination Du Calcaire
Allumer l'appareil à l'aide de l'interrupteur principal (voir. (8) des. 1). Appuyer sur la touche “2 x expresso” du système d'infusion qui doit être nettoyé et maintenir la touche “2 x expresso” durant l'allumage de l'appareil à l'aide de l'interrupteur principal. Le processus de nettoyage automatique du système d'infusion commence et la touche peut être libérée. -
Page 68: Anomalies De Fonctionnement
7. Anomalies de fonctionnement Les perturbations du fonctionnement suivantes sont provoquées par les dépôts de calcaire: Le café n'a pas la température adéquate: Les tuyaux de sortie de l'échangeur de chaleur sont obstrués par du calcaire. L'eau ne sort pas de tous les systèmes d'infusion: Le calcaire empêche la sortie de l'eau. -
Page 69: Elimination Des Éléments Usés
REMARQUE ! Pour l’élimination de l’appareil veuillez respecter les prescriptions en vigueur dans votre pays et votre commune. Bartscher GmbH Franz-Kleine-Str. 28 D-33154 Salzkotten Tél.: +49 (0) 5258 971-0 Germany Fax: +49 (0) 5258 971-120... - Page 70 - 66 -...
- Page 71 6. Reiniging en onderhoud 6.1 Veiligheidsvoorschriften 6.2 Reiniging en ontkalking 84-85 6.3 Veiligheidsvoorschriften voor onderhoud 7. Mogelijke storingen in het functioneren 8. Verwijderen Bartscher GmbH Franz-Kleine-Str. 28 D-33154 Salzkotten Tel.: +49 (0) 5258 971-0 Germany Fax: +49 (0) 5258 971-120 - 67 -...
-
Page 72: Algemeen
1. Algemeen 1.1 Informatie over de gebruiksaanwijzing Deze gebruiksaanwijzing bevat de beschrijving van de installatie, de bediening en het onderhoud van het apparaat en dient als belangrijke informatiebron en naslagwerk. De kennis en het inachtnemen van alle hier beschreven veiligheidsvoorschriften en instructies is een voorwaarde voor veilig en juist gebruik van het apparaat. -
Page 73: Aansprakelijkheid En Vrijwaring
1.3 Aansprakelijkheid en vrijwaring Alle gegevens en tips die zijn opgenomen in deze gebruiksaanwijzing zijn samengesteld rekening houdend met de geldende voorschriften, de actuele technische stand van zaken en onze langdurige inzichten en ervaring. Ook de tekst van deze gebruiksaanwijzing is zo goed mogelijk vertaald. Wij zijn echter niet aansprakelijk voor eventuele fouten in de vertaling. -
Page 74: Veiligheid
2. Veiligheid In dit gedeelte wordt een overzicht gegeven van alle belangrijke veiligheidsaspecten. Bovendien zijn er in de onderstaande hoofdstukken concrete veiligheidsvoorschriften opgenomen (aangeduid met symbolen) om risico’s te voorkomen. Daarom moeten de op het apparaat aangebrachte pictogrammen, tekens en opschriften in acht genomen worden en steeds goed leesbaar gehouden. -
Page 75: Reglementair Gebruik
OPLETTEN! Het toestel is niet bestemd voor gebruik door personen (inclusief kinderen) met een fysieke, sensorische of geestelijke handicap en/of met onvoldoende ervaring en/of onvoldoende kennis, tenzij deze personen onder toezicht staan van een voor hun veiligheid verantwoordelijke persoon of van die persoon voldoende uitleg hebben gekregen betreffende het gebruik maken van het apparaat. -
Page 76: Transport, Verpakking En Bewaring
3. Transport, verpakking en bewaring 3.1 Controle bij aflevering ALs het apparaat afgeleverd is, onmiddelijk controleren of het compleet en zonder transportschade is. Als er duidelijk zichtbare transportschade is, het geleverde apparaat niet of alleen onder voorbehoud aannemen. De schade opschrijven op de transportdocumenten/ het leveringsdocument van de leverancier. -
Page 77: Specificaties
4. Specificaties 4.1 Technische gegevens Naam Espressomachine “Coffeeline” 190.160 190.161 190.162 190.163 190.164 Art. nr. G2 plus G3 plus Model: 4,2 kW 6,2 kW 2,85 kW 3,3 kW 3,3 kW Vermogen 3 NAC 3 NAC 230 V 230 V 230 V... -
Page 78: Onderdelenoverzicht
4.2 Onderdelenoverzicht ⑤ ⑥ ⑦ ④ ③ ⑧ ② ① ⑨ ⑫ ⑩ ⑪ Afb. 1 Stoompijpje Heetwaterkraan Stoomregelaar Waterregelaar Display Doseringsknoppen Plateau voor kopjes/schoteltjes Hoofdschakelaar Controlelampje 10. In hoogte verstelbare voetjes 11. Zetgroep met piston 12. Lekbakje - 74 -... -
Page 79: Installatie En Bediening
A c c e s s o i r e s • • • • Bij het model Mini (190.160): 1 piston voor 2 kopjes + 1 piston voor 1 kopje + kunststof slangetje van een ½ meter lengte en 1 eenheid reinigingsmembraan. -
Page 80: Plaatsing En Aansluiting
• Raak het apparaat niet aan indien u blootsvoets bent of natte of vochtige handen heeft. • Raak nooit de inwendige delen van het apparaat aan. • Verschuif of kantel het apparaat niet als dit in werking is. WAARSCHUWING! Gevaar voor elektrische schokken! Ondeskundige installatie van het apparaat kan verwondingen veroorzaken! Vergelijk de installatiegegevens van het lokale stroomnetwerk met de technische gegevens van het apparaat (zie typeschild). -
Page 81: Bediening
5.3 Bediening Vullen van de boiler Het apparaat is uitgerust met een automatische controle van het vulniveau van de boiler. Bovendien is hij uitgerust met een beveiligingsmechanisme tegen plotselinge onderbrekingen in de watertoevoer: 1. Op dat moment worden het verwarmingselement, de magneetventielen voor de watertoevoer en de motor van de pomp automatisch uitgeschakeld. - Page 82 Piston voor twee kopjes Piston voor één kopje 1 kops filterbakje 2 kops filterbakje Afb. 3 Koffie zetten a) Draai de piston uit het groepshoofd. b) Breng een filterbakje aan en vul deze met de gewenste hoeveelheid koffie. Om de beste koffie-eigenschappen te verkrijgen en aroma en smaak te behouden, kan het beste vers gemalen koffie gebruikt worden.
- Page 83 Bedieningspaneel LED-doseerknoppen THEE (korter dan 1 sec. indrukken) 1 x espresso Continu dosering koffie (tussen de 1-8 seconden indrukken) Programmeren (langer dan 8 seconden) 1 x koffie 2 x espresso 2 x koffie indrukken) Afb. 4 Standen van de espressomachine De espressomachine heeft 3 standen: 1.
- Page 84 3. OFF Het apparaat is losgekoppeld van de stroomvoorziening. Afb. 5 Verwarming van vloeistoffen • Houd het stoompijpje (zie (1) afb. 1) boven het lekbakje en open de stoomregelaar op een laag niveau om waterdruppels van het stoompijpje te verwijderen. •...
- Page 85 Druk nu de knop “continu dosering’ eenmaal korter dan 1 seconde in. Het hete water komt uit de heetwaterkraan. Nadat de gewenste hoeveelheid water is bereikt de knop opnieuw indrukken en de dosering van het theewater wordt geprogrammeerd. De dosering van het theewater kan voor elke zetgroep verschillend ingesteld worden. Programmering van de koffiedosering Houd de knop “continu dosering”...
-
Page 86: Instelling Van De Tijd
Zelfreiniging van de zetgroepen / Voorspoelen 1. Het apparaat moet zijn ingeschakeld in de stand “ON”. 2. Schakel het apparaat uit met de hoofdschakelaar (zie (8) afb. 1). 3. Houd de knop “2 x espresso” ingedrukt en schakel tegelijkertijd het apparaat in met de hoofdschakelaar. - Page 87 Automatische in-/uitschakelfunctie van de espressomachine Auto ON/OFF Auto ON/OFF ON: hh:mm OFF: hh:mm Inschakelen Uitschakelen • Om de automatische in-/uitschakelfunctie van de espressomachine in te stellen: druk op de knop “2 x espresso”. • Om de uuraanduiding te wijzigen: als de urenwaarde knippert, druk dan op “1 x espresso”...
-
Page 88: Reiniging En Onderhoud
6. Reiniging en onderhoud 6.1 Veiligheidsvoorschriften Zowel voor reiniging als voor reparatie de stekker van het apparaat uit het stopcontact halen en het apparaat laten afkoelen. Gebruik geen bijtende reinigingsmiddelen en zorg ervoor, dat er geen water in het apparaat komt. Het is niet toegestaan het apparaat, de kabel of de stekker in water of een andere vloeistof onder te dompelen, om elektrische schokken te vermijden. -
Page 89: Veiligheidsvoorschriften Voor Onderhoud
Draai de piston in het groepshoofd totdat hij vastklikt. Schakel het apparaat uit met behulp van de hoofdschakelaar (zie (8) afb. 1). Druk op de knop “2 x espresso” van de zetgroep die schoongemaakt moet worden en houd de knop “2 x espresso” ingedrukt terwijl u het apparaat aanzet met behulp van de hoofdschakelaar. -
Page 90: Mogelijke Storingen In Het Functioneren
7. Mogelijke storingen in het functioneren De volgende storingen in het functioneren worden veroorzaakt door kalkaanslag: De afgegeven koffie heeft niet de juiste temperatuur: De uitstroompijpjes van de warmtewisselaar zijn geblokkeerd door kalk. Het water komt niet uit alle zetgroepen: Kalk maakt uitstroom van het water onmogelijk. -
Page 91: Verwijderen
Het apparaat uit het stopcontact halen en de aansluitkabel uit het apparaat verwijderen. AANWIJZING! Bij de verwijdering van het apparaat dient u de in uw land geldende voorschriften in acht te nemen. Bartscher GmbH Franz-Kleine-Str. 28 D-33154 Salzkotten Tel.: +49 (0) 5258 971-0 Germany... - Page 92 - 88 -...
- Page 93 6.1 Wskazówki dotyczące bezpieczeństwa 6.2 Czyszczenie i odkamienianie 106-107 6.3 Wskazówki dotyczące bezpieczeństwa podczas konserwacji 7. Możliwe usterki 8. Utylizacja Bartscher GmbH Franz-Kleine-Straße 28 D-33154 Salzkotten Tel.: +49 (0) 5258 971-0 Niemcy Faks: +49 (0) 5258 971-120 - 89 -...
-
Page 94: Informacje Ogólne
1. Informacje ogólne 1.1 Informacje dotyczące instrukcji obsługi Niniejsza instrukcja obsługi zawiera opis instalacji urządzenia, jego obsługi oraz konserwacji i służy jako ważne źródło informacji oraz poradnik. Znajomość i przestrzeganie wszystkich zawartych w niej wskazówek dotyczących bezpieczeństwa i obsługi stanowi warunek bezpiecznej i prawidłowej pracy z urządzeniem. Ponadto należy przestrzegać... -
Page 95: Odpowiedzialność Producenta I Gwarancja
1.3 Odpowiedzialność producenta i gwarancja Wszystkie informacje zawarte w niniejszej instrukcji obsługi zostały zestawione przy uwzględnieniu obowiązujących przepisów, aktualnej wiedzy konstruktorskiej i inżynierskiej oraz naszej wiedzy, a także naszych wieloletnich doświadczeń. Również tłumaczenia instrukcji obsługi zostały wykonane jak najbardziej rzetelnie. Nie możemy jednak przejąć... -
Page 96: Bezpieczeństwo
2. Bezpieczeństwo Niniejszy rozdział zawiera zarys informacji, dotyczących wszystkich istotnych aspektów związanych z bezpieczeństwem. Ponadto poszczególne rozdziały zawierają konkretne wskazówki (oznaczone symbolami), dotyczące bezpieczeństwa i mające zapobiegać powstawaniu zagrożeń. Należy także przestrzegać informacji z piktogramów, tabliczek oraz napisów umieszczonych na urządzeniu i zadbać o to, aby były one czytelne. Przestrzeganie wszystkich wskazówek dotyczących bezpieczeństwa gwarantuje optymalną... -
Page 97: Użytkowanie Zgodnie Z Przeznaczeniem
OSTRZEŻENIE! o Urządzenie nie jest przeznaczone do użytkowania przez osoby (w tym także dzieci) o ograniczonej sprawności fizycznej, sensorycznej czy umysłowej lub z niedostatecznym doświadczeniem i/lub niedostateczną wiedzą, chyba że osoby te znajdują się pod nadzorem osoby odpowiedzialnej za ich bezpieczeństwo lub otrzymały od niej wskazówki, jak należy używać... -
Page 98: Transport, Opakowanie I Magazynowanie
3. Transport, opakowanie i magazynowanie 3.1 Kontrola dostawy Po dotarciu dostawy należy niezwłocznie sprawdzić, czy urządzenie jest kompletne i czy nie zostało uszkodzone podczas transportu. W przypadku stwierdzenia widocznych uszkodzeń transportowych, należy odmówić przyjęcia urządzenia lub dokonać przyjęcia warunkowego. Zakres szkody należy wpisać do dokumentów przewozowych / listu przewozowego spedytora. -
Page 99: Parametry Techniczne
4. Parametry techniczne 4.1 Dane techniczne Nazwa Ekspres ciśnieniowy do kawy „Coffeeline“ 190.160 190.161 190.162 190.163 190.164 Nr art.: G2 plus G3 plus Model: 4,2 kW 6,2 kW 2,85 kW 3,3 kW 3,3 kW 3 NAC 3 NAC przyłączeniowa: 230 V... -
Page 100: Wykaz Podzespołów
4.2 Wykaz podzespołów ⑤ ⑥ ⑦ ④ ③ ⑧ ② ① ⑨ ⑫ ⑩ ⑪ Rys. 1 Dysza pary Kurek gorącej wody Regulator pary Regulator wody Wyświetlacz Przyciski dozowania Półka na filiżnaki / spodki Włącznik główny Lampka kontrolna 10. Nóżki z regulacją wysokości 11. -
Page 101: Instalacja I Obsługa Urządzenia
A k c e s o r i a • • • • Do modeli Mini (190.160): 1 sitko na 2 filiżanki + 1 sitko na 1 filiżankę + wąż z tworzywa sztucznego długości ½ metra i 1 jednostka czyszcząca membranę. -
Page 102: Ustawienie I Podłączenie Urządzenia
• Do otworów w urządzeniu nie wolno wkładać żadnych przedmiotów. • Nie dotykać urządzenia, będąc boso, lub mającmokre lub wilgotne ręce. • Nigdy nie dotykać wewnętrznych części urządzenia. • Podczas pracy nie poruszać urządzeniem, ani go nie przechylać. NIEBEZPIECZEŃSTWO! Zagrożenie prądem elektrycznym! W przypadku niewłaściwej instalacji, urządzenie może spowodować... -
Page 103: Obsługa
5.3 Obsługa Napełnianie zbiornika wodą Urządzenie jest wyposażone w automatyczną kontrolę dopełniania zbiornika wody. Poza tym wyposażone jest w mechanizm ochronny przed nagłymi przerwami w dostawie wody: 1. Przy tym automatycznie odłączana jest grzałka, zawór magnetyczny dopływu wody oraz pompa silnika. 2. - Page 104 Sitko na dwie filiżanki Sitko na jedną filiżankę Kosz filtra – porcja Kosz filtra porcja pojedyncza podwójna Rys. 3 Zaparzanie kawy a) Wykręcić sitko z głowicy zaparzającej. b) Założyć kosz filtra i napełnić go odpowiednią ilością kawy. Aby uzyskać najlepsze właściwości kawy, a także utrzymać...
-
Page 105: Panel Obsługi
Panel obsługi LED -przyciski wydawania HERBATA (przyciskać krócej niż 1 sek.) 1 x espresso Przycisk pracy ciągłej kawa (przyciskać 1-8 sekund) Programowanie 1 x kawa 2 x espresso 2 x kawa (przyciskać dłużej niż 8 sekund) Rys. 4 Tryby ekspresu do kawy Ekspres do kawy posiada 3 tryby: 1. - Page 106 3. OFF Urządzenie jest odłączone od źródła prądu. Rys. 5 Podgrzewanie płynów • Trzymać dyszę pary (zob. (1) rys. 1) nad wanienką ściekową i otworzyć regulator pary na niskim poziomie, aby usunąć krople wody z dyszy pary. • Zakręcić regulator pary. •...
- Page 107 Teraz nacisnąć “Przycisk pracy ciągłej” jeden raz na krócej niż 1 sekunda. Gorąca woda wydostaje się z kurka gorącej wody. Po otrzymaniu potrzebnej ilości wody przycisk ten należy nacisnąć ponownie i dozowanie wody na herbatę zostaje zaprogramowane. Dozowanie wody na herbatę może być ustawione inaczej dla każdej z grup zaparzania. Programowanie dozowania kawy „Przycisk pracy ciągłej“...
-
Page 108: Ustawianie Czasu
Samoczyszczenie grup zaparzania / Płukanie wsteczne 1. Urządzenie musi znajdować się w trybie włączonym "ON". 2. Wyłączyć urządzenie włącznikiem głównym (zob. (8) rys. 1). 3. Trzymać wciśnięty przycisk “2 x espresso” i włączyć jednocześnie urządzenie za pomocą włącznika głównego (zob. (8) rys. 1). Ustawianie czasu „Przycisk pracy ciągłej“... - Page 109 Funkcja automatycznego włączania / wyłączania ekspresu Auto ON/OFF Auto ON/OFF ON: hh:mm OFF: hh:mm Włączanie Wyłączanie • Aby ustawić funkcje automatycznego włączania / wyłączania ekspresu do kawy, należy nacisnąć przycisk „2 x espresso“. • Aby zmienić wskaźnik godziny, podczas gdy wartość godziny miga, należy wcisnąć przycisk „1 x espresso“, aby wartość...
-
Page 110: Czyszczenie I Konserwacja
6. Czyszczenie i konserwacja 6.1 Wskazówki dotyczące bezpieczeństwa o Przed czyszczeniem urządzenia lub rozpoczęciem prac naprawczych, urządzenie należy odłączyć od źródła zasilania (wyjąć wtyczkę z gniazdka) i odczekać, aż ostygnie. o Nie wolno stosować żadnych żrących detergentów i należy uważać, aby do urządzenia nie przedostała się... -
Page 111: Wskazówki Dotyczące Bezpieczeństwa Podczas Konserwacji
e) Wyłączyć urządzenie za pomocą włącznika głównego (zob. (8) rys. 1). f) Wcisnąć przycisk “2 x espresso” grupy zaparzania, która ma być czyszczona, i trzymać wciśnięty przycisk “2 x espresso”, podczas włączania urządzenia za pomocą włącznika głównego. Automatyczny proces samoczyszczenia grupy zaparzania rozpoczyna się... -
Page 112: Możliwe Usterki
7. Możliwe usterki Następujące zakłócenia w funkcjonowaniu są spowodowane osadem z kamienia: Wydawana kawa nie ma odpowiedniej temperatury: Rurki wylotowe wymiennika ciepła są zablokowane przez kamień. Woda nie wydostaje się ze wszystkich grup zaparzania: Kamień uniemożliwia wypływanie wody. OSTRZEŻENIE! Aby zapobiec nieprawidłowemu działaniu urządzenia na skutek tworzenia się osadów wapnia, przy twardości wody powyżej 6°... -
Page 113: Utylizacja
W tym celu należy odłączyć urządzenie od zasilania i odciąć kabel zasilający. WSKAZÓWKA! Podczas utylizacji urządzenia należy postępować zgodnie z właściwymi przepisami państwowymi lub regionalnymi. Bartscher GmbH Franz-Kleine-Straße 28 D-33154 Salzkotten Tel.: +49 (0) 5258 971-0 Niemcy Faks: +49 (0) 5258 971-120...