Publicité

Les langues disponibles

Les langues disponibles

Liens rapides

Catalog No.
No de Cat.
Catálogo No.
0613-20 LokTor Hammer-Drill
0614-20 LokTor Hammer-Drill
0616-20 LokTor Driver Drill
0622-20 LokTor Driver Drill
0624-20 LokTor Hammer-Drill
14.4 V AND 18 V LOKTOR 1/2" HAMMER-DRILLS & DRIVER DRILLS
MARTEAUX PERFORATEURS ET TOURNEVIS ELECTRIQUES 14,4 V
ET 18 V 13 mm (1/2") LOKTOR
MARTILLOS PERFORADORES Y MARTILLOS TALADRADORES DE
13 mm (1/2") LOKTOR Y 14,4 V Y 18 V
SPECIAL NOTE: New battery packs are not fully charged. Charge your battery pack before using it for the first time and
follow the charging instructions in your charger manual.
NOTE SPÉCIALE: Les batteries neuves ne sont pas entièrement chargées. Chargez la batterie avant de vous en servir la
première fois en suivant les instructions de recharge dans le manuel qui accompagne cet outil.
NOTA ESPECIAL: Las batterias, cuando son nuevas, no están totalmente cargadas. Cargue su bateria antes de usarla
por primera vez siga las instrucciones de carga que vienen en el manuel de la herramienta.
TO REDUCE THE RISK OF INJURY, USER MUST READ AND UNDERSTAND
OPERATOR'S MANUAL.
AFIN DE RÉDUIRE LE RISQUE DE BLESSURES, L'UTILISATEUR DOIT LIRE ET
BIEN COMPRENDRE LE MANUEL DE L'UTILISATEUR.
PARA REDUCIR EL RIESGO DE LESIONES, EL USUARIO DEBE LEER Y
ENTENDER EL MANUAL DEL OPERADOR.
OPERATOR'S MANUAL
MANUEL de L'UTILISATEUR
MANUAL del OPERADOR

Publicité

Table des Matières
loading

Sommaire des Matières pour Milwaukee 0613-20

  • Page 1 MANUEL de L'UTILISATEUR MANUAL del OPERADOR Catalog No. No de Cat. Catálogo No. 0613-20 LokTor Hammer-Drill 0614-20 LokTor Hammer-Drill 0616-20 LokTor Driver Drill 0622-20 LokTor Driver Drill 0624-20 LokTor Hammer-Drill 14.4 V AND 18 V LOKTOR 1/2" HAMMER-DRILLS & DRIVER DRILLS MARTEAUX PERFORATEURS ET TOURNEVIS ELECTRIQUES 14,4 V ET 18 V 13 mm (1/2") LOKTOR...
  • Page 2: General Safety Rules-For All Battery Operated Tools

    GENERAL SAFETY RULES-FOR ALL BATTERY OPERATED TOOLS WARNING! READ AND UNDERSTAND ALL INSTRUCTIONS. Failure to follow all instructions listed below, may result in electric shock, fire and/or serious personal injury. SAVE THESE INSTRUCTIONS PERSONAL SAFETY WORK AREA Keep your work area clean and Stay alert, watch what you are do- well lit.
  • Page 3 19. Maintain tools with care. Keep cut- TOOL USE AND CARE ting tools sharp and clean. Prop- erly maintained tools with sharp cut- 13. Use clamps or other practical way ting edge are less likely to bind and are to secure and support the work- easier to control.
  • Page 4: Specific Safety Rules

    SPECIFIC SAFETY RULES Maintain labels and nameplates. These carry important information. If unreadable or missing, contact a MILWAUKEE service facility for a free replacement. WARNING! Some dust created by power sanding, sawing, grinding, drilling, and other construction activities contains chemicals known to cause cancer, birth defects or other reproductive harm.
  • Page 5: Functional Description

    Battery pack Trigger Control switch Keyless chuck Side handle Torque selector collar Capacities Wood Screws Steel Flat Bit Auger Bit Hole Saw Masonry (dia.) 0613-20 1/2" 1-1/2" 1-1/8" 2-1/8" 3/8" 1/4" 0614-20 1/2" 1-1/2" 1-1/8" 2-1/8" 3/8" 1/4" 0616-20 1/2"...
  • Page 6 WARNING! (Fig. 1 & 2) Battery pack can be inserted into the tool in two ways. Charge only MILWAUKEE 12, 14.4 and 18 Volt battery packs in charg- ers. Other types of batteries may Fig. 1 explode causing personal injury and damage.
  • Page 7 ASSEMBLY WARNING! Installing the Side Handle To install the side handle, loosen the Always lock trigger or remove side handle grip until the ring is large battery pack before changing or enough to slide over the torque selec- removing accessories. Only use tor collar.
  • Page 8 For forward (clockwise) rotation, push in Selecting Hammer or Drill Action the control switch from the right side of the (Cat. No. 0613-20, 0614-20, and 0624-20 only) tool (Fig. 6). Check the direction of MILWAUKEE Hammer-Drills are designed rotation before use.
  • Page 9: Applications

    To vary the speed, simply increase or de- (Cat. No. 0613-20, 0614-20, and 0624-20 crease pressure on the trigger. The further only). Use high speed carbide-tipped bits. the trigger is pulled, the greater the speed. Drilling soft masonry materials such as cin- der block requires little pressure.
  • Page 10 Typical Bracing Methods Driving Screws and Nut Running Drill a pilot hole when driving screws into Fig. 9 Forward rotation thick or hard materials. Set the torque se- lector collar to the proper position and set the speed to low. Use the proper style and size screwdriver bit for the type of screw you are using.
  • Page 11 MAINTENANCE WARNING! Use a MILWAUKEE battery pack only until it no longer performs with the power and torque needed for your application. To reduce the risk of injury, always unplug the charger and Store your battery pack in a cool, dry place.
  • Page 12 FIVE YEAR TOOL WARNING! LIMITED WARRANTY To reduce the risk of explosion, Every MILWAUKEE tool is tested before never burn a battery pack even if leaving the factory and is warranted to be damaged, dead free from defects in material and work- completely discharged.
  • Page 13: Accessories

    Only use accessories specifically recommended for this tool. Others may be hazardous. For a complete listing of accessories refer to your MILWAUKEE Electric Tool catalog or go on-line to www.mil-electric-tool.com. To obtain a catalog, contact your local distributor or a service center listed on the back cover of this operator’s manual.
  • Page 14: Règles De Sécurité Générales Pour Tous Les Outils À Batterie

    RÈGLES DE SÉCURITÉ GÉNÉRALES POUR TOUS LES OUTILS À BATTERIE AVERTISSEMENT! VOUS DEVEZ LIRE ET COMPRENDRE TOUTES LES INSTRUCTIONS Le non-respect, même partiel, des instructions ci-après entraîne un risque de choc électrique, d'incendie et/ou de blessures graves. CONSERVEZ CES INSTRUCTIONS N'utilisez un outil qu'avec un AIRE DE TRAVAIL bloc-batterie conçu spécifiquement...
  • Page 15: Utilisation Et Entretien Des Outils

    10. Enlevez les clés de réglage ou de 18. Lorsque le bloc-batterie n'est pas serrage avant de démarrer l'outil. en service, tenez-le à l'écart Une clé laissée dans une pièce d'autres objets métalliques tournante de l'outil peut provoquer des (trombones, pièces de monnaie, blessures.
  • Page 16: Règles De Sécurité Particulière

    Entretenez les étiquettes et marques du fabricant. Les indications qu'elles contiennent sont précieuses. Si elles deviennent illisibles ou se détachent, faites-les remplacer gratuitement à un centre de service MILWAUKEE accrédité. AVERTISSEMENT! La poussière dégagée par perçage, sciage et autres travaux de construction contient des substances chimiques reconnues comme pouvant causer le cancer, des malformations congénitales ou d’autres troubles de reproduction.
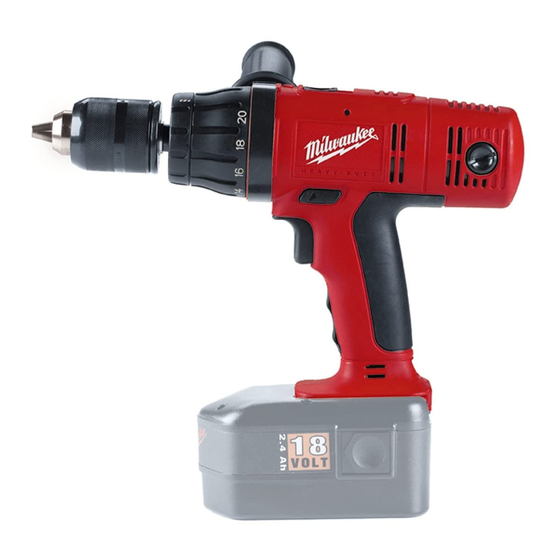
  • Page 17: Description Fonctionnelle

    Collier sélecteur de couple Spécifications No. de Volts Tr/min. Coups- Cat. Minute à vide 0613-20 14,4 Bas 0 - 7 500 Bas 0 - 500 Haut 0 - 1 700 Haut 0 - 25 500 0614-20 14,4 Bas 0 - 7 500...
  • Page 18: Montage De L'outil

    Insertion du bloc de piles dans l’outil AVERTISSEMENT! (Fig. 1 & 2) Le bloc de pile peut être inséré de deux Seules les batteries MILWAUKEE façons. de 12V, 14,4V et 18V doivent être rechargées avec le chargeur de Fig. 1 batterie.
  • Page 19 MONTAGE DE L'OUTIL AVERTISSEMENT! Installation de la poignée latérale Pour installer la poignée latérale, Il faut toujours retirer la batterie et desserrez son manche jusqu’à ce que verrouiller la détente de l’outil l’anneau soit suffisamment grand pour avant de changer ou d’enlever les glisser par-dessus le collier sélecteur accessoires.
  • Page 20 (Pour le no de cat. avec un bloc de piles à pleine charge. 0613-20, 0614-20, et 0624-20 seulement) Les marteaux perforateurs de MILWAUKEE sont conçus pour fonctionner sur deux 0614-20 & 0622-20 &...
  • Page 21 Utilisation du commutateur (Fig. 6, 7, Démarrage, arrêt et contrôle de la et 8) vitesse Le commutateur peut être réglé sur trois Pour mettre l’outil en marche, appuyez positions: marche avant, marche arrière et sur la gâchette. verrouillée. En raison d’un mécanisme de Pour arrêter l’outil, relâchez la gâchette verrouillage, le commutateur ne peut être et le frein électrique arrête l’outil...
  • Page 22 électrique, vérifier avant (No de cat. 0613-20, 0614-20, et 0624-20 de percer ou de visser si l’aire de seulement). Utilisez des forets à haute travail n’est pas traversée par des vitesse avec pointe au carbone. Les matériaux de maçonnerie moins durs,...
  • Page 23 AVERTISSEMENT! Méthodes d’etayage typiques Fig. 9 Rotation avant Haute puissance rotatoire. Afin de réduire les risques de blessures, tenez toujours l’outil solidement et étayez-le fermement. Servez- vous toujours de la poignée latérale lorsque. Coincement de mèches Une grande force rotatoire se dégage Réaction lorsqu’une mèche reste coincée dans le matériau.
  • Page 24 à un centre plusieurs mois, elle perdra graduellement de service MILWAUKEE accrédité pour les sa charge. Cependant, après plusieurs services suivants: cycles de recharge et de décharge en période d’utilisation normale, elle retrouvera...
  • Page 25: Garantie Limitée De L'outil De Cinq Ans

    à une succursale ou à un cen- à un centre d’entretien agréé par tre de service MILWAUKEE , ou au MILWAUKEE , en port payé et assuré. Cette détaillant participant le plus près de chez garantie ne couvre pas les dommages vous.
  • Page 26: Accessoires

    Pour une liste complète des accessoires, prière de se reporter au catalogue MILWAUKEE Electric Tool ou allez en ligne à www.mil-electric-tool.com. Pour obtenir un catalogue, il suffit de contacter votre distributeur local ou l'un des centres-service énumérés sur la...
  • Page 27: Area De Trabajo

    INSTRUCCIONES GENERALES DE SEGURIDAD PARA LAS HERRAMIENTAS A BATERIAS ¡ADVERTENCIA! LEA Y ENTIENDA TODAS LAS INSTRUCCIONES El no seguir las instrucciones a continuación puede ocasionar una descarga eléctrica, incendio y/o lesiones graves. GUARDE ESTAS INSTRUCCIONES riesgo de incendio si se usa con otra AREA DE TRABAJO batería.
  • Page 28 11. No se aleje demasiado del mate- nillos u otro objetos pequeños rial de trabajo. Siempre mantenga metálicos que pueden realizar el equilibrio. El equilibrio correcto una conexión desde un terminal permite el mejor control de la a otro. Hacer un cortocircuito de los herramienta durante situaciones terminales de la batería, puede producir inesperadas.
  • Page 29 Guarde las etiquetas y placas de especificaciones. Estas tienen información importante. Si son ilegibles o si no se pueden encontrar, póngase en contacto con un centro de servicio de MILWAUKEE para una refacción gratis. ¡ADVERTENCIA! Algunas partículas de polvo resultantes del lijado mecánico, aserrado, esmerilado, taladrado y otras actividades relacionadas a la construcción, contienen...
  • Page 30: Descripcion Funcional

    Broca de Tornillos Cilíndrica Acero Broca Plana Concreto Berbiquí (diam.) de Bordes 54 mm (2-1/8") 0613-20 13 mm (1/2") 48 mm (1-1/2") 9,5 mm (3/8") 29 mm (1-1/8") 6 mm (1/4") 54 mm (2-1/8") 0614-20 13 mm (1/2") 48 mm (1-1/2") 9,5 mm (3/8")
  • Page 31 Cómo insertar la batería en la herramienta (Fig. 1 y 2) Cargue solamente las baterías La batería se puede insertar en la MILWAUKEE de 12 V, 14,4 V y 18 V herramienta de dos maneras. en cargadores. Otros tipos de baterías pueden explotar y causar Fig.
  • Page 32 ENSAMBLAJE DE LA HERRAMIENTA ¡ADVERTENCIA! Cómo instalar el mango lateral Para instalar el mango lateral, afloje Cuando herramientas el agarre del mango lateral hasta que eléctricas es necesario siempre la argolla sea lo suficientemente grande seguir ciertas precauciones como para deslizarse sobre el collar básicas de seguridad con el del selector de par torsor.
  • Page 33 0614-20 & 0622-20 & 0616-20 0613-20 0624-20 Posiciones Par torsor Par torsor Par torsor 0 - 1,9 N•m 1 - 5 0 - 1,9 N•m...
  • Page 34 Cómo seleccionar una acción de Para retroceder (el giro es en el sentido martilleo o taladrado (Cat. No. 0613-20, opuesto a las manecillas del reloj), se 0614-20, y 0624-20 solamente) presiona el interruptor de control colocado al lado izquierdo del taladro (Fig. 7).
  • Page 35 (Cat. electrocución, antes de taladrar o No. 0613-20, 0614-20, y 0624-20 colocar tornillos verifique que en solamente). Use brocas de punta de el área de trabajo no hayan carburo de alta velocidad. El taladrado en tuberías o cables ocultos.
  • Page 36 Métodos de apoyo más comunes ¡ADVERTENCIA! Fig. 9 Rotación avance Fuerza de rotación elevada. Par reducir el riesgo de lesiones, sujete y apoye la herramienta de manera segura. Utilice siempre la empuñadura lateral. Reacción Atoramiento de la broca Apoyándose contra el suelo Una fuerza de rotación elevada ocurre Fig.
  • Page 37 Para reducir el riesgo de una a cargarse nunca mas. Use una bateria lesión, desconecte siempre la MILWAUKEE hasta que ya no trabaje con herramienta antes darle la potencia y el torque necesario para la cualquier mantenimiento.
  • Page 38 Baterías Recargables, o RBRC por sus sucursal de reparaciones/ventas de la siglas en inglés). Al final de la vida útil de fábrica MILWAUKEE o a un centro de las baterías, devuelva éstas a la Oficina reparaciones autorizado por MILWAUKEE .
  • Page 39 El de uso accesorios no recomendados podría resultar peligroso. Para una lista completa de accessorios, refiérase a su catálogo MILWAUKEE Electric Tool o visite nuestro sitio en Internet: www.mil-electric-tool.com. Para obtener un catálogo, contacte su distribuidor local o uno de los centros de servicio listos en la página de cubierta de este manual.
  • Page 40 Warranty and Technical Information Brookfield, Wisconsin USA 1-800-729-3878 CANADA Milwaukee Electric Tool (Canada) Ltd. En outre le réseau de distributeurs est à la disposition de la clientèle d’un océan à l’autre. Consultez les pages jaunes de 755 Progress Avenue l’annuaire téléphonique pour l’adresse du centre le plus près Scarborough, Ontario M1H 2W7 de chez vous.

Ce manuel est également adapté pour:

0614-200616-200622-200624-20

Table des Matières