AEG HC452600EB Notice D'utilisation
Masquer les pouces Voir aussi pour HC452600EB:
Table des Matières

Publicité

Les langues disponibles

Les langues disponibles

Liens rapides

HC452600EB
NL TEPPAN YAKI-GRILLPLAAT
EN TEPPAN YAKI GRILL PLATE
FR GRILL TEPPAN YAKI
DE TEPPAN YAKI GRILLPLATTE
GEBRUIKSAANWIJZING
USER MANUAL
NOTICE D'UTILISATION
BENUTZERINFORMATION
2
21
39
58

Publicité

Table des Matières
loading

Sommaire des Matières pour AEG HC452600EB

  • Page 1 HC452600EB NL TEPPAN YAKI-GRILLPLAAT GEBRUIKSAANWIJZING EN TEPPAN YAKI GRILL PLATE USER MANUAL FR GRILL TEPPAN YAKI NOTICE D'UTILISATION DE TEPPAN YAKI GRILLPLATTE BENUTZERINFORMATION...
  • Page 2: Accessoires En Verbruiksartikelen

    ACCESSOIRES EN VERBRUIKSARTIKELEN In de AEG webshop vindt u alles wat u nodig heeft om al uw apparaten van AEG mooi te houden en perfect te laten functioneren. Ook vindt u hier een groot aantal...
  • Page 3: Table Des Matières

    Inhoud INHOUD 4 Veiligheidsinformatie 5 Montage-instructies 10 Beschrijving van het product 12 Bedieningsinstructies 15 Nuttige aanwijzingen en tips 18 Onderhoud en reiniging 19 Problemen oplossen 19 Milieubescherming In deze gebruiksaanwijzing worden de volgende symbolen gebruikt: Belangrijke informatie over uw persoonlijke veiligheid en informatie over het voorkomen van schade aan het apparaat.
  • Page 4: Veiligheidsinformatie

    Veiligheidsinformatie VEILIGHEIDSINFORMATIE Lees voor uw eigen veiligheid en correcte werking van het apparaat eerst deze handleiding aandachtig door, alvorens het apparaat te installeren. Bewaar deze instructies altijd bij het apparaat, zelfs wanneer u deze verplaatst of verkoopt. Gebruikers moeten volledig op de hoogte zijn van de bediening en veiligheidsfuncties van het apparaat.
  • Page 5: Montage-Instructies

    Noteer voor de installatie, het serienummer (ser. nr.) op het typeplaatje.Het typeplaatje van het apparaat bevindt zich aan de onderkant van de behuizing. PNC: 941 560 807/01 Made in Switzerland Serie: 220-240V ~50/60Hz 2,8 kW/Leistung ind. 2,8 kW HC452600EB Typ: 55TEP00AU...
  • Page 6 Montage-instructies Veiligheidsvoorschrift WAARSCHUWING! Lees deze voorschriften zorgvuldig door! Controleer of het apparaat tijdens het transport niet beschadigd is. Sluit geen beschadigd apparaat aan. Neem indien nodig contact op met de leverancier. Alleen een geautoriseerde onderhoudstechnicus kan dit apparaat installeren, aansluiten of repareren.
  • Page 7: Montage

    Montage-instructies U dient te beschikken over de juiste isolatievoorzieningen: stroomonderbrekers, zekeringen (schroefzekeringen moeten uit de houder worden verwijderd), aardlekschakelaars en con- tactgevers. Als u het als accessoire geleverde frame C-FRAME gebruikt, moet u eerst de met het frame meegeleverde instructies lezen voordat u het apparaat installeert. Montage min.
  • Page 8 Montage-instructies min. 25 mm min. min. 5 mm 20 mm min. 38 mm min. 5 mm • Dicht het gat tussen het werkblad en het glaskeramiek met siliconen. • Breng wat sop op de siliconen aan. • Trek overmatige siliconen eraf met de schraper. De installatie van meer dan één apparaat Aanvullende onderdelen:aansluitstang(en), hittebestendig silicone, afdichtstrip met rubbe- ren vorm.
  • Page 9 Montage-instructies Plaats de apparatuur, één per keer, op een zacht oppervlak zoals een deken met de on- derkant omhoog. Trek de afdichtstrip rondom de onderrand van het apparaat langs de buitenrand van de glazen keramische plaat. Schroef de bevestigingsplaten losjes in de juiste gaten van de beschermende behuizing. Plaats het eerste apparaat in de opening van het werkblad.
  • Page 10: Beschrijving Van Het Product

    Beschrijving van het product 12. Raak het silicone pas weer aan als het is uitgehard. Dit kan een dag duren. 13. Verwijder het silicone dat eruit steekt voorzichtig met een scheermesje. 14. Reinig voorzichtig de glazen keramische plaat. BESCHRIJVING VAN HET PRODUCT De belangrijkste eigenschappen van uw apparaat •...
  • Page 11: Algemeen Overzicht

    Beschrijving van het product Algemeen overzicht Achterste grilzone 1400W Voorste grilzone 1400W Glazen balk Bedieningspaneel Indeling bedieningspaneel Gebruik de tiptoetsen om het apparaat te bedienen. De displays, indicatielampjes en geluiden tonen welke functies worden gebruikt. tiptoets Functie Schakelt het apparaat in en uit. Het bedieningspaneel vergrendelen/ontgrendelen.
  • Page 12: Bedieningsinstructies

    Bedieningsinstructies Display Display Beschrijving De grillzone is uitgeschakeld. De grillzone wordt gebruikt. Er is een storing. + cijfer 3 staps restwarmte-indicatie: door gaan met koken / warmhouden / restwarmte. De functie vergrendeling/kinderbeveiliging werkt. De functie Automatische uitschakelen is in werking getreden. OptiHeat Control (3-staps restwarmte-indicatie) WAARSCHUWING! Gevaar van brandwonden door restwarmte!
  • Page 13: Temperatuurinstelling

    Bedieningsinstructies Temperatuurinstelling Raak de bedieningsstrip daar aan waar de gewen- ste kookstand zich bevindt. Corrigeer naar links of rechts, indien nodig Laat niet los voordat de juiste kookstand is bereikt. Het display toont de kook- stand. Als u de temperatuur instelt, knippert het display tot de grillzone de temperatuur bereikt. Daarna hoort u een geluid en toont de display de temperatuur.
  • Page 14 Bedieningsinstructies Het symbool gaat uit en gaat branden. • Om te zien hoe lang de kookzone al werkt:stel de kookzone in met . Het indicatie- lampje van de kookzone gaat sneller knipperen. Het display geeft de tijd aan die de kook- zone werkt.
  • Page 15: Offsound Control (In- En Uitschakelen Van De Geluiden)

    Nuttige aanwijzingen en tips OffSound Control (In- en uitschakelen van de geluiden) Uitschakelen van de geluiden Schakel het apparaat uit. Raak 3 seconden aan. De displays gaan aan en uit. Raak 3 seconden aan. gaat aan, het geluid is aan. Raak aan, gaat aan, het geluid is uit.
  • Page 16 Nuttige aanwijzingen en tips Gerecht Temperatuur (°C) Tijd / Tips Vis en schaaldieren 140–160 Het apparaat voorverwarmen Zalmfilets 8 minuten, draaien na 4 minu- Reuzegarnalen (gepeld) 6 minuten, draaien na 3 minu- Haaiensteaks, ongeveer 2,5 cm 10 minuten, draaien na 5 mi- nuten Zeetong, Müllerin Art (gebak- 8 minuten, draaien na 4 minu-...
  • Page 17 Nuttige aanwijzingen en tips Gerecht Temperatuur (°C) Tijd / Tips Varkensmedaillons 8 minuten, draaien na 4 minu- ten (afhankelijk van de dikte) Varkenslapjes 8 minuten, draaien na 4 minu- Varkensschnitzel 6 minuten, draaien na 3 minu- Spare ribs 8-10 minuten, meerdere keren draaien Varkensfilet 6–8 minuten, goed aangebak-...
  • Page 18: Onderhoud En Reiniging

    Onderhoud en reiniging mogelijk bij lage temperaturen gaar te laten worden en de gerechten niet te veel te bruinen. ONDERHOUD EN REINIGING Reinig het apparaat na elk gebruik. Gebruik altijd kookgerei met een schone bodem. WAARSCHUWING! Scherpe voorwerpen en schurende reinigingsmiddelen beschadigen het apparaat. Het reinigen van het apparaat met een stoomstraal- of hogedrukreiniger is om veiligheids- redenen verboden.
  • Page 19: Problemen Oplossen

    Problemen oplossen PROBLEMEN OPLOSSEN Probleem Mogelijke oorzaak en oplossing U kunt het apparaat niet in- • U hebt twee of meer sensorvelden tegelijk aangeraakt. Raak schakelen of bedienen. slechts één sensorveld tegelijk aan. • Er is water of er zijn vetspatten op het bedieningspaneel. Rei- nig het bedieningspaneel.
  • Page 20 Milieubescherming voor mens en milieu die zich zouden kunnen voordoen in geval van verkeerde afvalverwerking. Voor gedetailleerdere informatie over het recyclen van dit product, kunt u contact opnemen met de gemeente, de gemeentereiniging of de winkel waar u het product hebt gekocht.
  • Page 21: Accessories And Consumables

    Please spend a few minutes reading to get the very best from it. ACCESSORIES AND CONSUMABLES In the AEG webshop, you’ll find everything you need to keep all your AEG appliances looking spotless and working perfectly. Along with a wide range of accessories...
  • Page 22 Contents CONTENTS 23 Safety information 24 Installation instructions 29 Product description 31 Operating instructions 34 Helpful hints and tips 36 Care and cleaning 37 What to do if… 38 Environment concerns The following symbols are used in this user manual: Important information concerning your personal safety and information on how to avoid damaging the appliance.
  • Page 23: Safety Information

    Safety information SAFETY INFORMATION For your safety and correct operation of the appliance, read this manual carefully before installation and use. Always keep these instructions with the appliance even if you move or sell it. Users must fully know the operation and safety features of the appliance. General safety WARNING! Persons (including children) with reduced physical sensory, mental capabilities or lack of ex-...
  • Page 24: Installation Instructions

    Before the installation, note down the serial number (Ser. Nr.) from the rating plate.The rating plate of the appliance is on its lower casing. PNC: 941 560 807/01 Made in Switzerland Serie: 220-240V ~50/60Hz 2,8 kW/Leistung ind. 2,8 kW HC452600EB Typ: 55TEP00AU...
  • Page 25: Safety Instructions

    Installation instructions Safety instructions WARNING! You must read these! Make sure that the appliance is not damaged because of transportation. Do not connect a damaged appliance. If it is necessary, speak to the supplier. Only an authorised service technician can install, connect or repair this appliance. Use only original spare parts.
  • Page 26 Installation instructions Assembly min. 500mm min. min. 50mm 50mm min. R 5mm 600mm min. 25 mm min. min. 5 mm 20 mm...
  • Page 27 Installation instructions min. 38 mm min. 5 mm • Seal the gap between the worktop and glass ceramic with silicone. • Put some soapy water on the silicone. • Pull off the excess silicone with the scraper. The installation of more than one appliance Added parts:connection bar(s), heat resistant silicon, rubber shape, sealing strap.
  • Page 28 Installation instructions Loosely turn in fixing plates from below on the worktop and on the connection bar. Put the subsequent appliance in the worktop cut out . Make sure that the front ends of the appliances are on the same level. Tighten the fixing plate / retaining grip screws.
  • Page 29: Product Description

    Product description PRODUCT DESCRIPTION The most important features of your appliance • The cooking surface has 2 layers of stainless steel with a layer of aluminium between them. It has a good thermal capacity, which prevents a quickly decrease in temperature, for example, when you prepare meat from the refrigerator.
  • Page 30: Control Panel Layout

    Product description Control panel layout Use the sensor fields to operate the appliance. The displays, indicators and sounds tell which functions operate. sensor field function It activates and deactivates the appliance. It locks/unlocks the control panel. It activates and deactivates the cleaning function. Temperature display It shows the temperature.
  • Page 31: Operating Instructions

    Operating instructions Display Description The Automatic Switch Off function operates. OptiHeat Control (3 step Residual heat indicator) WARNING! Risk of burns from residual heat! OptiHeat Control indicates the level of the residual heat. The induction cooking zones make the heat necessary for cooking directly in the bottom of the cookware. The glass ceramic is heated by the heat of the cookware.
  • Page 32 Operating instructions The selection of Timer function is possible for cooking zones that are active and the heat setting is set. • To set the cooking zone: touch again and again until the indicator of a necessary cooking zone comes on. When this function is activated, comes on.
  • Page 33: The Child Safety Device

    Operating instructions Lock You can lock the control panel, but not . It prevents an accidental change of the heat setting. First set the heat setting. To start this function touch . The symbol comes on for 4 seconds. The Timer stays on. To stop this function touch .
  • Page 34: Helpful Hints And Tips

    Helpful hints and tips HELPFUL HINTS AND TIPS Preparing food with the Teppan Yaki You prepare the food directly on the roasting surface, with or without fat. You can also use pots or pans, but the warm up time is longer then on the glass-ceramic hob or on the gas gob.
  • Page 35 Helpful hints and tips Food to be cooked Temperature (°C) Time / Tips Medallions of Veal, 4 cm thick 10 minutes, turn after 5 mi- nutes Veal steaks, 3 - 4 cm thick 6 minutes, turn after 3 minutes Veal escalope, natural 5 minutes, turn after 2½...
  • Page 36: Care And Cleaning

    Care and cleaning Food to be cooked Temperature (°C) Time / Tips Poultry 140–160 Pre-heat the appliance Chicken supreme 8 - 10 minutes, turn after 4 - 5 minutes Turkey breast strips 6 minutes, turn several times Sausages Pre-heat the appliance Fried egg Pre-heat the appliance Crepes / Omelettes...
  • Page 37: What To Do If

    What to do if… Remove the cooking residues using a spatula. Clean the appliance with a moist cloth Rub the appliance dry with a clean cloth. At the end rub the appliance with some fat. WARNING! • Do not use the scraper or sharp objects to clean the glass bar and the space between it and glass ceramic.
  • Page 38: Environment Concerns

    Environment concerns Problem Possible cause and remedy There is no signal when you The signals are deactivated. touch the panel sensor fields. Activate the signals (see OffSound Control ). If you tried the above solutions and cannot repair the problem, speak to your dealer or the Customer Care Department.
  • Page 39: Pour Des Résultats Parfaits

    Veuillez prendre quelques instants pour lire cette notice afin d'utiliser au mieux votre appareil. ACCESSOIRES ET CONSOMMABLES Dans la boutique en ligne d'AEG, vous trouverez tout ce qu'il vous faut pour que vos appareils AEG fonctionnent parfaitement. Sans oublier une vaste gamme d'accessoires conçus et fabriqués selon les critères de qualité...
  • Page 40 Sommaire SOMMAIRE 41 Consignes de sécurité 42 Instructions d'installation 47 Description de l'appareil 49 Notice d'utilisation 52 Conseils utiles 55 Entretien et nettoyage 56 En cas d'anomalie de fonctionnement 57 En matière de protection de l'environnement Les symboles suivants sont utilisés dans ce manuel: Informations importantes pour votre sécurité...
  • Page 41: Consignes De Sécurité

    Consignes de sécurité CONSIGNES DE SÉCURITÉ Pour votre sécurité et le bon fonctionnement de l'appareil, lisez attentivement ce manuel avant l'installation et l'utilisation. Conservez ces instructions à proximité de l'appareil. Les utilisateurs doivent connaître parfaitement le fonctionnement et les fonctions de sécurité de l'appareil.
  • Page 42: Instructions D'installation

    Avant d'installer l'appareil, notez le numéro de série qui figure sur la plaque signaléti- que.La plaque signalétique se trouve sur la partie inférieure de l'appareil. PNC: 941 560 807/01 Made in Switzerland Serie: 220-240V ~50/60Hz 2,8 kW/Leistung ind. 2,8 kW HC452600EB Typ: 55TEP00AU...
  • Page 43: Avertissement Importants

    Instructions d'installation Avertissement importants AVERTISSEMENT Veuillez lire attentivement cette notice d'utilisation ainsi que les recommandations et les avertissements qu'elle contient avant de procéder à l'installation et à la première utilisation de l'appareil. Vérifiez que l'appareil n'a pas été endommagé pendant le transport. Ne branchez jamais un appareil endommagé.
  • Page 44: Montage

    Instructions d'installation Dans le cas d'une installation fixe, le raccordement au réseau doit être effectué par l'inter- médiaire d'un interrupteur à coupure omnipolaire, ayant une distance d'ouverture des con- tacts d'au moins 3 mm. Les dispositifs d'isolement comprennent : des coupe-circuits, des fusibles (les fusibles à vis- ser doivent être retirés du support), des disjoncteurs de mise à...
  • Page 45 Instructions d'installation min. 25 mm min. min. 5 mm 20 mm min. 38 mm min. 5 mm • Isolez l'espace entre le plan de travail et la vitrocéramique avec du silicone. • Appliquez de l'eau savonneuse sur le silicone. • Retirez l'excédent de silicone avec le grattoir. Installation de plusieurs appareils.
  • Page 46 Instructions d'installation Posez les appareils, un à la fois, sur une surface souple, une couverture par exemple, le dessous vers le haut. Placez le joint d'étanchéité autour du bord inférieur de l'appareil le long du bord exter- ne de la surface vitrocéramique. Vissez légèrement les plaques de fixation dans les trous prévus dans le boîtier de pro- tection.
  • Page 47: Description De L'appareil

    Description de l'appareil 12. Ne touchez pas le silicone tant qu'il n'a pas durci. Cela peut prendre une journée. 13. Enlevez soigneusement le silicone en trop avec une lame de rasoir. 14. Nettoyez soigneusement la surface vitrocéramique. DESCRIPTION DE L'APPAREIL Les caractéristiques essentielles de votre appareil •...
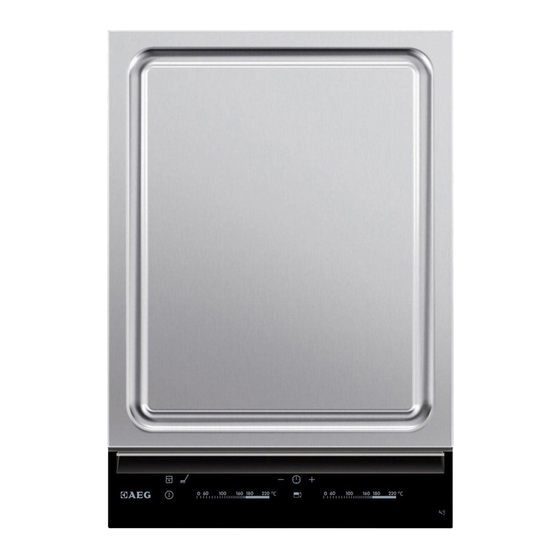
  • Page 48: Vue D'ensemble

    Description de l'appareil Vue d'ensemble Zone arrière du gril 1400 W Zone avant du gril 1400 W Plaque en verre Bandeau de commande Description du bandeau de commande Appuyez sur les touches sensitives pour faire fonctionner l'appareil. Les voyants et les signaux sonores confirment l'activation des fonctions sélectionnées.
  • Page 49: Optiheat Control (Voyant De Chaleur Résiduelle - 3 Niveaux)

    Notice d'utilisation touche sensitive fonction Bandeau de commande Pour régler la température. Affichages Afficheur Description La zone de rôtissage est désactivée. La zone de rôtissage est en fonctionnement. Il y a une anomalie. + chiffre Voyant de chaleur résiduelle à trois niveaux : continuer la cuisson / maintien au chaud / chaleur résiduelle Les fonctions de verrouillage/sécurité...
  • Page 50: Le Niveau De Cuisson

    Notice d'utilisation Le niveau de cuisson Appuyez, sur le bandeau de commande, sur le ni- veau de cuisson souhaité. Corrigez-le au besoin en effleurant une autre position, à droite ou à gau- che. Ne relâchez pas la pression tant que le niveau de cuisson souhaité...
  • Page 51: Verrouillage

    Notice d'utilisation • Pour activer le minuteur progressif : Appuyez sur Le symbole disparaît et réapparait. • Pour voir comment fonctionne la zone de cuisson :paramétrez la zone de cuisson avec . Le voyant de la zone de cuisson commence à clignoter rapidement. L'afficheur indi- que l'heure à...
  • Page 52: Conseils Utiles

    Conseils utiles • Lorsque vous mettez la table de cuisson à l'arrêt avec , la Sécurité enfants est de nou- veau activée. OffSound Control (Désactivation et activation des signaux sonores) Désactivation des signaux sonores Mettez l'appareil à l'arrêt. Appuyez sur pendant 3 secondes.
  • Page 53 Conseils utiles Graisses / Huiles Température max. (°C) Point de fumée (°C) Huile d'olive Huile de tournesol Huile d’arachide Graisse de noix de coco Préchauffez toujours l'appareil. Nature de la préparation Température (°C) Durée/conseils Poisson et crustacés 140–160 Préchauffez l'appareil Darnes de saumon 8 minutes, tourner après 4 mi- nutes...
  • Page 54 Conseils utiles Nature de la préparation Température (°C) Durée/conseils bien cuit 8 minutes, tourner après 4 mi- nutes sans matières grasses, les temps de cuisson augmentent d'environ 20 % Hamburgers 6 - 8 minutes, tourner après 3 - 4 minutes Châteaubriand 160 puis 100 Faire revenir la viande dans de...
  • Page 55: Entretien Et Nettoyage

    Entretien et nettoyage Nature de la préparation Température (°C) Durée/conseils Fruits 140-160 Préchauffez l'appareil Légumes 140-160 10 - 20 minutes, tourner plu- sieurs fois Légumes 140-160 10 - 15 minutes, sous une clo- che de cuisson (tourner à mi- cuisson) Faire revenir du riz précuit 140-160 10 - 15 minutes, tourner plu-...
  • Page 56: En Cas D'anomalie De Fonctionnement

    En cas d'anomalie de fonctionnement AVERTISSEMENT • Ne nettoyez pas la plaque en verre et l'espace qui sépare celle-ci du vitrocérame avec le grat- toir ou des objets pointus. La plaque en verre est fixée à la plaque en céramique. •...
  • Page 57: En Matière De Protection De L'environnement

    En matière de protection de l'environnement mations figurant sur la plaque signalétique, la combinaison à 3 lettres et chiffres pour la vitrocéramique (située dans un des coins de la table de cuisson) et le type de message d'er- reur qui s'affiche. En cas d'erreur de manipulation de la part de l'utilisateur, le déplacement du technicien du Service Après-vente ou du magasin vendeur peut être facturé...
  • Page 58: Zubehör Und Verbrauchsmaterialien

    Minuten Zeit zum Lesen, um seine Vorzüge kennen zu lernen. ZUBEHÖR UND VERBRAUCHSMATERIALIEN Im AEG Webshop finden Sie alles, was Sie für ein makelloses Aussehen und perfektes Funktionieren Ihrer AEG Geräte benötigen. Wir bieten auch ein umfangreiches Zubehörsortiment, das Ihre höchsten Qualitätsansprüche erfüllt, vom Profi-Kochgeschirr bis zu...
  • Page 59 Inhalt INHALT 60 Sicherheitshinweise 61 Montageanleitung 66 Gerätebeschreibung 68 Gebrauchsanweisung 71 Praktische Tipps und Hinweise 73 Reinigung und Pflege 74 Was tun, wenn … 75 Umwelttipps In dieser Benutzerinformation werden folgende Symbole verwendet: Wichtige Hinweise zur Sicherheit von Personen und Informationen zur Vermeidung von Geräteschäden Allgemeine Hinweise und Ratschläge Hinweise zum Umweltschutz...
  • Page 60: Sicherheitshinweise

    Sicherheitshinweise SICHERHEITSHINWEISE Lesen Sie diese Bedienungsanleitung bitte sorgfältig durch, bevor Sie das Gerät anschließen und benutzen, um Gefahren zu vermeiden und einen korrekten Betrieb des Geräts zu ge- währleisten. Bewahren Sie diese Bedienungsanleitung in der Nähe des Geräts auf, auch wenn Sie dieses anderswo aufstellen.
  • Page 61: Montageanleitung

    Notieren Sie vor der Montage des Geräts die Seriennummer (Ser. Nr.), die Sie auf dem Ty- penschild finden.Das Typenschild befindet sich unten am Gehäuse des Geräts. PNC: 941 560 807/01 Made in Switzerland Serie: 220-240V ~50/60Hz 2,8 kW/Leistung ind. 2,8 kW HC452600EB Typ: 55TEP00AU...
  • Page 62 Montageanleitung Sicherheitshinweise WARNUNG! Lesen Sie unbedingt die folgenden Hinweise! Vergewissern Sie sich, dass das Gerät beim Transport nicht beschädigt wurde. Ein beschä- digtes Gerät nicht anschließen. Wenden Sie sich bei Bedarf an den Lieferanten. Das Gerät darf nur von einem Servicetechniker einer autorisierten Kundendienststelle in- stalliert, angeschlossen oder repariert werden.
  • Page 63 Montageanleitung Geeignete Trenneinrichtungen sind erforderlich: Überlastschalter, Sicherungen (Schraubsi- cherungen müssen aus dem Halter entfernt werden können), Fehlerstromschutzschalter und Schütze. Wenn Sie den Zubehörrahmen C-FRAME verwenden, lesen Sie zuerst die mit dem Rahmen mitgelieferte Anleitung, bevor Sie das Gerät montieren. Montage min.
  • Page 64 Montageanleitung min. 25 mm min. min. 5 mm 20 mm min. 38 mm min. 5 mm • Dichten Sie den Spalt zwischen der Arbeitsplatte und der Glaskeramik mit Silikon ab. • Geben Sie etwas Seifenlauge auf das Silikon. • Entfernen Sie das überschüssige Silikon mit einem Schaber. Montage von mehr als einem Gerät Mitgelieferte Teile:Verbindungsleiste(n), hitzebeständiges Silikon, Gummiprofil, Dichtungs- streifen.
  • Page 65 Montageanleitung Legen Sie die Geräte nacheinander mit der Rückseite nach oben auf eine weiche Flä- che, zum Beispiel eine Decke. Kleben Sie den Dichtungsstreifen umlaufend auf der Unterseite des Geräts entlang des äußeren Randes der Glaskeramikscheibe auf. Schrauben Sie die Befestigungsplatten locker in die entsprechenden Öffnungen im Schutzkasten ein.
  • Page 66: Gerätebeschreibung

    Gerätebeschreibung 12. Berühren Sie das Silikon nicht, bevor es ausgehärtet ist. Dies kann einen Tag dauern. 13. Entfernen Sie das überschüssige Silikon vorsichtig mit einer Rasierklinge. 14. Reinigen Sie die Glaskeramikoberfläche. GERÄTEBESCHREIBUNG Die wichtigsten Merkmale Ihres Gerätes • Die Kochfläche besteht aus zwei Schichten Edelstahl mit einer Aluminiumschicht dazwi- schen.
  • Page 67: Allgemeine Übersicht

    Gerätebeschreibung Allgemeine Übersicht Hintere Grillzone 1400 W Vordere Grillzone 1400 W Glasleiste Bedienfeld Bedienfeldanordnung Bedienen Sie das Gerät über die Sensorfelder. Die Anzeigen, Kontrolllampen und akustischen Signale informieren Sie über die aktiven Funktionen. Sensorfeld Funktion Ein- und Ausschalten des Geräts. Verriegelung/Entriegelung des Bedienfelds.
  • Page 68: Gebrauchsanweisung

    Gebrauchsanweisung Anzeigen Display Beschreibung Die Kochzone ist ausgeschaltet. Die Kochzone ist eingeschaltet. Eine Fehlfunktion ist aufgetreten. + Zahl 3-stufige Restwärmeanzeige: Weitergaren/Warmhalten/Restwärme Die Sperre/Kindersicherung ist aktiviert. Die Abschaltautomatik ist in Betrieb. OptiHeat Control (Restwärmeanzeige, 3-stufig) WARNUNG! Es besteht Verbrennungsgefahr durch Restwärme! OptiHeat Control zeigt die Restwärmestufe an.
  • Page 69: Die Kochstufe

    Gebrauchsanweisung Die Kochstufe Berühren Sie die Einstellskala für die Kochstufe. Möchten Sie eine andere Kochstufe einstellen, be- rühren Sie die Skala weiter links oder rechts. Neh- men Sie den Finger erst von der Skala, wenn die richtige Kochstufe eingestellt ist. Das Display gibt die eingestellte Kochstufe an.
  • Page 70: Die Kindersicherung

    Gebrauchsanweisung Berühren Sie Das Symbol erlischt und leuchtet auf. • So können Sie feststellen, wie lange die Kochzone bereits in Betrieb ist:Stellen Sie die Kochzone mit ein. Die Anzeige der Kochzone blinkt schneller. Das Display zeigt die Einschaltdauer der Kochzone an. Das Display zeigt die Einschaltdauer der Kochzone an, die für längere Zeit benutzt wird.
  • Page 71: Offsound Control (Aktivierung Und Deaktivierung Des Signaltons)

    Praktische Tipps und Hinweise OffSound Control (Aktivierung und Deaktivierung des Signaltons) Deaktivieren des Signaltons Schalten Sie das Gerät aus. Berühren Sie 3 Sekunden lang. Die Anzeigen leuchten auf und erlöschen. Berühren Sie 3 Sekunden lang. leuchtet und der Signalton ist aktiviert. Berühren Sie leuch- tet auf, der Signalton ist deaktiviert.
  • Page 72 Praktische Tipps und Hinweise Fette / Öle Höchsttemperatur (°C) Rauchpunkt (°C) Kokosfett Heizen Sie das Gerät stets vor. Zu garende Speise Temperatur (°C) Dauer/Tipps Fisch und Schalentiere 140–160 Gerät vorheizen Lachsfilets 8 Min., nach 4 Min. wenden Riesengarnelen (ohne Schale) 6 Min., nach 3 Min.
  • Page 73: Reinigung Und Pflege

    Reinigung und Pflege Zu garende Speise Temperatur (°C) Dauer/Tipps Schweinsschnitzel 6 Min., nach 3 Min. wenden Rippchen 8–10 Min., mehrmals wenden Schweinefleischspießchen 6–8 Min., von allen Seiten gut anbraten Lammfleisch 160–180 Gerät vorheizen Lammkoteletts 10 Min., nach 5 Min. wenden Lammfilets 10 Min., nach 5 Min.
  • Page 74: Was Tun, Wenn

    Was tun, wenn … WARNUNG! Scharfe Gegenstände und scheuernde Reinigungsmittel beschädigen das Gerät. Reinigen Sie das Gerät aus Sicherheitsgründen nicht mit einem Dampfstrahl- oder Hoch- druckreiniger. Reinigungsfunktion Berühren Sie . Beide Zonen werden auf 80 °C gestellt. Das Display blinkt, bis die Temperatur von 80 °C erreicht wird.
  • Page 75: Umwelttipps

    Umwelttipps Problem Mögliche Ursache und Abhilfe Wird das Gerät ausgeschaltet, Ein oder mehrere Sensorfelder wurden bedeckt. Entfernen Sie den ist ein Signalton zu hören. Gegenstand von den Sensorfeldern. Die Restwärmeanzeige leuchtet Die Kochzone ist nicht heiß, da sie nur kurze Zeit in Betrieb war. nicht.
  • Page 76 892934126-A-152011...

Table des Matières