Table des Matières
Publicité
Les langues disponibles
Les langues disponibles
Liens rapides
Operating Instructions | Mode d'emploi | Bedienungsanleitung |
Istruzioni per I'uso | Handleiding | Manual de instrucciones |
Инструкции по эксплуатации
ME06
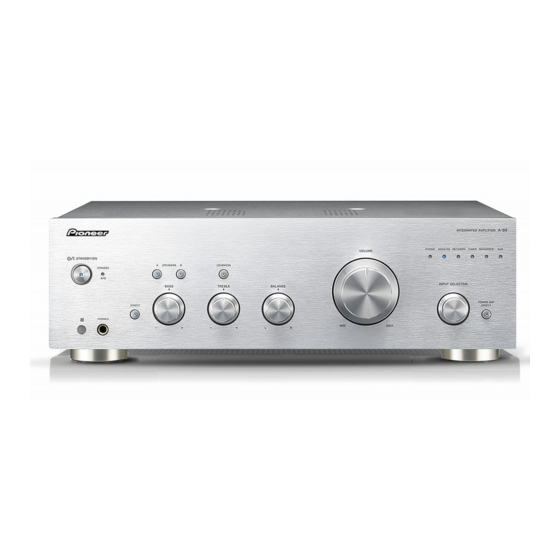
Integrated Amplifier | Amplificateur Intégré |
Eingebauter Verstärker | Amplificatore Integrato |
Geïntegreerde versterker | Amplificador integrado |
Интегральный усилитель
70
A-
-K/-S
50
A-
-K/-S
Publicité
Chapitres
Table des Matières
Dépannage

Manuels Connexes pour Pioneer A-70-K


Sommaire des Matières pour Pioneer A-70-K
- Page 1 Operating Instructions | Mode d’emploi | Bedienungsanleitung | Istruzioni per I’uso | Handleiding | Manual de instrucciones | Инструкции по эксплуатации ME06 -K/-S Integrated Amplifier | Amplificateur Intégré | Eingebauter Verstärker | Amplificatore Integrato | Geïntegreerde versterker | Amplificador integrado | -K/-S Интегральный...
-
Page 2: Important
WARNING IMPORTANT This equipment is not waterproof. To prevent a fire or shock hazard, do not place any container filled with CAUTION liquid near this equipment (such as a vase or flower RISK OF ELECTRIC SHOCK pot) or expose it to dripping, splashing, rain or DO NOT OPEN moisture. -
Page 3: Table Des Matières
Thank you for buying this Pioneer Operating Environment This product is for general household purposes. Any product. Operating environment temperature and humidity: failure due to use for other than household purposes Please read through these operating instructions so that +5 °C to +35 °C (+41 °F to +95 °F); less than 85 %RH (such as long-term use for business purposes in a you will know how to operate your model properly. -
Page 4: Caution
Before you start Chapter 1: Using the remote control Before you start The remote has a range of about 7 m at an angle of about 30º from the remote sensor. The batteries included with the unit have been provided What’s in the box to allow you check product operation and may not last long. -
Page 5: Connecting Up
Connecting up Chapter 2: • iPod is a trademark of Apple Inc., registered in the Caution U.S. and other countries. Connecting up • The SIGNAL GND terminal is provided to reduce noise when connecting the unit to components such as an analog turntable. About “Bi-wiring”... -
Page 6: Connecting Speaker Cables
(R) jack. Be sure to insert the plugs fully • Another method of connection is to connect the Multiple Pioneer components equipped with CONTROL If a coaxial digital cable (sold separately) is used to into the jacks. -
Page 7: Using A Usb Cable To Connect To A Computer (A-70 Only)
Pioneer. Caution • The use of a power cord other than the one provided will invalidate the warranty, since Pioneer will not be responsible for any damage incurred. (The power cord provided with the unit has a rated current capacity of 10 A.) -
Page 8: Controls And Displays
Controls and displays Chapter 3: Remote sensor 14 CARTRIDGE select switch (A-70 only) Receives the signals from the remote control (page 4). Select the type of cartridge used with your turntable. Controls and displays PHONES jack 15 POWER AMP DIRECT button/indicator Use to connect headphones. -
Page 9: Rear Panel
Controls and displays Rear panel See pages 5-7 for details regarding connections. AUX IN 2 10 11 12 13 PHONO IN (MM/MC) terminals (A-70) GND (Turntable ground) terminal This ground terminal is designed to help reduce noise PHONO IN (MM) terminals (A-50) when a turntable is connected. -
Page 10: Remote Control
OPTION buttons are disabled. SACD PLAYER control buttons Use to control Pioneer SACD player. NETWORK AUDIO PLAYER control buttons Use to control Pioneer network audio player. LOUDNESS Use to set the loudness circuit ON/OFF (page 8). MUTE Mutes/unmutes the sound. -
Page 11: Operation
Operation Chapter 4: Set the power to Standby When using the unit as a power amplifier Operation When a pre-amplifier is connected to the unit’s POWER Press the remote control’s STANDBY/ AMP DIRECT IN terminals, the unit can be used as a power amplifier. -
Page 12: Playing Music From A Digital Audio Component (A-70 Only)
Important • When using the DIGITAL IN USB port to input audio files from a computer to this unit, it may be necessary to install a special driver on the computer. For details, see the website of Pioneer. -
Page 13: To Set For Automatic Standby Status (Auto Power Down)
Operation To set for automatic standby status (Auto Power Down) This function automatically switches the unit to standby mode if no signal or switch operation is detected for 30 minutes. If the unit’s power is ON, press the APD button on the remote control. When this condition is set to ON, the STANDBY/APD indicator on the unit’s front panel will light green. -
Page 14: Additional Information
(page 5). components and electrical appliances being used. If the trouble cannot be rectified even after exercising the checks listed below, ask your nearest Pioneer authorized service center or your dealer to carry out repair work. Can’t operate the remote •Replace the battery (page 4). -
Page 15: Specifications
Bi-wiring ......4 Ω to 16 Ω © 2012 PIONEER CORPORATION. All rights reserved. - Page 16 AVERTISSEMENT IMPORTANT Cet appareil n’est pas étanche. Pour éviter les risques d’incendie et de décharge électrique, ne placez près de ATTENTION lui un récipient rempli d’eau, tel qu’un vase ou un pot DANGER D´ELECTROCUTION de fleurs, et ne l’exposez pas à des gouttes d’eau, des NE PAS OUVRIR éclaboussures, de la pluie ou de l’humidité.
- Page 17 électrique. Assurez-vous qu’elle est éliminée peut provoquer un risque d’incendie ou un choc d’autres composants Pioneer ....6 correctement après sa dépose. électrique. Vérifier le câble d’alimentation de temps en Connexions d’entrée audio numérique...
-
Page 18: Attention
Préparatifs Chapitre 1 : Utilisation de la télécommande • Ne pas installer l’unité sur un divan ou tout autre objet/matériau ayant des caractéristiques Préparatifs La télécommande a une portée d’environ 7 mètres avec absorbantes sous risque d’affecter la qualité du un angle de 30°... -
Page 19: Raccordement
Raccordement Chapitre 2: • iPod est une marque commerciale d’Apple Inc., Attention enregistrées aux états-Unis et dans d’autres pays. Raccordement • La borne SIGNAL GND est fournie pour réduire le bruit lors de la connexion de l’unité aux A propos de “bi-câblage (bi-wiring)” composants, tels que la platine analogique. -
Page 20: Connexion Des Câbles D'enceinte
• Vous pouvez alternativement connecter les bornes l’alimentation sera automatiquement coupée par De nombreux composants Pioneer dotés de prises Si un câble numérique coaxial (vendu séparément) est SPEAKERS A sur HIGH et celles sur LOW mesure de sécurité. -
Page 21: Utilisation D'un Câble Usb Pour Brancher Un Ordinateur (Uniquement A-70)
Pour plus de détail, visitez le site Internet de Pioneer. • L’utilisation d’un cordon électrique autre que celui fourni invalide la garantie, Pioneer n’étant pas responsable des éventuels dommages subis. (Le cordon d’alimentation fourni avec l’unité présente une capacité nominale de 10 A.) •... -
Page 22: Commandes Et Afficheur
Commandes et afficheur Chapitre 3: Capteur de télécommande 13 Commandes du VOLUME Reçoit les signaux émis par la télécommande (page 4). Utilisez pour régler le niveau du volume. (Permet Commandes et afficheur également d’effectuer des réglages du volume sonore Prise PHONES des écouteurs). -
Page 23: Panneau Arrière
Commandes et afficheur Panneau arrière Pour de plus amples informations sur les connexions, voir les pages 5-7. AUX IN 2 10 11 12 13 PHONO IN (MM/MC) bornes (A-70) Borne GND (mise à la terre de la platine) Cette borne de terre a été conçue pour réduire le bruit PHONO IN (MM) bornes (A-50) lorsqu’un tourne-disque est branché. - Page 24 Boutons de commande du SACD PLAYER Permet de contrôler le lecteur SACD Pioneer. Boutons de commande du NETWORK AUDIO PLAYER Permet de contrôler le lecteur Pioneer audio en réseau. LOUDNESS Utilisez pour activer/désactiver (ON/OFF) (page 8) le circuit de la puissance sonore.
-
Page 25: Télécommande
Fonctionnement Chapitre 4: Réglage de la puissance sur la mise en Lorsque vous utilisez l’appareil comme Fonctionnement veille amplificateur de puissance Lorsqu’un pré-amplificateur est connecté aux bornes Appuyez sur le bouton STANDBY/ON POWER AMP DIRECT IN de l’unité, l’unité peut être de la télécommande. -
Page 26: Lecture De Musique Depuis Un Composant Audio Numérique (A-70 Uniquement)
Important • Lorsque vous utilisez le port DIGITAL IN USB pour lire des fichiers audio d’un ordinateur sur cette unité, il peut être nécessaire d’installer un pilote spécial sur l’ordinateur. Pour plus de détail, visitez le site Internet de Pioneer. -
Page 27: Pour Régler Un Statut De Veille Automatique (Fonction De Mise Hors Tension Automatique)
Fonctionnement Pour régler un statut de veille automatique (fonction de mise hors tension automatique) Cette fonction fait automatiquement passer l’unité en mode veille si aucun signal ou opération du sélecteur n’est détecté pendant 30 minutes. Si l’appareil est sous tension, appuyez sur le bouton APD de la télécommande. Lorsque cette fonction est définie sur ON, l’indicateur STANDBY/APD situé... -
Page 28: Informations Supplémentaires
Examinez les autres composants et les appareils électriques en usage. Si le souhaité. Réglez le sélecteur correctement (page 11). problème ne peut pas se résoudre malgré les indications ci-dessous, consultez votre service après-vente Pioneer le •Appuyez sur MUTE de la télécommande pour désactiver la sourdine (page 10). -
Page 29: Spécifications
A+B........8 Ω à 32 Ω © 2012 PIONEER CORPORATION. - Page 30 WARNUNG WICHTIG Dieses Gerät ist nicht wasserdicht. Zur Vermeidung der Gefahr von Brand und Stromschlag keine Behälter mit CAUTION Flüssigkeiten (z.B. Blumenvasen und -töpfe) in die RISK OF ELECTRIC SHOCK Nähe des Gerätes bringen und dieses vor Tropfwasser, DO NOT OPEN Spritzwasser, Regen und Nässe schützen.
-
Page 31: Vor Einem Längeren Nichtgebrauch Des Gerätes
Audiokabel anschließen..... 6 Netzkabel; sehen Sie auch zu, dass es nicht eingeklemmt Netzstecker in eine Netzsteckdose eingesteckt wird, Zentrale Steuerung mit anderen Pioneer- wird. Machen Sie niemals einen Knoten in das Netzkabel, besteht akute Stromschlaggefahr! Daher ist Komponenten verwenden . -
Page 32: Bevor Sie Beginnen
Bevor Sie beginnen Kapitel 1: • Bei der Entsorgung von verbrauchten Batterien sind die einschlägigen gesetzlichen Vorschriften Aufstellung des Verstärkers Bevor Sie beginnen und Umweltschutzbestimmungen strikt einzuhalten. Achten Sie bei der Aufstellung des Geräts darauf, dass es auf einer ebenen und stabilen Oberfläche steht. Verwendung der Fernbedienung •... -
Page 33: Anschlüsse
Anschlüsse Kapitel 2: • iPod ist ein in den USA und anderen Ländern Vorsicht eingetragenes Warenzeichen der Apple Inc. Anschlüsse • Der SIGNAL GND-Anschluss reduziert Störgeräusche, wenn das Gerät an Komponenten wie analoge Plattenspieler angeschlossen wird. “Bi-wiring” (Doppelverkabelung) • Die PHONO IN-Anschlüsse sind werkseitig mit kurzen Stiften ausgestattet. -
Page 34: Lautsprecherkabel Anschließen
Mehrere mit CONTROL IN/OUT-Anschlüssen deaktiviert). Netzwerkschaltungen verwendet werden, beachten eine potentiell GEFÄHRLICHE Spannung an. Zur ausgestattete Pioneer-Komponenten lassen sich mit Sie bitte, dass nach Netztrennung kein Ton Vermeidung von Stromschlaggefahr ist unbedingt dem Gerät verbinden; dadurch können diese ausgegeben wird und die Lautsprecher beschädigt darauf zu achten, den Netzstecker beim Komponenten zentral über den Fernbedienungssensor... -
Page 35: Einen Computer Per Usb-Kabel Anschließen (Nur A-70)
Audiodateien von einem Computer an dieses Gerät genutzt wird, müssen Sie möglicherweise einen Vorsicht speziellen Treiber auf dem Computer installieren. Einzelheiten finden Sie auf der Pioneer-Webseite. • Verwenden Sie nur das mitgelieferte Netzkabel; andernfalls erlischt die Garantie und Pioneer übernimmt keine Verantwortung für jegliche Schäden. -
Page 36: Bedienelemente Und Anzeigen
Bedienelemente und Anzeigen Kapitel 3: Fernbedienungssensor 13 VOLUME-Regler Empfängt Signale von der Fernbedienung (Seite 4). Zum Einstellen der Lautstärke. (Auch zum Einstellen der Bedienelemente und Anzeigen Kopfhörerlautstärke.) PHONES-Buchse 14 CARTRIDGE-Auswahlschalter (nur A-70) Zum Anschluss von Kopfhörern. Bei gedrückter POWER AMP DIRECT-Taste wird kein Ton ausgegeben. Wählen Sie den Tonabnehmer, der mit Ihrem Plattenspieler verwendet werden soll. -
Page 37: Rückwand
Bedienelemente und Anzeigen Rückwand Detaillierte Hinweise zu Anschlüssen finden Sie auf den Seiten 5 – 7. AUX IN 2 10 11 12 13 PHONO IN (MM/MC)-Anschlüsse (A-70) GND-Anschluss (Plattenspieler-Masse) Dieser Masseanschluss vermindert Störgeräusche beim PHONO IN (MM)-Anschlüsse (A-50) Anschluss eines analogen Plattenspielers. Es handelt sich nicht um Schutzerde. -
Page 38: Fernbedienung
STANDBY/ON angeschlossenen Geräts. • Wenn der A-50 angeschlossen ist, sind die Tasten USB, COAXIAL und OPTION ohne Funktion. SACD PLAYER-Bedienungstasten Zum Steuern eines Pioneer-SACD-Players. NETWORK AUDIO PLAYER-Bedientasten Zum Steuern eines Pioneer-Netzwerk-Audioplayers. LOUDNESS Zum Ein- und Ausschalten der Loudness-Schaltung (Seite 8). -
Page 39: Bedienung
Bedienung Kapitel 4: Bereitschaftsmodus einstellen Beim Einsatz des Gerätes als Verstärker Bedienung Wenn ein Vorverstärker an die POWER AMP DIRECT IN- Drücken Sie die Fernbedienungstaste Anschlüsse angeschlossen wird, lässt sich das Gerät als STANDBY/ON. Verstärker einsetzen. Drücken Sie die Taste POWER AMP DIRECT an der Frontblende des Gerätes. -
Page 40: Musik Von Einer Digitalen Audiokomponenten
Schließen Sie das Gerät immer direkt über ein USB- Kabel am Computer an. Wichtig • Wenn der DIGITAL IN USB-Port zur Eingabe von Audiodateien von einem Computer an dieses Gerät genutzt wird, müssen Sie möglicherweise einen speziellen Treiber auf dem Computer installieren. Einzelheiten finden Sie auf der Pioneer-Webseite. -
Page 41: Automatisch In Den Bereitschaftsmodus Wechseln (Auto-Abschaltung)
Bedienung Automatisch in den Bereitschaftsmodus wechseln (Auto-Abschaltung) Diese Funktion schaltet das Gerät automatisch in den Bereitschaftsmodus, falls 30 Minuten lang kein Signal und keine Tastenbetätigung erkannt wird. Falls das Gerät eingeschaltet ist, drücken Sie die Fernbedienungstaste APD. Wenn diese Funktionen aktiv ist, leuchtet die STANDBY/APD-Anzeige an der Frontblende des Gerätes grün. Zum Abschalten drücken Sie die Taste noch einmal. -
Page 42: Zusätzliche Informationen
Zusatzgeräte. Wenn Sie das Problem auch nach Prüfung der folgenden Punkte nicht beheben können, wenden Sie angeschlossen? Achten Sie auf gute, wackelfreie Verbindungen (Seite 5). sich für Reparaturen an die nächste Pioneer-Kundendienststelle oder Ihren Händler. Die Fernbedienung funktioniert nicht. •Tauschen Sie die Batterien aus (Seite 4). -
Page 43: Technische Daten
Bi-wiring ......4 Ω bis 16 Ω © 2012 PIONEER CORPORATION. Alle Rechte vorbehalten. - Page 44 ATTENZIONE Questo apparecchio non è impermeabile. Per prevenire IMPORTANTE pericoli di incendi o folgorazioni, non posizionare nelle vicinanze di questo apparecchio contenitori pieni di CAUTION liquidi (quali vasi da fiori, o simili), e non esporre RISK OF ELECTRIC SHOCK l’apparecchio a sgocciolii, schizzi, pioggia o umidità. DO NOT OPEN D3-4-2-1-3_A1_It Il simbolo del lampo con terminale a forma...
- Page 45 I fili di alimentazione devono essere collocati in altri componenti Pioneer ....6 possibili scosse o folgorazioni dovute all’accidentale tal modo che non saranno calpestati.
-
Page 46: Avvertenza
Prima di iniziare Capitolo 1: Uso del telecomando • Non montare l’unità su un divano o altro oggetto o materiale dotato di qualità assorbenti poiché la Prima di iniziare Il telecomando dispone di un raggio di circa 7 m in un qualità... -
Page 47: Collegamento
Collegamento Capitolo 2: Attenzione Informazioni sul “biwiring” Collegamento • Per ridurre i disturbi quando l’unità è collegata a Questa unità può essere usata con altoparlanti che componenti come un giradischi analogico viene supportano il biwiring. Assicurarsi di collegare fornito il terminale SIGNAL GND. •... -
Page 48: Collegamento Dei Cavi Degli Altoparlanti
SPEAKERS A a HIGH e i viene utilizzato per collegare il terminale DIGITAL IN Più componenti Pioneer dotati di jack CONTROL IN/ terminali SPEAKERS B a LOW (inversamente COAXIAL dell’unità al connettore dell’uscita audio OUT possono essere collegati all’unità, consentendo il... -
Page 49: Utilizzo Di Un Cavo Usb Per Effettuare Il Collegamento A Un Computer (Solo Per Il Modello A-70)
• L’utilizzo di un cavo di alimentazione diverso da installare un driver speciale sul computer. Per quello fornito renderà nulla la garanzia, in quanto ulteriori dettagli consultare il sito web di Pioneer. Pioneer non sarà responsabile per eventuali danni prodottisi. (Il cavo di alimentazione fornito insieme all’unità... -
Page 50: Comandi E Display
Comandi e display Capitolo 3: Sensore remoto 12 Pulsante ATTENUATOR (solo per il modello A-70) Riceve i segnali dal telecomando (pagina 4). Comandi e display Premere il pulsante quando si desiderano eseguire Presa PHONES regolazioni fini del volume del suono durante Usare per collegare le cuffie. -
Page 51: Pannello Posteriore
Comandi e display Pannello posteriore Per informazioni in dettaglio sui collegamenti fare riferimento alle pagine 5-7. AUX IN 2 10 11 12 13 Terminali PHONO IN (MM/MC) (A-70) Terminale GND (terra piatto giradischi) Questo terminale di terra è stato progettato per ridurre il PHONO IN (MM) Terminali (A-50) disturbo quando è... -
Page 52: Telecomando
Pulsanti del comando SACD PLAYER Usare il telecomando per impartire comandi al lettore SACD Pioneer. Pulsanti del comando NETWORK AUDIO PLAYER Usare per regolare il lettore audio di rete Pioneer. LOUDNESS Usare per attivare/disattivare il circuito del volume (pagina 8). MUTE Consente di eliminare/ripristinare l’audio. -
Page 53: Funzionamento
Funzionamento Capitolo 4: Impostare la modalità di standby Uso dell’unità come amplificatore di Funzionamento potenza Premere il tasto STANDBY/ON del Quando un preamplificatore è collegato ai suoi terminali telecomando. POWER AMP DIRECT IN, l’unità può essere usata come un amplificatore di potenza. Premere il pulsante POWER AMP Riproduzione DIRECT sul pannello frontale dell’unità. -
Page 54: Riproduzione Di Musica Da Un Componente Audio
Importante • Quando si utilizza la porta DIGITAL IN USB per consentire l’ingresso di file audio trasferendoli da un computer all’unità, potrebbe essere necessario installare un driver speciale sul computer. Per ulteriori dettagli consultare il sito web di Pioneer. -
Page 55: Impostazione Dello Stato Di Standby Automatico (Auto Power Down)
Funzionamento Impostazione dello stato di standby automatico (Auto Power Down) Questa funzione mette automaticamente l’unità in modalità di attesa se non vengono rilevati segnali o funzionamento dell’interruttore per 30 minuti. Se l’alimentazione dell’unità è ACCESA, premere il tasto APD sul telecomando. Quando questa funzione è... -
Page 56: Informazioni Supplementari
è necessario scaricare il driver corretto per USB, non si riesce a riprodurre i file il dispositivo dal sito web Pioneer e installarlo sul computer. Consultare il sito web audio salvati sul computer. -
Page 57: Dati Tecnici
A, B ....... da 4 Ω a 16 Ω © 2012 PIONEER CORPORATION. - Page 58 WARNING IMPORTANT WAARSCHUWING This equipment is not waterproof. To prevent a fire or BELANGRIJK Dit apparaat is niet waterdicht. Om brand of een shock hazard, do not place any container filled with CAUTION elektrische schok te voorkomen, mag u geen voorwerp liquid near this equipment (such as a vase or flower CAUTION RISK OF ELECTRIC SHOCK...
- Page 59 Pioneer-componenten ..... . 6 snoeren. De netsnoeren dienen zo te worden geleid Zorg er daarom voor dat de oude stekker na het Digitale audio-ingangen (alleen A-70) .
-
Page 60: Let Op
Voordat u begint Hoofdstuk 1: • Om lekken van batterijvloeistof te voorkomen, moet u de batterijen verwijderen als u de De versterker installeren Voordat u begint afstandsbediening gedurende langere tijd niet zult gebruiken (1 maand of meer). Als er toch vloeistof Installeer dit toestel op een vlak en stabiel oppervlak. -
Page 61: Aansluitingen
Aansluitingen Hoofdstuk 2: Let op Over “dubbele bedrading” Aansluitingen • De SIGNAL GND-aansluiting is voorzien om het Dit apparaat kan worden gebruikt met luidsprekers lawaai te verminderen wanneer u het apparaat die dubbele bedrading ondersteunen. Zorg dat u de aansluit op componenten, zoals een analoge platenspeler. -
Page 62: Luidsprekerkabels Aansluiten
(de afstandsbedieningssensor wordt automatisch • Een andere methode is het aansluiten van de Meerdere Pioneer-componenten die zijn uitgerust met uitgeschakeld). SPEAKERS A-aansluitingen op HOOG en van de CONTROL IN/OUT-aansluitingen kunnen worden SPEAKERS B-aansluitingen op LAAG (omgekeerd aangesloten op het apparaat. -
Page 63: Met Een Usb-Kabel Voor Het Aansluiten Op Een Computer (Alleen A-70)
Let op stuurprogramma te installeren op de computer. Raadpleeg de website van Pioneer voor details. • Het gebruik van een andere voedingskabel dan de bijgeleverde, zal de garantie ongeldig maken omdat Pioneer niet aansprakelijk kan worden gehouden voor enige opgelopen schade. -
Page 64: Functies En Displays
Functies en displays Hoofdstuk 3: Afstandsbedieningssensor 12 ATTENUATOR-aansluitingen (alleen A-70) Ontvangt de signalen van de afstandsbediening Functies en displays (pagina 4). Indrukken wanneer u fijne aanpassingen wilt aanbrengen aan de geluidssterkte wanneer u afspeelt op PHONES-aansluiting een zeer laag volumeniveau. Gebruiken voor het aansluiten van de hoofdtelefoon. -
Page 65: Achterpaneel
Functies en displays Achterpaneel Raadpleeg pagina’s 5-7 voor details over verbindingen. AUX IN 2 10 11 12 13 PHONO IN (MM/MC)-aansluitingen GND-aansluiting (aarding platendraaier) Deze aardingsaansluiting is ontworpen om ruis te (A-70) onderdrukken wanneer een platendraaier is PHONO IN (MM)-aansluitingen (A-50) aangesloten. -
Page 66: Afstandsbediening
STANDBY/ON overeenkomstige aansluiting op het achterpaneel. • Wanneer de A-50 is aangesloten, worden de knoppen USB, COAXIAL en OPTION uitgeschakeld. SACD PLAYER-bedieningsknoppen Gebruiken om de Pioneer SACD-speler te bedienen. NETWERKAUDIOSPELER- bedieningsknoppen Gebruiken om de Pioneer netwerkaudiospeler te bedienen. LOUDNESS Gebruiken om het volumecircuit AAN/UIT te zetten (pagina 8). -
Page 67: Bediening
Bediening Hoofdstuk 4: Stel de voeding in op stand-by Wanneer u het apparaat gebruikt als Bediening stroomversterker Druk op de STANDBY/ON-knop van Wanneer een voorversterker is aangesloten op de de afstandsbediening. POWER AMP DIRECT IN-aansluitingen van het apparaat, kan dit worden gebruikt als een stroomversterker. -
Page 68: Muziek Afspelen Vanaf Een Digitale Audiocomponent (Alleen A-70)
Belangrijk • Wanneer u de DIGITAL IN USB-poort gebruikt voor het invoeren van audiobestanden vanaf een computer naar dit apparaat, kan het nodig zijn een speciaal stuurprogramma te installeren op de computer. Raadpleeg de website van Pioneer voor details. -
Page 69: Instellen Voor Automatische Stand-Bystatus (Auto Uitschakelen)
Bediening Instellen voor automatische stand-bystatus (Auto uitschakelen) Deze functie schakelt het apparaat automatisch naar de stand-bymodus als er gedurende 30 minuten geen signaal of schakelbewerking wordt gedetecteerd. Als de voeding van het apparaat is INGESCHAKELD, drukt u op de APD-knop op de afstandsbediening. -
Page 70: Bijkomende Informatie
(pagina 5). probleem aan de hand van de gegeven maatregelen niet kunt verhelpen, dient u contact op te nemen met uw dichtstbijzijnde officiële Pioneer-servicecentrum of met uw vakhandelaar om het apparaat te laten repareren. De afstandsbediening doet het niet. -
Page 71: Specificaties
A+B....... . . 8 Ω tot 32 Ω Dubbele bedrading..... 4 Ω tot 16 Ω © 2012 PIONEER CORPORATION. Alle rechten voorbehouden. - Page 72 ADVERTENCIA IMPORTANTE Este aparato no es impermeable. Para evitar el riesgo de incendio y de descargas eléctricas, no ponga ningún CAUTION recipiente lleno de líquido (como pueda ser un vaso o RISK OF ELECTRIC SHOCK un florero) cerca del aparato ni lo exponga a goteo, DO NOT OPEN salpicaduras, lluvia o humedad D3-4-2-1-3_A1_Es...
- Page 73 No coloque la unidad, algún de Pioneer ....... 6 forma apropiada después de haberla extraído.
-
Page 74: Precaución
Antes de comenzar Capítulo 1: Uso del mando a distancia Antes de comenzar El mando a distancia tiene un alcance de unos 7 metros en un ángulo de 30º desde el sensor remoto. Las pilas incluidas con la unidad se han proporcionado Contenido de la caja para que pueda comprobar el funcionamiento del producto y es posible que no duren mucho. -
Page 75: Conexión
Conexión Capítulo 2: • iPod es una marca comercial de Apple Inc., Precaución registrada en EE.UU. y en otros países. Conexión • El terminal SIGNAL GND se proporciona para reducir el ruido cuando la unidad se conecta a componentes como una pletina analógica. El “cableado doble”... -
Page 76: Conectar Los Cables De Los Altavoces
• Otro método de conexión consiste en conectar los Se pueden conectar varios componentes de Pioneer Si se utiliza un cable digital coaxial (se vende por alimentación como medida de seguridad. -
Page 77: Utilizar Un Cable Usb Para Conectar Un Equipo (Solo A-70)
Para obtener detalles, Precaución consulte el sitio Web de Pioneer. • Si utiliza un cable de alimentación distinto al proporcionado se invalidará la garantía, ya que Pioneer no asumirá ninguna responsabilidad por ningún daño producido. -
Page 78: Controles Y Pantallas
Controles y pantallas Capítulo 3: Sensor remoto 12 Botón ATTENUATOR (solo A-70) Recibe las señales del mando a distancia (página 4). Presione este botón cuando desee realizar ajustes Controles y pantallas precisos en el volumen de sonido cuando la Toma PHONES reproducción se realice a niveles de volumen de sonido Utilícelo para conectar auriculares. -
Page 79: Panel Posterior
Controles y pantallas Panel posterior Consulte las páginas 5-7 para obtener detalles relacionados con las conexiones. AUX IN 2 10 11 12 13 Terminales PHONO IN (MM/MC) (A-70) Terminal GND (tierra giratoria) Este terminal de tierra está diseñado para ayudar a Terminales PHONO IN (MM) (A-50) reducir el ruido cuando se conecta una pletina. -
Page 80: Mando A Distancia
Utilícelos para controlar el reproductor de SACD de Pioneer. Botones de control NETWORK AUDIO PLAYER Utilícelos para controlar el reproductor de audio de red de Pioneer. LOUDNESS Utilícelos para ACTIVAR o DESACTIVAR el circuito de intensidad de volumen (página 8). MUTE Silencia/activa el sonido. -
Page 81: Funcionamiento
Funcionamiento Capítulo 4: Establecer la alimentación en el modo de Cuando se utilice la unidad como Funcionamiento espera amplificador de potencia Cuando se conoce un preamplificador a los terminales Presione el botón STANDBY/ON del POWER AMP DIRECT IN de la unidad, esta se puede mando a distancia. -
Page 82: Reproducir Música Procedente De Un Componente De Audio Digital (Solo A-70)
Importante • Cuando se utilice el puerto DIGITAL IN USB para transferir archivos de audio desde un equipo a esta unidad, puede ser necesario instalar un controlador especial en dicho equipo. Para obtener detalles, consulte el sitio Web de Pioneer. -
Page 83: Para Establecer El Estado De Espera Automático (Apagado Automático)
Funcionamiento Para establecer el estado de espera automático (apagado automático) Esta función cambia automáticamente la unidad al modo de espera si no se detecta señal o no se realiza ninguna operación durante 30 minutos. Si la alimentación de la unidad está CONECTADA, presione el botón APD del mando a distancia. -
Page 84: Información Adicional
Establezca el selector correctamente centro de servicio Pioneer más cercano o a su establecimiento que lleven a cabo tareas de reparación. (página 11). -
Page 85: Especificaciones
A+B........8 Ω a 32 Ω Cableado doble......4 Ω a 16 Ω © 2012 PIONEER CORPORATION. Todos los derechos reservados. - Page 86 WARNING IMPORTANT ПРЕДУПРЕЖДЕНИЕ This equipment is not waterproof. To prevent a fire or BAЖHO Данное оборудование не является shock hazard, do not place any container filled with CAUTION водонепроницаемым. Во избежание пожара или liquid near this equipment (such as a vase or flower CAUTION RISK OF ELECTRIC SHOCK поражения...
-
Page 87: Условия Эксплуатации
аппарат, предметы мебели и т.д. на сетевой шнур, электрическим током. После удаления вилки Использование централизованного управления с помощью других компонентов Pioneer..6 не зажимайте его. Не завязывайте узлов на шнуре утилизируйте ее должным образом. -
Page 88: Внимание
Перед началом работы Глава 1: батарейный отсек, а затем установите новые батарейки. В случае утечки электролита из Установка усилителя Перед началом работы батарейки и попадания его на кожу смойте его большим количеством воды. Устройство нужно установить на ровную и устойчивую •... -
Page 89: Подключение
Подключение Глава 2: • iPod является товарным знаком компании Apple Осторожно Inc., зарегистрированным в США и других странах. Подключение • Клемма SIGNAL GND (Заземление сигнала) предназначена для снижения уровня шумов при подключении усилителя к таким устройствам, как О “двухпроводном соединении” проигрыватель... -
Page 90: Подключение Кабелей Ас
К усилителю можно подключать различные компоненты показано на рисунке). Подсоедините белый штекер к гнезду левого канала (L), Pioneer, оснащенные гнездами CONTROL IN/OUT сигнала (только для модели A-70) а красный штекер – к гнезду правого канала (R). (Вход и выход управления), что позволяет... -
Page 91: Подключение К Компьютеру С Помощью Usb-Кабеля (Только Для Модели A-70)
входных звуковых сигналов на клемму разъема DIGITAL IN USB, см. стр. 12. • Использование кабеля питания, не входящего в комплект поставки, приведет к аннулированию гарантии, поскольку компания Pioneer не будет нести ответственности за возникшие повреждения. Разъем (Кабель питания, входящий в комплект поставки... -
Page 92: Органы Управления И Индикаторы
Органы управления и индикаторы Глава 3: Сенсор сигналов пульта 11 Регулятор BALANCE дистанционного управления Этот регулятор обычно должен оставаться в Органы управления и индикаторы центральном положении. Отрегулируйте баланс, если Принимает сигналы с пульта ДУ (см. стр. 4). звук АС одного канала громче звука АС другого канала. Гнездо... -
Page 93: Задняя Панель
Органы управления и индикаторы Задняя панель Сведения о подключении см. на стр. 5-7. AUX IN 2 10 11 12 13 Клеммы PHONO IN (MM/MC) (A-70) Клемма GND (Заземление проигрывателя) Клеммы PHONO IN (MM) (A-50) Эта клемма заземления предназначена для снижения Вход... -
Page 94: Пульт Дистанционного Управления
Органы управления и индикаторы STANDBY/ON 12 APD Пульт дистанционного управления С помощью этой кнопки включается и отключается Переключает усилитель между режимом ожидания и функция автоматического выключения (см. стр. 13). включенным состоянием. A-70 A-50 Кнопки переключения входов Используйте эти кнопки для выбора источника входного сигнала. -
Page 95: Эксплуатация
Эксплуатация Глава 4: Использование усилителя в качестве Отрегулируйте тембр в соответствии со своими предпочтениями с помощью Эксплуатация усилителя мощности регуляторов BASS (Тембр НЧ) и TREBLE При подключении предварительного усилителя к (Тембр ВЧ), а также кнопки LOUDNESS одному из входов данного усилителя POWER AMP (Тонкомпенсация). -
Page 96: Воспроизведение Музыки С Устройства Цифрового Звука (Только Для Модели A-70)
подключать усилитель к компьютеру с помощью USB-кабеля. Внимание • При использовании порта DIGITAL IN USB (Цифровой USB-порт) для ввода звуковых файлов из компьютера в усилитель, может потребоваться установка на компьютере специального драйвера. Дополнительные сведения см. в Интернете на веб- сайте компании Pioneer. -
Page 97: Активация Функции Автоматического Перехода В Режим Ожидания (Автоматического Выключения)
Эксплуатация Активация функции автоматического перехода в режим ожидания (автоматического выключения) Эта функция автоматически переключит усилитель в режим ожидания в случае, если в течение 30 минут сигнал будет отсутствовать или не будет выполнено никаких переключений. Если питание усилителя включено, нажмите кнопку APD на пульте ДУ. Если... -
Page 98: Дополнительная Информация
воспроизводящий компонент. Переключите селектор на соответствующий вход Если неполадку не удается устранить даже после ознакомления с приведенными ниже рекомендациями, то обратитесь (стр. 11). в ближайший авторизованный сервисный центр Pioneer или к вашему дилеру. •Для включения звука нажмите на пульте ДУ кнопку MUTE (Отключение звука) (стр. 10). -
Page 99: Чистка Устройства
• Чтобы удалить с усилителя пыль или грязь, Правительства Российской Федерации № 720 от 16 июня 1997 года корпорация Pioneer Europe NV Высокие частоты ....± 10 дБ (10 кГц) используйте... - Page 100 Registra il tuo prodotto su http://www.pioneer.it (o http://www.pioneer.eu) e scopri subito quali vantaggi puoi ottenere! Ontdek nu de voordelen van online registratie! Registreer uw Pioneer product via http://www.pioneer.nl - http://www.pioneer.be (of http://www.pioneer.eu) Registre su producto en http://www.pioneer.es (o en http://www.pioneer.eu) Descubra los beneficios de registrarse on-line: Зарегистрируйте...