Sony SMP-U10 Mode D'emploi

Manuels Connexes pour Sony SMP-U10


Sommaire des Matières pour Sony SMP-U10
- Page 32 Précautions • La plaque signalétique est AVERTISSEMENT Précautions apposée sous l’appareil. • La puissance requise par cet appareil est indiquée sur Afin de réduire les risques Sécurité l’adaptateur CA. Vérifiez si d’incendie ou d’choc Si un objet ou du liquide pénètre à votre alimentation domestique électrique, n’exposez pas cet correspond à...
- Page 33 Les téléviseurs à audio MPEG Layer-3 sous écran au plasma ou à projection licence Fraunhofer IIS et sont particulièrement sensibles à Thomson. ce phénomène. Pour toute question ou tout problème à propos de ce lecteur, consultez le détaillant Sony le plus proche.
- Page 34 Table des matières AVERTISSEMENT..........2 Précautions .
-
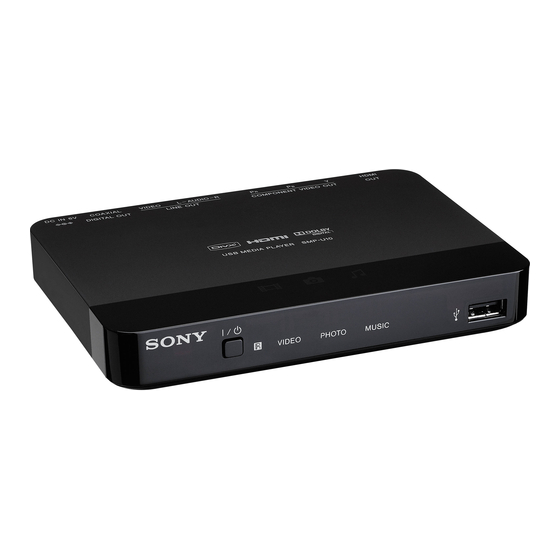
Page 35: Utilisation Des Composants Et Des Commandes
[/1 (marche/veille) (13) Utilisation des Allume le lecteur ou le place en mode veille. composants et des VOL (volume) +/– (12) commandes Règle le volume du téléviseur. B Touches numériques Pour plus de détails, reportez-vous aux pages Saisit le numéro de plage, etc. indiquées entre parenthèses. - Page 36 E ./> PREV/NEXT (précédent/ suivant) Passe à la plage ou au fichier précédent/suivant en mode de lecture continue. REPLAY/ADVANCE (relecture/avance/étape) – Lit la scène à nouveau /fait un bref saut en avant dans la scène lorsque vous appuyez pendant la lecture.
-
Page 37: Panneau Frontal
Panneau frontal VIDEO PHOTO MUSIC A Touche [/1 (marche/veille) (13) C Indicateurs de média (14) Indique le type de média sélectionné. (capteur de télécommande) (12) D Prise USB (type A) (14) Permet de brancher un périphérique USB. Panneau arrière A Prise HDMI OUT (sortie interface D Prise LINE OUT (VIDEO) (sortie multimédia haute définition) (8, 11) vidéo) (8) -
Page 38: Raccordements Et Réglages
(vert) (bleu) (rouge) d’excellente qualité. Prise d’entrée HDMI/DVI Utilisez un câble Sony HDMI certifié (non HDMI IN COMPONENT VIDEO IN fourni) pour obtenir une image et un son numériques de haute qualité par l’entremise Téléviseur Téléviseur... -
Page 39: À Propos Des Fonctions Contrôle Pour Hdmi Pour 'Bravia Sync' (Pour Raccordements Hdmi Uniquement)
Veillez à ce que le connecteur ne soit pas à l’envers ou incliné. En raccordant des composants Sony qui sont compatibles avec la fonction CONTRÔLE POUR HDMI à l’aide d’un câble HDMI (non fourni), vous pouvez bénéficier des fonctions suivantes : À... -
Page 40: Étape 2 : Raccordement De Votre Appareil Audio
Dolby Digital et d’une prise d’entrée numérique, utilisez ce raccordement. Il est possible d’obtenir l’effet ambiophonique du Dolby Digital (5.1ch). Si vous raccordez un appareil audio Sony compatible avec la fonction CONTRÔLE POUR HDMI, reportez-vous au mode d’emploi fourni avec cet appareil audio. -
Page 41: Étape 3 : Raccordement De L'adaptateur Ca
* La fiche jaune est utilisée pour les signaux vidéo (page 8). Étape 3 : Raccordement Téléviseur, projecteur de l’adaptateur CA ou appareil audio INPUT Raccordez l’adaptateur CA fourni à la prise AUDIO VIDEO DC IN 6V du lecteur. (rouge) (blanc) (jaune)* Fiche CC... -
Page 42: Étape 4 : Préparation De La Télécommande
Sony 01 (par défaut) Hitachi Vous pouvez contrôler le niveau sonore, la source d’entrée et le commutateur LG/Goldstar d’alimentation de votre téléviseur Sony à Panasonic 17, 49 l’aide de la télécommande fournie. Philips 06, 08, 72 Touches disponibles Selon l’appareil raccordé, il se peut que vous Samsung ne puissiez pas commander votre téléviseur... -
Page 43: Étape 5 : Configuration Rapide
Appuyez sur X/x pour Étape 5 : Configuration sélectionner le réglage rapide correspondant au type de téléviseur utilisé. Suivez les étapes ci-dessous pour régler Sélectionnez « 16:9 » ou « 4:3 LETTER uniquement les paramètres de base BOX » (page 22). nécessaires à... -
Page 44: Lecture
Lecture Lecture des fichiers Avant de raccorder un périphérique USB au lecteur, vérifiez les périphériques USB et les La liste d’albums s’affiche. types de fichiers que le lecteur peut lire. Consultez la rubrique « Périphériques USB Appuyez sur X/x pour pouvant être lus »... -
Page 45: Sélection D'un Fichier Photo
• En réglant « MÉDIA » sur « PHOTO Réglez « MÉDIA » sur « MUSIQUE » pour activer (MUSIQUE) », vous pouvez visionner un la fonction des paroles. diaporama avec accompagnement sonore lorsque les fichiers photo et musicaux sont placés dans le même album. -
Page 46: Visionnement D'un Diaporama De Haute Qualité (Phototv Hd)
En raccordant un appareil L’information détaillée du fichier photo Sony compatible « PhotoTV HD » à l’aide sélectionné s’affiche. d’un câble HDMI, vous pouvez apprécier un s’affiche lorsque l’image a été prise à... -
Page 47: Établir La Cadence Du Diaporama (Intervalle)
• Lorsque le mode « PhotoTV HD » est activé, le Choix de l’apparence des lecteur change automatiquement le réglage d’émission du signal vidéo dans diapositives (EFFET) « RÉSOLUTION HDMI » à « 1920×1080i », « TYPE TÉLÉ » à « 16:9 », et « YC /RVB Vous pouvez sélectionner la façon dont les (HDMI) »... -
Page 48: Liste Des Paramètres Du Menu De Commande
Exemple : Affichage du menu de commande Liste des paramètres du menu de 1 lors de la lecture d’un fichier vidéo. commande Appuyez sur X/x pour sélectionner un paramètre du menu de commande, puis appuyez sur ENTER. Paramè- Nom du paramètre, fonction Pour plus de détails sur un paramètre, consultez la «... - Page 49 DATE ZOOM Affiche la date à laquelle la photo à Agrandit l’image jusqu’à quatre fois été prise avec un appareil photo sa taille originale. Faites-la défiler en appuyant sur C/X/x/c. numérique. Pour revenir à l’affichage normal, MÉDIA appuyez sur CLEAR. Sélectionnez un type de média à...
-
Page 50: Personnalisation De La Configuration De Lecture
Personnalisation de la Le réglage « CINEMA 1 » ou « CINEMA 2 » est recommandé lorsque vous regardez un film. configuration de lecture • Cette fonction n’est pas disponible lorsque le mode « PhotoTV HD » est activé (page 16). Réglage de l’image de •... -
Page 51: Réglage Du Délai Entre L'image Et Le Son (Synchro Av)
Réglage du délai entre l’image et le son (SYNCHRO AV) Si le son n’est pas synchronisé avec les images, vous pouvez régler le délai entre l’image et le son. Après avoir sélectionné (SYNCHRO AV) dans le menu de commande (page 17), appuyez sur c pour sélectionner «... -
Page 52: Configuration Et Réglages
CHOIX DE LA Configuration et réglages LANGUE Utilisation du menu de Vous pouvez sélectionner plusieurs langues pour les menus à l’écran. réglage ◆ ÉCRANS (menus à l’écran) Permet de changer la langue des menus à Vous pouvez modifier divers paramètres, tels l’écran. - Page 53 ◆ PROGRESSIVE (COMPONENT OUT Active l’économiseur d’écran. ONLY) Désactive l’économiseur Si le téléviseur est compatible avec des d’écran. signaux de format progressif (480p), réglez « PROGRESSIVE (COMPONENT OUT ◆ ARRIÈRE-PLAN ONLY) » sur « OUI ». Notez que vous devez Permet de sélectionner la couleur de l’arrière- raccorder l’appareil à...
-
Page 54: Réglage Personnalisé
AUTO Détecte automatiquement le RÉGLAGE type de logiciel (basé sur film PERSONNALISÉ ou sur vidéo) et sélectionne le mode de conversion adéquat. Sélectionnez normalement ce Ce menu vous permet de régler les paramètres réglage. liés à la lecture, entre autres. Les réglages par défaut sont soulignés. -
Page 55: Réglage Audio
◆ SORTIE NUMÉRIQUE RÉGLAGE AUDIO Permet de déterminer si les signaux audio sont émis via la prise DIGITAL OUT (COAXIAL)/HDMI OUT. Vous pouvez régler le son en fonction des Sélectionnez normalement ce raccordements et des conditions de lecture. réglage. Si vous sélectionnez Les réglages par défaut sont soulignés. -
Page 56: Réglage Hdmi
◆ 48kHz/96kHz PCM RÉGLAGE HDMI Permet de sélectionner la fréquence d’échantillonnage du signal audio. 48kHz/16bit Les signaux audio des fichiers Vous pouvez régler les paramètres liés au vidéo sont toujours convertis en raccordement HDMI. 48 kHz/16 bits. Les réglages par défaut sont soulignés. 96kHz/24bit Tous les types de signaux, y ◆... - Page 57 TÉLÉ » est réglé sur « 4:3 LETTER BOX ». Émet des signaux RVB. PhotoTV HD Affiche une image extrêmement détaillée lorsqu’un appareil Sony • Si l’image de lecture devient parasitée, réglez ce compatible « PhotoTV HD » paramètre sur « RVB ». est raccordé.
- Page 58 ◆ SUIVI LANGUE Fait passer la langue de ce lecteur à la langue actuelle des menus à l’écran du téléviseur. Vous ne pouvez pas sélectionner cette fonction lorsque « CONTRÔLE POUR HDMI » est réglé sur « NON ». Active cette fonction. Désactive cette fonction.
-
Page 59: Informations Complémentaires
Les de le résoudre. Si le problème persiste, périphériques USB non compatibles contactez votre détaillant Sony le plus peuvent générer du bruit, produire un signal proche. audio saccadé ou ne pas être lus. -
Page 60: Fonction D'autodiagnostic (Lorsque Des Chiffres Et Des Lettres S'affichent)
Fonction d’autodiagnostic Notes au sujet des (lorsque des chiffres et des fichiers vidéo, photo ou lettres s’affichent) de musique La fonction d’autodiagnostic vise à prévenir les problèmes de fonctionnement du lecteur. Ce lecteur peut lire les fichiers suivants : Lorsqu’elle est activée, un numéro de service à... -
Page 61: Caractéristiques Techniques
• Réglez « MÉDIA » sur « PHOTO (MUSIQUE) » pour répéter les fichiers musicaux et photo Caractéristiques (page 18). techniques • Selon les conditions d’encodage/enregistrement, certains fichiers vidéo, photo et musicaux peuvent Sorties ne pas être lus. (Désignation de la prise : type de prise/ •... -
Page 62: Index
Index Chiffres 16:9 22 Menu de commande 17 TEMPS/TEXTE 18 48kHz/96kHz PCM 26 Menu de réglage 22 TYPE TÉLÉ 22 4:3 LETTER BOX 22 Menus à l’écran Télécommande 5, 12 Affichage du menu de commande 17 ADVANCE 6 USB 14 Menu de réglage 22 Affichage MIXAGE AVAL 25... - Page 64 4-157-000-21(1) Sony Corporation Printed in Malaysia...