Publicité
Liens rapides
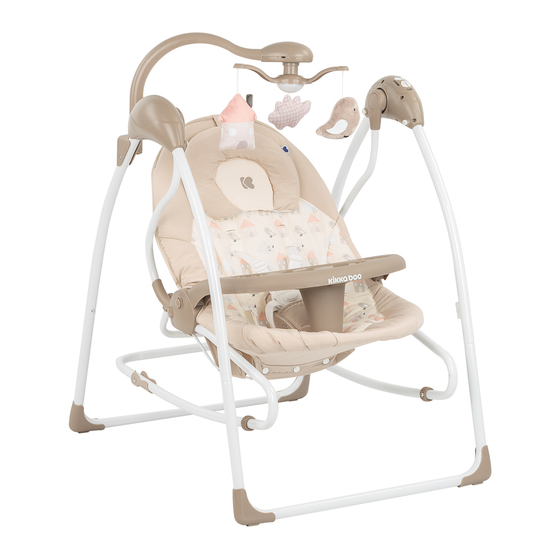
MIA STELLA
swing/bouncer 2 in 1
swing up to 9 kg
bouncer up to 12 kg
INSTRUCTIONS FOR USE
- INSTRUCCIONES DE USO - INSTRUÇÕES DE USO - ISTRUZIONI PER L'USO - MODE D'EMPLOI -
GEBRAUCHSANWEISUNG - INSTRUCTIUNI DE FOLOSIRE - INSTRUKCJA UŻYCIA - UPUTSTVO ZA UPOTREBU -
-
-
- UPUTE ZA KORIŠTENJE - NÁVOD
K POUŽITÍ - INŠTRUKCIE NA POUŽÍVANIE - HASZNÁLATI ÚTMUTATÓ - Ο ΗΓΙΕΣ ΧΡΗΣΗΣ - KULLANIM İÇİN TALİMATLAR -
Publicité

Manuels Connexes pour KIKKA BOO MIA STELLA


Sommaire des Matières pour KIKKA BOO MIA STELLA
- Page 1 MIA STELLA swing/bouncer 2 in 1 swing up to 9 kg bouncer up to 12 kg INSTRUCTIONS FOR USE - INSTRUCCIONES DE USO - INSTRUÇÕES DE USO - ISTRUZIONI PER L'USO - MODE D'EMPLOI - GEBRAUCHSANWEISUNG - INSTRUCTIUNI DE FOLOSIRE - INSTRUKCJA UŻYCIA - UPUTSTVO ZA UPOTREBU - - UPUTE ZA KORIŠTENJE - NÁVOD...
- Page 2 USE / / USO / ΧΡΗΣΗ / UTILIZARE / VERWENDEN / USO / UTILISER / / UŻYWAĆ/ UPOTREBA/ USAR / KULLANIM / POUŽITIE / HASZNÁLAT / POUŽITÍ / click click click click...
- Page 3 click Hanging tube plastic left right “click” Adapter socket...
- Page 4 SCREW BATTERY BOX COVER...
- Page 5 1.5V SIZE AA / LR6...
- Page 6 WARNING! Read these instructions carefully before use and keep them for future reference. Failure to follow these warnings and the assembly instructions could result in serious injury or death. Products need to be installed by adult and used under adult supervision. 1.
-
Page 7: Functions
ASSEMBLY 2. Insert the seat support tube into the backrest tube until a “click” 3. Put on the seat cover to the seat frame. 4. Insert the steel wire through fabric sewing housing, put the two ends of the steel wire t into the plastic holes until sound "click"... - Page 8 12 . aa (lr6-1.5v)
- Page 9 ; 2. ; 3. ; 4. ; 5. ; 7. ; 8. ; 9. ; 11. ; 12. ; 14. ; 15. ; 17. ; 18. ; 19. AC-DC; " " “ ” " " " " " ". " ".
- Page 10 ¡ADVERTENCIA! Lea estas instrucciones cuidadosamente antes de usarlas y guárdelas para futuras referencias. Si no se siguen estas advertencias y las instrucciones de montaje podrían producirse lesiones graves o la muerte. Los productos deben ser instalados por un adulto y utilizados bajo la supervisión de un adulto. 1.
- Page 11 MONTAJE 2. Inserte el tubo de soporte del asiento en el tubo del respaldo hasta que haga clic. 3. Coloque la cubierta del asiento en el marco del asiento. 4. Inserte el cable de acero a través de la caja de costura de la tela, coloque los dos extremos del cable de acero en los ori cios de plástico hasta que suene un "clic"...
- Page 12 IMPORTANTE! GUARDE ESTAS INSTRUÇÕES PARA REFERÊNCIA FUTURA. AVISO! Leia estas instruções cuidadosamente antes de usar e guarde-as para referência futura. O não cumprimento destes avisos e instruções de montagem pode resultar em ferimentos graves ou morte. Os produtos precisam ser instalados por adulto e usados sob supervisão de um adulto. 1.
- Page 13 IMPORTANTE! GUARDE ESTAS INSTRUÇÕES PARA REFERÊNCIA FUTURA. MONTAGEM 2. Insira o tubo de suporte do assento no tubo do encosto até um “clique” 3. Coloque a tampa do assento na estrutura do assento. 4. Insira o o de aço através da caixa de costura de tecido, coloque as duas extremidades do o de aço encaixadas nos orifícios de plástico até...
- Page 14 AVVERTIMENTO! Leggere attentamente queste istruzioni prima dell'uso e conservarle per riferimenti futuri. La mancata osservanza di queste avvertenze e delle istruzioni di montaggio può provocare lesioni gravi o mortali. I prodotti devono essere installati da un adulto e utilizzati sotto la supervisione di un adulto. 1.
- Page 15 MONTAGGIO 2. Inserire il tubo di supporto del sedile nel tubo dello schienale no a quando un “clic” 3. Mettere il rivestimento del sedile sul telaio del sedile. 4. Inserire il lo di acciaio attraverso l'alloggiamento della cucitura del tessuto, inserire le due estremità del lo di acciaio nei fori di plastica no a quando il "clic"...
- Page 16 WARNUNG! Lesen Sie diese Anweisungen vor dem Gebrauch sorgfältig durch und bewahren Sie sie zum späteren Nachschlagen auf. Die Nichtbeachtung dieser Warnungen und der Montageanleitung kann zu schweren oder tödlichen Verletzungen führen. Produkte müssen von Erwachsenen installiert und unter Aufsicht von Erwachsenen verwendet werden. 1.
- Page 17 VERSAMMLUNG 2. Setzen Sie das Sitzstützrohr in das Rückenlehnenrohr ein, bis es einrastet. 3. Setzen Sie den Sitzbezug auf den Sitzrahmen. 4. Führen Sie den Stahldraht durch das Sto -Nähgehäuse und stecken Sie die beiden Enden des Stahldrahts in die Plastiklöcher, bis sie hörbar einrasten.
- Page 18 ATTENTION! Lisez attentivement ces instructions avant utilisation et conservez-les pour pouvoir vous y référer ultérieurement. Le non respect de ces avertissements et des instructions de montage peut entraîner des blessures graves, voire mortelles. Les produits doivent être installés par un adulte et utilisés sous sa surveillance. 1.
-
Page 19: Les Fonctions
ASSEMBLÉE 2. Insérez le tube de support de siège dans le tube du dossier jusqu’à ce que vous entendiez un «clic». 3. Placez la housse du siège sur la structure du siège. 4. Insérez le l d'acier dans le logement de couture en tissu, placez les deux extrémités du l d'acier dans les trous en plastique jusqu'à ce que vous entendiez un "clic". - Page 20 AVERTIZARE! Citi i cu aten ie aceste instruc iuni înainte de utilizare și păstra i-le pentru recomandări ulterioare. Nerespectarea acestor avertismente și instruc iunile de asamblare pot duce la răniri grave sau deces. Produsele trebuie să e instalate de către adul i și utilizate sub supravegherea adul ilor. 1.
- Page 21 ASAMBLARE 2. Introduce i tubul suportului scaunului în tubul pentru spătar până când un "clic" 3. Pune i capacul scaunului pe cadrul scaunului. 4. Introduce i rul de o el prin carcasa de coasere a esăturii, pune i cele două capete ale rului de o el în locașurile de plastic până când sunetul "face i clic"...
- Page 22 WAŻNE! ZACHOWAJ TE INSTRUKCJE NA PRZYSZŁOŚĆ. OSTRZEŻENIE! Przeczytaj uważnie te instrukcje przed użyciem i zachowaj je na przyszłość. Nieprzestrzeganie tych ostrzeżeń i instrukcji montażu może spowodować poważne obrażenia lub śmierć. Produkty muszą być instalowane przez dorosłych i używane pod nadzorem dorosłych. 1.
- Page 23 WAŻNE! ZACHOWAJ TE INSTRUKCJE NA PRZYSZŁOŚĆ. MONTAŻ 2. Wsuń rurkę wspornika siedzenia w rurę oparcia, aż „kliknie” 3. Załóż pokrowiec na siedzenie. 4. Włóż stalowy drut przez obudowę do szycia tkanin, umieść dwa końce drutu stalowego w plastikowych otworach, aż dźwięk „kliknie” 5.
- Page 24 12 . ( 6-1.5 ) SRPSKI SRPSKI...
- Page 25 ; 2. ; 3. ; 4. ; 5. ; 7. ; 8. ; 9. ; 12. ; 14. ; 15. ; 17. ; 18. ; 19. - " " 23: 1. , 12 . ; 5. , 30 , 60 );...
- Page 26 12 . aa (lr6-1.5v)
- Page 27 ; 2. ; 3. ; 4. ; 5. ; 7. ; 8. ; 9. ; 12. ; 14. ; 15. ; 17. ; 18. ; 19. AC-DC " " 1.5V AAA LR03 23: 1. , 12 . ; 5. , 30 , 60 );...
- Page 28 12 . aa (lr6-1.5v)
- Page 29 ; 2. ; 3. ; 4. ; 5. ; 7. ; 8. ; 9. ; 12. ; 14. ; 15. ; 17. ; 18. ; 19. AC-DC « » 1,5 AAA LR03 23: 1. , 12 . ; 5. , 30 , 60 );...
- Page 30 12 . aa (lr6-1.5v)
- Page 31 ; 2. ; 3. ; 4. ; 5. ; 7. ; 8. ; 9. ; 12. ; 14. ; 15. ; 17. ; 18. ; 19. AC-DC " " 1.5V AAA LR03 23: 1. " ", 12 . ; 5. , 30 , 60 );...
- Page 32 VAŽNO! SPREMITE OVE UPUTE ZA BUDUĆNOST POPISA. UPOZORENJE! Pažljivo pročitajte ove upute prije uporabe i čuvajte ih za buduću uporabu. Nepoštivanje uputa za ugradnju i uputa za uporabu može dovesti do ozbiljnih ozljeda ili smrti. Proizvodi trebaju biti postavljeni od strane odraslih i koristiti pod nadzorom odrasle osobe. 1.
- Page 33 VAŽNO! SPREMITE OVE UPUTE ZA BUDUĆNOST POPISA. 1. DIJELOVI 1. tkanina sjedala; 2. cijev za naslon; 3. potporna cijev sjedala; 4. tkanina s ksnom čeličnom žicom; 5. poprečna cijev; 6. lijevo tijelo; 7. Desni dio trupa; 8. držanje noge; 9. viseće cijevi Selektivni dijelovi (Ako bilo što od navedenog nedostaje, obratite se proizvođaču) 10.
- Page 34 DŮLEŽITÉ! ULOŽTE TIETO POKYNY PRO BUDOUCÍ SEZNAM. VAROVÁNÍ! Před použitím si pozorně přečtěte tyto pokyny a uschovejte je pro budoucí použití. Nedodržení pokynů pro instalaci a návodu k použití může mít za následek vážné zranění nebo smrt. Výrobky by měly instalovat dospělí a používat pod dohledem dospělých. 1.
- Page 35 DŮLEŽITÉ! ULOŽTE TIETO POKYNY PRO BUDOUCÍ SEZNAM. 1. ČÁSTI 1. tkanina sedadla; 2. trubice pro opěradlo; 3. opěrná trubka sedadla; 4. hadřík s pevným ocelovým drátem; 5. příčná trubice; 6. levé tělo; 7. Pravá část trupu; 8. držení těla; 9. závěsné trubky Selektivní...
- Page 36 POZOR! SPEVNIŤ TÚTO PRÍRUČKU PRE BUDÚCI LISTOVANIE. POZOR! Pred použitím si pozorne prečítajte tieto pokyny a uschovajte ich pre budúce použitie. Nedodržanie pokynov na inštaláciu a návodu na použitie môže mať za následok vážne zranenie alebo smrť. Výrobky by mali inštalovať dospelí a mali by sa používať pod dohľadom dospelých. 1.
- Page 37 POZOR! SPEVNIŤ TÚTO PRÍRUČKU PRE BUDÚCI LISTOVANIE. 1. ČASTI 1. tkanina sedadla; 2. trubica na operadlo; 3. oporná trubica sedadla; 4. tkanina s pevným oceľovým drôtom; 5. priečna trubica; 6. telo na ľavej strane; 7. Pravá časť trupu; 8. držanie nohy; 9. závesné rúry Selektívne časti (Ak niektorá...
- Page 38 VIGYÁZAT! KÖVESSE EZT A KÉZIKÖNYVET A JÖVŐBENI LISTÁHOZ. FIGYELEM! Használat előtt olvassa el gyelmesen ezeket az utasításokat, és tartsa azokat későbbi felhasználásra. Ezen gyelmeztetések és az összeszerelési utasítások be nem tartása súlyos sérülést vagy halált okozhat. A termékeket felnőtteknek kell telepíteniük és felnőtt felügyelet alatt kell használniuk. 1.
- Page 39 VIGYÁZAT! KÖVESSE EZT A KÉZIKÖNYVET A JÖVŐBENI LISTÁHOZ. KÖZGYŰLÉS 2. Helyezze be az ülés támasztócsövet a háttámla csőbe, amíg egy 3. Helyezze az ülés burkolatát az üléskeretre. 4. Helyezze be az acélhuzalt a szövet varróházába, helyezze az acélhuzal két végét a műanyag lyukakba, amíg a "kattintás" nem hallható. 5.
- Page 40 ΠΡΟΕΙ ΟΠΟΙΗΣΗ! ιαβάστε ροσεκτικά αυτέ τι οδηγίε ριν α ό τη χρήση και φυλάξτε τι για ελλοντική αναφορά. Εάν δεν ακολουθήσετε αυτέ τι ροειδο οιήσει και τι οδηγίε συναρ ολόγηση , ορεί να ροκληθεί σοβαρό τραυ ατισ ό ή θάνατο . Τα...
- Page 41 ΣΥΝΕΛΕΥΣΗ 2. Εισαγάγετε το σωλήνα στήριξη του καθίσ ατο στον σωλήνα καθίσ ατο έχρι να γίνει "κλικ" 3. Το οθετήστε το κάλυ α του καθίσ ατο στο λαίσιο του καθίσ ατο . 4. Εισάγετε το χαλύβδινο σύρ α έσω του εριβλή ατο ραψί ατο υφάσ ατο , το οθετήστε τα δύο άκρα του χαλύβδινου σύρ ατο έσα στι...
- Page 42 ÖNEMLİ! GELECEK REFERANS İÇİN TUTMAK UYARI! Kullanmadan önce bu talimatları dikkatlice okuyun ve ileride başvurmak üzere saklayın. Bu uyarılara ve montaj talimatlarına uyulmaması, ciddi yaralanmalara veya ölüme neden olabilir. Ürünler yetişkinler tarafından kurulmalı ve yetişkin gözetiminde kullanılmalıdır. 1. Herhangi bir parça kırılmış, yırtılmış veya eksikse ürünü kullanmayın ve yalnızca üretici tarafından onaylanan yedek parçaları kullanın. 2.
- Page 43 ÖNEMLİ! GELECEK REFERANS İÇİN TUTMAK MONTAJ 2. Koltuk destek borusunu koltuk arkası borusuna “tık” sesi gelinceye kadar yerleştirin. 3. Koltuk kılıfını koltuk çerçevesine yerleştirin. 4. Çelik teli kumaş dikiş yuvasına yerleştirin, çelik teli iki ucunu "klik" sesi gelene kadar plastik deliklere yerleştirin. 5.
- Page 46 WARRANTY The warranty is provided by the company „Kika Group“ Ltd. Commercial guarantee applies to the territory of Bulgaria. The guarantee is valid in cases where the damage is the result of a latent defect in the components of the device, as well as during the exploitation through the warranty period. The warranty period for the products manufactured by „Kika Group“...
- Page 47 PERFORMED WARRANTY REPAIRS ....................................The exact description of the damage and how to resolve: ........................................................................Repairs: ....................................name, surname ....................................Date, signature, stamp PERFORMED WARRANTY REPAIRS ....................................The exact description of the damage and how to resolve: ........................................................................Repairs: ..................................
- Page 48 „ ” „ ” – – – „ ” .112-115. .108 .112-115 „ ” .032/515151...
- Page 49 . 112- 115. . 108 . 112-115 . 112. (1) . 113. (1) ( - , . 18 2011 .) (2) ( . 1 - , . 18 2011 .) (3) ( . 2, . - , . 18 2011 .) .
- Page 50 .............................................................................................................................................................................................................................................................................................................................................................................................................................................................................................., ..................................................................................................., ................................... : ........................... : ..............................................................: ........: ........
- Page 51 KIKKA BOO Bulgaria KIKKA BOO Spain Vasil Levski 121 Calle Sos Del Rey Catolico, 16, 7C Plovdiv, Bulgaria Granada, Spain office@kikkaboo.com office@kikkaboo.com Kikkaboo (Bulgaria) Kikkaboo Spain kikkabooworld kikkaboospain...