
Manuels Connexes pour Keurig Hot K200 PLUS Série


Sommaire des Matières pour Keurig Hot K200 PLUS Série
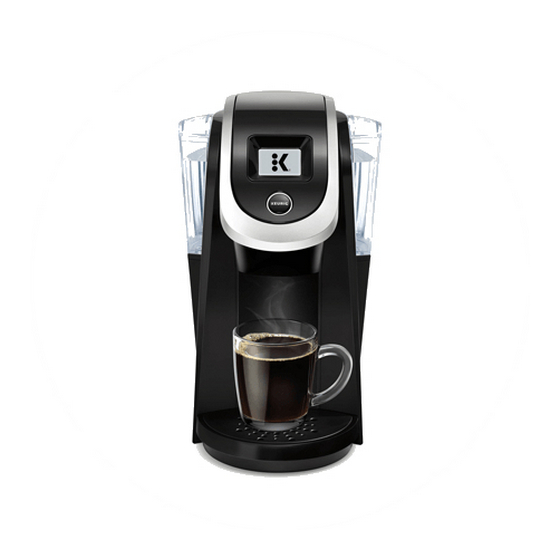
- Page 1 USE & CARE GUIDE GUIDE D’UTILISATION ET D’ENTRETIEN Série Series SYSTÈME D’INFUSION UNE TASSE À LA FOIS PLUS...
-
Page 2: Important Safeguards
IMPORTANT SAFEGUARDS SAVE THESE When using electrical appliances, basic before cleaning or maintenance. This appliance is equipped with a safety precautions should be followed, Allow to cool before putting on Power Cord having a grounding INSTRUCTIONS. including the following: or taking off parts and before wire with a grounding plug. -
Page 3: Short Cord Instructions
CAUTION: There are three sharp over a longer cord. Longer detachable USER GUIDE TABLE OF CONTENTS needles that puncture pods, two power-supply cords or extension cords KEURIG® PLUS SERIES BREWING SYSTEM | K200 SERIES above the Pod Holder and the are available and may be used if care other in the bottom of the Pod is exercised in their use. -
Page 4: Home Screen
FEATURES TOUCH DISPLAY CONTROLS scroll SCREEN FOR SCREEN FOR HOME SCREEN K-CUP® PODS K-CARAFE PODS ™ Settings Button STRONG KEURIG BREW ™ (only available for coffee) Power Button Setting 1 HOT COCOA/OTHER Brew Size (for select non-coffee Power Button beverages) Brew Size Power Button BREW SETTINGS... -
Page 5: Let's Get Brewing
QUICK TIPS & TO DOS QUICK TIPS With your Keurig Plus Series brewer, you can brew a single cup or a full carafe. ® Be sure to use Keurig brand pods: Your Keurig Plus Series brewer is able ® ® to brew over 180 varieties of coffee, tea, and hot cocoa, plus seasonal and café-style beverages. -
Page 6: Cleansing Brew
1 | LET’S GET BREWING! SETUP CLEANSING BREW Place the brewer on a counter and plug Lift the Handle, remove and discard the To begin a cleansing brew, place a Lift and lower the Handle. Do not place a into a grounded outlet. shipping disk. - Page 7 1 | LET’S GET BREWING! BREW YOUR FIRST K-CUP® POD BREW YOUR FIRST K-CARAFE ™ Place a mug on the Drip Tray. Lower the Handle. Make sure the Keurig Carafe is empty. Select a K-Carafe pod, place firmly in ™ ™...
-
Page 8: Dispensing Hot Water Into A Mug
1 | LET’S GET BREWING! BREW YOUR FIRST K-MUG™ POD DISPENSING HOT WATER INTO A MUG Remove Drip Tray and securely insert an Select a K-Mug pod, place firmly in the Place a mug on the Drip Tray. Lift and Press CONTINUE to dispense hot water. -
Page 9: Settings Menu
2 | TIPS & MAINTENANCE SETTINGS MENU ACCESS SETTINGS ENABLE HIGH ALTITUDE Explore everything your Keurig Plus Series ® To ensure your brewer works properly at brewer has to offer by accessing the higher altitudes (5,000 feet), ENABLE the SETTINGS menu. From the home screen, HIGH ALTITUDE mode. -
Page 10: Caring For Your Brewer
2 | TIPS & MAINTENANCE CARING FOR YOUR BREWER CLEANING THE BREWER EXTERIOR CLEANING THE POD HOLDER Lift the Handle. Push up while grabbing Pull out the Pod Holder Assembly (1) and Keep your Keurig Plus Series brewer looking its best by ®... - Page 11 2 | TIPS & MAINTENANCE CARING FOR YOUR BREWER CLEANING THE BREWER ENTRANCE NEEDLE Please ensure the brewer is Remove Brewer Maintenance Accessory Once you have removed the Brewer Having trouble brewing? You may have powered off. With the printed text on from Pod Holder.
- Page 12 2 | TIPS & MAINTENANCE CARING FOR YOUR BREWER KEURIG CARAFE OPERATION CLEANING THE EXIT NEEDLE ™ If a clog arises in the Exit Needle, push Use a paper clip or similar tool to The unique Keurig Carafe was specifically designed for use with the Keurig Plus Series ™...
- Page 13 2 | TIPS & MAINTENANCE CARING FOR YOUR BREWER TIME TO DESCALE THE BREWER DESCALING YOUR BREWER Depending on the mineral content of your water, calcium deposits or scale may build Before you begin, you will need a large mug, fresh water, Keurig Descaling Solution, and ™...
-
Page 14: Recycling K-Mug™ And K-Carafe™ Pods
2 | TIPS & MAINTENANCE CARING FOR YOUR BREWER RECYCLING K-MUG™ AND K-CARAFE™ PODS DESCALING YOUR BREWER (CONTINUED) The plastic cups of K-Carafe pods can be Once brewing is complete, lift the ™ recycled wherever #5 plastic is accepted. Handle and carefully remove the The cleaning action of Keurig Descaling Solution may result in a foam dispensed from the ™... -
Page 15: Stopping The Brew Process
2 | TIPS & MAINTENANCE STOPPING THE BREW PROCESS WATER FILTER ALERT FOR K-CUP PODS AND K-CARAFE PODS (KEURIG BREW SETTING 1) Your brewer is designed to deliver the perfect cup time after time, year after year. To keep ® ™... - Page 16 3 | TROUBLESHOOTING TROUBLESHOOTING BREWER DOES NOT HAVE POWER BREWER BREWS ONLY A PARTIAL CUP • Plug the brewer into an independent outlet without dimmer control. • Clean the Pod Holder if necessary (refer to page 19). • Check to be sure that the brewer is plugged in securely. •...
- Page 17 4 | WARRANTY WARRANTY LIMITED ONE YEAR WARRANTY OTHER LIMITATIONS Keurig warrants that your brewer will be free of defects in materials or workmanship THIS WARRANTY IS EXCLUSIVE AND IS IN LIEU OF ANY OTHER EXPRESS WARRANTY, under normal home use for one year from the date of purchase. It is recommended WHETHER WRITTEN OR ORAL.
-
Page 18: Règles De Sécurité Importantes
RÈGLES DE SÉCURITÉ IMPORTANTES CONSERVER CES Lors de l’utilisation des appareils Éteindre et débrancher le système Cet appareil est muni d’un cordon électriques, il faut toujours suivre les d’infusion avant tout nettoyage ou d’alimentation qui a un fil de mise à la précautions de base, y compris ce qui suit : entretien. - Page 19 causés par un cordon d’alimentation plus TABLE DES MATIÈRES DU GUIDE D’UTILISATION MISE EN GARDE : Il y a trois aiguilles pointues qui perforent les capsules, long. Des cordons d’alimentation amovibles SYSTÈME D’INFUSION KEURIG® DE LA SÉRIE PLUS | MODÈLE K200 deux au-dessus du support à...
-
Page 20: Commandes De L'écran Tactile
FONCTIONS COMMANDES DE L’ÉCRAN TACTILE faire défiler PRÊT TASSES CHOCOLAT Soulevez pour commencer CHAUD FORT AUTRE ÉCRAN DES CAPSULES ÉCRAN DES CAPSULES K-CUP® K-CARAFE ÉCRAN D’ACCUEIL Bouton des réglages FORT INFUSION KEURIG Bouton d’alimentation (uniquement disponible pour le café) Réglage 1 CHOCOLAT CHAUD/AUTRE Format d’infusion (pour certaines boissons autres que... -
Page 21: Conseils Rapides Et Choses À Faire
CONSEILS RAPIDES ET CHOSES À FAIRE CONSEILS RAPIDES Avec votre système d’infusion Keurig de la Série Plus, vous pouvez infuser une tasse ® individuelle ou une carafe complète. Assurez-vous d’utiliser les capsules de la marque Keurig : Votre système d’infusion Keurig ®... -
Page 22: Infusion De Nettoyage
1 | COMMENÇONS À INFUSER! INSTALLATION INFUSION DE NETTOYAGE Placez le système d’infusion sur un comptoir et Soulevez la poignée, retirez et jetez le disque Pour commencer une infusion de nettoyage, Soulevez et abaissez la poignée. Ne mettez pas branchez-le dans une prise mise à la terre. d’expédition. -
Page 23: Infusez Votre Première Capsule K-Carafe
1 | COMMENÇONS À INFUSER! INFUSEZ VOTRE PREMIÈRE CAPSULE K-CUP® INFUSEZ VOTRE PREMIÈRE CAPSULE K-CARAFE Placez la tasse sur la cuvette d’égouttage. Abaissez la poignée. Assurez-vous que la Carafe Keurig est vide. Sélectionnez une capsule K-Carafe Sélectionnez une capsule K-Cup , placez-la Retirez la cuvette d’égouttage et insérez la placez-la fermement dans le support à... -
Page 24: Infusez Votre Première Capsule K-Mug
1 | COMMENÇONS À INFUSER! INFUSEZ VOTRE PREMIÈRE CAPSULE K-MUG DISTRIBUTION D’EAU CHAUDE DANS UNE TASSE Retirez la cuvette d’égouttage et insérez de Sélectionnez une capsule K-Mug , placez- Placez la tasse sur la cuvette d’égouttage. Appuyez sur CONTINUER pour distribuer de manière sécuritaire une tasse de voyage vide. -
Page 25: Menu Des Réglages
2 | CONSEILS ET ENTRETIEN MENU DES RÉGLAGES ACCÈS AUX RÉGLAGES ACTIVER LA HAUTE ALTITUDE RÉGLAGES RÉGLAGES HAUTE ALTITUDE Explorez tout ce que votre système d’infusion Pour vous assurer que votre système d’infusion LANGUE LANGUE ACTIVER de la Série Plus a à vous offrir en Keurig ®... -
Page 26: Entretien De Votre Système D'infusion
2 | CONSEILS ET ENTRETIEN ENTRETIEN DE VOTRE SYSTÈME D’INFUSION NETTOYAGE DE L’EXTÉRIEUR DU SYSTÈME D’INFUSION NETTOYAGE DU SUPPORT À CAPSULE Soulevez la poignée. Poussez en saisissant les Retirez l’assemblage (1) et la base (2) du Préservez la meilleure apparence possible de votre système d’infusion côtés de l’assemblage du support à... - Page 27 2 | CONSEILS ET ENTRETIEN ENTRETIEN DE VOTRE SYSTÈME D’INFUSION NETTOYAGE DE L’AIGUILLE D’ENTRÉE DU SYSTÈME D’INFUSION Veuillez vous assurer que le système d’infusion Retirez l’accessoire d’entretien du support Une fois que vous avez retiré l’accessoire Vous avez des difficultés à infuser? Il est probable est éteint.
- Page 28 2 | CONSEILS ET ENTRETIEN ENTRETIEN DE VOTRE SYSTÈME D’INFUSION FONCTIONNEMENT DE LA CARAFE KEURIG NETTOYAGE DE L’AIGUILLE DE SORTIE Si une obstruction se produit dans l’aiguille Utilisez un trombone ou un outil similaire La Carafe Keurig a été spécialement conçue pour être utilisée par le système d’infusion Keurig de la ®...
- Page 29 2 | CONSEILS ET ENTRETIEN ENTRETIEN DE VOTRE SYSTÈME D’INFUSION IL EST TEMPS DE DÉTARTRER LE SYSTÈME D’INFUSION! DÉTARTRAGE DE VOTRE SYSTÈME D’INFUSION Selon le contenu en minéraux de votre eau, des dépôts de calcium ou du tartre peuvent s’accumuler Avant de commencer, vous aurez besoin d’une grande tasse, d’eau fraîche, de la solution de détartrage dans votre système d’infusion, c’est pourquoi nous recommandons d’utiliser de l’eau en bouteille ou Keurig...
- Page 30 2 | CONSEILS ET ENTRETIEN ENTRETIEN DE VOTRE SYSTÈME D’INFUSION RECYCLAGE DES CAPSULES K-MUG ET K-CARAFE DÉTARTRAGE DE VOTRE SYSTÈME D’INFUSION (SUITE) Les contenants en plastique des capsules K-Mug Une fois l’infusion terminée, soulevez la et K-Carafe peuvent être recyclés là où le poignée et retirez soigneusement la capsule L’action nettoyante de la solution de détartrage Keurig peut entraîner le versement d’une mousse...
-
Page 31: Arrêter Le Processus D'infusion
2 | CONSEILS ET ENTRETIEN ARRÊTER LE PROCESSUS D’INFUSION ALERTE DU FILTRE À EAU POUR LES CAPSULES K-CUP , K-MUG ET K-CARAFE (INFUSION KEURIG RÉGLAGE 1) Votre système d’infusion a été conçu pour procurer la tasse parfaite heure après heure, année après ®... -
Page 32: Dépannage
3 | DÉPANNAGE DÉPANNAGE LE SYSTÈME D’INFUSION N’INFUSE PAS UNE TASSE COMPLÈTE LE SYSTÈME D’INFUSION NE S’ALLUME PAS • Nettoyez le support à capsule au besoin (reportez-vous à la page 51). • Branchez le système d’infusion dans une prise de courant indépendante sans commande d’intensité. •... -
Page 33: Garantie
4 | GARANTIE GARANTIE GARANTIE LIMITÉE D’UN AN AUTRES LIMITATIONS Keurig garantit que chaque système d’infusion est exempt de tout défaut de pièces ou de LA PRÉSENTE GARANTIE EST EXCLUSIVE ET TIENT LIEU DE TOUTE AUTRE GARANTIE EXPRESSE, fabrication, sous réserve d’une utilisation domestique normale, pendant un an à partir de la date ÉCRITE OU VERBALE. - Page 34 Keurig Green Mountain, Inc. 33 Coffee Lane Waterbur y, VT 05676, É.-U. 1.800.361.5628 P/N | Pièce n° PT0000000796 Rév. A 08/16...