Seko Pool Basic Pro Evo Manuel D'installation

Seko Pool Basic Pro Evo Manuel D'installation

Ph-/rx/ph+ - ph/rx/flocc
Table des Matières

Publicité

Les langues disponibles
  • FR

Les langues disponibles

0000137191
Pool Basic Pro Evo
pH-/Rx/pH+ - pH/Rx/Flocc
Rev. 1.0
INSTRUCTIONS MANUAL
MANUAL DE INSTALACION
MANUEL D'INSTALLATION
MANUALE D'INSTALLAZIONE
EN
DE
HANDBUCH
ES
FR
IT

Publicité

Table des Matières
loading

Sommaire des Matières pour Seko Pool Basic Pro Evo

  • Page 1 Pool Basic Pro Evo pH-/Rx/pH+ - pH/Rx/Flocc INSTRUCTIONS MANUAL HANDBUCH MANUAL DE INSTALACION MANUEL D’INSTALLATION MANUALE D’INSTALLAZIONE 0000137191 Rev. 1.0...
  • Page 2 User Manual 000013791 Rev. 1.0...
  • Page 3: Table Des Matières

    CONTENTS 1. GENERAL INTRODUCTION 2. INSTALLATION PRECAUTIONS 3. IDENTIFICATION OF COMPONENTS 4. TECHNICAL SPECIFICATIONS 5. ASSEMBLY INSTRUCTIONS 5.1 APPLICATION EXAMPLE 6. DESCRIPTION OF THE CIRCUIT 7. CALIBRATION MENU 7.1 C ALIBRATION 8. PROGRAMMING 9. DOSING METHOD 10. ACTIVATIONS 11. ALARMS 12.
  • Page 4: General Introduction

    1. GENERAL INTRODUCTION The Pool Basic Pro EVO control method belongs to a new line of instruments carefully developed by the supplier for the innovative management of pools. This device is easy to use and permits continuous control of the pH.
  • Page 5: Identification Of Components

    3. IDENTIFICATION OF COMPONENTS Instructions manual PH 7 PH 4 A. Pool Basic Pro EVO regulator B. Suction hose in PVC Crystal 4x6 (4 m) x 2 C. Delivery hose in PE 4X6 (5 m) x 2 D. pH Electrode model SPH-1 E.
  • Page 6: Technical Specifications

     Input signal: 100÷240 Vac  Level probe: pH, Redox, Flocculant Install the Pool Basic Pro EVO control device on a hard support (vertical wall) where it can be easily accessed by the operator. Attach the Pool Basic Pro EVO control device using the provided fixing bracket (distance between centre of holes: 95mm.
  • Page 7: Assembly Instructions

    5. ASSEMBLY INSTRUCTIONS Max. length of cable: 6m *NOTE 1 Lunghezza massima de cavo: 6 mt * NOTA 1 Maximum pressure *NOTE 1 Pressione Massima: 1,5 bar * NOTA 2 *NOTE 1: FOR LARGE PUMPS, THE CABLE MUST PASS THROUGH AN AREA OTHER THAN THE POWER SUPPLY ZONE IN ORDER TO PREVENT CURRENT DISTURBANCES.
  • Page 8: Application Example

    5.1 APPLICATION EXAMPLE COMPENSATION FILTER HEAT TANK INTERCHANGER RECIRCULATION PUMP Note: The linear distance of the hose between the probe and the point of injection must not be less than 60cm. 000013791 Rev. 1.0...
  • Page 9: Description Of The Circuit

    6. DESCRIPTION OF THE CIRCUIT 1) Inlet pH measurement 2) Inlet Redox measurement 3) Inlet temperature probe 4) Inlet probe level for product pH-/Flocc 5) Inlet probe level for product Redox 6) Inlet probe level for product pH+/pH 7) Keyboard input 8) Flow (recirculation pump) 9) Relay for pH-/pH product, external pump 10)Alarm relay or for Redox product, external pump...
  • Page 10 7.1.1 Calibration of pH probe Remove the probe from the probe Wash the probe Get some water holder Press CAL Calibration B.Solut. pH Measure Press the Cal key for 3 seconds and Press Cal to start calibration with a use it to confirm the pH measurement buffer solution pH 7 Keep the probe in the buffer solution pH 7...
  • Page 11 7.1.2 Calibration of Redox probe To carry out this calibration the Redox measurement must be enabled. Remove the probe from the probe Wash the probe Get some water holder Press CAL Calibration B.Solut. 465 mV Rx Measure Press the Cal key for 3 seconds and Press Cal to start calibration with a use it to confirm the Rx measurement buffer solution 465 mV...
  • Page 12: Programming

    8. PROGRAMMING The programming menu can be accessed by simultaneously pressing the Cal and Set keys for at least 3 seconds. Upon release of the keys the display will show: Language Display Settings Press Enter and the + and – keys to change Progrma Menu the language: Language...
  • Page 13 Redox measurement display (A and B Settings configuration) Use Enter to access the sub-menus:  Setpoint  Sp Type Progrma Menu  OFA time Rx Measure  Alr Band  Type Press Enter and the + and - keys to change Rx Measure the Set Point value (0÷1500 mV).
  • Page 14 pH measurement display (B configuration) Settings Use Enter to access the sub-menus:  Setpoint  Dos type Progrma Menu  OFA time pH Measure  Alr Band  Type Press Enter and the + and - keys to change pH Measure the Set Point value (0÷14 pH) Setpoint 7.4 pH...
  • Page 15 Advanced Display Settings Use Enter to access the sub-menus:  Pump config.  Relay config Progrma Menu  Temp. Avdvanced  Flow  Cal.  Password Press Enter to modify the pump configuration:  Configuration A: The first pump on the left carries out the pH- function, the pump in the middle the Redox function and the one on the right...
  • Page 16 DISPLAY VIEW WITH THE SYSTEM ON STAND-BY Stand-by display (Configuration A) Operation The display is divided into 4 parts:  On the upper left hand side the alarm is shown, when present.  On the lower left hand side the value read by 760mV 8.3pH the Rx probe is shown.
  • Page 17: Dosing Method

    9. DOSING METHOD The control of the pumps in the pH and Redox scale is carried out through the PWM function. The proportional band is fixed on the values pH0.8 and Redox = 120 mV Proportional dosing pH-/pH+ The instrument allows the chemical measurement to be controlled and modified through the pH- and pH+ Set Point automatically;...
  • Page 18 pH/Redox proportional dosing The instrument allows the chemical measurement to be controlled and modified through the pH Set Point automatically; adjusting the dosing though the pH motor controlled in Proportional Time. The dosing below is obtained by setting the following parameters: ...
  • Page 19 ON/OFF pH/Redox dosing The instrument allows the chemical measurement to be controlled and modified through the pH Set Point automatically; adjusting the dosing though the pH motor controlled in ON/OFF. The dosing below is obtained by setting the following parameters: ...
  • Page 20: Activations

    10. ACTIVATIONS  Flow Function Through the recirculation pump. High voltage input 100 ÷ 240 Vac, the dosing system is switched on. High voltage input is off (the recirculation pump is switched off), the dosing system shows FLOW flashing. 11. ALARMS Lev pH-= pH product level probe alarm.
  • Page 21: List Of Possible Anomalies And Relative Solutions

    13. LIST OF POSSIBLE ANOMALIES AND RELATIVE SOLUTIONS ANOMALY CAUSE SOLUTION 1) Check for possible short circuits on the electrode  instrument connection cable (between the cable’s core and the external instrument Problem with the cable and/or shielding). always indicates pH connector.
  • Page 22: Handling

    14. HANDLING Hose replacement: Position the roller at 20 past 10, Completely release left Release the cover by pulling the turning it in the direction of the connector, holding it taut towards the left connector upward. circular arrow. outside, and turn the roller in the direction of the circular arrow so that the hose is freed up to the right connector.
  • Page 23: Storing The Pump After Use

    15. STORING THE PUMP AFTER USE When the regulation device must be stored, clean water should be pumped through the hose in order to rinse it. Then position the probe holder at 7h05, turning in the direction indicated by the circular arrow. These two precautions will facilitate the subsequent reactivation of the unit.
  • Page 24 WARNINGS PRODUCTS TO BE USED:  pH Reduction: product with a sulphuric acid base, easily found on the market.  pH Increase: product with an alkaline acid base PRODUCTS NOT RECOMMENDED  Do not use hydrochloric acid. Ask the installer about all other products. PROBE WARNINGS ...
  • Page 25 Benutzerhandbuch 0000137191 Rev. 1.0...
  • Page 26 INHALTSVERZEICHNIS 1. ALLGEMEINE BESCHREIBUNG 2. VORSICHTSMASSNAHMEN BEI DER INSTALLATION 3. IDENTIFIKATION DER BESTANDTEILE 4. TECHNISCHE DATEN 5. MONTAGEANWEISUNGEN 5.1 ANBRINGUNGSBEISPIEL 6. KREISLAUFBESCHREIBUNG 7. KALIBRIERUNGSMENÜ 7.1 KALIBRIERUNG 8. PROGRAMMIERUNG 9. DOSIERMETHODE 10. AKTIVIERUNGEN 11. ALARME 12. VOREINGESTELLTE STEUERWERTE 13. MÖGLICHE BETRIEBSSTÖRUNGEN UND ENTSPRECHENDE ABHILFEMASSNAHMEN 14.
  • Page 27: Allgemeine Beschreibung

    1. ALLGEMEINE BESCHREIBUNG Die Regelungsmethode Pool Basic Pro EVO ist Teil der neuen Serie der von der lieferant entwickelten Geräte für die moderne Poolpflege. Das Gerät ist einfach bedienbar und erlaubt eine ständige Kontrolle des pH-Werts und die Dosierung von zwei Produkten.
  • Page 28: Identifikation Der Bestandteile

    3. IDENTIFIKATION DER BESTANDTEILE Instructions manual PH 7 PH 4 LEGENDE A. Regler Pool Basic Pro EVO B. Ansaugschlauch aus PVC Crystal 4x6 (4 m) x 2 C. Druckschlauch aus PE 4X6 (5 m) x 2 D. pH-Elektrode Modell SPH-1 E. Rx-Elektrode F.
  • Page 29: Technische Daten

     Füllstandssonde: pH, Redox, Flockungsmittel Den Regler Pool Basic Pro EVO auf einen festen Unterbau (senkrechte Wand) installieren, wo es vom Bediener leicht erreichbar ist. Den Regler Pool Basic Pro EVO mit der im Set mitgelieferten Montagehalterung befestigen (Bohrungsabstand: 95 mm. Bohrloch Ø 6).
  • Page 30: Montageanweisungen

    5. MONTAGEANWEISUNGEN MAX. KABELLÄNGE: 6 m ANMERKUNG 1 Lunghezza massima de cavo: 6 mt * NOTA 1 HÖCHSTDRUCK: 1,5 BAR ANMERKUNG 2 Pressione Massima: 1,5 bar * NOTA 2 ANMERKUNG 1: DAS KABEL MUSS BEI GROßEN PUMPEN IN EINER ANDEREN ZONE ENTLANG * NOTA 1: IL CAVO DEVE PASSARE IN UNA ZONA DIVERSA DA QUELLA DI ALIMENTAZIONE LAUFEN, ALS DER FÜR DIE EINSPEISUNG, UM STÖRUNGEN ZU VERMEIDEN.
  • Page 31: Anbringungsbeispiel

    5.1 ANBRINGUNGSBEISPIEL AUSGLEICHS- WÄRMETAUSCHER FILTER BEHÄLTER UMWÄLZPUMPE Hinweis: Der lineare Leitungsabstand zwischen der Sonde und dem Einspritzpunkt darf nicht unter 60 cm liegen. 0000137191 Rev. 1.0...
  • Page 32: Kreislaufbeschreibung

    6. KREISLAUFBESCHREIBUNG Eingang pH-Messung Eingang Rx-Messung Eingang Temperatursonde Eingang Füllstandssonde für Produkt pH-/Flocc Eingang Füllstandssonde für Produkt Redox Eingang Füllstandssonde für Produkt pH+/pH Eingang Tastatur Durchfluss (Umwälzpumpe) Relais für Produkt pH-/pH, Außenpumpe. 10) Alarmrelais oder Produkt Redox, Außenpumpe 11) Relais für Produkt pH+/Flocc, Außenpumpe. 12) Stromversorgungseingang 13) Schalter 14) Sicherung...
  • Page 33 7.1.1 Kalibrierung der pH-Sonde Die Sonde aus dem Sondenhalter Die Sonde spülen Wasser einfüllen nehmen Kalibration Press CAL pH Messung B.Solut. Die Taste Cal 3 Sekunden lang Cal drücken, um die Kalibrierung mit gedrückt halten und mit der selben einer Pufferlösung 7 pH zu starten Taste die pH-Messung bestätigen Die Sonde in die Pufferlösung 7 pH eintauchen...
  • Page 34 7.1.2 Kalibrierung der Redox-Sonde Zur Durchführung dieser Kalibrierung muss die Redox-Messung aktiviert werden Die Sonde aus dem Sondenhalter Die Sonde spülen Wasser einfüllen nehmen Kalibration Press CAL Rx Messung B.Solut. 465 mV Die Taste Cal 3 Sekunden lang Cal drücken, um die Kalibrierung mit gedrückt halten und mit der selben einer Pufferlösung 465 mV zu starten Die Sonde in die Pufferlösung 465 mV...
  • Page 35: Programmierung

    8. PROGRAMMIERUNG Durch gleichzeitiges, mindestens 3 Sekunden langes Drücken der Tasten Cal und Set erhält man Zugriff auf das Programmiermenü. Bei Loslassen der Tasten erscheinen folgende Anzeigen auf dem Display: Display Sprache Einstellungen Durch Drücken von Enter und der Tasten + Parameter und - lässt sich die Sprache verändern: Sprache...
  • Page 36 Display Rx-Messung (Konfiguration A und B) Einstellungen Durch Drücken von Enter erhält man Zugriff auf die Untermenüs:  Setpoint Parameter  Art der Dosierung Rx Messung  OFA-Zeit  Bandalarm  Art der Dosierung Durch Drücken von Enter und der Tasten + und Rx Messung (0÷1500 mV) - wird der Setpoint-Wert...
  • Page 37 Display pH-Messung (Konfiguration B) Einstellungen Durch Drücken von Enter erhält man Zugriff auf die Untermenüs:  Setpoint Parameter  Art der Dosierung pH Messung  OFA-Zeit  Bandalarm  Art der Dosierung pH Messung Durch Drücken von Enter und der Tasten + und - wird der Setpoint-Wert (0÷14 pH) verändert Sollwert 7.4 pH...
  • Page 38 Display Erweitertes Menü Einstellungen Durch Drücken von Enter erhält man Zugriff auf die Untermenüs:  Konfig. Pumpen  Relay config Parameter  Temp. Erweitert  Durchfluss  Cal  Passwort Durch Drücken von Enter lässt sich die Konfiguration der Pumpen verändern: ...
  • Page 39 Esc drücken, um die Menüs zu verlassen und die Einstellungen mit Enter bestätigen. Display Einstellungen Mit den Tasten + und - kann JA oder NEIN Menù gewählt werden, d.h. ob die Einstellungen Varlasse gespeichert werden sollen, oder nicht. Zum Bestätigen Enter drücken. DISPLAY-ANZEIGE MIT SYSTEM IM STANDBY Funktionsweise Display Standby (Konfiguration A)
  • Page 40: Dosiermethode

    9. DOSIERMETHODE Die Kontrolle der Pumpen in der pH- und Redox-Skala erfolgt über di Funktion PWM. Der Proportionalbereich ist auf die Werte pH = 0,8 und Redox = 120 mV eingestellt PROPORTIONALE DOSIERUNG PH-/PH+ Das Gerät ermöglicht eine automatische Kontrolle und Veränderung der chemischen Messung über die Setpoints pH- und pH+, indem die Dosierung über die pH-/pH+-Motoren eingestellt wird, die sich auf eine proportionale Zeit einstellen lassen.
  • Page 41 PROPORTIONALE DOSIERUNG PH/REDOX Das Gerät ermöglicht eine automatische Kontrolle und Veränderung der chemischen Messung über den Setpoint pH, indem die Dosierung über den pH/Rx-Motor eingestellt wird, das sich auf eine proportionale Zeit einstellen lässt. Durch Einstellen der folgenden Parameter erhält man die nachstehend aufgeführte Dosierung: ...
  • Page 42 DOSIERUNG ON/OFF PH/REDOX Das Gerät ermöglicht eine automatische Kontrolle und Veränderung der chemischen Messung über den Setpoint pH, indem die Dosierung über den pH-Motor eingestellt wird, der sich auf ON/OFF einstellen lässt. Durch Einstellen der folgenden Parameter erhält man die nachstehend aufgeführte Dosierung: ...
  • Page 43: Aktivierungen

    10. AKTIVIERUNGEN  Durchfluss-Funktion Mittels Umwälzpumpe. Hochspannungseingang 100 ÷ 240 Vac, das Dosiersystem ist eingeschaltet. Hochspannungseingang auf Off (die Umwälzpumpe ist ausgeschaltet), das Dosiersystem zeigt den blinkenden Schriftzug FLOW an. 11. ALARME Lev pH- = Alarm Füllstandssonde für Produkt pH. Lev pH+ = Alarm Füllstandssonde für Produkt pH.
  • Page 44: Mögliche Betriebsstörungen Und Entsprechende Abhilfemassnahmen

    13. MÖGLICHE BETRIEBSSTÖRUNGEN UND ENTSPRECHENDE ABHILFEMASSNAHMEN STÖRUNG URSACHE ABHILFE 1) Prüfen, ob etwaige Kurzschlüsse im Anschlusskabel zwischen Elektrode  Gerät vorliegen (zwischen Kabelkern und Gerät zeigt Kabel- und/oder externer Abschirmung). immer pH 7,00 an Verbindungsstörung. 2) Überprüfen, dass keine Feuchtigkeit bzw.
  • Page 45: Bestückung

    14. BESTÜCKUNG Auswechseln des Schlauchs: Die Rolle durch Drehen in linken Anschluss komplett Den Deckel lösen, in dem der Richtung des runden Pfeils in lösen, ihn nach außen hin festhalten linke Anschluss hochgezogen Position 10 und 20 bringen. und die Rolle in Richtung des runden wird.
  • Page 46: Lagerung Der Pumpe Nach Gebrauch

    15. LAGERUNG DER PUMPE NACH GEBRAUCH Vor Einlagerung des Regelgeräts sollte zur Reinigung des Schlauchs sauberes Wasser durch die Pumpe gepumpt werden. Danach den Sondenhalter durch Drehen in Richtung des runden Pfeils in Position 7 und 05 bringen. Diese beiden Maßnahmen erleichtern eine nachfolgende Wiederinbetriebnahme des Geräts. 0000137191 Rev.
  • Page 47: Warnhinweise

    WARNHINWEISE EMPFOHLENE PRODUKTE:  Zur Senkung des pH-Werts: Produkt auf Schwefelsäurebasis (im Handel erhältlich).  Zur Steigerung des pH-Werts: Produkt auf alkalischer und saurer Basis NICHT EMPFOHLENE PRODUKTE  Keine Chlorwasserstoffsäure verwenden. Hinsichtlich aller anderen Produkte lassen Sie sich von Ihrem Installateur beraten. ANWENDUNGSHINWEISE FÜR DIE SONDE ...
  • Page 48 Manual de uso 0000137191 Rev. 1.0...
  • Page 49 ÍNDICE 1. INTRODUCCIÓN GENERAL 2. PRECAUCIONES DE INSTALACIÓN 3. IDENTIFICACIÓN DE LOS COMPONENTES 4. DATOS TÉCNICOS 5. INDICACIONES DE MONTAJE 5.1 EJEMPLO DE APLICACIÓN 6. DESCRIPCIÓN DEL CIRCUITO 7. MENÚ CALIBRACIÓN 7.1 C ALIBRACIÓN 8. PROGRAMACIÓN 9. MÉTODO DOSIFICACIÓN 10. ACTIVACIONES 11.
  • Page 50: Introducción General

    1. INTRODUCCIÓN GENERAL El método de regulación Pool Basic Pro EVO pertenece a una nueva gama de instrumentos cuidadosamente desarrollados por lo provvedor para favorecer una gestión innovadora de las piscinas. Este dispositivo es fácil de utilizar y permite controlar constantemente el pH.
  • Page 51: Identificación De Los Componentes

    Instructions manual PH 7 PH 4 LEYENDA A. Regulador Pool Basic Pro EVO B. Tubo de aspiración de PVC Crystal 4x6 (4 m) x 2 C. Tubo de envío de PE 4X6 (5 m) x 2 D. Electrodo pH modelo SPH-1 E.
  • Page 52: Datos Técnicos

     Señal entrada: 100÷240 Vca  Sonda nivel: pH, Redox, Floculante Instale el regulador Pool Basic Pro EVO sobre un soporte rígido (pared vertical), en un lugar fácilmente accesible para el operador. Fije el regulador Pool Basic Pro EVO mediante el soporte de fijación incluido junto al kit (distancia entre los ejes de perforación del soporte: 95...
  • Page 53: Indicaciones De Montaje

    5. INDICACIONES DE MONTAJE Longitud máxima del cable : 6 m ___________________________ Lunghezza massima de cavo: 6 mt NOTA 1 * NOTA 1 Presión máxima: 1,5 bar ____________________ Pressione Massima: 1,5 bar NOTA 2 * NOTA 2 * NOTA 1: EL CABLE DEBE PASAR EN UNA ZONA DISTINTA DE LA DE ALIMENTACIÓN * NOTA 1: IL CAVO DEVE PASSARE IN UNA ZONA DIVERSA DA QUELLA DI ALIMENTAZIONE PER POMPE GROSSE, PER EVITARE DISTURBI DI CORRENTE.
  • Page 54: Ejemplo De Aplicación

    5.1 EJEMPLO DE APLICACIÓN TINA FILTRO INTERCAMBIADOR COMPENSACIÓN DE CALOR BOMBA RECIRCULACIÓN Nota: La distancia lineal de la canalización entre la sonda y el punto de inyección no debe ser inferior a 60 cm. 0000137191 Rev. 1.0...
  • Page 55: Descripción Del Circuito

    6. DESCRIPCIÓN DEL CIRCUITO 1) Entrada medida pH 2) Entrada medida Redox 3) Entrada sonda temperatura 4) Entrada sonda nivel para producto pH-/Flocc 5) Entrada sonda nivel para producto Redox 6) Entrada sonda nivel para producto pH+/pH 7) Entrada teclado 8) Flujo (bomba recirculación) 9) Relé...
  • Page 56 7.1.1 Calibración sonda pH Sacar la sonda del portasonda Lavar la sonda Coger un poco de agua Calibracion Press CAL pH Medida B.Solut. Mantener pulsada la tecla Cal durante Pulsar Cal para activar la calibración 3 segundos y confirmar la Medida pH con una solución tampón 7 pH con la misma tecla Introducir la sonda en la solución...
  • Page 57 7.1.2 Calibración sonda Redox Para poder efectuar esta calibración es necesario habilitar la medida Redox Sacar la sonda del portasonda Lavar la sonda Coger un poco de agua Calibracion Press CAL Rx Medida B.Solut. 465 mV Mantener pulsada la tecla Cal durante Pulsar Cal para activar la calibración 3 segundos y confirmar la Medida Rx con una solución tampón 465 mV...
  • Page 58: Programación

    8. PROGRAMACIÓN Pulsando al mismo tiempo las teclas Cal y Set durante al menos 3 segundos se accede al menú de programación. Al soltar las teclas el display visualiza: Display Idioma Configuraciones Pulsar Enter y las teclas + y – para Programacion modificar el idioma.
  • Page 59 Display Medida Redox (Configuración A y B) Configuraciones Con Enter se accede a los submenús:  Setpoint  Dosif. Programacion  Tiempo OFA Medida Rx  Alr Band  Type Pulsar Enter y las teclas + y - para modificar Medida Rx el valor del Set Point (0÷1500 mV) Setpoint...
  • Page 60 Display Medida pH (Configuración B) Configuraciones Con Enter se accede a los submenús:  Setpoint  Tipo Dos Programacion  Tiempo OFA Medida pH  Alr Band  Type Pulsar Enter y las teclas + y - para modificar Medida pH el valor del Set Point (0÷14 pH) Setpoint 7.4 pH...
  • Page 61 Display Avanzado Configuraciones Con Enter se accede a los submenús:  Config. Bombas  Relay config Programacion  Temp. Avanzado  Flujo  Cal  Contraseña Con Enter se puede modificar la configuración de las bombas:  Configuración A: La primera bomba de la izquierda desempeñará...
  • Page 62 Pulsar Esc para salir de los distintos menús y confirmar con Enter las programaciones configuradas. Display Configuraciones Con las teclas + y – se puede elegir SÍ o Menù NO, es decir, si guardar o no las Salin configuraciones y confirmar con Enter. VISUALIZACIÓN DISPLAY CON EL SISTEMA EN STAND-BY Funcionamiento Display Stand-by (Configuración A)
  • Page 63: Método Dosificación

    9. MÉTODO DOSIFICACIÓN El control de las bombas en la escala pH y Redox se realiza mediante función PWM. La banda proporcional está fijada en valores pH= 0,8 y Redox = 120 mV Dosificación proporcional pH-/pH+ El instrumento permite controlar y modificar automáticamente la medida química mediante los Puntos de ajuste pH- y pH+, regulando la dosificación mediante los motores del pH- e pH+ en modalidad Tiempo proporcional.
  • Page 64 Dosificación proporcional pH/Redox El instrumento permite controlar y modificar automáticamente la medida química mediante el Set point pH, regulando la dosificación mediante el motor del pH en modalidad Tiempo proporcional. Configurando los siguientes parámetros se obtiene la dosificación que aparece abajo: ...
  • Page 65 Dosificación ON/OFF pH/Redox El instrumento permite controlar y modificar automáticamente la medida química mediante el Set point pH en automático, regulando la dosificación mediante el motor del pH en modalidad ON-OFF. Configurando los siguientes parámetros se obtiene la dosificación que aparece abajo: ...
  • Page 66: Activaciones

    10. ACTIVACIONES  Función Flujo Mediante bomba de recirculación. Entrada de alta tensión 100 ÷ 240 Vca, el sistema de dosificación está encendido. Entrada de alta tensión está en OFF (la bomba de recirculación está apagada), el sistema de dosificación visualiza FLOW parpadeante. 11.
  • Page 67: Lista De Las Posibles Anomalías Y De Sus Correspondientes Soluciones

    13. LISTA DE LAS POSIBLES ANOMALÍAS Y DE SUS CORRESPONDIENTES SOLUCIONES ANOMALÍA CAUSA SOLUCIÓN 1) Controle si se ha producido algún cortocircuito en el cable de conexión electrodo  instrumento (entre el núcleo instrumento Problema del cable y/o del central del cable y la protección externa). indica siempre el pH conector 2) Asegúrese de que no haya huellas de...
  • Page 68: Desplazamiento

    14. DESPLAZAMIENTO Sustitución del tubo: Colocar el rodillo a las 10 y 20 Desbloquear completamente el racor Desbloquear la tapa tirando girando en el sentido de la izquierda manteniéndolo hacia arriba el racor de la flecha circular. tensado hacia el exterior y girar el izquierda.
  • Page 69: Almacenamiento De La Bomba Después Del Uso

    15. ALMACENAMIENTO DE LA BOMBA DESPUÉS DEL USO Al guardar el dispositivo de regulación, es aconsejable bombear agua limpia para enjuagar el tubo. A continuación, coloque el portasonda a las 7 y 05 haciéndolo girar en la dirección indicada por la flecha circular. Estas dos precauciones facilitarán la sucesiva reactivación del aparato.
  • Page 70 ADVERTENCIAS PRODUCTOS QUE SE DEBEN UTILIZAR:  Disminución del pH: Producto a base de ácido sulfúrico, fácil de encontrar en el mercado.  Aumento del pH: producto a base de ácido alcalino PRODUCTOS DESACONSEJADOS  No utilice ácido clorhídrico. Para todos los demás productos, pida consejo al instalador. ADVERTENCIAS SOBRE LA SONDA ...
  • Page 71 Manuel d’utilisation 0000137191 Rev. 1.0...
  • Page 72 SOMMAIRE 1. INTRODUCTION GÉNÉRALE 2. PRÉCAUTIONS POUR L’INSTALLATION 3. IDENTIFICATION DES COMPOSANTS 4. DONNÉES TECHNIQUES 5. INDICATIONS DE MONTAGE 5.1 EXEMPLE D’APPLICATION 6. DESCRIPTION DU CIRCUIT 7. MENU ÉTALONNAGE 7.1 ÉTALONNAGE 8. PROGRAMMATION 9. MÉTHODE DE DOSAGE 10. ACTIVATIONS 11. ALARMES 12.
  • Page 73: Introduction Générale

    1. INTRODUCTION GÉNÉRALE La méthode de réglage Pool Basic Pro EVO appartient à la nouvelle gamme d’instruments développés par fournisseur afin d’assurer une gestion novatrice et précise, des piscines. Ce dispositif permet de contrôler constamment le pH. Les pompes péristaltiques ont un débit de 1,5 l/h pour le réglage du pH et elles ont une capacité...
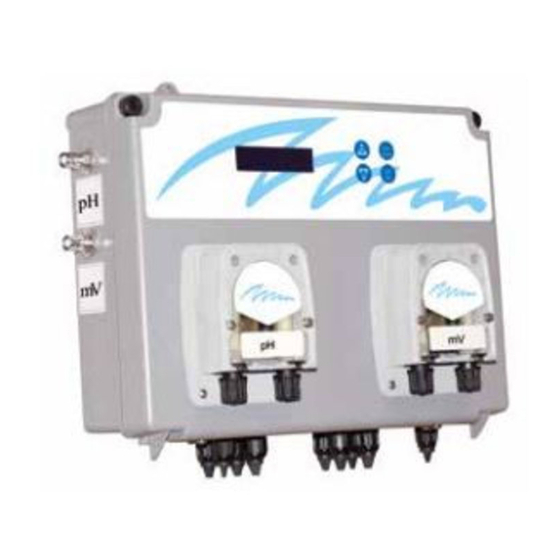
  • Page 74: Identification Des Composants

    Instructions manual PH 7 PH 4 LÉGENDE A. Régulateur Pool Basic Pro EVO B. Tuyau d’aspiration PVC Crystal 4x6 (4 m) x 2 C. Tuyau de refoulement en PE 4X6 (5 m) x 2 D. Électrode pH modèle SPH-1 E. Électrode Redox F.
  • Page 75: Données Techniques

     Signal entrée : 100-240 Vc.a.  Sonde niveau : pH, Reox, Floculant Installer le régulateur Pool Basic Pro EVO sur un support rigide (mur vertical), dans un lieu facilement accessible pour l’opérateur. Fixer le régulateur Pool Basic Pro EVO au moyen de la plaque de fixation fournie avec le kit (entraxe de perçage de la plaque : 95 mm trou Ø...
  • Page 76: Indications De Montage

    5. INDICATIONS DE MONTAGE Longueur maximum du câble : 6 m. Lunghezza massima de cavo: 6 mt REMARQUE 1 * NOTA 1 Pression maximum : 1,5 bar. Pressione Massima: 1,5 bar REMARQUE 2 * NOTA 2 * REMARQUE 1 : SUR LES PLUS GROSSES POMPES, AFIN D’ÉVITER DES PERTURBATIONS INDUITES PAR * NOTA 1: IL CAVO DEVE PASSARE IN UNA ZONA DIVERSA DA QUELLA DI ALIMENTAZIONE LE COURANT, LE CÂBLE DOIT PASSER DANS UNE ZONE ÉLOIGNÉE DES CÂBLES PER POMPE GROSSE, PER EVITARE DISTURBI DI CORRENTE.
  • Page 77: Exemple D'application

    5.1 EXEMPLE D’APPLICATION BAC DE ÉCHANGEUR FILTRE COMPENSATION DE CHALEUR POMPE DE CIRCULATION Remarque : La distance linéaire de la canalisation entre la sonde et le point d’injection ne doit pas être inférieure à 60 cm. 0000137191 Rev. 1.0...
  • Page 78: Description Du Circuit

    6. DESCRIPTION DU CIRCUIT Entrée mesure pH Entrée mesure Redox Entrée sonde température Entrée sonde de Niveau pour produit pH-/Floc Entrée sonde de Niveau pour produit Redox Entrée sonde de Niveau pour produit pH+/pH Entrée clavier Débit (pompe circulation) Relais pour produit pH-/pH, pompe extérieure Relais d’alarme ou pour produit Redox, pompe extérieure Relais pour produit pH+/Floc, pompe extérieure Entrée alimentation...
  • Page 79: Calibrage Sonde Ph

    7.1.1 Calibrage sonde pH Enlever la sonde du porte-sonde Laver la sonde Prélever de l’eau Calibrage Presse CAL Mesure pH B.Solut. Appuyer sur la touche Cal pendant 3 Appuyer sur Cal pour démarrer le secondes, puis, toujours avec Cal, calibrage avec une solution tampon pH valider la Mesure pH Immerger la sonde dans la solution tampon ph 7...
  • Page 80: Calibrage Sonde Rédox

    7.1.2 Calibrage sonde Rédox Afin de pouvoir effectuer ce calibrage, il faut activer la mesure potentiel Rédox. Enlever la sonde du porte-sonde Laver la sonde Prélever de l’eau Calibrage Appoyeur sur CAL Mesure Rx B.Solut. 465 mV Appuyer sur la touche Cal pendant 3 Appuyer sur Cal pour démarrer le secondes, puis, toujours avec Cal, calibrage avec une solution tampon...
  • Page 81: Programmation

    8. PROGRAMMATION Pour accéder au menu de programmation, appuyer en même temps sur les touches Cal et Set pendant au moins 3 secondes. Quand on relâche les touches, l’afficheur visualise : Affichage Langue Programmation Appuyer sur Enter, puis sur les touches + et Parametres - pour modifier la langue : Langue...
  • Page 82 Affichage Mesure Rx (Configuration A ou B) Programmation Appuyer sur Enter pour accéder aux sous- menus :  Point de consigne Parametres  Type Dos Mode Rx  Délai OFA  Bande ALR  Type Appuyer sur Enter, puis sur les touches + et Mode Rx - pour modifier la valeur du Point de Consigne...
  • Page 83 Affichage Mesure pH (Configuration B) Programmation Appuyer sur Enter pour accéder aux sous- menus :  Point de consigne Parametres  Type Dos Mode pH  Délai OFA  Bande ALR  Type Appuyer sur Enter, puis sur les touches + et Mode pH - pour modifier la valeur du Point de Consigne...
  • Page 84 Afficheur Paramètres avancés Programmation Appuyer sur Enter pour accéder aux sous- menus :  Config. Pompes  Relay config Parametres  Temp. Param. avances  Débit  Cal  Mot de passe Appuyer sur Enter pour modifier la configuration des pompes : ...
  • Page 85 Pour quitter les menus appuyer sur Esc et valider avec Enter les paramètres réglés. Afficheur Programmation Avec les touches + et –, choisir OUI ou Menù NON, c’est-à-dire s’il faut ou non enregistrer Exit la programmation. Valider avec Enter. AFFICHAGE DE L’AFFICHEUR AVEC LE SYSTEME EN MODE VEILLE Afficheur en Veille (Configuration A) Fonctionnement L’affichage est divisé...
  • Page 86: Méthode De Dosage

    9. Méthode de dosage Le contrôle des pompes dans l’échelle pH et potentiel Rédox s’effectue au moyen de la fonction PWM. La plage proportionnelle est fixée sur les valeurs pH= 0,8 et potentiel Rédox = 120 mV. DOSAGE PROPORTIONNEL PH-/PH+ L’instrument permet de contrôler et de modifier en automatique la mesure chimique par l’intermédiaire du Point de consigne pH- et pH+ en réglant le dosage au moyen du moteur du pH-/pH+ commandé...
  • Page 87 Dosage proportionnel pH/Redox L’instrument permet de contrôler et de modifier en automatique la mesure chimique par l’intermédiaire du Point de consigne pH en réglant le dosage au moyen du moteur du pH commandé en Temps Proportionnel. En configurant les paramètres suivants, on obtient le dosage illustré ci-après : ...
  • Page 88 Dosage ON/OFF pH/Redox L’instrument permet de contrôler et de modifier en automatique la mesure chimique par l’intermédiaire du Point de consigne pH en réglant le dosage au moyen du moteur du pH commandé en ON/OFF. En configurant les paramètres suivants, on obtient le dosage illustré ci-après : ...
  • Page 89: Activations

    10. ACTIVATIONS  Fonction Débit Au moyen de la pompe de circulation. Entrée haute tension à 100 - 240 Vc.a., le système de dosage est activé. Entrée haute tension sur off (la pompe de circulation est arrêtée), le système de dosage affiche FLOW clignotant.
  • Page 90: Liste Des Anomalies Possibles Et Remèdes Correspondants

    13. LISTE DES ANOMALIES POSSIBLES ET REMÈDES CORRESPONDANTS ANOMALIE CAUSE SOLUTION 1) Contrôler s’il y a des courts-circuits sur  câble connexion électrode instrument (entre l’âme centrale du câble et L’instrument indique Problème du câble et/ou du le blindage extérieur). toujours pH 7,00 connecteur.
  • Page 91: Entretien

    14. ENTRETIEN Remplacement du tuyau : 0000137191 Rev. 1.0...
  • Page 92: Rangement De La Pompe Après L'utilisation

    15. RANGEMENT DE LA POMPE APRÈS L’UTILISATION Quand on range le dispositif de réglage, il est conseillé de pomper de l’eau claire afin de rincer le tuyau. Ensuite, positionner le porte-sonde sur 7h 05, en le tournant dans la direction indiquée par la flèche circulaire.
  • Page 93 AVERTISSEMENTS PRODUITS À UTILISER :  Diminution du pH : produit à base d’acide sulfurique, disponible dans le commerce.  Augmentation du pH : produit à base d’acide alcalin. PRODUITS DÉCONSEILLÉS  Ne pas utiliser de l’acide chlorhydrique. Pour tous les autres produits, se renseigner auprès de l’installateur. AVERTISSEMENTS RELATIFS À...
  • Page 94 Manuale d'uso 0000137191 Rev. 1.0...
  • Page 95 INDICE 1. INTRODUZIONE GENERALE 2.PREECAUZIONI DI INSTALLAZIONE 3. IDENTIFICAZIONE DEI COMPONENTI 4. DATI TECNICI 5. INDICAZIONI MONTAGGIO 5.1 ESEMPIO DI APPLICAZIONE 6. DESCRIZIONE DEL CIRCUITO 7. MENU' CALIBRAZIONE 7.1 CALIBRAZIONE 7.1.1 Calibrazione sonda pH 7.1.2 Calibrazione sonda Redox 8. PROGRAMMAZIONE 9.
  • Page 96: Introduzione Generale

    1. INTRODUZIONE GENERALE Il metodo di regolazione Pool Basic Pro EVO appartiene alla nuova gamma di strumenti sviluppati dal fornitore in modo accurato, per una gestione innovativa delle piscine. Questo dispositivo facile da utilizzare permette di controllare costantemente il pH.
  • Page 97: Identificazione Dei Componenti

    Instructions manual PH 7 PH 4 LEGENDA A. Regolatore Pool Basic Pro EVO B. Tubo di aspirazione in PVC Crystal 4x6 (4 m) x 2 C. Tubo di mandata in PE 4X6 (5 m) x 2 D. Elettrodo pH modello SPH-1 E.
  • Page 98: Dati Tecnici

     Segnale ingresso: 100÷240 Vac  Sonda livello: pH, Redox, Flocculante Installare il regolatore Pool Basic Pro EVO su un supporto rigido (parete verticale), in un luogo facilmente accessibile per l'operatore. Fissare il regolatore Pool Basic Pro EVO mediante la staffa di fissaggio fornita insieme al kit (interasse di foratura della staffa: 95 mm.
  • Page 99: Indicazioni Di Montaggio

    5. INDICAZIONI DI MONTAGGIO Lunghezza massima de cavo: 6 mt * NOTA 1 Pressione Massima: 1,5 bar * NOTA 2 * NOTA 1: IL CAVO DEVE PASSARE IN UNA ZONA DIVERSA DA QUELLA DI ALIMENTAZIONE PER POMPE GROSSE, PER EVITARE DISTURBI DI CORRENTE. * NOTA 2: LA PRESSIONE MAX.
  • Page 100: Esempio Di Applicazione

    5.1 ESEMPIO DI APPLICAZIONE VASCA FILTRO SCAMBIATORE COMPENSAZIONE DI CALORE POMPA RICIRCOLO Nota: La distanza lineare della canalizzazione fra la sonda ed il punto d'iniezione non deve essere inferiore a 60 cm. 0000137191 Rev. 1.0...
  • Page 101: Descrizione Del Circuito

    6. DESCRIZIONE DEL CIRCUITO 1) Ingresso misura pH 2) Ingresso misura Redox 3) Ingresso sonda temperatura 4) Ingresso sonda Livello per prodotto pH-/Flocc 5) Ingresso sonda Livello per prodotto Redox 6) Ingresso sonda Livello per prodotto pH+/pH 7) Ingresso tastiera 8) Flusso (pompa ricircolo) 9) Relè...
  • Page 102: Calibrazione Sonda Ph

    7.1.1 Calibrazione sonda pH Prendere dell’acqua Togliere la sonda dal portasonda Lavare la sonda Calibrazione Premere CAL B.Solut. Misura pH Premere il tasto Cal per 3 secondi e Premer Cal per avviare la calibrazione sempre con lo stesso confermare la con una soluzione tampone 7 pH Misura pH Tenere la sonda nella soluzione...
  • Page 103: Calibrazione Sonda Redox

    7.1.2 Calibrazione sonda Redox Per poter effettuare questa calibrazione bisogna abilitare la misura Redox Prendere dell’acqua Togliere la sonda dal portasonda Lavare la sonda Calibrazione Premere CAL Misura Rx B.Solut. 465 mV Premere il tasto Cal per 3 secondi e Premer Cal per avviare la calibrazione sempre con lo stesso confermare la con una soluzione tampone 465 mV...
  • Page 104: Programmazione

    8. PROGRAMMAZIONE Premendo contemporaneamente i tasti Cal e Set per almeno 3 secondi, si accede al menù di programmazione. Al rilascio dei tasti il display visualizza: Display Lingua Impostazioni Premendo Enter e i tasti + e - si modifica la Menù...
  • Page 105 Display Misura Rx (Configurazione A o B) Impostazioni Con Enter si accede ai sottomenù:  Setpoint  Tipo Dos Menù  Tempo OFA Misura Rx  Alr Band  Type Premendo Enter e i tasti + e - si modifica il Misura Rx valore del Set Point (0÷1500 mV) Setpoint...
  • Page 106 Display Misura pH (Configurazione B) Impostazioni Con Enter si accede ai sottomenù:  Setpoint  Tipo Dos Menù  Tempo OFA Misura pH  Alr Band  Type Premendo Enter e i tasti + e - si modifica il Misura pH valore del Set Point (0÷14 pH) Setpoint 7.4 pH...
  • Page 107 Display Avanzato Impostazioni Con Enter si accede ai sottomenù:  Conf. Pompe  Config. relè Menù  Temp. Avanzato  Flusso  Cal  Password Con Enter si può modifica re la configurazione delle pompe:  Configurazione A: La prima pompa di sinistra svolgerà...
  • Page 108 VISUALIZZAZIONE DISPLAY CON IL SISTEMA IN STAND-BY Display Stand-by (Configurazione A) Funzionamento Nel display è diviso in 4 parti :  In alto a sinistra viene visualizzato l’allarme quando si verifica.  In basso a sinistra viene visualizzato 760mV 8.3pH il valore letto dalla sonda di Rx.
  • Page 109: Metodo Di Dosaggio

    9. METODO DOSAGGIO Il controllo delle pompe nella scala pH e Redox avviene tramite funzione PWM. La banda proporzionale è fissata su valori pH= 0.8 e Redox = 120 mV Dosaggio proporzionale pH-/pH+ Lo strumento consente di controllare e modificare la misura chimica tramite i Set Point pH- e pH+ in automatico;...
  • Page 110 Dosaggio proporzionale pH/Redox Lo strumento consente di controllare e modificare la misura chimica tramite il Set Point pH in automatico; regolando il dosaggio tramite il motore del pH/Redox comandato in Tempo Proporzionale. Impostando i seguenti parametri si ottiene il dosaggio riportato di sotto: ...
  • Page 111 Dosaggio ON-OFF pH/Redox Lo strumento consente di controllare e modificare la misura chimica tramite il Set Point pH in automatico; regolando il dosaggio tramite il motore del pH comandato in ON/OFF. Impostando i seguenti parametri si ottiene il dosaggio riportato di sotto: ...
  • Page 112: Attivazioni

    10. ATTIVAZIONI Funzione Flusso Tramite pompa di ricircolo. Ingresso ad alta tensione 100 ÷ 240 Vac, il sistema di dosaggio è acceso. Ingresso ad alta tensione è off (la pompa di ricircolo è spenta), il sistema di dosaggio visualizza FLOW lampeggiante. 11.
  • Page 113: Elenco Delle Possibili Anomalie E Rimedi Relativi

    13. ELENCO DELLE POSSIBILI ANOMALIE E RIMEDI RELATIVI ANOMALIA CAUSA SOLUZIONE 1) Verificare eventuali corti circuiti sul cavo di collegamento elettrodo  strumento (fra l’anima centrale del cavo e la schermatura Lo strumento indica Problema del cavo e/o del esterna). sempre il pH 7.00 connettore.
  • Page 114: Movimentazione

    14. MOVIMENTAZIONE Sostituzione del tubo: Posizionare il rullino alle 10 e Sbloccare completamente Sbloccare il coperchio tirando in 20, girandolo nel senso della raccordo di sinistra mantenendolo alto il raccordo di sinistra. freccia circolare. teso verso l'esterno e girare il rullino nel senso della freccia circolare, in modo da liberare il tubo fino al raccordo a destra.
  • Page 115: Stoccaggio Della Pompa Dopo L'uso

    15. STOCCAGGIO DELLA POMPA DOPO L'USO Al momento di riporre il dispositivo di regolazione, si consiglia di pompare l'acqua pulita per sciacquare il tubo. In seguito, posizionare il portasonda alle 7 e 05, girandolo nella direzione indicata dalla freccia circolare. Queste due precauzioni faciliteranno la successiva riattivazione dell'apparecchio.
  • Page 116: Avvertenze

    AVVERTENZE PRODOTTI DA UTILIZZARE:  Diminuzione del pH: prodotto a base di acido solforico, reperibile facilmente in commercio.  Aumento del pH: prodotto a base di acido alcalino PRODOTTI SCONSIGLIATI  Non utilizzare acido cloridrico. Per tutti gli altri prodotti, farsi consigliare dall'installatore. AVVERTENZE SULLA SONDA ...

Table des Matières