Table des Matières

Publicité

Les langues disponibles

Les langues disponibles

Liens rapides

ISTRUZIONI PER L'USO
OPERATING INSTRUCTIONS
BEDIENUNGSANLEITUNG
MODE D'EMPLOI
Type Sup 037DR
LEGGERE ATTENTAMENTE QUESTE ISTRUZIONI D'USO PRIMA DI UTILIZZARE LA MACCHINA.
READ THESE OPERATING INSTRUCTIONS CAREFULLY BEFORE USING THE MACHINE.
DIESE BEDIENUNGSANLEITUNG IST VOR DEM ERSTEN GEBRAUCH DER MASCHINE AUFMERKSAM ZU LESEN.
LIRE ATTENTIVEMENT CES INSTRUCTIONS AVANT D'UTILISER LA MACHINE.
FOR HOUSEHOLD USE ONLY
USAGE DOMESTIQUE SEULEMENT

Publicité

Table des Matières
loading

Sommaire des Matières pour Philips Saeco Syntia RI9836

  • Page 1 ISTRUZIONI PER L'USO OPERATING INSTRUCTIONS BEDIENUNGSANLEITUNG MODE D’EMPLOI Type Sup 037DR LEGGERE ATTENTAMENTE QUESTE ISTRUZIONI D'USO PRIMA DI UTILIZZARE LA MACCHINA. READ THESE OPERATING INSTRUCTIONS CAREFULLY BEFORE USING THE MACHINE. DIESE BEDIENUNGSANLEITUNG IST VOR DEM ERSTEN GEBRAUCH DER MASCHINE AUFMERKSAM ZU LESEN. LIRE ATTENTIVEMENT CES INSTRUCTIONS AVANT D’UTILISER LA MACHINE.
  • Page 2: Norme Di Sicurezza

    GENERALITÀ La macchina da caff è è indicata per la preparazione di caff è espresso impiegando caff è in grani; è dotata di un dispositivo per l’ e rogazione del vapore e di acqua calda. Il corpo della macchina dall’ e legante design è stato progettato per uso domestico e non è indicato per un funzionamen- to continuo di tipo professionale.
  • Page 3: Protezione D'altre Persone

    Protezione d’altre persone Tenere i bambini sotto supervisione, per evitare che giochino con l’apparecchio. I bambini non si rendono conto del pericolo connesso agli elettrodomestici. Non lasciare alla portata dei bam bi ni i ma te ria li utilizzati per im bal la re la mac chi na. Pericolo d’ustioni Evitare di dirigere contro se stessi e/o altri il getto di vapore e/o d’acqua calda: pericolo di scottature! Usare sempre le apposite maniglie o manopole.
  • Page 4 Coperchio contenitore caff è in grani Manopola regolazione macinatura Contenitore caff è in grani Pannello comandi Erogatore caff è Scompartimento caff è pre-macinato Griglia appoggia tazze Indicatore vasca raccogli gocce piena Sportello di servizio Gruppo caff è Cassetto raccogli fondi Protezione per tubo erogazione Tubo erogazione acqua calda / vapore Interruttore generale...
  • Page 5: Operazioni Preliminari

    • Estrarre il serbatoio acqua dalla sua INSTALLAZIONE sede. Per la propria sicurezza e quella di • Sciacquarlo e riempirlo con acqua terzi attenersi scrupolosamente fresca; non superare il livello (MAX) alle istruzioni riportate nel capitolo riportato nel serbatoio. Reinserire il “Norme di sicurezza”.
  • Page 6: Caricamento Circuito

    • Portare l’interruttore generale su “I” per Caricamento circuito poter accendere la macchina. • Per caricare il circuito inserire un conte- nitore sotto al tubo vapore (pannarello, se presente); • Ruotare il selettore in senso orario fi no • Il display visualizza quindi l’icona di ON/ al punto “...
  • Page 7 Sul display viene visualizzato il seguen- Primo utilizzo o dopo un pe- te simbolo. riodo di lungo inutilizzo. Queste semplici operazioni vi permette- ranno di erogare sempre un ottimo caff è. Verde 9 Erogare acqua fino alla segnalazione 1 Inserire un contenitore capiente sotto di mancanza acqua, quindi ruotare l’...
  • Page 8 Misurazione durezza acqua Filtro acqua “INTENZA”. La misurazione della durezza dell’acqua Per migliorare la qualità dell’acqua uti- è molto importante per gestire corretta- lizzata, si consiglia d’installare il filtro mente il fi ltro “Intenza” e la frequenza di acqua. decalcifi cazione della macchina. Togliere il filtro dalla confezione ed Immergere, per 1 secondo nell’acqua, il immergerlo in posizione verticale (con...
  • Page 9 Quando appare l’icona premere il tasto REGOLAZIONI “ “ per accedere alla programmazione La macchina che avete acquistato consen- della macchina. te di eff ettuare alcune regolazioni che vi Nero permetteranno di utilizzarla al meglio. Premere il tasto “ “ fi no a visualizzare Saeco Adapting System la presente pagina.
  • Page 10: Erogazione Caffé

    all’interno del contenitore caffè, • La macchina inizia la fase di eroga- spegnere la macchina, e staccare la zione; sul display appare il simbolo spina dalla presa di corrente. Non “ ” che evidenzia il tasto che si sta immettere caff è in grani quando il programmando.
  • Page 11 La selezione deve essere eseguita prima Regolazione erogatore della selezione del caff è. In questo modo Con la macchina da caff è si possono utiliz- si determina l’intensità del sapore secon- zare la maggior parte delle tazze/tazzine do i gusti personali. esistenti in commercio.
  • Page 12: Erogazione Acqua Calda

    La macchina è regolata per Premere e rilasciare: preparare un vero espresso il tasto “ ” per ottenere un caffè all’italiana. Questa caratteristica espresso; potrebbe allungare leggermente i il tasto “ “ per un caff è lungo. tempi d’ e rogazione a tutto vantaggio •...
  • Page 13: Erogazione Vapore / Cappuccino

    • Ruotare il selettore in senso orario fi no di acqua calda dentro ad un bicchiere al punto “ ”. e pulire esternamente il tubo vapore (o pannarello ove presente). Questo garantirà una perfetta pulizia di tutte le parti dagli eventuali residui di latte.
  • Page 14: Pulizia E Manutenzione

    • Immergere nel tubo vapore (pannarel- PULIZIA E MANUTEN lo, se presente) il latte da riscaldare. ZIONE Pulizia generica • Ogni giorno, a macchina accesa, vuota- re e pulire il cassetto raccogli fondi. • Ruotare il selettore in senso antiorario fi no al punto “...
  • Page 15 - riposizionare la parte superiore • Verifi care che i due riferimenti coinci- nel tubo vapore (assicurarsi che sia dano. completamente inserita). Rimontare la parte esterna del panna- rello. • Si consiglia di pulire quotidianamente il serbatoio dell’acqua: - Estrarre il fi ltrino bianco posto all’in- terno del serbatoio e pulirlo con •...
  • Page 16: Decalcificazione

    DECALCIFICAZIONE • Premere il tasto “ ” per confermare l’ e ntrata nel ciclo di decalcifi cazione. La formazione del calcare è naturale con- seguenza dell’uso dell’apparecchio. Da questo momento è obbli- gatorio completare il ciclo di La necessità d’ e seguire la decalcifi cazione decalcifi cazione.
  • Page 17 • Quando la soluzione all’interno del • Quando si inserisce il serbatoio pieno serbatoio è terminata appare il simbolo di acqua nella macchina, ruotare il posto a lato; questo indica di riportare selettore in senso orario fi no al punto il selettore nella posizione “...
  • Page 18: Uscire Dalla Programmazione

    PROGRAMMAZIONE Comandi di programmazio- L’utente può modifi care alcuni parametri In ogni pagina si possono apportare delle di funzionamento della macchina secondo modifi che: le proprie esigenze. Entrare nel “menu” Arancione Si può accedere al menu di program- mazione solo quando la macchina è in “Stand-by”.
  • Page 19: Esempio Di Programmazione

    Funzioni Esempio di programmazio- TEMPERATURA CAFFÈ Questa funzione consente di regolare la Nell’esempio, vogliamo chiarire come si temperatura di erogazione del caff è. procede alla programmazione del con- trasto del display. Per modifi care le altre Arancione funzioni procedere in maniera analoga. Portare la macchina in Stand-by.
  • Page 20: Display Pannello Comandi

    DISPLAY PANNELLO COMANDI Segnali di avviso Segnali di pronto • • Macchina pronta per l’ e rogazione del caff è Macchina in fase di riscaldamento per l’ e rogazione di caff è, acqua calda e vapore. con caff è in chicchi e dell’acqua calda. Verde Arancione •...
  • Page 21: Segnali D'allarme

    Segnali d’allarme • • Riportare il pomello del rubinetto acqua Videata iniziale per entrare nel ciclo di calda / vapore in posizione corretta. decalcifi cazione. Premendo “ESC” si può uscire. Rosso Rosso • Aprire il rubinetto per eseguire il processo •...
  • Page 22: Risoluzione Problemi

    RISOLUZIONE PROBLEMI Comportamenti Cause Rimedi La macchina non si accende. La macchina non è collegata alla rete elettrica. Collegare la macchina alla rete elettrica. Il caff è non è abbastanza caldo Le tazzine sono fredde. Scaldare le tazzine con acqua calda. Non fuoriesce acqua calda o vapore.
  • Page 23: Dati Tecnici

    DATI TECNICI Il costruttore si riserva il diritto di modifi care le caratteristiche tecniche del prodotto. Tensione nominale - Potenza nominale - Alimentazione ..........Vedi targhetta posta all’interno dello sportello Materiale corpo .
  • Page 24 IMPORTANT SAFEGUARDS When using electrical appliances, basic safety precautions should always be followed, including the following: 1. Read all instructions. 2. Do not touch hot surfaces. Use handles or knobs. 3. To protect against fire, electric shock and injury to persons do not immerse cord, plugs, or appliance in water or other liquid.
  • Page 25 CAUTION This appliance is for household use only. Any servicing, other than cleaning and user maintenance, should be performed by an authorized service center. Do not immerse machine in water. To reduce the risk of fire or electric shock, do not disassemble the machine.
  • Page 26: General Information

    GENERAL INFORMATION The coff ee machine is suitable for preparing espresso coff ee using either coff ee beans or ground coff ee and is equipped with a device to dispense steam and hot water. The structure of the ma- chine has been designed for domestic use only and is not suitable for continuous professional- type operation.
  • Page 27 Danger of Burns Never direct the steam/hot water wand towards yourself or others: Danger of scalding! Always use the handles or knobs provided. Machine Location - Suitable Location for Operation and Maintenance For best use, it is recommended to: • Choose a safe, level surface, where there will be no danger of overturning it or being inju- red.
  • Page 28 Coff ee bean hopper lid Grinder adjustment knob Coff ee bean hopper Control panel Dispensing head Pre-ground bypass doser Drip tray Full drip tray indicator Service door Brew group Dregdrawer Wand protective gripper Steam/hot water wand Power switch Drip tray Water hardness test Water tank Brew group lubricant...
  • Page 29: Machine Packaging

    • Remove the water tank and install the INSTALLATION Intenza water fi lter as recommended For your own and for other people’s on page 27. safety, carefully follow the instruc- • Fill the tank with fresh drinking water. tions provided in the “Safety Regula- Do not exceed the “max”...
  • Page 30: Priming The Water Circuit

    • Turn the machine ON by pressing the Priming the Water Circuit power switch to “I”. • To prime the water circuit, place a container under the steam/hot water wand(Pannarello, if supplied). • Turn the selector dial clockwise to set •...
  • Page 31 The following icon will be displayed. Using the machine for the first time or after a long period of inactivity. These simple operations will make it pos- Green sible to always brew excellent coff ee. 9 Dispense water until the no water sig- nal is displayed, then turn the selector 1 Place a large container under the switch counter-clockwise to set it to...
  • Page 32: Intenza Water Filter

    Water hardness measurement Intenza Water Filter The water hardness measurement is very To improve the quality of the used water, important in order to correctly manage it is recommended that you install the the “Intenza” fi lter and the frequency with water fi lter.
  • Page 33: Saeco Adapting System

    ADJUSTMENTS When the icon appears, press the “ “ button to access the machine program- The machine that you have bought allows ming menu. for certain adjustments that will permit Black you to use it to its full potential. Press the “ “...
  • Page 34: Adjusting The Coff Ee Quantity

    bean hopper. • The machine begins the dispensing Do not pour coff ee beans when the phase. The “ ” icon will be displayed to show which button is being pro- coff ee grinder is working. grammed. Green • Press the button with the “ ” icon The machine allows slight adjustments to again when the desired amount of the coff ee grinder to adapt it to the kind...
  • Page 35: Using Coff Ee Beans

    Selection must be made prior to brewing Dispensing Head Adjust- the coff ee. The system sets the aroma ac- ment cording to the personal taste of the user. Most cups on the market can be used with this coff ee machine. After selecting “Strong Aroma”, the func- The height of the dispensing head may tion for brewing coff ee with pre-ground...
  • Page 36: Using Pre-Ground Coff Ee

    The machine is adjusted to Warning: Only add pre-ground brew a true Italian espresso coffee to the bypass doser. coffee. This feature may slightly Other substances and objects may lengthen the brewing time, allowing cause severe damages to the ma- the intense flavor of the coffee to chine.
  • Page 37 • Turn the selector dial clockwise to the externally. In this way, all parts will “ ” position. be perfectly cleaned and free of any milk residue. • Place a container under the steam/hot water wand (Pannarello, if supplied). • The following icon will be displayed: Green •...
  • Page 38: Cleaning And Maintenance

    • Immerse the steam/hot water wand CLEANING AND (Pannarello, if supplied) in the milk to MAINTENANCE be heated. General cleaning • Empty and clean the dregdrawer daily, with the machine turned on. • Turn the selector dial counter-clockwise to set it to the “ ”...
  • Page 39: Brew Group

    • It is recommended to clean the water • Make sure that the brew group is in tank daily. rest position. The two references must match. - Remove the small white fi lter in the water tank and wash it under running drinking water.
  • Page 40 DESCALING • Press button “ ” to confirm the activation of the descaling cycle. Limescale build-up is normal with the use of this appliance. From this point forward, the descaling cycle must be The display informs you when descaling completed before proceeding. is necessary: Orange •...
  • Page 41 • When the solution in the tank is • When inserting the water tank in the fi nished dispensing, the icon on the machine, turn the selector switch side is displayed to indicate that the clockwise to position “ ”. Dispense selector dial must be brought back to the entire tank as previously described.
  • Page 42: Programming Commands

    PROGRAMMING Programming commands Changes can be made on each page: The user can change some of the ma- chine operating parameters to suit his/ her needs. Orange Enter the “menu” The programming menu can only be ac- cessed when the machine is in “stand-by” - The “...
  • Page 43: Functions

    Functions Programming example In this example, we want to explain how COFFEE TEMPERATURE to programme the display contrast. Pro- This function allows you to adjust the cof- ceed in a similar manner to change the fee brewing temperature. other functions. Orange Change the machine status to stand-by mode.
  • Page 44: Control Panel Display

    CONTROL PANEL DISPLAY Warning Signals Ready Signals • The machine is warming up to brew coff ee • The machine is ready for whole bean coff ee and dispense hot water or steam. brewing and hot water dispensing. Green Orange •...
  • Page 45: Alarm Signals

    Alarm Signals • • Return the hot water / steam knob to its Start screen for descaling cycle activation. proper position. Press “OK” to continue or “ESC” to quit. • Open the knob to carry out the operation • Close the service door. described.
  • Page 46 TROUBLESHOOTING Machine Actions Causes Solutions The machine does not turn on. The machine is not connected to the power Connect the machine to the power source. source. The coff ee is not hot enough. The cups are cold. Warm the cups with hot water. No hot water or steam is dispensed.
  • Page 47: Technical Specifications

    TECHNICAL SPECIFICATIONS The manufacturer reserves the right to make changes to the technical specifi cations of the product. Nominal Voltage - Power Rating - Power Supply ............See label on the inside of the service door Housing material .
  • Page 48: Sicherheitsvorschriften

    ALLGEMEINES Die Kaff eemaschine eignet sich für die Zubereitung von Espresso unter Verwendung von Boh- nenkaff ee. Sie ist mit einer Vorrichtung für die Dampf- und die Heißwasserausgabe ausgestat- tet. Das Gehäuse der Maschine hat ein elegantes Design und ist für den Hausgebrauch konzi- piert worden, nicht aber für den Dauergebrauch bei gewerblichen Anwendungen.
  • Page 49 Schutz anderer Personen Kinder beaufsichtigen, damit sie nicht mit dem Gerät spielen. Kinder können die Gefahrensi- tuationen, die durch Haushaltsgeräte entstehen können, nicht abschätzen. Die für die Verpak- kung der Maschine benutzten Materialien sollten nicht in Reichweite von Kindern aufbewahrt werden.
  • Page 50 Bohnenbehälterdeckel Drehknopf Einstellung Mahlgrad Kaff eebohnenbehälter Bedienfeld Kaff eeauslauf Schacht vorgemahlener Kaff ee Tassenabstellrost Anzeige Abtropfschale voll Servicetür Brühgruppe Kaff eesatzbehälter Ansicht Rückseite Schutz für Ausgabedüse Heißwasser-/Dampfdüse Hauptschalter Abtropfschale Test Wasserhärte Wassertank Fett für die Brühgruppe Dosierer vorgemahlener Kaff ee Netzkabel Wasserfi lter Intenza LCD-Display...
  • Page 51: Vorbereitende Arbeiten

    • Den Wassertank aus seiner Aufnahme INSTALLATION herausnehmen. Für Ihre eigene Sicherheit und die • Den Tank ausspülen und mit frischem Dritter sollten die Hinweise im Ka- Wasser füllen. Der Füllstand (MAX), pitel “Sicherheitsvorschriften” strikt der im Tank markiert ist, sollte nicht eingehalten werden.
  • Page 52: Entlüftung Des Systems

    • Den Hauptschalter auf “I” stellen, um Entlüftung des Systems die Maschine einschalten zu können. • Um das System zu entlüften, einen Behälter unter die Dampfdüse (Pan- narello, soweit vorhanden) stellen. • Den Wahlschalter im Uhrzeigersinn • Das Display zeigt dann das Symbol EIN/ bis zum Punkt “...
  • Page 53 Auf dem Display wird das folgende Erste Inbetriebnahme oder Symbol angezeigt. Benutzung nach längerer Nichtbenutzung. Mit diesen einfachen Vorgängen wird die Grün Ausgabe eines stets optimalen Kaffees 9 Wasser ausgeben, bis der Hinweis gewährleistet. erfolgt, dass kein Wasser mehr vor- handen ist.
  • Page 54: Messung Der Wasserhärte

    Messung der Wasserhärte Wasserfi lter “INTENZA” Die Messung des Wasserhärtegrads ist Um die Qualität des verwendeten Wassers von wesentlicher Bedeutung für den kor- zu verbessern, wird die Installation des rekten Betrieb des Wasserfi lters “Intenza” Wasserfi lters empfohlen. und die Häufigkeit der Entkalkung der Maschine.
  • Page 55: Saeco Adapting System

    Wenn das Symbol angezeigt wird, die Taste EINSTELLUNGEN “ “ drücken, um die Programmierung Auf der Maschine, die Sie erworben ha- der Maschine zu öff nen. ben, können Sie einige Einstellungen Schwarz vornehmen, mit denen Sie den Betrieb optimieren können. Die Taste “...
  • Page 56: Einstellung Kaff Eemenge In Der Tasse

    Mahlgrades kann über den Drehknopf • Die Maschine beginnt die Ausgabepha- im Bohnenbehälter vorgenommen se. Auf dem Display wird das Symbol werden. Vor Eingriffen im Inneren “ ” angezeigt, das die Taste angibt, des Kaff eebehälters sollten stets die die gerade programmiert wird. Maschine ausgeschaltet und der Stek- Grün •...
  • Page 57 Die Anwahl muss vor der Anwahl des Einstellung Auslauf Kaffees erfolgen. Auf diese Weise kann Mit der Kaff eemaschine kann ein Großteil die Geschmacksintensität an den persön- aller handelsüblichen Tassen verwendet lichen Geschmack angepasst werden. werden. Der Auslauf kann in der Höhe eingestellt Nach der Anwahl von “starkem Aroma“...
  • Page 58 Die Maschine ist für die Aus- Achtung: Ausschließlich vor- gabe eines echten italieni- gemahlenen Kaffee in den schen Espresso eingestellt. Durch Schacht füllen. Die Einfüllung anderer diese Eigenschaft können die Ausga- Substanzen und Gegenstände kann bezeiten leicht verlängert werden, zu schweren Schäden an der Maschine um ein intensives Aroma des Kaff ees führen, die nicht durch die Garantie zu gewährleisten.
  • Page 59 • Den Wahlschalter im Uhrzeigersinn bis Wasser in ein Glas ausgeben und die zum Punkt “ ” drehen. Dampfdüse (oder den Pannarello) außen reinigen. Damit werden alle Teile von eventuellen Milchrückstän- den gereinigt. • Einen Behälter unter die Dampfdüse (Pannarello) stellen. •...
  • Page 60: Reinigung Und Pflege

    • Die Dampfdüse (Pannarello) in die zu REINIGUNG UND PFLEGE erhitzende Milch tauchen. Allgemeine Reinigung • Täglich bei eingeschalteter Maschine den Satzbehälter entleeren und reini- gen. • Den Wahlschalter im Gegenuhrzeiger- sinn bis in Position “ ” drehen. Den Behälter mit langsamen kreisenden •...
  • Page 61 mit frischem Trinkwasser waschen; • Überprüfen, ob die beiden Markierun- - die Dampfdüse mit einem feuchten gen (kleiner Pfeil innen, großer Pfeil Tuch reinigen und eventuelle Milch- außen) aufeinander zeigen. reste entfernen; - den oberen Bereich der Dampfdüse wieder anbringen (sicherstellen, dass diese vollständig eingesetzt ist).
  • Page 62 ENTKALKUNG • Die Taste “ ” drücken, um den Beginn des Entkalkungszyklus zu Die Bildung von Kalkablagerungen ist bestätigen. eine natürliche Folge des Betriebs des Ge- räts. Das Display zeigt an, wenn die Aus- Nun muss der Entkalkungszy- führung der Entkalkung erforderlich ist: Orangefarben klus abgeschlossen werden.
  • Page 63 • Ist keine Lösung mehr im Tank vor- • Wird der vollständig mit Wasser gefüllte handen, wird das seitlich dargestellte Tank in die Maschine eingesetzt, den Symbol angezeigt. Dieses zeigt an, dass Wahlschalter im Uhrzeigersinn bis in der Wahlschalter wieder in die Position Position “...
  • Page 64 PROGRAMMIERUNG Programmiersteuerungen Auf jeder Seite können Änderungen aus- Der Benutzer kann einige der Betriebs- geführt werden: parameter der Maschine ändern und an seine eigenen Anforderungen anpassen. Orangefarben Das “Menü” öff nen Das Programmmenü kann nur dann ge- öffnet werden, wenn sich die Maschine - Mit den Tasten “...
  • Page 65 Funktionen Programmierungsbeispiel Im Programmierungsbeispiel wird die KAFFEETEMPERATUR Programmierung des Displaykontrasts Mit dieser Funktion kann die Ausgabe- erläutert. Für die Änderungen der an- temperatur des Kaff ees eingestellt wer- deren Funktionen ist in analoger Weise den. Orangefarben vorzugehen. Die Maschine in Standby umschalten. TIMER (STANDBY) Mit dieser Funktion kann die Zeit einge- stellt werden, die zwischen den letzten...
  • Page 66 DISPLAY BEDIENTAFEL Hinweis-Signale Signale Bereit • Maschine in Aufheizphase für die Ausgabe • Maschine bereit für die Ausgabe von Kaff ee von Kaff ee, heißem Wasser und Dampf. mit Bohnenkaff ee und heißem Wasser. Grün Orangefarben • Maschine bereit für die Ausgabe von Kaff ee •...
  • Page 67 Alarmsignale • • Den Drehknopf der Düse Heißwasser/Dampf Anzeige für den Beginn des Entkalkungszy- wieder in die korrekte Position drehen. klus. Der Abbruch erfolgt durch Druck von “ESC”. • Den Regler öffnen, um das angegebene • Die Servicetür schließen. Verfahren auszuführen. •...
  • Page 68 PROBLEME UND IHRE MÖGLICHEN URSACHEN Verhalten/Störung Ursachen Abhilfen Die Maschine schaltet sich nicht ein. Die Maschine ist nicht an das Stromnetz ange- Die Maschine an das Stromnetz anschließen. schlossen. Der Kaff ee ist nicht heiß genug. Die Tassen sind kalt. Die Tassen mit heißem Wasser vorwärmen.
  • Page 69: Technische Daten

    TECHNISCHE DATEN Der Hersteller behält sich das Recht vor, technische Änderungen am Produkt vorzunehmen. Nennspannung - Nennleistung - Stromversorgung ..........Siehe Typenschild auf der Innenseite der Klappe Material des Gerätekörpers .
  • Page 70 IMPORTANT Lors de l’utilisation d’appareils électriques, il est indispensable de respecter toujours les précautions de sécurité principales, y compris les suivantes : 1. Lire toutes les instructions. 2. Ne pas toucher de surfaces chaudes. Utiliser les poignées ou les boutons. 3.
  • Page 71 PRÉCAUTIONS La machine est réservée à un usage domestique. Tout entretien, en dehors du nettoyage et de l’entretien usuel par l’usager, doit être fait par un service après- vente autorisé. Ne pas plonger la base dans l’eau. Pour éviter les courts-circuits et les décharges électriques, ne pas démonter la base.
  • Page 72: Généralités

    GÉNÉRALITÉS La machine à café est indiquée pour la préparation de café expresso avec du café en grains et est équipée d’un dispositif pour la distribution d’eau chaude et de vapeur. La structure de cet appareil au design élégant a été conçue exclusivement pour un usage domestique et n’ e st donc pas indiqué...
  • Page 73: Protection Des Autres Personnes

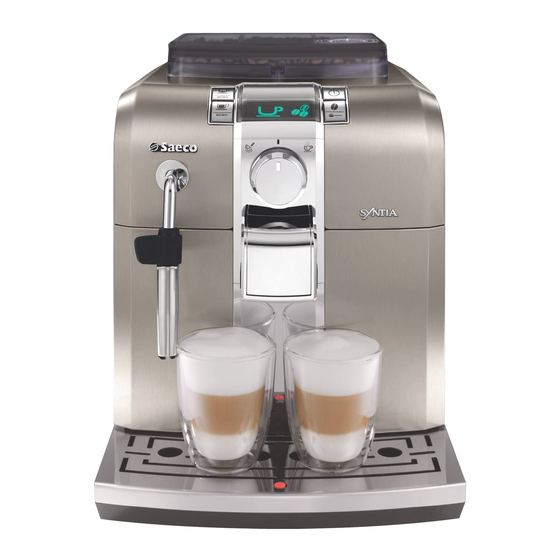
    Protection des autres personnes Garder les enfants sous supervision, afi n d’ é viter qu’ils ne jouent avec l’appareil. Les enfants ne se rendent pas compte du danger que représentent les électroménagers. Les matériaux utilisés pour l’ e mballage de la machine doivent être gardés hors de la portée des enfants. Danger de brûlures Ne pas diriger le jet d’...
  • Page 74 Couvercle du réservoir à café en grains Bouton de réglage mouture Réservoir à café en grains Bandeau de commande Distributeur de café Logement café prémoulu Grille égouttoir Indicateur bac d’ é gouttement plein Porte de service Groupe de distribution Tiroir à marc Protection pour buse de distribution Buse de distribution de vapeur / eau chaude Interrupteur général...
  • Page 75: Mise En Place

    • Extraire le réservoir à eau de son loge- MISE EN PLACE ment. Pour votre sécurité et celle des tiers, • Le rincer et remplir avec de l’eau fraî- respecter scrupuleusement aux che ; ne dépasser le niveau (MAX) se instructions fournies à...
  • Page 76: Amorçage Du Circuit

    • Tourner l’interrupteur général sur « I » Amorçage du circuit pour mettre la machine en marche. • Pour amorcer le circuit, placer un récipient sous la buse de vapeur (Pan- narello, si présent) ; • L’icône ON/OFF apparaît sur l’affi- •...
  • Page 77: Première Utilisation Ou Après Une Longue Période D'inac

    Le symbole suivant apparaît sur l’affi - Première utilisation ou après cheur. une longue période d’inac- tivité. Ces simples opérations vous permettront Vert de distribuer toujours un café excellent. 9 Distribuer de l’ e au jusqu’à la signalisa- tion de manque d’ e au, tourner ensuite 1 Placer un grand récipient sous la buse le sélecteur dans le sens inverse des de distribution.
  • Page 78: Mesure De La Dureté De L'eau

    Mesure de la dureté de l’eau Filtre à eau « Intenza ». La mesure de la dureté de l’eau est très Afin d’améliorer la qualité de l’eau uti- importante afi n de gérer correctement le lisée, il est conseillé d’installer le fi ltre à fi ltre «...
  • Page 79: Réglage Du Moulin À Café

    Lorsque l’icône s’affiche, appuyer sur RÉGLAGES la touche “ “ pour accéder à la pro- La machine que vous avez achetée peut grammation de la machine. effectuer des réglages vous permettant Noir de l’utiliser le mieux. Appuyer sur la touche “ “...
  • Page 80: Réglage Longueur Du Café Dans La Tasse

    et ôter la fi che de la prise de courant • La machine commence la phase de dis- avant d’intervenir pour une raison tribution ; l’affi cheur affi che le symbole quelconque à l’intérieur du réservoir “ ” qui indique la touche qui est en à...
  • Page 81: Réglage Du Distributeur

    La sélection doit être eff ectuée avant celle Réglage du distributeur du café. De cette façon, on détermine Avec la machine à café, vous pouvez uti- l’intensité de la saveur selon vos goûts liser la plupart de grandes/petites tasses personnels. disponibles dans le commerce.
  • Page 82: Avec Café Prémoulu

    La machine est réglée pour Appuyer et relâcher : la préparation d’un véritable la touche “ ” pour obtenir un café café expresso italien. Cette caracté- expresso ; ristique pourrait augmenter légè- la touche “ “ pour obtenir un café rement les temps de distribution, allongé.
  • Page 83: Distribution Vapeur / Cappuccino

    • Tourner le sélecteur dans le sens des buse de vapeur (ou du Pannarello, aiguilles d’une montre jusqu’au point si prévu). Cela assure un nettoyage “ ”. parfait de toutes les parties de la machine, en enlevant tout éventuel résidu de lait. •...
  • Page 84: Nettoyage Et Entretien

    • Plonger la buse de vapeur (Pannarello, NETTOYAGE ET ENTRE si présent) dans le lait à réchauff er. TIEN Nettoyage général • Tous les jours, vider et nettoyer le tiroir à marc lorsque la machine est en mar- che. • Tourner le sélecteur dans le sens inverse des aiguilles d’une montre jusqu’au point “...
  • Page 85: Nettoyer Le Groupe De Distribution

    insérée complètement). • Vérifier que les deux repères coïnci- Monter à nouveau la partie extérieure dent. du Pannarello. • Il est conseillé de nettoyer une fois par jour le réservoir à eau : - Extraire le petit fi ltre blanc situé à l’intérieur du réservoir et le nettoyer avec de l’...
  • Page 86: Détartrage

    DÉTARTRAGE • Appuyer sur la touche “ ” pour confirmer l’activation du cycle de La formation du calcaire est une consé- détartrage. quence naturelle entraînée par l’utilisa- tion de l’appareil. À partir de ce moment, il est obligatoire de compléter le L’affi cheur nous indique lorsqu’il faut ef- cycle de détartrage.
  • Page 87 • Lorsque la solution dans le réservoir • Lorsque le réservoir rempli d’eau est est fi nie, le symbole à côté apparaît sur inséré dans la machine, tourner le l’affi cheur. sélecteur dans le sens des aiguilles d’une montre jusqu’au point “ ”.
  • Page 88: Commandes De Programmation

    PROGRAMMATION Commandes de program- mation L’utilisateur peut modifi er certains para- Il est possible d’apporter des modifica- mètres de fonctionnement de la machine tions dans chaque page : selon ses exigences. Accéder au « menu » Orange On peut accéder au menu de programma- tion seulement lorsque la machine est en «...
  • Page 89 Fonctions Exemple de programmation Dans l’exemple, on veut expliquer com- TEMPÉRATURE DU CAFÉ ment programmer le contraste de l’affi- Cette fonction permet de régler la tempé- cheur. Pour modifi er les autres fonctions, rature de distribution du café. procéder de la même façon. Orange Mettre la machine en Stand-by.
  • Page 90: Afficheur Du Bande Au De Commande

    AFFICHEUR DU BANDE AU DE COMMANDE Signaux d’avertissement Signaux machine prête • Machine en phase de chauffage pour la • Machine prête pour la distribution du café distribution de café, d’eau chaude et de avec café en grains et de l’ e au chaude. vapeur.
  • Page 91: Signaux D'alarme

    Signaux d’alarme • • Remettre le bouton du robinet eau chaude/ Page-écran initiale pour l’activation du cycle vapeur dans la bonne position. de détartrage. Appuyer sur « ESC » pour sortir. Rouge Rouge • Ouvrir le robinet pour exécuter le processus •...
  • Page 92: Dépannage

    DÉPANNAGE Comportements Causes Remèdes La machine ne se met pas en mar- La machine n’est pas branchée sur le réseau Brancher la machine sur le réseau électrique. che. électrique. Le café n’ e st pas assez chaud. Les tasses sont froides. Réchauff er les tasses avec de l’...
  • Page 93: Données Techniques

    DONNÉES TECHNIQUES Le constructeur se réserve le droit d’apporter des modifi cations aux caractéristiques techniques du produit. Tension nominale - Puissance nominale - Alimentation ..........Voir la plaquette signalétique dans la porte Matériau du corps .
  • Page 94 • 94 •...
  • Page 95 • 95 •...
  • Page 96 Saeco International Group S.p.A. Via Torretta, 240 I-40041 Gaggio Montano, Bologna Tel: + 39 0534 771111 Fax: + 39 0534 31025 www.saeco.com Il produttore si riserva il diritto d`apportare qualsiasi modifica senza preavviso. The manufacturer reserves the right to change the features of the product without prior notice. Der Hersteller behält sich das Recht vor, Änderungen ohne Ankündigung vorzunehmen.

Table des Matières