
Manuels Connexes pour Pioneer XV-DV77


Sommaire des Matières pour Pioneer XV-DV77
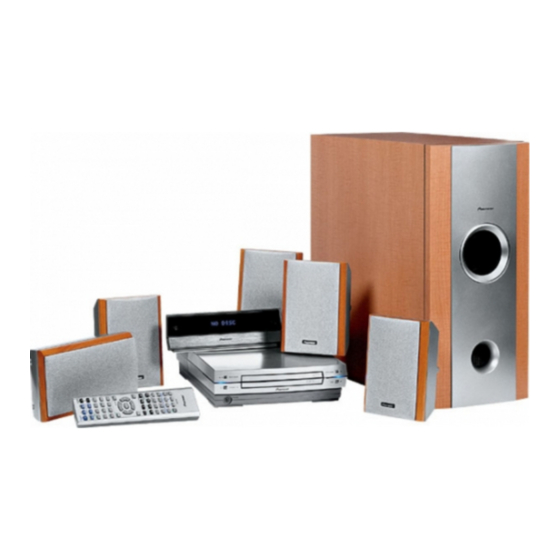
- Page 1 DVD/CD TUNER LECTEUR DVD/CD AVEC TUNER XV-DV77 XV-DV88 POWERED SUBWOOFER SUBWOOFER ALIMENTÉ S-DV77SW S-DV88SW SATELLITE SPEAKER ENCEINTE SATELLITE S-DV77ST S-DV88ST Operating Instructions Mode d’emploi...
- Page 2 When using this product, follow the instructions written on the [For European model] underside of the unit, which concern the XV-DV77/XV-DV88. [For European model] CAUTION This product contains a laser diode of higher class than 1.
-
Page 3: Operating Environment
[For European model] Operating Environment H045 En Operating environment temperature and humidity: ° ° ° ° C – +35 C (+41 F – +95 F); less than 85%RH (cooling vents not blocked) Do not install in the following locations • Location exposed to direct sunlight or strong artificial light •... -
Page 4: Important Notice
[For U.S. model] IMPORTANT NOTICE H006AEn The serial number for this equipment is located in the bottom plate. Please write this serial number on your enclosed warranty card and keep it in a secure area. This is for your security. We Want You Listening For A Lifetime Used wisely, your new sound equipment will provide a lifetime of... -
Page 5: Conditions De Fonctionnement
ATTENTION Pour toute réparation, s’adresser à un personnel qualifié. DANGER D'ELECTROCUTION NE PAS OUVRIR La note suivante se trouve sur votre lecteur. Localisation : Sur le panneau inférieur du XV-DV77/DV88 CLASS 1 LASER PRODUCT Sous le couvercle du XV-DV77/DV88 CAUTION VISIBLE AND INVISIBLE LASER RADIATION WHEN OPEN. -
Page 6: Précautions D'installation
Check the power cord once in a while. provoquer un risque d’incendie ou un choc électrique. Vérifier le câble When you find it damaged, ask your nearest PIONEER authorized service d’alimentation de temps en temps. Contacter le service après-vente PIONEER center or your dealer for a replacement. -
Page 7: Table Des Matières
Contents Table de matières 1 Before You Start 1 Préparatifs Features ..............10 Caractéristiques ............10 Using this manual ............10 Utilisation de ce manuel ..........10 Hints on installation ..........1 1 Suggestions pour l’installation ........1 1 Avoiding problems with condensation ....1 1 Comment éviter les problèmes de condensation .. - Page 8 Bookmarking a place in a disc ........48 Comment changer la langue audio ......44 Memorizing disc settings .......... 48 Comment changer les canaux audio ......44 Displaying disc information ........49 Comment faire une liste de programmes ....46 Displays when playing ..........
- Page 9 General settings ............82 Angle Indicator (Indicateur d’angle) ..... 77 Setup Menu Mode ..........82 Réglages de la langue ..........77 Parental Lock ............82 OSD language (Langue OSD) ........ 77 Registering a new password ........83 Audio Language (Langue audio) ......77 Changing your password .........
-
Page 10: Before You Start
Using this manual Inc. Fabriqué sous licence de Digital Theater Systems, Inc. This manual is for the XV-DV77/DV88 DVD Surround System (XV-DV88 DVD Surround System in Europe only). It is divided into several sections: information for before you start using the system (chapters 1–2); getting started using Utilisation de ce manuel the system (chapters 3–4);... -
Page 11: Avoiding Problems With Condensation
Before You Start Préparatifs Suggestions pour l’installation Hints on installation Nous souhaitons que vous puissiez profiter de cet appareil We want you to enjoy using this unit for years to come, so pendant les années à venir, veuillez donc garder en mémoire please bear in mind the following points when choosing a les points suivants au moment de choisir un endroit suitable location for it:... -
Page 12: Discs Compatible With This System
Before You Start Préparatifs Discs compatible with this system Disques compatibles avec cet appareil Any disc that displays one of the following logos should play Cet appareil devrait pouvoir lire les disques portant les logos suivants. D’autres formats, y compris les DVD-RAM, DVD- in this system. -
Page 13: Controls And Displays
Controls and Displays Front panel 6 PLAY/PAUSE ( touch sensor) 0 OPEN/CLOSE (touch sensor) 7 STOP STANDBY/ON Disc tray PLAY/PAUSE OPEN/CLOSE STANDBY/ON STOP Headphone jack (Illustration shows European model) Display -DSP- COND.LAST 96KHz PRO LOGIC RPT–1 PGM RDM DIGITAL 13 2 Lights when playing a Dolby Pro Logic PRO LOGIC Timer –... -
Page 14: Commandes Et Affichages
Commandes et affichages Panneau avant 6 PLAY/PAUSE (touche sensible) 0 OPEN/CLOSE (touche sensible) 7 STOP STANDBY/ON Plateau à disques PLAY/PAUSE OPEN/CLOSE STANDBY/ON STOP Prise pour écouteurs (L’illustration montre le modèle européen) Afficheur -DSP- COND.LAST 96KHz PRO LOGIC RPT–1 PGM RDM DIGITAL 13 2 S’allume à... -
Page 15: Remote Control
Controls and Displays Remote control 16 7 | DIMMER page 91 17 8 | PROGRAM pages 44, 61 18 9 STANDBY SYSTEM TUNER 19 10/0 Use as 10 or 0 FM/AM 20 MENU | TOP MENU page 30 DIRECT PLAY 3 V1/V2/V3 –... -
Page 16: Télécommande
Commandes et affichages Télécommande 16 7 | DIMMER page 91 17 8 | PROGRAM pages 44, 62 18 9 STANDBY SYSTEM TUNER 19 10/0 S’utilise comme 10 ou 0 FM/AM 20 MENU | TOP MENU page 30 DIRECT PLAY 3 V1/V2/V3 –... -
Page 17: Setting Up
Setting Up Configuration Introduction Introduction Before starting, make sure that your Avant de commencer, vérifiez que votre STANDBY system is installed and set up according chaîne est installée et configurée en to the Setting up the system guide, and fonction du guide Configuration de la plugged into a power outlet. -
Page 18: Changing The Clock Display Format
Setting Up Configuration 4 Use the 5 and ∞ buttons to set the hour, 4 Utilisez les touches 5 et ∞ pour régler then press ENTER. l’heure puis appuyez sur ENTER. • The default clock display format is 12-hour. • Le format de 12 heures est l’affichage par défaut de l’horloge. -
Page 19: Setting Up For Surround Sound
Setting Up Configuration Setting up for surround Configuration du son sound surround You can use this system right out of the Vous pouvez utiliser cette chaîne telle box for surround sound with just the quelle, sortie de son emballage pour SYSTEM default settings. - Page 20 Setting Up Configuration 4 Press 3 to move on to the CENTER 4 Appuyez sur 3 pour aller jusqu’au speaker setting. réglage d’enceinte CENTER. CENTER SP 3.Om CENTER SP 3.Om 5 Use the 5 and ∞ buttons to set the 5 Utilisez les touches 5 et ∞...
-
Page 21: Balancing The Surround Sound
Setting Up Configuration Balancing the surround sound Comment équilibrer le son surround You can further improve surround sound performance Vous pouvez améliorer la performance du son surround by balancing the levels from the subwoofer, center and en équilibrant les niveaux des enceintes subwoofer, surround speakers relative to the front left/right centrale et surround relatives aux enceintes avant speakers. -
Page 22: Setting The Tv System
Setting Up Configuration 4 Use the 5 and ∞ buttons to adjust the 4 Utilisez les touches 5 et ∞ pour ajuster le level of a speaker as the test tone plays. niveau d’une enceinte pendant la lecture du test de tonalité. Lch + 3dB Lch + 3dB For best results, sit in your main listening position when... -
Page 23: Using The Setup Navigator
Setting Up Configuration Using the setup navigator Utilisation du Setup Navigator Before playing any discs, we strongly recommend using the Setup Navigator. Avant de lire tous les disques, nous STANDBY This makes some basic DVD system recommandons fortement l’utilisation settings for you. du Setup Navigator. - Page 24 Setting Up Configuration 3 Sélectionnez “ Start ”. 3 Select ‘Start’. • Appuyez sur pour sélectionner l’option en ENTER • Press to select the highlighted option. ENTER surbrillance. • If you decide you don’t want to use the Setup • Si vous décidez que vous ne souhaitez pas utiliser le Navigator, select Auto Start Off here instead.
-
Page 25: Setting Up The Remote To Control Your Tv
Setting Up Configuration Setting up the remote to Configuration de la control your TV télécommande pour commander votre You can set up the supplied remote to control your TV. téléviseur Vous pouvez configurer la 1 Switch on your TV. télécommande fournie pour com- 2 Find the name of the manu- mander votre téléviseur. -
Page 26: Using This Remote With Your Tv
151 193 194 200 CONTINENTAL EDISO 545 564 565 PHILIPS 515 518 521 DAEWOO 515 558 106 135 196 PHONOLA DUAL PIONEER 566 107 562 572 101 1 18 EMERSON 561 562 563 PRISM FERGUSON QUASAR 101 103 FINLUX 515 535 536 537 538 539 542 543... - Page 27 104 105 180 144 PANASONIC 100 101 102 151 193 CENTURION PHILCO 1 15 104 CIS HOTEL PHILIPS 1 15 CORONAD PIONEER 1 18 101 107 CRAIG 109 1 10 108 PORTLAND CROSLEY 1 15 PRISM CURTIS MAT 104 107 1 10...
-
Page 28: Getting Started
Getting Started Mise en service Playing DVDs, CDs and Lecture de DVD, de CD et STANDBY Video CDs de Video CD DIRECT PLAY 3 The basic controls for playing discs are Les commandes de base pour la lecture covered here. Further functions are de disques sont décrites ici. -
Page 29: Basic Playback Controls
Getting Started Mise en service Basic playback controls Commandes de base de lecture Button What it does Touche Fonction Starts playback or pauses a disc that’s Démarre la lecture ou met en pause un playing (press again to restart playback). disque en cours de lecture (appuyez de DVD and Video CD only: Resumes playback nouveau pour reprendre la lecture). -
Page 30: Navigating Dvd Disc Menus
Getting Started Mise en service DVD and Video CD only: Uniquement DVD et Video CD : (SHIFT ¡) (SHIFT ¡) 1. Appuyez pour démarrer le scannage 1. Press to start slow-motion forward avance ralenti. Appuyez de nouveau pour scanning. Press again to change the changer la vitesse de scannage ( scanning speed ( 2. -
Page 31: Navigating Video Cd Pbc Menus
Getting Started Mise en service Navigating Video CD PBC menus Comment naviguer sur les menus PBC Some Video CDs have menus from which you can de Video CD choose what you want to watch. These are called PBC Certains Video CD disposent de menus à partir desquels (Playback control) menus. -
Page 32: Listening To The Radio
Getting Started Mise en service Listening to the radio Pour écouter la radio TUNER Les opérations suivantes vous indiquent The following steps show you how to FM/AM DIRECT PLAY 3 comment accorder des émissions de tune in to FM and AM radio broadcasts radio FM et AM en utilisant les using the automatic, manual and fonctions d’accord automatique,... -
Page 33: Improving Fm Stereo Sound
Getting Started Mise en service Improving FM stereo sound Comment améliorer le son FM stéréo If you’re listening to a stereo FM broadcast, but find that Si vous écoutez une émission FM stéréo, mais vous there is a lot of noise because of a weak signal, try trouvez qu’il y a trop de parasites à... -
Page 34: Listening To Station Presets
Getting Started Mise en service 2 Press SYSTEM MENU and select TUNER 2 Appuyez sur SYSTEM MENU et MENU. sélectionnez TUNER MENU. TUNER MENU TUNER MENU • Change menu options using the 2 and 3 buttons. • Changez les options du menu en utilisant les touches 2 et 3. -
Page 35: Naming Station Presets
Getting Started Mise en service Naming station presets Pour nommer des stations préréglées Pour identifier plus facilement les stations préréglées, For easier identification, you can name your station vous pouvez leur donner un nom. presets. 1 Rappelez la station préréglée à laquelle 1 Recall the station preset you want to vous souhaitez donner un nom. -
Page 36: Tuner System Displays
Getting Started Mise en service Tuner system displays Affichages du système du tuner • Press SYSTEM DISP to change the infor- • Appuyez sur SYSTEM DISP pour changer mation shown in the display. l’information montrée sur l’affichage. 87.5OMHz 87.5OMHz Frequency Fréquence Radio Text Texte radio... -
Page 37: Reducing The Auxiliary Input Level
Getting Started Mise en service Remarque STANDBY • For detailed instructions on using • Pour les instructions détaillées DIRECT PLAY 3 V1/V2/V3 the optional MD or tape deck, see the d’utilisation de la platine MD ou la VIDEO TAPE included operating instructions. platine cassette en option, voir le mode d’emploi qui est inclus. -
Page 38: Using Sound Modes And Effects
Using Sound Modes and Effects Utilisation des modes de son et des effets Using the Sound menu Utilisation du menu Sound This menu gives you access to various amplifier sound settings: Ce menu vous offre l’accès à plusieurs réglages d’amplification sonore : Remarque The bass and treble settings have no effect when using the DSP modes, or when the Surround mode is set to... -
Page 39: Using Sound Modes
Using Sound Modes and Effects Utilisation des modes de son et des effets Using sound modes Utilisation de modes de son This system offers several ways to enjoy surround sound Cet appareil vous offre plusieurs manières de profiter de and stereo sources. When playing Dolby Digital, Dolby sources sonores surround et stéréo. - Page 40 Using Sound Modes and Effects Utilisation des modes de son et des effets • • STANDARD STANDARD , except that 2-channel (analog or digital) Comme , sauf que les sources à 2 canaux AUTO AUTO sources are processed using Dolby Pro Logic for (analogiques ou numériques) sont traitées en utilisant surround-sound effects.
-
Page 41: Playing Other Stereo Sources With Dsp Effects
Using Sound Modes and Effects Utilisation des modes de son et des effets Playing other stereo sources with DSP Lecture d’autres sources stéréo avec effects des effets DSP You can add room effects to audio CDs and other stereo Vous pouvez ajouter des effets spatiaux aux CD audio et sources using the DSP modes. -
Page 42: Playing Discs
Playing Discs Lecture de disques Introduction Introduction • Most of the functions covered in this chapter apply to • La plupart des fonctions décrites dans ce chapitre DVD discs, Video CDs and CDs, although the exact font référence aux disques DVD, Video CD et CD, bien operation of some varies slightly with the kind of disc que l’opération exacte de certains varie un peu avec le loaded. -
Page 43: Switching Camera Angles
Playing Discs Lecture de disques Switching camera angles Comment changer les angles de caméra Some DVD discs feature scenes shot from two or more angles—check the disc box for details: it should be Certains disques DVD présentent des scènes enregistrées marked with a icon if it contains multi-angle sous deux ou plusieurs angles. -
Page 44: Switching Audio Channels
Playing Discs Lecture de disques Switching audio channels Comment changer les canaux audio Pour les karaokés ou des CD et For karaoke or similar format CDs and Video CDs, it’s Video CD avec un format similaire, il est possible de possible to select stereo, left channel only, or right sélectionner, uniquement le canal de gauche ou channel only. - Page 45 Playing Discs Lecture de disques 4 Enter the title/chapter numbers for your 4 Saisissez les numéros de titre/chapitre program list. correspondants à votre liste de For titles/chapters 1–10, use the corresponding number programmes. buttons. For 11 and over, use the >10 button (>10, 2, 4 Pour les titres/chapitres de 1 à...
-
Page 46: Using Random Play
Playing Discs Lecture de disques 3 Press ENTER or 6 to start playback 3 Appuyez sur ENTER ou 6 pour démarrer immediately, or PROGRAM to exit if you immédiatement la lecture, ou sur PRO- want to start playback later. GRAM pour quitter le mode si vous •... -
Page 47: Using Repeat Play
Playing Discs Lecture de disques Using repeat play Utilisation de la lecture répétée Vous pouvez régler le lecture pour répéter des pistes You can set the player to repeat individual tracks on CDs individuelles de CD ou de Video CD, des chapitres ou des or Video-CDs, chapters or titles on DVD discs, or the titres sur des disques DVD, ou tout un disque. -
Page 48: Bookmarking A Place In A Disc
Playing Discs Lecture de disques Bookmarking a place in a disc Indexation d’un emplacement d’un disque If you watch only part of a DVD disc with the intention of picking up later where you left off, you can bookmark Si vous ne regardez qu’une partie du disque DVD dans the place then resume playback at a later date without l’intention de le reprendre plus tard à... -
Page 49: Displaying Disc Information
Playing Discs Lecture de disques Les réglages mémorisés sont : The settings memorized are: • OSD Position (Position OSD) (page 76) • OSD Position (page 76) • Subtitle Language (page 78) • Subtitle Language (Langue des sous-titres) • Audio Language (page 77) (page 78) •... -
Page 50: Displays When Playing
Playing Discs Lecture de disques Displays when playing Affichages pendant la lecture current title/chapter number elapsed time of current title Numéro du titre/chapitre actuel Temps écoulé du titre actuel Play 3–29 49.58 Play 3–29 49.58 Title –51.06 / 101.04 Title –51.06 / 101.04 remaining time of current title... - Page 51 Playing Discs Lecture de disques Numéro de la piste actuelle/ current track number/ nombre total de pistes Temps total écoulé du Video CD total number of tracks Video CD's total elapsed time Play 3/12 10.53 Play 3/12 10.53 –59.26 / 70.19 –59.26 / 70.19...
-
Page 52: Displays When Stopped
Playing Discs Lecture de disques Displays when stopped Affichages à l’arrêt Information: DVD Information: DVD Title Chapter Title Chapter Title Chapter Title Chapter 1~ 1 1~ 1 1~ 1 1~ 1 1~ 1 1~ 1 1~ 1 1~ 1 1~ 1 1~ 1 1~ 1 1~ 1... -
Page 53: Using Rds
Using RDS Utilisation du RDS Using RDS Utilisation du RDS (European model only) (Uniquement pour le modèle européen) Radio Data System, or RDS as it’s usually known, is a Le système de données de radio (Radio Data System), ou system used by FM radio stations to provide listeners plus habituellement connu par RDS, est un système with various information—the name of the station and utilisé... -
Page 54: Rds Program Types
Using RDS Utilisation du RDS RDS Program types Types de programmes RDS News Actualités NEWS NEWS Current affairs Affaires courantes AFFAIRS AFFAIRS General information Information générale INFO INFO Sports Sports SPORT SPORT Educational material Matériel éducatif EDUCATE EDUCATE Radio drama Drame Radio DRAMA DRAMA... -
Page 55: Displaying Rds Information
Using RDS Utilisation du RDS Displaying RDS information Affichage de l’information RDS When the tuner is receiving on the FM band, the RDS Quand le tuner est en réception sur la bande FM, les displays become available. affichages du RDS deviennent disponibles. 1 Press SYSTEM DISP repeatedly to select 1 Appuyez plusieurs fois sur SYSTEM DISP an RDS display. -
Page 56: Searching For A Program Type
Using RDS Utilisation du RDS Searching for a program type Recherche d’un type de programme You can search for a station that is broadcasting any Vous pouvez rechercher une station qui émette program type from the list on page 54. n’importe quel type de programme de la liste de la page 1 Select FM with the TUNER FM/AM but- ton. -
Page 57: Playing Mp3S
Playing MP3s Lecture de MP3 Playing MP3s Lecture de MP3 This system can play MP3 files on a CD-ROM disc. MP3 Cet appareil peut lire des fichiers MP3 d’un disque CD- is a popular audio format on computers and the ROM. -
Page 58: Searching For Folders And Tracks
Playing MP3s Lecture de MP3 Searching for folders and tracks Recherche de répertoires et de pistes 1 Use the FOLDER/GROUP (SHIFT and 4/¢) buttons to select a folder. 1 Utilisez les touches FOLDER/GROUP The folder number is shown in the display. (SHIFT et 4/¢) pour sélectionner un répertoire. -
Page 59: Using Repeat Play
Playing MP3s Lecture de MP3 Using repeat play Utilisation de la lecture répétée Use the repeat play feature to repeat the current track, or Utilisez la fonction de lecture répétée pour répéter la all the tracks on the disc. piste actuelle ou toutes les pistes du disque. 1 During playback, press REPEAT to select 1 Pendant la lecture, appuyez sur REPEAT pour a repeat play mode. -
Page 60: Using The Mp3 Navigator
Playing MP3s Lecture de MP3 Using the MP3 Navigator Utilisation du MP3 Navigator Use the MP3 Navigator to make searching for the Utilisez le MP3 Navigator pour rechercher plus track(s) you want to play easier. You can also use it to facilement la/les piste/s que vous souhaitez lire. -
Page 61: Making A Program List Of Mp3 Tracks
Playing MP3s Lecture de MP3 Making a program list of MP3 tracks Comment faire une liste de programmes de pistes MP3 1 Load a CD-ROM containing MP3 files. 1 Chargez un CD-ROM contenant des 2 Press PROGRAM to enter the Program fichiers MP3. -
Page 62: Mp3 Compatibility Information
Playing MP3s Lecture de MP3 Touches du curseur – Pour naviguer sur la liste MP3 compatibility information de programmes. • Mono or stereo MPEG-1 Audio Layer 3 format CLR – Supprime de la liste de programmes l’item compatible. actuellement sélectionné. •... -
Page 63: Using The Timer
Using the Timer Utilisation de la minuterie Using the wake up timer Utilisation de la minuterie de réveil You can use the timer as an alarm clock to wake up to Vous pouvez utiliser la minuterie comme un réveil pour the sound of a disc loaded, the radio, or the optional vous réveiller au son d’un disque chargé, de la radio, ou tape or MD deck. -
Page 64: Activating/Deactivating The Wake Up Timer
Using the Timer Utilisation de la minuterie 6 Set the switch off time. 6 Réglez l’heure de désactivation. OFF 1O:3O OFF 1O:3O Set in the same way as the switch on time, pressing Réglez-la de la même manière que l’heure d’allumage, to finish. -
Page 65: Checking The Timer Settings
Using the Timer Utilisation de la minuterie Checking the timer settings Comment vérifier les réglages de la If you’ve set the wake-up timer, you can check the minuterie settings while the system is in standby. Si vous réglez la minuterie de réveil, vous pouvez vérifier les réglages alors que l’appareil est en attente. - Page 66 Using the Timer Utilisation de la minuterie 2 Use the 5 or ∞ button to select a sleep 2 Utilisez la touche 5 ou ∞ pour timer setting. sélectionner un réglage de minuterie de • sommeil. SLEEP AUTO Switch off after the CD, MD or tape has played out * •...
-
Page 67: Advanced Sound Setup
Advanced Sound Setup Configuration avancée du son Dynamic Range Control Commande gamme dynamique La gamme dynamique d’une source est la différence qu’il y The dynamic range of a source is the difference between a entre les sons les plus tranquilles et les plus bruyants. La the quietest and the loudest sounds. -
Page 68: Advanced Sound Settings
Advanced Sound Settings Configuration avancée du son Dual-mono setting Réglage dual-mono The dual-mono setting applies only to Dolby Digital Le réglage dual-mono s’applique seulement aux discs that feature dual-mono material—see the disc disques en Dolby Digital qui offrent un matériel dual- box for details. -
Page 69: Adjusting Channel Volume Levels
Advanced Sound Setup Configuration avancée du son Adjusting channel volume levels Réglage des niveaux de volume du Depending on your room and where you’re sitting, you canal may want to adjust the relative volumes of one or more Selon la pièce et l’endroit où vous vous asseyez, il se speakers for a more balanced sound. -
Page 70: 1 Dvd Setup Menu
DVD Setup Menu Menu Setup (de configuration) du DVD Using the DVD Setup menu Utilisation du menu Setup du DVD Le menu Setup du DVD vous donne accès à tous les The DVD Setup menu gives you access to all the system’s réglages de la chaîne DVD. -
Page 71: Audio Settings
DVD Setup Menu Menu Setup (de configuration) du DVD Audio settings Réglages audio Dolby Digital Out Dolby Digital Out (Sortie Dolby Digital) • Default: Dolby Digital • Par défaut : Dolby Digital Audio V2 Language Video1 General — Dolby Digital Dolby Digital Out Dolby Digital 3 PCM Audio... -
Page 72: Video Settings
DVD Setup Menu Menu Setup (de configuration) du DVD Video settings Réglages vidéo TV Screen TV Screen (Ecran du téléviseur) • Set in Setup Navigator (Default: 16:9 (Wide)) • Réglé au Setup Navigator (Par défaut : 16:9 (Wide)) Audio Video1 V2 Language General TV Screen... -
Page 73: Screen Saver
Background • Default setting: Pioneer Logo Background Color (Couleur de fond) • Réglage par défaut : Pioneer Logo Audio Video2 Language General Background —... - Page 74 DVD Setup Menu Menu Setup (de configuration) du DVD Selecting a preset Sélection d’un préréglage 1 Select ‘Start’. 1 Sélectionnez “ Start ”. 2 Select ‘Video Memory Select’. 2 Sélectionnez “ Video Memory Select ”. 3 Select a preset. 3 Sélectionnez un préréglage. •...
- Page 75 DVD Setup Menu Menu Setup (de configuration) du DVD • Sharpness – Adjusts the sharpness of the mid- • Sharpness (Netteté)– Règle la netteté des objets frequency (less detailed) elements in the picture. (This de fréquence moyenne (moins détaillés) de l’image. (Ce setting is only effective when Fine Focus is On.) réglage est uniquement effectif quand Fine Focus est •...
-
Page 76: Still Picture
Still Picture (Image figée) • Réglage par défaut : Auto • Default setting: Auto Audio Video2 Language General Audio Video2 Language General Background Color Pioneer Logo — Background Color Pioneer Logo — Video Adjust Video Adjust Still Picture Field — Still Picture Field —... -
Page 77: Angle Indicator
Menu Setup (de configuration) du DVD Angle Indicator (Indicateur d’angle) Angle Indicator • Default setting: On • Réglage par défaut : On Audio Video2 Language General Background Color — Pioneer Logo Audio Video2 Language General Video Adjust Still Picture Auto — Background Color —... -
Page 78: Subtitle Language
DVD Setup Menu Menu Setup (de configuration) du DVD This setting is your preferred audio language for DVD Ce réglage correspond à votre langue audio préférée discs. If the language you specify here is recorded on a pour les disques DVD. Si la langue que vous spécifiez ici disc, the system automatically plays the disc in that est enregistrée sur un disque, la chaîne lira language (although this depends on the Auto Lan-... -
Page 79: Auto Language
DVD Setup Menu Menu Setup (de configuration) du DVD Audio Video1 Language General Audio Video1 Language General Subtitle Language Subtitle Language Code (0~2) Code (0~2) List of Languages List of Languages ja: Japanese ja: Japanese Setup audio language Setup audio language +/–... -
Page 80: Dvd Language
DVD Setup Menu Menu Setup (de configuration) du DVD Astuce You can still switch audio and subtitle languages on Vous pouvez encore changer la langue audio et celle des playback using the buttons. AUDIO SUBTITLE sous-titres lors de la lecture en utilisant les touches AUDIO SUBTITLE DVD Language... -
Page 81: Subtitle Display
DVD Setup Menu Menu Setup (de configuration) du DVD Subtitle Display (Affichage des sous- Subtitle Display • Default Setting: On titres) • Réglage par défaut : On (activé) Audio Video1 Language General OSD Language – English Audio Video1 Language General Audio Language –... -
Page 82: General Settings
DVD Setup Menu Menu Setup (de configuration) du DVD General settings Réglages généraux Setup Menu Mode Setup Menu Mode (Mode menu de configuration) • Default setting: Basic • Réglage par défaut : Basic Audio Video1 V2 Language General Setup Menu Mode Expert —... -
Page 83: Registering A New Password
DVD Setup Menu Menu Setup (de configuration) du DVD Avant de pouvoir régler le niveau de verrouillage Before you can set the Parental Lock level or the parental ou le code du pays il faut consigner un mot de Country Code you must register a password. As the passe. -
Page 84: Setting/Changing The Parental Lock Level
DVD Setup Menu Menu Setup (de configuration) du DVD Setting/changing the Parental Lock Comment régler/changer le niveau de level verrouillage parental 1 Select ‘Level’. 1 Sélectionnez “ Level ”. 2 Use number buttons to enter your pass- 2 Utilisez les touches numérotées pour word, then press ENTER. -
Page 85: Country Code List
DVD Setup Menu Menu Setup (de configuration) du DVD Country code list Liste des codes de pays Country Input code Country code Pays Code d’entrée Code du pays 01 18 01 18 ARGENTINA ARGENTINE 0121 0121 AUSTRALIA AUSTRALIE 0120 0120 AUSTRIA AUTRICHE 0205... -
Page 86: Connecting Up
Connecting Up Raccordements Before making or changing any rear panel connections, Avant de faire ou de modifier tout raccordement au make sure that all the components are switched off and panneau arrière, vérifiez que tous les composants sont unplugged from the power supply. éteints et débranchés de l’alimentation. -
Page 87: Connecting Other Components
Connecting Up Raccordements Connecting other components Raccordement d’autres composants 1 Use a stereo audio cable to connect the 1 Utilisez un câble audio stéréo pour analog outputs of an external component raccorder les sorties analogiques d’un to the AUDIO IN jacks of this unit. composant externe aux prises AUDIO IN This will allow you to play the component through this de cette unité. - Page 88 Connecting Up Raccordements (Illustration shows European model) (L’illustration montre le modèle européen) 4 Use a digital optical cable to connect the 4 Utilisez un câble optique numérique pour OPT. OUT jack of this system to the raccorder la prise OPT. OUT de cet optical digital input of an external com- appareil à...
-
Page 89: Connecting External Antennas
Connecting Up Raccordements Connecting external antennas Raccordement d’antennes externes External AM antenna Antenne AM externe Use 5–6 meters (15–18 ft.) of vinyl-insulated wire and Utilisez 5 à 6 mètres de fil en vinyl et installez-le soit à set up either indoors (B) or outdoors (A). Leave the l’intérieur (A) soit à... -
Page 90: Additional Information
Additional Information Information complémentaire Child lock Restriction pour les enfants When set to on, the remote control functions normally, Quand la fonction est activée, la télécommande but all front panel controls are inoperative. fonctionne normalement, mais toutes les commandes du panneau avant sont inopérables. 1 Switch the system into standby. -
Page 91: Dimming The Display
The disc pickup lens should not become dirty in normal use, but if for some reason it should malfunction due to Produits nettoyants pour lentille de dirt or dust, consult your nearest Pioneer authorized disque service center. Although lens cleaners for CD players are Lors de l’utilisation normale de l’unité, la lentille du... -
Page 92: Storing Discs
This system is designed for use with conventional, fully circular discs only. Use of shaped discs is not recom- mended. Pioneer disclaims all liability arising in Cette chaîne est conçue pour l’utilisation de disques connection with the use of shaped CDs and DVDs. -
Page 93: Glossary
Additional Information Information complémentaire Glossary Glossaire Aspect ratio Aspect ratio (Rapport de format) Largeur d’un écran de téléviseur par rapport à sa The width of a TV screen relative to its height. Conven- hauteur. Les téléviseurs conventionnels mesurent 4:3 tional TVs are 4:3 (in other words, the screen is almost (dans d’autres termes, l’écran est presque carré), les square);... -
Page 94: Language Code List
Additional Information Information complémentaire Language code list Liste des codes de langues Language/Langue Code Language/Langue Code Language/Langue Code Japanese/japonais ( ja ) 1001 Quechua ( qu ) 1721 Hausa ( ha ) 0801 English/anglais ( en ) 0514 Rhaeto-Romance ( rm ) 1813 Hindi ( hi ) 0809... -
Page 95: Screen Sizes And Disc Formats
Additional Information Information complémentaire Screen sizes and disc formats Tailles d’écran et formats de disque The table below shows the effect of various TV Screen La table ci-dessous montre l’effet de divers réglages de TV settings on the different kinds of disc available. Screen sur différents types de disques disponibles. -
Page 96: Troubleshooting
If the trouble cannot be rectified after checking the appareils électriques utilisés. Si vous ne pouvez pas items below, ask your nearest Pioneer authorized service rectifier le problème même après avoir vérifié les points center or your dealer to carry out repair work. -
Page 97: Troubleshooting Tips
Additional Information Troubleshooting tips Problem Remedy CDs, DVDs and Video CDs The disc is ejected automati- • Check that the disc is clean and undamaged (page 92). cally after loading. • Make sure that the disc is seated properly in the disc guide. •... -
Page 98: Resetting The System
1 Switch the system into standby using the the unit for proper operation. If this does not correct the front panel standby/on switch. problem, please consult your nearest Pioneer service 2 Hold down the front panel 7 button and center. -
Page 99: Astuces Du Guide De Dépannage
Information complémentaire Astuces du guide de dépannage Problème Solution CD, DVD et Video CD Le disque est éjecté • Vérifiez que le disque est propre et en bon état (page 92). automatiquement après l’avoir • Assurez-vous que le disque est placé correctement sur le cercle interne. chargé. -
Page 100: Réinitialisation De L'appareil
Ceci réinitialisera l’unité pour qu’elle l’interrupteur de mise en attente/en fonctionne convenablement. Si cela ne corrige pas le marche du panneau avant. problème, veuillez consulter votre service Pioneer le plus 2 Maintenez enfoncée la touche 7 du proche. panneau avant et rallumez. -
Page 101: Specifications
Additional Information Information complémentaire Specifications Spécifications Powered subwoofer (S-DV77SW/ Subwoofer alimenté (S-DV77SW/ DV88) Amplifier Section DV88) Section amplificateur Surround Surround Front, Center, Rear ........30 W, per channel Avant, centrale, arrière ......30 W, par canal (1 kHz, 1% T.H.D., 8 Ω) (1kHz, distorsion harmonique totale de 1%, 8 Ω) Subwoofer ...... - Page 102 Poids ..............0,92 Kg Center speaker Dimensions ....210 (W) x 78 (D) x 1 10 (H) mm (8-1/4 (W) x 3-1/16 (D) x 4-5/16 (H) in.) Lecteur DVD/CD avec tuner (XV-DV77 Weight ..........0.92 kg (2 lbs) /DV88) DVD/CD Tuner (XV-DV77/DV88) Section lecteur DVD (Audio) Rapport signal/bruit ........
-
Page 103: Éléments Fournis
• Les spécifications et l’aspect extérieur sont sujets à de possibles without notice, due improvements. modifications sans préavis, dû aux imprévus. Published by Pioneer Corporation. Publication de Pioneer Corporation. Copyright © 2001 Pioneer Corporation. © 2001 Pioneer Corporation. All rights reserved. Tous droits de reproduction et de traduction réservés. En/Fr... -
Page 104: Demo Display
Haven 1087, Keetberglaan 1, B-9120 Melsele, Belgium TEL: 03/570.05.11 PIONEER ELECTRONICS AUSTRALIA PTY. LTD. 178-184 Boundary Road, Braeside, Victoria 3195, Australia, TEL: [03] 9586-6300 PIONEER ELECTRONICS DE MEXICO S.A. DE C.V. San Lorenzo 1009 3er Piso Desp. 302 Col. Del Valle Mexico D.F. C.P. 03100 TEL: 5-688-52-90 Printed in /Imprimé...