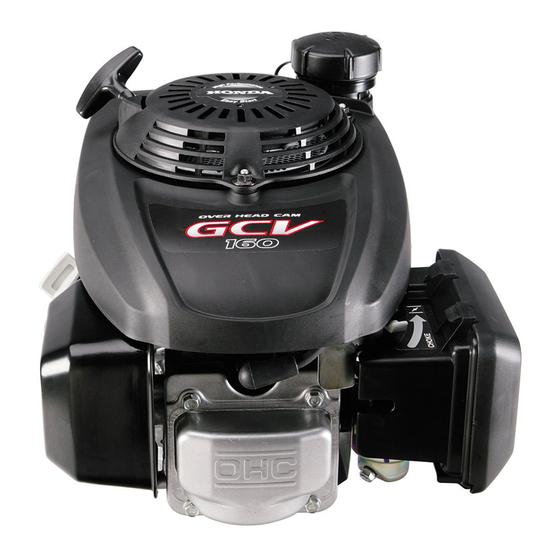
Honda GCV160 Manuel De L'utilisateur
Masquer les pouces
Voir aussi pour GCV160:
- Manuel de l'utilisateur (88 pages) ,
- Manuel du propriétaire (48 pages) ,
- Manuel de l'utilisateur (56 pages)
Table des Matières
Publicité
Les langues disponibles
Les langues disponibles
Liens rapides
INTRODUCTION
Thank you for purchasing a Honda engine. We want to help you get
the best results from your new engine and operate it safely. This
manual contains information on how to do that; please read it carefully
before operating the engine. If a problem should arise, or if you have
any questions about your engine, consult an authorized Honda
servicing dealer.
All information in this publication is based on the latest product
information available at the time of printing. American Honda Motor
Co., Inc. reserves the right to make changes at any time without
notice and without incurring any obligation. No part of this publication
may be reproduced without written permission.
This manual should be considered a permanent part of the engine
and should remain with the engine if resold.
Review the instructions provided with the equipment powered by this
engine for any additional information regarding engine startup,
shutdown, operation, adjustments, or any special maintenance
instructions.
SAFETY MESSAGES
Your safety and the safety of others are very important. We have
provided important safety messages in this manual and on the
engine. Please read these messages carefully.
A safety message alerts you to potential hazards that could hurt you
or others. Each safety message is preceded by a safety alert
symbol B and one of three words, DANGER, WARNING, or
CAUTION.
These signal words mean:
B DANGER
B WARNING
B CAUTION
Each message tells you what the hazard is, what can happen, and
what you can do to avoid or reduce injury.
DAMAGE PREVENTION MESSAGES
You will also see other important messages that are preceded by the
word NOTICE.
This word means:
Your engine or other property can be
NOTICE
damaged if you don't follow instructions.
The purpose of these messages is to help prevent damage to your
engine, other property, or the environment.
© 2003-2009 American Honda Motor Co., Inc.-All Rights Reserved
31Z8B024
00X31-Z8B-0240
You WILL be KILLED or SERIOUSLY
HURT if you don't follow instructions.
You CAN be KILLED or SERIOUSLY
HURT if you don't follow instructions.
You CAN be HURT if you don't follow
instructions.
POM31Z8B024
EM5
IPC.170000.2009.08
PRINTED IN U.S.A.
OWNER'S MANUAL
MANUEL DE L'UTILISATEUR
MANUAL DEL PROPIETARIO
GCV160 • GCV190
B
The engine exhaust from this product contains
chemicals known to the State of California to cause
cancer, birth defects, or other reproductive harm.
CONTENTS
INTRODUCTION . . . . . . . . . . . . . . . . . . . . . . . . . . . . . . . . . . . . . . . . . . 1
SAFETY MESSAGES . . . . . . . . . . . . . . . . . . . . . . . . . . . . . . . . . . . . . . 1
SAFETY INFORMATION . . . . . . . . . . . . . . . . . . . . . . . . . . . . . . . . . . . . 2
BEFORE OPERATION CHECKS . . . . . . . . . . . . . . . . . . . . . . . . . . . . . 3
OPERATION . . . . . . . . . . . . . . . . . . . . . . . . . . . . . . . . . . . . . . . . . . . . . 3
SAFE OPERATING PRECAUTIONS . . . . . . . . . . . . . . . . . . . . . . . . . . 3
TYPE 1: FLYWHEEL BRAKE/REMOTE THROTTLE . . . . . . . . . . . . . 4
TYPE 2: MANUAL CHOKE/MANUAL THROTTLE . . . . . . . . . . . . . . . 5
TYPE 4: AUTOMATIC CHOKE RETURN/FIXED THROTTLE. . . . . . . 5
TYPE 5: MANUAL CHOKE/FIXED THROTTLE. . . . . . . . . . . . . . . . . . 6
TYPE 6: REMOTE THROTTLE/BLADE BRAKE CLUTCH . . . . . . . . . 6
TYPE 8: AUTOMATIC CHOKE/FIXED THROTTLE. . . . . . . . . . . . . . . 7
FLYWHEEL BRAKE . . . . . . . . . . . . . . . . . . . . . . . . . . . . . . . 7
BRAKE CLUTCH (equipment control) . . . . . . . . . . . . . . . . . 7
SERVICING YOUR ENGINE . . . . . . . . . . . . . . . . . . . . . . . . . . . . . . . . . 8
MAINTENANCE SCHEDULE. . . . . . . . . . . . . . . . . . . . . . . . . . . . . . . . 8
REFUELING . . . . . . . . . . . . . . . . . . . . . . . . . . . . . . . . . . . . . . . . . . . . . 8
Recommended Oil . . . . . . . . . . . . . . . . . . . . . . . . . . . . . . . . . . . . . . . . 9
AIR CLEANER . . . . . . . . . . . . . . . . . . . . . . . . . . . . . . . . . . . . . . . . . . . 9
SPARK PLUG. . . . . . . . . . . . . . . . . . . . . . . . . . . . . . . . . . . . . . . . . . . 10
FLYWHEEL BRAKE INSPECTION . . . . . . . . . . . . . . . . . . . . . . . . . . 10
SPARK ARRESTER (optional equipment) . . . . . . . . . . . . . . . . . . . . . 11
STORING YOUR ENGINE . . . . . . . . . . . . . . . . . . . . . . . . . . . . . . . . . . 11
TRANSPORTING . . . . . . . . . . . . . . . . . . . . . . . . . . . . . . . . . . . . . . . . . 12
TAKING CARE OF UNEXPECTED PROBLEMS . . . . . . . . . . . . . . . . 12
TECHNICAL INFORMATION . . . . . . . . . . . . . . . . . . . . . . . . . . . . . . . . 13
CONSUMER INFORMATION . . . . . . . . . . . . . . . . . . . . . . . . . . . . . . . 16
International Warranty Information . . . . . . . . . . . . . . . . . . . . . . . last page
ENGLISH
B
WARNING:
185854
1
Publicité
Chapitres
Table des Matières

Manuels Connexes pour Honda GCV160


Sommaire des Matières pour Honda GCV160
-
Page 1: Table Des Matières
INTRODUCTION Thank you for purchasing a Honda engine. We want to help you get the best results from your new engine and operate it safely. This OWNER’S MANUAL manual contains information on how to do that; please read it carefully before operating the engine. -
Page 2: Safety Information
SAFETY INFORMATION TYPE 2: MANUAL CHOKE/MANUAL THROTTLE • Understand the operation of all controls and learn how to stop the CHOKE LEVER engine quickly in case of emergency. Make sure the operator receives adequate instruction before operating the equipment. • Do not allow children to operate the engine. Keep children and pets away from the area of operation. -
Page 3: Before Operation Checks
BEFORE OPERATION CHECKS TYPE 7: ELECTRIC START WITH ENGINE-MOUNTED STARTER SWITCH/MANUAL CHOKE CONTROL/FIXED THROTTLE IS YOUR ENGINE READY TO GO? For your safety, and to maximize the service life of your equipment, it is very important to take a few moments before you operate the STARTER SWITCH engine to check its condition. -
Page 4: Type 1: Flywheel Brake/Remote Throttle
TYPE 1: FLYWHEEL BRAKE/REMOTE THROTTLE Throttle Setting Starting the Engine Position the throttle control for the desired engine speed. For best engine performance, it is recommended the engine be operated with 1. Turn the fuel valve to the ON the throttle in the FAST (or high) position. position. -
Page 5: Type 2: Manual Choke/Manual Throttle
TYPE 2: MANUAL CHOKE/MANUAL THROTTLE Stopping the Engine Starting the Engine 1. Release the flywheel brake lever to stop the engine. 1. Turn the fuel valve to the ON position. 2. Turn the fuel valve to the OFF position. 2. Move the choke lever to the ON position (cold engine). TYPE 4: AUTOMATIC CHOKE RETURN/FIXED THROTTLE 3. -
Page 6: Type 5: Manual Choke/Fixed Throttle
TYPE 5: MANUAL CHOKE/FIXED THROTTLE Throttle Setting Starting the Engine Position the choke/throttle/stop lever for the desired engine speed. ENGINE STOP SWITCH For best engine performance, it is recommended the engine be 1. Turn the fuel valve to the ON CHOKE operated with the choke/throttle/stop lever in the FAST (or high) position. -
Page 7: Type 8: Automatic Choke/Fixed Throttle
TYPE 8: AUTOMATIC CHOKE/FIXED THROTTLE Throttle Setting Starting the Engine Position the throttle control for the desired engine speed. For best FLYWHEEL BRAKE CONTROL CABLE engine performance, it is recommended the engine be operated with 1. Turn the fuel valve to the ON the throttle in the FAST (or high) position. -
Page 8: Servicing Your Engine
“certified” to ambient temperatures. EPA standards. (4) These items should be serviced by an authorized Honda servicing dealer, unless you have the proper tools and are mechanically proficient. Refer MAINTENANCE SAFETY to the Honda shop manual for service procedures. -
Page 9: Engine Oil
Oil Change NOTICE Drain the engine oil when the engine is warm. Warm oil drains quickly Fuel can damage paint and some types of plastic. Be careful not to and completely. spill fuel when filling your fuel tank. Damage caused by spilled fuel is not covered under your Distributor’s Limited Warranty. -
Page 10: Spark Plug
If it is less than THICKNESS 1. Disconnect the cap from 3 mm, take the engine to the spark plug, and your authorized Honda remove any dirt from the servicing dealer. spark plug area. 4. Install the fuel tank and 2. -
Page 11: Spark Arrester (Optional Equipment)
Check local laws and regulations. A spark trouble-free and looking good. The following steps will help to keep arrester is available from authorized Honda servicing dealers. rust and corrosion from impairing your engine’s function and The spark arrester must be serviced every 100 hours to keep it appearance, and will make the engine easier to start when you use it functioning as designed. -
Page 12: Transporting
Take the engine to an authorized With the engine and exhaust system cool, cover the engine to keep malfunction, ignition malfunction, Honda servicing dealer or refer to the out dust. A hot engine and exhaust system can ignite or melt some valves stuck, etc. -
Page 13: Technical Information
ELECTRIC STARTER TYPES maintenance of emission control systems. The following instructions and procedures must be followed in order to keep the emissions from your Honda engine within the emission standards. Tampering and Altering Tampering with or altering the emission control system may increase emissions beyond the legal limit. -
Page 14: Quick Reference Information
Specifications Air Index An Air Index Information hang tag/label is applied to engines certified GCV160 to an emission durability time period in accordance with the Type Recoil start Electric start requirements of the California Air Resources Board. Length x Width x Height 14.4 x 13.0 x 14.2 in... - Page 15 Battery Connections Wiring Diagrams Use the following materials to connect a 12-volt battery to the starter RECOIL STARTER BLACK (All Types) on type 7 units (with electric start switch/fixed throttle/manual choke): • Battery – 12-volt lead acid battery with a recommended ampere-hr rating of 3 Ah or a 14.4-volt NiCd battery with a recommended ampere-hr rating of 1.7 Ah.
-
Page 16: Consumer Information
What American Honda Will Repair or Replace Under Warranty: discuss it with the dealership's management. The Service Manager, American Honda will repair or replace, at its option, any part that is proven to be defective in material or workmanship under normal use during the General Manager, or Owner can help. -
Page 17: International Warranty Information
ENTIRE WRITTEN WARRANTY This DISTRIBUTOR'S WARRANTY is the only and the entire written warranty Honda Canada Inc., for and on behalf of Honda Motor Co. Ltd., Tokyo, Japan, given by Honda for Honda General Purpose Engines. No dealer or his agent or... -
Page 18: Emission Control System Warranty
YOUR WARRANTY RIGHTS AND OBLIGATIONS: Honda dealer determines it is defective or causes a failure of a warranted part, CALIFORNIA your claim for repair of your engine may be denied. If the part in question is not The California Air Resources Board and Honda are pleased to explain the related to the reason your engine requires repair, your claim will not be denied. -
Page 19: Introduction
INTRODUCTION Merci d’avoir acheté un moteur Honda. Ce manuel vous aidera à obtenir les meilleurs résultats de votre nouveau moteur et à l’utiliser sans danger. Il contient tous les renseignements nécessaires ; veuillez le lire attentivement avant de faire fonctionner le moteur. En MANUEL DE L’UTILISATEUR... -
Page 20: Information Concernant La Sécurité
INFORMATION CONCERNANT LA SÉCURITÉ TYPE 2 : STARTER MANUEL/PAPILLON MANUEL • Veillez à comprendre le fonctionnement de toutes les commandes et à apprendre comment éteindre le moteur rapidement en cas LEVIER DE STARTER d’urgence. Assurez-vous que le conducteur reçoive les instructions nécessaires avant d’utiliser le matériel. -
Page 21: Contrôles Avant Utilisation
TYPE 6 : PAPILLON COMMANDÉ/FREIN-EMBRAYAGE À AUBES CONTRÔLES AVANT UTILISATION (COMMANDE DE MATÉRIEL) LE MOTEUR EST-IL PRÊT À FONCTIONNER ? Pour des raisons de sécurité et pour assurer une durée de service optimale du matériel, il est très important de consacrer quelques instants au contrôle de l’état du moteur avant de l’utiliser. -
Page 22: Type 1 : Frein De Volant/Papillon Commandé
TYPE 1 : FREIN DE VOLANT/PAPILLON COMMANDÉ Arrêt du moteur LENT RAPIDE Démarrage du moteur 1. Placer le levier de starter/papillon [2] FERMÉ en position LENT. 1. Mettre le robinet d’essence [1] OUVERT en position OUVERT. 2. Libérer le levier du frein de volant [3] pour arrêter le moteur. -
Page 23: Type 3 : Frein De Volant/Starter Commandé/ Carburateur Préréglé
TYPE 3 : FREIN DE VOLANT/STARTER COMMANDÉ/ Modèles à démarreur à enrouleur CARBURATEUR PRÉRÉGLÉ Tirer légèrement la poignée du démarreur jusqu'à rencontrer une Démarrage du moteur résistance, puis tirer vigoureusement (voir instruction 4 du Type 1 OUVERT FERMÉ page 4). Commencer à tirer sur la corde du démarreur dès que le 1. - Page 24 TYPE 6 : PAPILLON COMMANDÉ/FREIN-EMBRAYAGE TYPE 7 : DÉMARREUR ÉLECTRIQUE AVEC BOUTON DE À AUBES DÉMARRAGE MONTÉ SUR LE MOTEUR/ COMMANDE DE STARTER MANUELLE/ Démarrage du moteur CARBURATEUR PRÉRÉGLÉ 1. Mettre le robinet d’essence [1] en position OUVERT. Démarrage du moteur 2.
-
Page 25: Type 8 : Starter Automatique/Carburateur Préréglé
TYPE 8 : STARTER AUTOMATIQUE/CARBURATEUR Arrêt du moteur LENT RAPIDE PRÉRÉGLÉ 1. Placer le levier de papillon [2] en position LENT. Démarrage du moteur 1. Mettre le robinet d’essence [1] en position OUVERT. 2. Mettre le levier du frein de volant [2] en position MARCHE. -
Page 26: Entretien Du Moteur
élevée, effectuer une vidange d’huile toutes les 25 heures. veiller à bien respecter les mesures de précaution et les (4) Ces opérations d’entretien sont à confier à un concessionnaire Honda agréé, à moins d’avoir l’outillage et les compétences mécaniques requis. -
Page 27: Huile Moteur
pièces métalliques, en caoutchouc et en plastique du circuit de Contrôle du niveau d’huile carburant pourraient subir des dommages. Les dommages au moteur 1. Vérifier l’huile avec le moteur arrêté et horizontal. ou problèmes de performance provenant d'un carburant aux pourcentages d'éthanol ou de méthanol supérieurs à... -
Page 28: Filtre À Air
[5]. Si elle est inférieure à 3 mm, 2. Déposer la bougie à l’aide porter le moteur chez un d’une clé à bougie [1] de concessionnaire Honda. taille correcte. 4. Remettre le réservoir d’essence et le démarreur en place et bien resserrer les trois écrous. -
Page 29: Pare-Étincelles (Types Applicables)
Un pare-étincelles est en vente chez les rouille et la corrosion de compromettre le fonctionnement et concessionnaires Honda agréés. l’apparence du moteur et permettront un démarrage plus facile lors de Pour assurer son bon fonctionnement, le pare-étincelles doit faire la remise en service. -
Page 30: Transport
Huile moteur TRANSPORT 1. Vidanger l’huile moteur Pour réduire le risque de fuite d’essence, maintenir le moteur (voir page 9). horizontal durant le transport. Mettre le robinet d’essence en position FERMÉ (voir instruction 1 du TYPE 1 page 4). 2. Déposer la bougie (voir page 10). -
Page 31: Informations Techniques
écrites expliquant le fonctionnement et l'entretien des systèmes antipollution. Les instructions et procédures suivantes doivent être observées afin d'assurer la conformité de votre moteur Honda avec les normes sur les émissions en vigueur. Modification et altération La modification ou l'altération du système antipollution peut entraîner... -
Page 32: Caractéristique
Indice d'air Caractéristiques GCV160 Une étiquette ou une étiquette volante sur l'indice d'air est apposée sur les moteurs étant certifiés pour une période de conformité donnée Type Démarreur à Démarreur en matière d'émissions suivant les normes du California Air Resource enrouleur électrique... - Page 33 Branchement de la batterie Schéma de câblage Utiliser le matériel suivant pour raccorder une batterie 12 volts au MODÈLES À DÉMARREUR À ENROULEUR démarreur sur les modèles de type 7 (à bouton de démarrage (TOUS TYPES) électrique/carburateur préréglé/starter manuel) : NOIR •...
-
Page 34: Information Du Consommateur
INFORMATION DU CONSOMMATEUR GARANTIE DU DISTRIBUTEUR Honda Canada Inc., pour et au nom de Honda Motor Co. Ltd., Tokyo, Japon, Informations sur la garantie et le localisateur de offre la garantie suivante sur chaque moteur à toutes fins neuf fabriqué par distributeurs/concessionnaires Honda Motor Co. -
Page 35: Garantie Des Piéces De Rechange
En tant que propriétaire du moteur pour produit mécanique, vous devez La GARANTIE DU DISTRIBUTEUR est la seule et unique garantie écrite offerte cependant savoir que Honda peut vous refuser le recours à la garantie si votre par Honda sur les moteurs à toutes fins Honda. Aucun concessionnaire, agent moteur pour produit mécanique ou l’une de ses pièces a fait l’objet d’emploi... -
Page 36: Systèmes Couverts Par Cette
Tubes, raccords, joints, garnitures et colliers de serrage associés aux systèmes indiqués. Remarque: Cette liste s'applique aux pièces fournies par Honda et ne couvre pas les pièces fournies par l'équipementier. Veuillez consulter la garantie de l'équipementier sur les émissions pour les pièces non fabriquées par Honda. -
Page 37: Introducción
Toda la información de esta publicación está basada en la información más reciente sobre el producto disponible en el momento de la impresión. Honda Motor Co., Inc. se reserva el derecho a realizar cambios en cualquier momento, sin aviso previo y sin incurrir en ninguna obligación. -
Page 38: Identificación: Componentes Y Contoles
INFORMACIÓN DE SEGURIDAD TYPE 2: CEBADOR MANUAL/ACELERACIÓN MANUAL • Comprenda el funcionamientode todos los controles y aprenda a parar el motor rápidamente en caso de emergencia. Asegúrese de que el operador reciba las instrucciones adecuadas antes de PALANCA DEL CEBADOR operar el equipo. -
Page 39: Comprobaciones Antes De La Operación
TYPE 6: ACELERACIÓN REMOTA/FRENO DE CUCHILLAS COMPROBACIONES ANTES DE LA OPERACIÓN (CONTROL DEL EQUIPO) ¿EL MOTOR ESTÁ LISTO PARA PARTIR? Para su seguridad, y para maximizar la vida útil del equipo, es muy importante tomarse unos minutos antes de operar el motor para PALANCA DEL comprobar su condición. - Page 40 TIPO 1: FRENO DEL VOLANTE/ACELERACIÓN REMOTA Parar el motor LENTO RÁPIDO Arranque de un motor 1. Mueva el control del CERRADA cebador/acelerador [2] 1. Gire la válvula de a la posición LENTO. ABIERTA combustible [1] a la posición ABIERTA. 2. Consulte el manual del 2.
- Page 41 TIPO 3: FRENO DEL VOLANTE/REMOTO CEBADOR/ 4. Arranque el motor. ACELERACIÓN FIJA Tipos con arrancador manual Arranque de un motor Tire suavemente de la empuñadura del arrancador hasta que APAGADO ENCENDIDO 1. Gire la válvula de combustible sienta resistencia. Entonces tire con fuerza (consulte el paso 4 del [1] a la posición ABIERTA.
- Page 42 TIPO 6: ACELERACIÓN REMOTA/FRENO DE CUCHILLAS TIPO 7: ARRANQUE ELÉCTRICO CON INTERRUPTOR DE ARRANQUE/CONTROL MANUAL DEL CEBADOR/ Arranque de un motor ACELERACIÓN PREAJUSTADA MONTADOS EN 1. Gire la válvula de combustible [1] a la posición ABIERTA. EL MOTOR 2. Mueva la palanca del RÁPIDO LENTO Arranque de un motor...
- Page 43 TIPO 8: AUTOMÁTICO CEBADOR/ACELERACIÓN FIJA Parar el motor LENTO RÁPIDO Arranque de un motor 1. Mueva el control del acelerador [2] a la 1. Gire la válvula de posición LENTO. combustible a la posición ABIERTA. 2. Mueva la palanca del freno del volante a la posición MARCHA.
-
Page 44: Servicio Del Motor
Honda para obtener los procedimientos de servicio. propietario. Consulte el manual del equipo o el manual del taller del motor Honda. Si no sigue este programa de mantenimiento pueden producirse fallas queno PRECAUCIONES DE SEGURIDAD entran en la garantía. -
Page 45: Aceite De Motor
anteriormente puede ocasionar problemas de arranque o de temperatura promedio en el área se encuentra entre los parámetros funcionamiento. También puede dañar las piezas de metal, goma y indicados. plástico del sistema de combustible. El daño al motor o los problemas de funcionamiento que resulten del uso de un combustible con porcentajes de etanol o metanol superiores a los mostrados anteriormente no están cubiertos por la garantía. -
Page 46: Filtro De Aire
Revisión del nivel de aceite FILTRO DE AIRE 1. Revise el aceite con el motor parado y nivelado. Un filtro de aire sucio restringirá el flujo de aire al carburador y causará el funcionamiento defectuoso del motor. Inspeccione el filtro 2. -
Page 47: Inspección Del Freno Del Volante
En algunas áreas, es ilegal operar un motor sin un o si el electrodo está desgastado. parachispas. Verifique las leyes y regulaciones locales. Los 4. Mida la separación de las puntas concesionarios de servicio autorizados Honda tienen disponibles del electrodo con un medidor parachispas. adecuado. La separación correcta es 0,70 ~ 0,80 mm. -
Page 48: Almacenaje Del Motor
ALMACENAJE DEL MOTOR Para impedir prolemas relacionados con el combustible: 1. Agregue el estabilizador para la gasolina siguiendo las Preparación del almacenaje instrucciones del fabricante. Una adecuada preparación del almacenaje es esencial para Cuando agregue un estabilizador para la gasolina, llene el tanque mantener al motor sin averías y con un buen aspecto. -
Page 49: Transporte
NÚMERO DE SERIE TIPO DE este motor para cualquier procedimiento que se recomiende en caso MOTOR de transporte. GCV160 __ __ __ __ __– __ __ __ __ __ __ __ __ __ __ OCUPARSE DE PROBLEMAS INESPERADOS GCV190 __ __ __ __ __– __ __ __ __ __ __... - Page 50 Especificaciones Especificaciones de afinamiento GCV160 ARTÍCULO ESPECIFICACIONES MANTENIMIENTO Abertura de la bujía 0,7 ~ 0,8 mm Consulte la Tipo Arrancador manual Arrancador eléctrico página 10. Largo x Ancho x Alto 367 x 331 x 360 mm 367 x 354 x 360 mm Holgura de la válvula...
- Page 51 ADVERTENCIA: Los bornes, las terminales y los accesorios Diagrama del cableado relacionados con la batería contienen plomo y compuestos de plomo. ARRANCADOR MANUAL Lávese las manos luego de tocarlos. NEGRO (Toda clase) 1. Conecte el cable positivo (+) de la batería usando el conector y aislador correspondientes al conector del arrancador suministrado.
-
Page 52: Información Del Consumidor
Honda de su localidad. Si todavía no está satisfecho después de hablar con el distribuidor de motor regional, podrá ponerse en contacto con la Oficina de Honda como se muestra. <Oficinas Honda>... - Page 53 Av. Interna 6-Predio A- Nova Veneza Phone:595-21-503-7921 Cep 13186-524, Sumare, Sp, Brasil CGC Fax:595-21-503-721 04.337.168/006-52 Guatemala Phone: 55-11-5576-5090 Agencia Y Fabrica Honda, S.A. (FAHonda Peru Fax:55-11-5574-1299 S.A.) Honda Del Peru (Hopesa) www.honda.com.br Boxes, Section 0315/ GUA Apartado Postal 1880, Av.
- Page 54 내에 있다는 증명서인 품질 보증서와 영수증을 지참하고 혼다범용엔진 딜러 또는 OEM제품을 구매한 딜러에게 방문하면 됩니다. 만일 그 딜러가 Honda 판단하여 엔진 수리가 필요할 경우 보증수리가 Honda 진행될 것입니다. Honda Motor Co., Ltd. Revised: March 2009 (PWL53374-B) Printed in U.S.A. ESPAÑOL...
- Page 55 ESPAÑOL...
- Page 56 Printed on Recycled Paper...