Dandy DPA120B3WDB Guide D'utilisation Et D'entretien

Manuels Connexes pour Dandy DPA120B3WDB


Sommaire des Matières pour Dandy DPA120B3WDB
-
Page 2: Ne Pas Retourner Cet Appareil Chez Le Détaillant Sans Consignes Supplémentaires
1-800-263-2629 (1-800-26-DANBY) DO NOT RETURN THIS UNIT TO THE RETAILER WITHOUT FURTHER INSTRUCTIONS Dear valued customer, we hope your Danby product purchase fulfills all your requirements. Your satisfaction is our priority! Please contact us at our toll free consumer service number for any inquiries you may have about your new unit. - Page 3 TO OBTAIN WARRANTY SERVICE YOU MUST PROVIDE A VALID PROOF OF PURCHASE. PLEASE STAPLE YOUR RECEIPT TO THIS PAGE FOR FUTURE REFERENCE. POUR OBTENIR LE SERVICE SUR GARANTIE, VOUS DEVEZ FOURNIR UNE PREUVE D’ACHAT VALIDE. VEUILLEZ AGRAFER VOTRE REÇU À CETTE PAGE POUR RÉFÉRENCE FUTURE.
-
Page 4: Table Des Matières
électrique ou de blessures aux personnes qui utilisent l’appareil. Si vous n’êtes pas certain que l’appareil est correctement mis à la terre, consultez un préposé du service qualifi é. Model Modèle • DPA120B3WDB / DPA120UB3WDB... -
Page 21: Bienvenue
Bienvenue Bienvenue dans la famille Danby. Nous sommes fiers de la qualité de nos produits et nous croyons fermement au serv- ice par une assistance fiable. Vous le découvrirez à la lecture de ce guide facile d’utilisation et vous en aurez la confir- mation par notre service d’assistance à... -
Page 22: Consignes De Sécurité Importantes
Consignes de sécurité importantes LISEZ TOUTE L’INFORMATION DE SÉCURITÉ AVANT UTILISATION Pour votre sécurité : Lisez ces instructions attentivement avant d’utiliser l’appareil et conservez-les afi n de pouvoir vous y référer ultérieurement. SUIVEZ TOUJOURS CES CONSIGNES PRÉCAUTIONS L’appareil doit être utilisé dans un endroit à l’abri de l’humidité, comme la DE SÉCURITÉ... - Page 23 Consignes de sécurité importantes LISEZ TOUTE L’INFORMATION DE SÉCURITÉ AVANT UTILISATION Pour votre sécurité: Lisez ces instructions attentivement avant d’utiliser l’appareil et conservez-les afi n de pouvoir vous y référer ultérieurement. ÉCONOMISEZ • Utilisez l’appareil dans des pièces des dimensions recommandées. •...
-
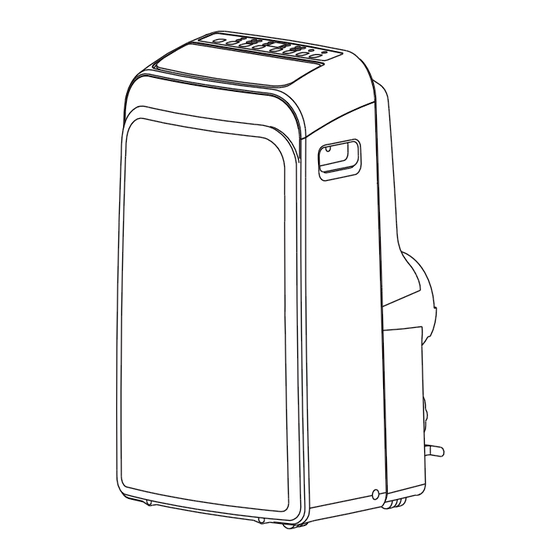
Page 24: Identification Des Pièces
Identifi cation des pièces ACCESSOIRES PIÈCES NOM DES PIÈCES QUANTITÉ -Tuyau d'évacuation et adapta- 1 ensemble teur (à embout rond) -Trousse de glissière pour fenêtre et vis Joint d’étanchéité en mousse 6 pièces Télécommange et pille (pour 1 ensemble les modèles télécommandés seulement) Tuyau de vidange 1 pièce... -
Page 25: L'identifi Cation Des Pièces
L’identifi cation des pièces ARRIÈRE REAR Upper air filter (Behind the grille) Filtre à air supérieur (derrière la grille) Fig.2 Upper air intake Supérieur entrée d’air Sortie d’air Air outlet Sortie du cordon d’alimentation Power cord outlet Power cord buckle (used only when storing Boucle du cordon d’alimentation (utilisé... - Page 26 Caractéristiques INSTRUCTIONS Bouton POWER (MARCHE/ARRÊT) Allume/éteint l’appareil. RELATIVES AUX COMMANDES Bouton SLEEP (SOMMEIL) Utilisé pour accéder au programme SOMMEIL. ÉLECTRONIQUES Bouton FAN (VENTILATEUR) Contrôle la vitesse du ventilateur. Appuyez sur ce bouton pour sélectionner la vitesse du ventilateur dans l’ordre suivant : BASSE (appuyes 1 fois), MOYENNE (appuyez 2 fois) et ÉLEVÉE (appuyez 3 fois).
-
Page 27: Consignes D'utilisation
Consignes d’utilisation MODE D’EMPLOI Fonction REFROIDISSEMENT -Appuyez sur le bouton « MODE » jusqu’à ce que l’indicateur lumineux « COOL » s’allume. -Appuyez sur les boutons fl èche ascendante ou descendante pour sélectionner la température de la pièce que vous désirez. La température peut être réglée entre 17°C et 30°C (62°F à... -
Page 28: Panne De Courant
Consignes d’utilisation MODE D’EMPLOI Fonction SOMMEIL Si vous appuyez sur ce bouton, la température sélectionnée augmentera (en mode refroidissement) de 1°C / 2°F en 30 minutes. La température sélectionnée augmen- tera (en mode refroidissement) encore de 1°C / 2°F au bout de 30 minutes supplé- mentaires. -
Page 29: Consignes D'installation
Consignes d’installation EMPLACEMENT • Le climatiseur doit être placé sur une fondation solide pour minimiser le bruit et les vibrations. Pour la sûreté, placez l’appareil sur un plancher lisse et de niveau, assez fort pour le supporter. • L’appareil est doté de roulettes pour faciliter son déplacement. Il ne doit être roulé... - Page 30 Consignes d’installation INSTALLATION DANS Mesurer le joint adhésif en mousse à la longueur du rebord de la fenêtre. Coupez le joint d’étanchéité en mousse (adhésif) à la longueur appropriée et UNE FENÊTRE À fi xez-le au rebord de la fenêtre. Fig. 9. GUILLOTINE DOUBLE 2.
-
Page 31: Installation Dans Une Fenêtre Coulissante
Consignes d’installation INSTALLATION DANS 1. Coupez le joint d’étanchéité en mousse (adhésif) à la longueur appropriée et fi xez-le au cardre de la fenêtre. Voir fi g. 13. UNE FENÊTRE 2. Fixez la trousse de glissière pour fenêtre au rebord de la fenêtre. Ajustez la COULISSANTE longueur de la trousse de glissière pour fenêtre en fonction de la hauteur de la fenêtre est inférieure à... -
Page 32: Installation Du Tuyau D'évacuation
Consignes d’installation INSTALLATION DU Le tuyau d’évacuation et l’adaptateur doivent être installés ou enlevés, selon le mode d’utilisation. TUYAU D’ÉVACUATION Mode REFROIDISSEMENT ou AUTOMATIQUE Installer Mode VENTILATEUR ou DÉSHUMIDIFICATION Enlever 1. Installez l’adaptateur d’évacuation pour fenêtre dans le tuyau d’évacuation, tel qu’illustré... - Page 33 Consignes d’installation DRAINAGE DE L’EAU •En mode déshumidifi cation, enlevez le supérieur bouchon de drainage A de l’arrière de l’appareil et installez le raccord de drain (raccord femelle universel 5/8 po) sur un tuyau de 3/4 po (non compris). Pour les modèles sans raccord de drain, fi...
-
Page 34: Soins Et Entretien
Soins et entretien AVERTISSEMENT 1. Veillez à débrancher l’appareil avant de le nettoyer ou de procéder à son entretien. 2. N’utilisez pas d’essence, de diluant ou d’autres produits chimiques pour nettoyer l’appareil. 3. Ne lavez pas l’appareil directment sous le robinet ou à l’aide d’un tuyau : vous pourriez vous électrocuter ou causer un incendie. -
Page 35: Dépannage
Dépannage De temps en temps, un problème est mineur et un appel de service peut ne pas être nécessaire. Utilisez ce guide de dépannage pour trouver une solution possible. Si l’unité continue de fonctionner incorrectement, appelez un dépôt de service autorisé ou le numéro sans frais de Danby pour obtenir de l’assistance. Tel: 1-800-26- (1-800-263-2629) PROBLÈME... -
Page 36: Garantie
GARANTIE LIMITÉE SUR LIMITED IN-HOME APPLIANCE WARRANTY APPAREIL ÉLECTROMÉNAGER À DOMICILE This quality product is warranted to be free from manufacturer’s defects in material and workmanship, provided that the unit is used under the normal operating conditions intended by the manufacturer. Cet appareil de qualité... - Page 37 NOTES / REMARQUES : __________________________________________________________________________________________ __________________________________________________________________________________________ __________________________________________________________________________________________ __________________________________________________________________________________________ __________________________________________________________________________________________ __________________________________________________________________________________________ __________________________________________________________________________________________ __________________________________________________________________________________________ __________________________________________________________________________________________ __________________________________________________________________________________________ __________________________________________________________________________________________ __________________________________________________________________________________________ __________________________________________________________________________________________ __________________________________________________________________________________________ __________________________________________________________________________________________ __________________________________________________________________________________________ __________________________________________________________________________________________ __________________________________________________________________________________________ __________________________________________________________________________________________ __________________________________________________________________________________________ __________________________________________________________________________________________ __________________________________________________________________________________________...
- Page 38 NOTES / REMARQUES : __________________________________________________________________________________________ __________________________________________________________________________________________ __________________________________________________________________________________________ __________________________________________________________________________________________ __________________________________________________________________________________________ __________________________________________________________________________________________ __________________________________________________________________________________________ __________________________________________________________________________________________ __________________________________________________________________________________________ __________________________________________________________________________________________ __________________________________________________________________________________________ __________________________________________________________________________________________ __________________________________________________________________________________________ __________________________________________________________________________________________ __________________________________________________________________________________________ __________________________________________________________________________________________ __________________________________________________________________________________________ __________________________________________________________________________________________ __________________________________________________________________________________________ __________________________________________________________________________________________ __________________________________________________________________________________________ __________________________________________________________________________________________...
- Page 39 NOTES / REMARQUES : __________________________________________________________________________________________ __________________________________________________________________________________________ __________________________________________________________________________________________ __________________________________________________________________________________________ __________________________________________________________________________________________ __________________________________________________________________________________________ __________________________________________________________________________________________ __________________________________________________________________________________________ __________________________________________________________________________________________ __________________________________________________________________________________________ __________________________________________________________________________________________ __________________________________________________________________________________________ __________________________________________________________________________________________ __________________________________________________________________________________________ __________________________________________________________________________________________ __________________________________________________________________________________________ __________________________________________________________________________________________ __________________________________________________________________________________________ __________________________________________________________________________________________ __________________________________________________________________________________________ __________________________________________________________________________________________ __________________________________________________________________________________________...
- Page 40 • Part Description • Numéro de pièce • Description de la pièce 1-800-26- (1-800-263-2629) Model • Modèle DPA120B3WDB DPA120UB3WDB Printed in China Danby Products Limited, Guelph, ON, Canada N1H 6Z9 Imprimé en Chine Danby Products Inc., Findlay, Ohio, USA 45840...