Table des Matières
Publicité
Les langues disponibles
Les langues disponibles
Liens rapides
JENN-AIR
®
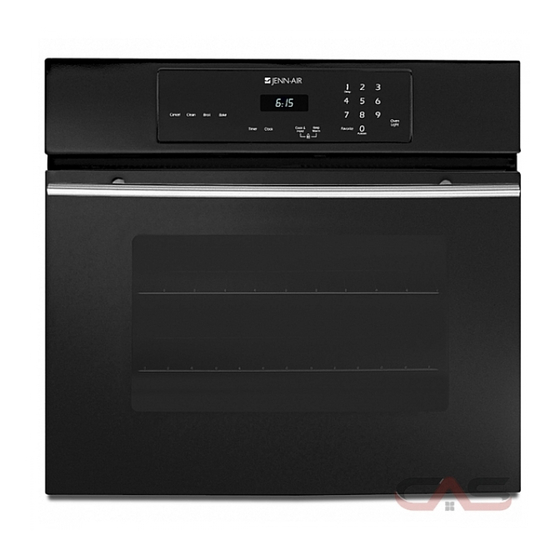
BUILT-IN ELECTRIC OVEN
FOUR ÉLECTRIQUE ENCASTRÉ JENN-AIR
®
Installation Instructions and Use & Care Guide
For questions about features, operation/performance, parts, accessories, or service in the U.S.A., call:
1-800-688-1100 or visit our website at www.jennair.com.
In Canada, call: 1-800-807-6777, or visit our website at www.jennair.ca.
Instructions d'installation et Guide d'utilisation et d'entretien
Au Canada, pour assistance, installation ou service, composez le 1-800-807-6777 ou visitez notre site web à www.jennair.ca.
Table of Contents/Table des matières ................... 2
W10176680A
Publicité
Table des Matières
Dépannage

Manuels Connexes pour Jenn-Air JJW8330DDS


Sommaire des Matières pour Jenn-Air JJW8330DDS
- Page 1 JENN-AIR ® BUILT-IN ELECTRIC OVEN FOUR ÉLECTRIQUE ENCASTRÉ JENN-AIR ® Installation Instructions and Use & Care Guide For questions about features, operation/performance, parts, accessories, or service in the U.S.A., call: 1-800-688-1100 or visit our website at www.jennair.com. In Canada, call: 1-800-807-6777, or visit our website at www.jennair.ca.
-
Page 2: Table Des Matières
TABLE OF CONTENTS TABLE DES MATIÈRES OVEN SAFETY ................2 SÉCURITÉ DU FOUR ..............18 ELECTRONIC OVEN CONTROLS..........4 COMMANDES ÉLECTRONIQUES DU FOUR ......19 Display..................5 Afficheur ..................20 Cancel ..................5 Annulation...................20 Clock ....................5 Horloge ..................20 Oven Light ..................5 Lampe du four ................20 Tones....................5 Signaux sonores.................20 Fahrenheit and Celsius..............5 Fahrenheit et Celsius..............20 Timer.....................5... -
Page 3: Important Safety Instructions
IMPORTANT SAFETY INSTRUCTIONS WARNING: To reduce the risk of fire, electrical shock, Keep Oven Vent Ducts Unobstructed. injury to persons, or damage when using the oven, follow Placement of Oven Racks – Always place oven racks in basic precautions, including the following: desired location while oven is cool. -
Page 4: Electronic Oven Controls
ELECTRONIC OVEN CONTROLS This manual covers several different models. The oven(s) you have purchased may have some or all of the items listed. The locations and appearances of the features shown here may not match those of your model. Single Oven Control A. -
Page 5: Display
Adjusting Sound Level Display The oven is factory set for medium (MEd) but can be changed to low (LO) or high (HI). When power is first supplied to the oven, a flashing time will 1. Press and hold DELAY and upper oven CANCEL for appear on the display. -
Page 6: 12-Hour Shut-Off
To Unlock Control Panel and Both Oven Doors: ADJUSTMENT °F COOKS FOOD 1. Press and hold upper oven CANCEL and COOK & HOLD for (ADJUSTMENT °C) 3 seconds. “OFF” disappears from the display and “LOCK” flashes while the controls and oven doors are unlocking. 10°F (5°C) ...a little more 20°F (10°C) -
Page 7: Bakeware
Traditional Cooking Bakeware FOOD RACK POSITION* The bakeware material affects cooking results. Follow Large cuts of meat and turkey, custard manufacturer’s recommendations and use the bakeware size pies, dessert soufflé recommended in the recipe. Use the following chart as a guide. Roasting small cuts of meat, cakes in BAKEWARE/ RECOMMENDATIONS... -
Page 8: Oven Vent
Oven Vent Broiling Broiling uses direct radiant heat to cook food. The lower the temperature, the slower the cooking. Thicker cuts and unevenly shaped pieces of meat, fish and poultry may cook better at lower broiling temperatures. For best results, use a broiler pan and grid. It is designed to drain juices and help avoid spatter and smoke. -
Page 9: Broiling Chart
BROILING CHART When using more than one rack, position bakeware/ cookware on the racks to allow movement of the fan Broil times are based on a 4 minute preheat. For best results, circulated air around the food. See the “Positioning Racks place food 3"... -
Page 10: Keep Warm™ Feature
2. Enter the roasting time using the number pads. Time can be “WARM” and the temperature will be displayed while Keep set from 10 minutes (00:10) to 11 hours, 59 minutes (11:59). Warm™ setting is active. If preheating is required, add 15 minutes to the programmed To Cancel Keep Warm™... -
Page 11: Automatic Shut-Off/Sabbath Mode
3. While “DELAY” is still flashing, press COOK & HOLD. Pressing Cancel or Stop will cancel a Bake cycle, however “HOLD,” “DELAY,” “00:00,” and “UPPER” or “LOWER” will the control will stay in the Sabbath Mode. flash in the display. If power fails, the oven will power up in Sabbath Mode with 4. -
Page 12: Oven Care
When the Cooking Time has Elapsed: To cancel a Favorite cycle: The selected function will turn off and “HOLD,” “WARM,” and 1. Press CANCEL. “170°” (“75°” Celsius) will appear in the display. The stored Favorite cycle will not be affected. After 1 hour in Hold Warm: 2. -
Page 13: General Cleaning
When the self-clean cycle ends: After 4 seconds, “CLEAN,” “DELAY,” and “UPPER” or “LOWER” will light and “LOCK” will flash in the display. When “LOCK” will turn off approximately 1 hour after the end of the both oven doors lock, “LOCK” will stop flashing and stay lit to clean cycle. -
Page 14: Oven Lights
Oven Lights Oven Door The oven lights are standard 40-watt appliance bulbs. They will For normal oven use, it is not suggested to remove the oven door. come on when the oven door is opened. They will not work However, if removal is necessary, make sure the oven is off and during the Self-Cleaning cycle. -
Page 15: Troubleshooting
TROUBLESHOOTING Try the solutions suggested here first in order to avoid the cost of an unnecessary service call. Nothing will operate Oven cooking results not what expected Has a household fuse blown, or has a circuit breaker Is the range level? Level the range. See the Installation tripped? Replace the fuse or reset the circuit. -
Page 16: Assistance Or Service
In the second through fifth years from the date of purchase, when this appliance is operated and maintained according to instructions attached to or furnished with the product, Jenn-Air will pay for factory specified parts for the following components (if applicable to the... - Page 17 5. Cosmetic damage, including scratches, dents, chips or other damage to the finish of your major appliance, unless such damage results from defects in materials or workmanship and is reported to Jenn-Air within 30 days from the date of purchase.
-
Page 18: Sécurité Du Four
SÉCURITÉ DU FOUR Votre sécurité et celle des autres est très importante. Nous donnons de nombreux messages de sécurité importants dans ce manuel et sur votre appareil ménager. Assurez-vous de toujours lire tous les messages de sécurité et de vous y conformer. Voici le symbole d’alerte de sécurité. -
Page 19: Commandes Électroniques Du Four
En Californie, la loi “Safe Drinking Water and Toxic Enforcement Act” stipule la publication par le Gouverneur de la Californie d’une liste des substances connues comme cause de cancer, défauts congénitaux ou autres effets néfastes sur la reproduction, et exige que les entreprises signalent les risques d’exposition à de telles substances. AVERTISSEMENT : Ce produit contient un composé... -
Page 20: Afficheur
Afficheur Signaux sonores Lors de la mise sous tension initiale de le four, une heure Les signaux sonores indiquent ce qui suit : clignotante apparaît sur l'afficheur. Voir la section "Horloge" pour Fonctions basiques régler l'heure. Un signal sonore unique Si une heure clignotante apparaît à... -
Page 21: Verrouillage Du Tableau De Commande Et De La Porte Du Four
Ajustement du calibrage de la température du four : Verrouillage du tableau de commande et 1. Appuyer sur la touche de cuisson appropriée BAKE. de la porte du four 2. Entrer 550 à l'aide des touches numériques. 3. Appuyer sur la touche BAKE pendant quelques secondes ou La porte et les commandes du four peuvent être verrouillées afin jusqu’à... -
Page 22: Ustensiles De Cuisson
NOMBRE POSITION SUR LA GRILLE Positions de la grille D'USTENSIL 3 ou 4 Dans les coins opposés sur chaque grille. S’assurer qu’aucun ustensile de cuisson ne se trouve directement au-dessus d’un autre. Pour obtenir de meilleurs résultats lorsque l’on cuit des gâteaux sur 2 grilles, utiliser les grilles 20 et 4 pour la cuisson normale et la cuisson par convection (sur certains modèles). -
Page 23: Recommandations
100°F (35°C) ou la température réelle du four, si elle est USTENSILES DE RECOMMANDATIONS supérieure à 100°F (35°C), s'affiche. La température CUISSON/RÉSULTATS augmente par tranches de 5° jusqu'à ce que la température préréglée soit atteinte. Plats en verre, Peut nécessiter de réduire vitrocéramique ou légèrement la température Compter 8 à... -
Page 24: Cuisson Par Convection
Cuisson au gril : Au cours de la fonction Convect (convection), l'élément en anneau fonctionne, avec le ventilateur, pour fournir une source 1. Appuyer sur la touhe BROIL du four supérieur ou inférieur. indirecte de chaleur dans la cavité du four. Si la porte du four est “BROIL”... -
Page 25: Caractéristique Keep Warm™ (Maintien Au Chaud)
2. Sélectionner la température du four. 6. “ROAST” cesse de clignoter et s'allume sur l'afficheur. Appuyer sur AUTOSET pour 350°F (175°C) ou sur les touches 100°F (35°C) ou la température réelle du four, si elle est numériques appropriées. Chaque pression supplémentaire supérieure à... -
Page 26: Cuisson Et Maintien Au Chaud
Réglage du programme Cook & Hold différé : Cuisson et maintien au chaud Avant le réglage, s'assurer que l'horloge est réglée à l'heure exacte. Voir la section “Horloge”. 1. Appuyer une fois sur DELAY pour le four supérieur et deux AVERTISSEMENT fois pour le four inférieur. -
Page 27: Programme Favoris
Le programme d'autonettoyage et le verrouillage Mise en marche d'un programme Favoris : automatique de la porte ne fonctionnement pas pendant le 1. Appuyer sur FAVORITE. mode Sabbat. La durée et la température pour le programme Cook & Hold En appuyant sur Cancel ou Stop, on annule un programme réglé... - Page 28 Préparation du four : 4. Pour choisir un réglage de nettoyage autre que le réglage moyen, appuyer sur AUTOSET pour faire défiler les réglages Sortir du four la lèchefrite, la grille et les ustensiles de cuisson d'autonettoyage. au four et, sur certains modèles, la sonde thermométrique. HVy (saleté...
-
Page 29: Nettoyage Général
Lorsque le programme d'autonettoyage commence : CAVITÉ DU FOUR “DELAY” s'éteint et la durée de nettoyage s'affiche. Lorsque le programme d'autonettoyage est terminé : Ne pas utiliser les nettoyants à four. “LOCK” s'éteint environ une heure après la fin du programme de Les renversements d’aliments devraient être nettoyés lorsque le nettoyage. -
Page 30: Dépannage
3. À l’aide d’un tournevis Phillips, ôter la vis ainsi que la plaque de couvre-charnière situées au-dessus de chaque gâche de loquet de porte, dans le châssis du four. Réinstallation : 1. Saisir la porte de chaque côté. 2. Aligner les charnières avec les gâches de charnières situées dans le châssis du four et insérer les extrémités de charnières dans les gâches. -
Page 31: Assistance Ou Service
Le service doit être fourni par une compagnie de service désignée par Jenn-Air. Cette garantie limitée est valide uniquement aux États-Unis ou au Canada et s’applique exclusivement lorsque l’appareil est utilisé... -
Page 32: Clause D'exonération De Responsabilité Au Titre Des Garanties Implicites; Limitation Des Recours
5. Les défauts apparents, notamment les éraflures, les bosses, fissures ou tout autre dommage au fini du gros appareil ménager, à moins que ces dommages soient dus à des vices de matériaux ou de fabrication et soient signalés à Jenn-Air dans les 30 jours suivant la date d’achat.