LENCO DIR-170WA Mode D'emploi
Masquer les pouces Voir aussi pour DIR-170WA:

Publicité

Les langues disponibles
  • FR

Les langues disponibles

Liens rapides

Model: DIR-170WA
User manual – Internet Radio with DAB+, FM and Bluetooth
Gebruikshandleiding – Internetradio met DAB+, FM en Bluetooth
Bedienungsanleitung – Internetradio mit DAB+, FM und Bluetooth
Mode d'emploi – Radio Internet avec DAB+, FM et Bluetooth
Manual de usuario – Radio Internet con DAB+, FM y Bluetooth
1

Publicité

Table des Matières
loading

Sommaire des Matières pour LENCO DIR-170WA

  • Page 1 Model: DIR-170WA User manual – Internet Radio with DAB+, FM and Bluetooth Gebruikshandleiding – Internetradio met DAB+, FM en Bluetooth Bedienungsanleitung – Internetradio mit DAB+, FM und Bluetooth Mode d’emploi – Radio Internet avec DAB+, FM et Bluetooth Manual de usuario – Radio Internet con DAB+, FM y Bluetooth...
  • Page 2: Table Des Matières

    Index English ..............................3 Nederlands ............................28 Deutsch ..............................53 Français ..............................80 Español ..............................106 Version 1.0...
  • Page 3: English

    English DIR-170WA CAUTION: Usage of controls or adjustments or performance of procedures other than those specified herein may result in hazardous radiation exposure. This unit should not be adjusted or repaired by anyone except qualified service personnel. PRECAUTIONS BEFORE USE KEEP THESE INSTRUCTIONS IN MIND: Do not use this device near water.
  • Page 4 17. * Devices with class 1 construction should be connected to a main socket outlet with a protective earthed connection. 18. * Devices with class 2 construction do not require a earthed connection. 19. Keep away from rodents. Rodents enjoy biting on power cords. 20.
  • Page 5 39. Only use attachments/accessories specified by the manufacturer. 40. Refer all servicing to qualified service personnel. Servicing is required when the apparatus has been damaged in any way, such as the power supply cord or the plug, when liquid has been spilled or objects have fallen into the apparatus, when the apparatus has been exposed to rain or moisture, does not operate normally, or has been dropped.
  • Page 6: Product Overview

    Product Overview...
  • Page 7 1. Display 2. Standby button 3. Alarm button 4. Fav button 5. Sleep button 6. Vol+/Vol-/OK wheel 7. Previous button 8. Dimmer button 9. Next button 10. Home button 11. Telescopic Antenna 12. ON/OFF switch button 13. DC IN socket 14.
  • Page 8: Remote Control

    Remote Control 1. Standby button 2. Input letters and numbers 3. Navigate Up button 4. Navigate Left button 5. Navigate Right button 6. Navigate Down button 7. OK button 8. Play/pause button 9. Stop button 10. Go back/forward button 11. Vol+/Vol- button...
  • Page 9: Initial Setup

    12. Home button 13. Mode button 14. Alarm button 15. Dimmer button 16. Sleep button 17. Mute button 18. Fav. button 19. Fav.+ button 20. EQ set tone 21. Language selection button Note: the cursor buttons (3, 4, 5, 6) on the remote control can also be used to navigate through the system menus.
  • Page 10 Do you want to check the WIFI network availability when powering on the device? Use the Navigation (6) wheel to select the desired option and press the Navigation (6) wheel to confirm. Now you can configure the wireless network. 1. Select YES if you want to continue and connect to your WIFI network using the standard method.
  • Page 11 Network configuration 1. Standard network configuration After selecting this option the DIR-170 will scan for available WIFI networks. The display will show the networks it found. Select your WIFI network by turning the Navigation/OK (6) wheel and confirm by pressing the Navigation/OK (6) wheel.
  • Page 12: Internet Radio

    If you want to enter the password directly on the DIR-170 front panel, you can turn the Navigation(6) wheel to select the first character and then press the button(9) to move forward to the next character. To make a correction, press the button (7) to go back and delete the last character at the same time.
  • Page 13 You can add favorites when playing the station you want to add as favorite or add them directly from the ‘Radio Station/Music’ list. Select with the navigation wheel(6) and press/hold “Fav” on the device or Navigation buttons on the Remote and then press the “Fav+” button. You can replace already saved favorites with a new favorite station.
  • Page 14: Media Center

    Local Radio: The Stations are categorized to the country/location in which the unit is operated. Sleep Radio: You can choose Birds, Piano, Rain, Spa, Space, and Wave as sleep radio. History: List of the ten recently listened stations. Service: Search radio station: Enter a stations name/keyword to search through the list of all radio stations.
  • Page 15 UPnP If you have set up shared media in your network, than you should see it by choosing UPnP. If you have more than one computer sharing media, these will also be shown. Select the shared media you want to play. Use Play/Pause, Next/Prev and Stop.
  • Page 16: Information Center

    INFORMATION CENTER Weather Information There are weather information and forecasts for 2000 cities. Select the country and then the city for the weather details. Press to see the weather forecasts. The device is able to display the weather information in the standby mode. On the weather information page, press OK to set the city to show in the standby mode.
  • Page 17: Configuration

    CONFIGURATION Time Display Analog/digital My MediaU When it is enabled, my mediaU will show on the main menu. If various mediaU accounts exist in the Radio, Select the default login account in here. Network Wireless Network Configuration: Enable/disable WiFi network. When you enable the WiFi network, the system will automatically select the required AP.
  • Page 18 Alarm There are 3 independent Alarms which can be set. 2 different Alarms (Alarm 1, Alarm 2) and one NAP alarm which is a countdown alarm which can be used when doing a quick sleep. Press the Alarm button on the remote control to enter the alarm settings menu directly and follow the following steps.
  • Page 19 Timer Countdown timer (max. 100min) Language English/Deutsch/Espanol/Francais/Portugese/Nederlands/Italiano/Pyccknn/ Svenska/Norske/Dansk/Magyar/Cesky/Slovensky/Polski/Turkce/Suomi Dimmer Power Saving/Turn On Display Color/Monochrome Power Management This option configures when the DIR-170 should go into standby mode. You can select Turn off/5 minutes/15 minutes/30 minutes. When configured, the DIR-170 will switch to standby when no music is played for the configured time.
  • Page 20 Resume When Power On The system default setting is to resume the internet radio playback if you were listening to internet radio or media center before switching off the unit. If you turn this option off, the system will return to the main menu when switching on the unit again.
  • Page 21 UPnP Connect your PC to the network. Ensure the Radio is powered on and connected to the same network. Open the UPnP platform Windows Media Player (11 or later), other platforms or servers such as Windows Media Connection may be used. Allow to share your media to the DIR-170.
  • Page 22: Bluetooth

    Activate the Bluetooth pairing mode of your phone/tablet and search the for the name Lenco DIR-170 on your phone/tablet. Then click it to pair. When successfully connected It will make a connected sound. You now can play music via...
  • Page 23 FM (RADIO) Select ‘FM mode’ from the main menu by using the navigation wheel(6) or with the navigation buttons on the remote. Press the navigation wheel(6) to enter the FM radio mode. The FM mode will start on 87.5MHz. To save all stations with strong signal, press the navigation wheel(6), it will show “auto scan?” choose YES.
  • Page 24 DAB+ (DIGITAL RADIO) Select ‘DAB/DAB+’ on the main display screen by turning the knob and pressing the navigation knob or with the remote navigation buttons. On first use of the DAB on your radio, your radio will begin scanning for DAB stations and will show’ Scanning’...
  • Page 25 Use only the power supply listed in these user instructions. GUARANTEE Lenco offers service and warranty in accordance with the European law, which means that in case of repairs (both during and after the warranty period) you should contact your local dealer.
  • Page 27: Disposal Of The Old Device

    In so doing, you will help to conserve natural resources and improve standards of environmental protection in treatment and disposal of electrical waste (Waste Electrical and Electronic Equipment Directive). SERVICE For more information and helpdesk support, please visit www.lenco.com Lenco Benelux BV, Thermiekstraat 1a, 6361 HB Nuth, The Netherlands.
  • Page 28: Nederlands

    Nederlands DIR-170WA LET OP: Gebruik van bedieningen of afstellingen of uitvoer van procedures anders dan gespecificeerd in deze documentatie kan leiden tot blootstelling aan schadelijke straling. Dit apparaat dient uitsluitend te worden aangepast of gerepareerd door gekwalificeerd onderhoudspersoneel. VOORZORGSMAATREGELEN VOOR GEBRUIK ONTHOUD DE VOLGENDE INSTRUCTIES: Gebruik dit apparaat niet in de buurt van water.
  • Page 29 14. Dit apparaat moet werken op een voedingsbron, zoals aangegeven op het specificatieplaatje. Als u twijfelt over het type voeding dat gebruikt wordt in uw huis, raadpleeg dan uw dealer of plaatselijk energiebedrijf. 15. *Het stopcontact moet in de buurt van de apparatuur zijn geïnstalleerd en eenvoudig te bereiken zijn.
  • Page 30: Installatie

    33. Dit product is alleen voor niet-professioneel gebruik bedoeld en niet voor commercieel of industrieel gebruik. 34. Verzeker u ervan dat het apparaat in een stabiele positie staat opgesteld. Schade, veroorzaakt door het gebruik van dit product in een onstabiele positie, of door het niet naleven van waarschuwingen of voorzorgsmaatregelen genoemd in deze handleiding, valt niet onder de garantie.
  • Page 31: Productoverzicht

    Productoverzicht...
  • Page 32 1. Scherm 2. Stand-by-toets 3. Alarmtoets 4. Favorietentoets 5. Slaap-toets 6. Vol+/Vol-/OK-Knop 7. Vorige-toets 8. Dimmertoets 9. Volgende-toets 10. Home-toets 11. Uitschuifbare antenne 12. AAN-/UIT-schakelaartoets 13. DC-ingang 14. Lijnuitgang (3,5mm) 15. AUX-ingang (3,5mm) 16. USB-poort 17. Voorkeuzetoetsen...
  • Page 33 Afstandsbediening 1. Stand-by-toets 2. Letters en cijfers invoeren 3. Navigatietoets Omhoog 4. Navigatietoets Links 5. Navigatietoets Rechts 6. Navigatietoets Omlaag 7. OK-toets 8. Afspelen/Pauzeren-toets 9. Stop-toets 10. Terug-/Vooruittoets 11. Toets Vol+/Vol-...
  • Page 34 12. Home-toets 13. Modus-toets 14. Alarmtoets 15. Dimmertoets 16. Slaap-toets 17. Demptoets 18. Favorietentoets 19. Fav+ toets 20. EQ Voor het instellen van de toon 21. Toets voor taalselectie Opmerking: de cursortoetsen (3, 4, 5, 6) op de afstandsbediening kunnen ook worden gebruikt om de systeemmenu's te navigeren.
  • Page 35 Wilt u de beschikbaarheid van WiFi-netwerken controleren wanneer het apparaat wordt ingeschakeld? Gebruik het Navigatiewieltje (6) om de gewenste optie te selecteren en druk vervolgens ter bevestiging op het Navigatiewieltje (6). U kunt nu het draadloze netwerk configureren. 1. Selecteer YES (Ja) als u verder wilt gaan en verbinding wilt maken met uw WiFi-netwerk op de gebruikelijke wijze.
  • Page 36 Netwerkconfiguratie 1. Standaard netwerkconfiguratie De DIR-170 zal naar beschikbare WiFi-netwerken zoeken nadat u deze optie selecteert. De display zal de gevonden netwerken weergeven. Selecteer uw WiFi-netwerk door het Navigatiewieltje/OK (6) te draaien en ter bevestiging op het Navigatieknop/OK (6) te drukken. Als uw geselecteerde WiFi-netwerk een wachtwoord vereist, dan kunt u deze op het volgende scherm invoeren.
  • Page 37: Internet Radio

    Als u het wachtwoord direct op het voorpaneel van de DIR-170 wilt invoeren, dan kunt u het Navigatiewieltje (6) draaien om het eerste karakter te selecteren en vervolgens op de toets (9) drukken om verder te gaan naar het volgende karakter. U kunt iets corrigeren door op de toets (7) te drukken om terug te gaan en tegelijkertijd het laatste karakter te wissen.
  • Page 38 U kunt favorieten toevoegen terwijl het station dat u als favoriet wilt opslaan wordt afgespeeld of u kunt favorieten direct toevoegen uit de lijst ‘Radio Station/Music’ (Radiostation/Muziek). Selecteer met het Navigatiewieltje (6), houd “Fav” op het apparaat of de Navigatietoetsen op de afstandsbediening ingedrukt en druk vervolgens op de toets “Fav+”.
  • Page 39 Druk op om het submenu ervan te openen. Wanneer u Auto Scan kiest, dan zal elk station in deze subcategorie 30 seconden lang worden afgespeeld totdat alle stations zijn afgespeeld. U kunt de automatische scanfunctie annuleren door op “OK” te drukken. Druk op de toets informatie te bekijken over het actieve radiostation.
  • Page 40 USB: Steek een USB- geheugenstick-in de USB-poort (16) en selecteer vervolgens USB in het MEDIACENTRUM. De DIR-170 zal de inhoud inlezen van het USB-geheugenapparaat. Browse folders/bestanden met het Navigatiewieltje (6) of de navigatietoetsen op de afstandsbediening. Het scherm toont de map en de bestandsnamen (niet noodzakelijk namen van tracks). Nadat u eenmaal een track hebt gevonden die u wilt afspelen, druk dan op het Navigatiewieltje op het apparaat of op OK op de afstandsbediening.
  • Page 41 Mijn MediaU Weergave en afspelen van uw eigen mediaU-stationslijst op de mediaU-server. Stel eerst uw account in. Volg de stappen hieronder om uw eigen stationslijst te activeren: Ga naar http://www.mediayou.net/. Word lidt van “mediaU”. Meld aan op de website; Voer het draadloze MAC-adres van de radio in op de mediaU website. Deze informatie is te vinden in het menu ->...
  • Page 42 Systeeminformatie U kunt hier de details bekijken van uw DIR-170 apparaat en de softwareversie en WiFi-informatie vinden. De informatie bevat het unieke MAC-adres dat u nodig hebt wanneer u uw “My MediaU” (Mijn MediaU) lidmaatschap registreert. CONFIGURATIE Tijdweergave Analoog/digitaal MY mediaU Wanneer ingeschakeld, dan zal Mijn MediaU in het hoofdmenu worden beheren weergegeven.
  • Page 43 ○ AAN Tips: Wanneer “ON” (Aan) is geselecteerd, dan zal de tijd één uur later zijn dan de huidige tijd. ○ UIT Tips: Wanneer “OFF” (Uit) is geselecteerd, dan zal de tijd hetzelfde zijn als de huidige tijd. Als de modus “Daylight Saving Time (DST)” (Zomertijd (DST)) als was geactiveerd en u kiest ”OFF”...
  • Page 44 Gebruik de omhoog-/omlaagtoetsen om de gewenste minuten in te stellen. Kies uit 5/10/20/30/60/90 of 120 minuten en druk vervolgens op de toets ‘ok’ om te selecteren Druk op de linker naviatietoets om terug te keren naar het hoofdscherm. Wanneer het DUJT-alarm is geactiveerd, dan zult u rechtsonder in de hoek een klokicoontje zien met de resterende tijd.
  • Page 45 Energiebeheer Deze optie configureert wanneer de DIR-170 op stand-by-modus moet worden geschakeld. U kunt Turn off (Uitschakelen)/5 minuten/15 minuten/ 30 minuten selecteren. Wanneer geconfigureerd, dan zal de DIR-170 op stand-by schakelen nadat er voor de ingestelde tijd geen muziek wordt afgespeeld. Kies de instelling Turn off (Uitschakelen) om de stand-by-functie te annuleren.
  • Page 46 Hervatten bij inschakelen Het systeem is standaard ingesteld om het afspelen van de internetradio te hervatten als u naar de internetradio of het mediacentrum luisterde voordat het apparaat werd uitgeschakeld. Als u deze optie uitschakelt, dan zal het systeem terugkeren naar het hoofdmenu wanneer u het apparaat weer inschakelt.
  • Page 47 Zoek en installeer apps in Google Play, die media delen. Voeg de audiobestanden van uw mobiel die u wilt delen toe. Nadat de gedeelde server is ingesteld, kies de muziek en regel het afspelen op de DIR-170 DLNA De DIR-170 ondersteunt naast UPnP ook de DLNA-functie; u deelt de muziekbestanden direct via pc of mobiele Android-telefoon.
  • Page 48: Bluetooth

    Activeer de Bluetooth- paringmodus van uw telefoon/tablet en zoek op uw telefoon/tablet naar de naam Lenco DIR-170. Klik vervolgens op deze naam om te paren. Er zal na een geslaagde verbinding een verbindingsgeluid klinken.
  • Page 49 FM-radio Selecteer ‘FM mode’ (FM-modus) in het hoofdmenu met het Navigatiewieltje (6) of met de navigatietoetsen op de afstandsbediening. Druk op het Navigatiewieltje (6) om de FM-radiomodus te openen. De FM-modus zal starten op 87,5MHz. Druk op het Navigatiewieltje (6) en kies YES (Ja) wanneer “auto scan?” verschijnt om alle stations met een krachtig signaal op te slaan.
  • Page 50 DAB+ (DIGITALE RADIO) Selecteer ‘DAB/DAB+’ op het hoofdscherm door de knop te draaien en op de navigatieknop of navigatietoetsen op de afstandsbediening te drukken. Wanneer u de DAB-functie op uw radio voor het eerst gebruikt, dan zal de radio beginnen naar DAB- stations te zoeken terwijl ’Scanning’...
  • Page 51: Garantie

    DAB/DAB+ voorkeuzestations herroepen Bekijk uw favoriete DAB/DAB+ stations in de DAB-modus door op de toets ‘Fav’ te drukken en de opgeslagen stations te doorlopen. Technische specificaties Network (Netwerk) 802.11b/g/n (WLAN) encryptie: WEP, WPA, WPA 2(PSK), WPS Streaming UPnP, DLNA Ondersteunde WMA, MP3, FLAC, AAC bestandtypes Aansluitingen...
  • Page 52: Verwijderen Van Het Oude Apparaat

    Lenco biedt service en garantie aan overeenkomstig met de Europese wetgeving. Dit houdt in dat u, in het geval van reparaties (zowel tijdens als na de garantieperiode), contact moet opnemen met uw lokale handelaar. Belangrijke opmerking: Het is niet mogelijk om producten die moeten worden gerepareerd rechtstreeks naar Lenco te sturen.
  • Page 53: Deutsch

    Deutsch DIR-170WA ACHTUNG: Die zweckentfremdete Bedienung, Benutzung oder Einstellung der Prozeduren kann zu gefährlichen Unfällen durch Strahlen führen. Dieses Gerät darf außer von qualifizierten Fachleuten von niemand anderem repariert oder eingestellt werden. VORSICHTSMASSNAHMEN VOR DER BENUTZUNG BEFOLGEN SIE IMMER FOLGENDE ANWEISUNGEN: Benutzen Sie das Gerät nicht in der Nähe von Wasser.
  • Page 54 14. Dieses Gerät ist durch eine Stromquelle wie auf dem Typenschild angegeben zu betreiben. Halten Sie bei Unsicherheiten über die Art Ihrer Stromversorgung in Ihrer Wohnung Rücksprache mit Ihrem Händler oder Ihrer Stromzuliefererfirma. 15. *Die Wandsteckdose muss sich in der Nähe des Geräts befinden und einfach zu erreichen sein. 16.
  • Page 55 33. Dieses Produkt ist nur für den nicht-professionellen Gebrauch und nicht für gewerbliche oder industrielle Zwecke bestimmt. 34. Stellen Sie sicher, dass das Gerät in einer stabilen Position aufgestellt ist. Schäden, die durch Verwendung dieses Produkts in einer instabilen Position oder durch Nichtbeachtung der anderen in diesem Handbuch enthaltener Warnungen und Vorwarnung entstehen, werden nicht durch die Garantie abgedeckt.
  • Page 56: Produktübersicht

    Produktübersicht...
  • Page 57 1. Anzeige 2. Standby-Taste 3. Wecker-Taste 4. Favoriten-Taste 5. Abschaltautomatik-Taste 6. Lautstärke+/Lautstärke–/OK-Drehknopf 7. Zurück-Taste 8. Dimmer-Taste 9. Vor-Taste 10. Startseite-Taste 11. Teleskop-Antenne 12. EIN/AUS-Schalter 13. DC-Eingangsbuchse 14. LINE-Ausgangsbuchse (3,5 mm) 15. AUX-Eingangsbuchse (3,5 mm) 16. USB-Anschluss 17. Speicherplatz-Tasten...
  • Page 58 Fernbedienung 1. Standby-Taste 2. Ziffern- und Buchstabeneingabe 3. Nach-oben-Navigationstaste 4. Nach-links-Navigationstaste 5. Nach-rechts-Navigationstaste 6. Nach-unten-Navigationstaste 7. OK-Taste 8. Wiedergabe/Pause-Taste 9. Stopp-Taste 10. Zurück/Vorwärts-Taste 11. Lautstärke+/Lautstärke–-Taste...
  • Page 59 12. Startseite-Taste 13. Modus-Taste 14. Wecker-Taste 15. Dimmer-Taste 16. Abschaltautomatik-Taste 17. Stummschaltungs-Taste 18. Favoriten-Taste 19. Favoriten+-Taste 20. EQ-Auswahltaste 21. Sprachauswahltaste Hinweis: Die Cursortasten (3, 4, 5, 6) der Fernbedienung können ebenfalls für die Navigation durch die Systemmenüs verwendet werden. INBETRIEBNAHME Versichern Sie sich vor Inbetriebnahme des Geräts, das die auf dem Typenschild angegebene Spannung mit der Spannung vor Ort übereinstimmt.
  • Page 60 Möchten Sie die Verfügbarkeit des WLANs überprüfen lassen, wenn das Gerät eingeschaltet wird? Wählen Sie die gewünschte Option mit Hilfe des Navigationsdrehknopfes (6) aus und drücken Sie diesen anschließend, um Ihre Auswahl zu bestätigen. Jetzt können Sie das WLAN einrichten. 1.
  • Page 61: Netzwerkkonfiguration

    Netzwerkkonfiguration 1. Standard-Netzwerkeinrichtung Nach Auswahl dieser Option scannt das DIR-170 nach verfügbaren Netzwerken. Auf dem Display werden die gefundenen Netzwerke angezeigt. Wählen Sie Ihr WLAN aus, indem Sie den OK/Navigationsdrehknopf (6) drehen und diesen anschließend zur Bestätigung Ihrer Auswahl drücken. Wenn das von Ihnen gewählte WLAN ein Passwort erfordert, dann können Sie dies im nächsten Bildschirm eingeben.
  • Page 62 Wenn Sie das Passwort direkt am vorderen Bedienfeld des DIR-170 eingeben möchten, dann können Sie den Navigationsdrehknopf (6) drücken, um das erste Zeichen auszuwählen. Drücken Sie anschließend die -Taste (9), um zum nächsten Zeichen zu springen. Drücken Sie zum Korrigieren die -Taste (7), um zurückzugehen und dabei das letzte Zeichen zu löschen.
  • Page 63 Favoriten Das sind Ihre bevorzugten Senderspeicherplätze. Hier können bis zu 250 Einträge gespeichert werden. Halten Sie „Fav“ am Gerät oder „Fav+“ auf der Fernbedienung gedrückt, um diesen Internetradiosender den Favoriten hinzuzufügen. Sie können Favoriten während der Wiedergabe des Senders, den Sie den Favoriten hinzufügen möchten, hinzufügen oder das Hinzufügen direkt von der Radiosender-/Musikliste aus durchführen.
  • Page 64 Radiosender/Musik Radiosender werden in die Unterkategorien Top 20 weltweit, Genre, Land/Standort (Afrika, Asien, Europa, Mittlerer Osten, Nordamerika, Ozeanien/Pazifik und Südamerika) und Highlights eingeteilt. Drücken Sie den Navigationsdrehknopf (6) oder „OK“ auf der Fernbedienung, um eine Unterkategorie und anschließend einen Sender für die Wiedergabe auszuwählen. Drücken Sie für jeden Sender den Navigationsdrehknopf (6) am Gerät oder „OK“...
  • Page 65 MEDIENCENTER Mit dem Mediencenter kann Musik von USB oder UPnP wiedergegeben werden. Verwenden Sie den Navigationsdrehknopf (6) oder die Navigationstasten der Fernbedienung, um eine der nachstehenden Funktionen auszuwählen: USB: Stecken Sie einen USB-Stick in den USB-Port (16) und wählen Sie dann im Mediencenter USB aus. Das DIR-170 liest nun den Inhalt des USB-Sticks ein.
  • Page 66 Wiedergabeliste: Sie können eine Wiedergabeliste Ihrer Lieblings-UPnP-Musik erstellen. Sie können die aktuell ausgewählte Musik der Wiedergabeliste hinzufügen. Halten Sie dafür den OK/Navigationsdrehknopf (6) am Gerät oder die „OK“-Taste der Fernbedienung gedrückt, um sie in der Wiedergabeliste zu speichern. Wiedergabeliste löschen Bitte wählen Sie diese Option, wenn Sie die Wiedergabeliste leeren möchten.
  • Page 67: System Information

    INFORMATIONSZENTRUM Wetterinformationen Es sind Wetterinformationen und Wettervorhersagen für 2000 Städte verfügbar. Wählen Sie zuerst ein Land und danach eine Stadt für die Wetterinformationen aus. Drücken Sie für die Wettervorhersage Das Gerät kann Wetterinformationen auch im Standby-Modus anzeigen. Drücken Sie auf der Seite Weather Information (Wetterinformationen) OK, um die Stadt für die Wetterinformationsanzeige im Standby-Modus auszuwählen.
  • Page 68 Einstellungen Zeitanzeige Analog/Digital My mediaU Bei Aktivierung wird my mediaU im Hauptmenü angezeigt. Wenn im Radio verschiedene mediaU-Konten vorhanden sind, wählen Sie hier das Standard-Anmeldekonto aus. Netzwerk Funknetzwerkkonfiguration: Aktivieren/Deaktivieren des Funknetzwerkes. Wenn Sie WLAN aktivieren, wählt das System automatisch den erforderlichen AP aus. Geben Sie das WEP- bzw. WPA-Passwort ein, um sich mit dem Funknetzwerk zu verbinden.
  • Page 69 ○ AUS Tipp: Wenn „OFF“ (AUS) ausgewählt ist, dann ist diese Uhrzeit identisch mit der natürlichen Uhrzeit. Wenn Sie die Funktion „Daylight Saving Time(DST)“ (Sommerzeitumstellung) aktiviert haben und nun „OFF“ (AUS) auswählen, dann wird die Uhrzeit um eine Stunde zurückgestellt. Mit anderen Worten, die Uhrzeit ist dieselbe wie die natürliche Uhrzeit.
  • Page 70 Wiederholen Sie die vorstehenden Schritte, um wecker 2 einzustellen Einstellen des Kurzschlafweckers Drücken Sie am Gerät oder auf der Fernbedienung die Taste „Alarm“. Wählen Sie NAP alarm (Kurzschlafwecker) aus Wählen Sie mit Hilfe der nach-oben- und nach-unten-Taste die gewünschten Minuten aus. Ihnen stehen die Auswahlen 5/10/20/30/60/90 und 120 Minuten zur Verfügung.
  • Page 71 Energieeinstellungen Diese Option legt fest, wann das DIR-170 in den Standby-Modus wechseln soll. Sie können aus Turn off (ausgeschaltet)/5 min/15 min/ 30 min auswählen. Nach erfolgter Einstellung wechselt das DIR-170 automatisch in den Standby-Modus, wenn innerhalb der eingestellten Zeit keine Musik wiedergegeben wurde.
  • Page 72 Fortsetzen Der Wiedergabe nach Einschalten Die Standardeinstellung des Systems ist die Wiederherstellung der Internetradiowiedergabe, wenn Sie vor dem Ausschalten des Geräts entweder über das Internetradio oder das Mediencenter Musik gehört haben. Wenn Sie diese Funktion ausschalten, dann wechselt das Gerät zum Hauptmenü, wenn Sie es wieder einschalten.
  • Page 73 Sie können ebenfalls Musikstreams von anderen Musikservern wie beispielsweise von einem Smartphone (Android-Plattform) genießen. Verbinden Sie Ihr Mobilgerät mit dem Netzwerk Suchen Sie auf Google Play Mediensharing-Apps und installieren Sie eine von ihnen. Fügen Sie die Audiodateien Ihres Mobilgerätes hinzu, welche Sie gemeinsam nutzen möchten. Wählen Sie die Musik nach erfolgter Einrichtung des freigebenden Servers aus und steuern Sie die Wiedergabe über Ihr DIR-170.
  • Page 74 Wenn Sie ein Android-Mobilgerät, Tablet-PC oder iPhone/iPad benutzen, können Sie freie oder kostenpflichtige DLNA-Apps auf Google Play oder Apple Store suchen und von dort aus auch installieren. Es ist empfehlenswert, auf Android-Mobilgeräten und Tablet-PCs bubble UPnP oder Twonky Beam und auf iPhone/iPad Twonky Beam zu verwenden. Möglicherweise unterstützen nicht alle APPs das Musikstreaming vom iPhone/iPod, aber Sie können Ihr iPhone/iPod auch zur Kontrolle des Musikstreamings von anderen Servern verwenden.
  • Page 75: Bluetooth

    Bluetooth über das Hauptmenü aus. Es ertönt ein Klang, der bedeutet, dass der Kopplungsmodus aktiviert wurde. Aktivieren Sie nun den Bluetooth-Kopplungsmodus Ihres Telefons/Tablet-PCs und suchen Sie in der Liste gefundener Geräte Ihres Telefons/Tablet-PCs nach dem Namen Lenco DIR-170. Klicken Sie ihn an, um zu koppeln. Es ertönt der Verbunden-Klang, wenn die Verbindung erfolgreich war.
  • Page 76 Halten Sie zum Speichern die Taste „Fav“ ca. 1 bis 2 Sekunden lang gedrückt, woraufhin im Display die Zahl „01“ angezeigt wird. Navigieren Sie mit Hilfe des Navigationsdrehknopfes durch die Speicherplatznummern (bis max. 99) und wählen Sie durch Drücken des Navigationsdrehknopfes (6) die Speicherplatznummer aus, auf der Sie den Sender speichern möchten.
  • Page 77 Belegen der Speicherplätze mit favorisierten DAB/DAB+-Radiosendern Wenn Sie Ihren gewünschten Radiosender gefunden haben, dann halten Sie „Fav“ ein paar Sekunden lang gedrückt, um zum Bildschirm „Add to my Favorites“ (Zu meinen Favoriten hinzufügen) zu wechseln. Drehen Sie den Navigationsdrehknopf (6), um eine Speicherplatznummer (bis max. 99) auszuwählen und bestätigen Sie durch Drücken des Navigationsdrehknopfes (6) Ihre Auswahl.
  • Page 78: Garantie

    Reparaturen (sowohl während als auch nach Ablauf der Garantiezeit) sollten Sie deshalb Ihren Einzelhändler kontaktieren. Wichtiger Hinweis: Es ist nicht möglich, Geräte für Reparaturen direkt an Lenco zu schicken. Wichtiger Hinweis: Falls dieses Gerät von einem nicht autorisierten Kundendienst geöffnet oder darauf zugegriffen wird, erlischt die Garantie.
  • Page 79 SERVICE Besuchen Sie bitte für weitere Informationen und unseren Kundendienst unsere Homepage www.lenco.com Lenco Benelux BV, Thermiekstraat 1a, 6361 HB Nuth, The Netherlands.
  • Page 80: Français

    Français DIR-170WA ATTENTION : L’utilisation de commandes ou de réglages ou l’exécution de procédures autres que ceux spécifiés dans ce manuel peut entraîner une exposition à des rayonnements dangereux. Cet appareil ne doit pas être réglé ou réparé par quiconque d’autre que du personnel qualifié.
  • Page 81 15. *La prise secteur doit être installée près de l’appareil et doit être facilement accessible. 16. *Ne surchargez pas les prises de courant ou les rallonges. Une surcharge peut entraîner un incendie ou une électrocution. 17. *Les appareils à la norme de construction de classe 1 doivent être branchés à une prise de courant disposant d’une connexion protectrice à...
  • Page 82 35. Ne retirez jamais le boîtier de l’appareil. 36. Ne placez jamais cet appareil sur un autre appareil électrique. 37. N’utilisez et ne rangez pas ce produit dans un endroit ensoleillé, chaud, très poussiéreux ou soumis à des vibrations excessives. 38.
  • Page 83: Présentation Du Produit
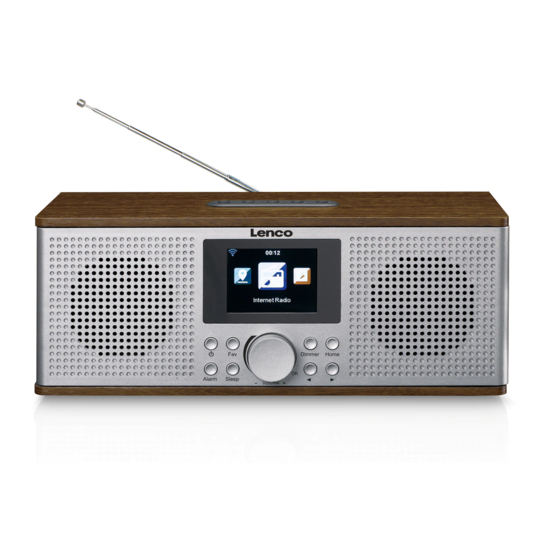
    Présentation du produit...
  • Page 84 1. Affichage 2. Bouton veille 3. Bouton Alarme 4. Bouton Favoris 5. Bouton Veille 6. Molette Vol+/Vol-/OK 7. Bouton Précédent 8. Bouton Variateur 9. Bouton suiv 10. Bouton Accueil 11. Antenne télescopique 12. Interrupteur MARCHE/ARRÊT 13. Prise d’entrée CC 14. Prise de sortie de ligne (3,5 mm) 15.
  • Page 85: Télécommande

    Télécommande 1. Bouton veille 2. Saisir des lettres et des chiffres 3. Bouton de navigation Haut 4. Bouton de navigation Gauche 5. Bouton de navigation Droite 6. Bouton de navigation Bas 7. Bouton OK 8. Bouton Lecture/pause 9. Bouton Arrêt 10.
  • Page 86: Paramétrage Initial

    12. Bouton Accueil 13. Bouton Mode 14. Bouton Alarme 15. Bouton Variateur 16. Bouton Veille 17. Bouton Sourdine 18. Bouton Favoris 19. Bouton Fav+ 20. Réglage de la totalité de l'égaliseur 21. Bouton de sélection de langue Remarque : les boutons de navigation (3, 4, 5 et 6) de la télécommande peuvent également servir à...
  • Page 87 Voulez-vous vérifier la disponibilité des réseaux Wi-Fi lors de la mise en marche de l’appareil ? Utilisez la molette de navigation (6) pour sélectionner l’option voulue, et appuyez sur la molette de navigation (6) pour confirmer. Vous pouvez maintenant configurer le réseau sans fil. 1.
  • Page 88 Configuration de réseau 1. Configuration réseau standard Après que vous avez sélectionné cette option, le DIR-170 recherchera les réseaux Wi-Fi disponibles. Les réseaux trouvés s’afficheront. Sélectionnez votre réseau Wi-Fi en tournant la molette de navigation/OK (6) et confirmez en appuyant sur la molette de navigation/OK (6). Si votre votre réseau Wi-Fi sélectionné...
  • Page 89: Radio Internet

    Si vous voulez saisir le mot de passe directement sur la façade du DIR-170, vous pouvez tourner la molette de navigation (6) pour sélectionner le premier caractère et appuyer sur le bouton (9) pour avancer jusqu’au prochain caractère. Pour faire une correction, appuyez sur le bouton (7) pour revenir en arrière et effacer le dernier caractère en même temps.
  • Page 90 Pour ajouter une station de radio favorite, maintenez enfoncé « Fav » sur l’appareil ou « Fav.+ » sur la télécommande pour sauvegarder la station parmi vos favoris. Vous pouvez ajouter des favoris en écoutant les stations à ajouter parmi les favoris ou les ajouter directement à...
  • Page 91 Station radio/Musique Les stations de radio sont classées en sous-catégories : Top 20 mondial, Genre, Pays/lieu (Afrique, Asie, Europe, Moyen-Orient, Amérique du Nord, Océanie/Pacifique et Amérique du Sud) et Résumé. Appuyez sur la molette de navigation (6) ou « OK » sur la télécommande, afin de sélectionner les sous-catégories et choisir une station à...
  • Page 92: Centre Multimédia

    CENTRE MULTIMÉDIA Le centre multimédia vous permet de lire de la musique à partir d’une clé USB ou de UPnP. Utilisez la molette de navigation (6) ou les boutons de navigation de la télécommande pour sélectionner l’une des fonctions suivantes : USB : Branchez une clé...
  • Page 93 Ma liste de lecture : Vous pouvez créer une liste de lecture de vos musiques UPnP favorites. Vous pouvez ajouter la musique active à la liste de lecture. Pour ce faire, maintenez enfoncée la molette de navigation (6)/OK sur l’appareil ou maintenez enfoncé le bouton « OK » sur la télécommande pour enregistrer la musique dans «...
  • Page 94: Centre D'informations

    CENTRE D’INFORMATIONS Weather Information (Informations météorologiques) Il existe des informations et prévisions météorologiques pour 2 000 villes. Sélectionnez le pays puis la ville pour les détails de la météo. Appuyez sur pour consulter les prévisions météorologiques. L’appareil peut afficher les informations météorologiques en mode veille. Sur la page des informations météorologiques, appuyez sur OK pour régler la ville à...
  • Page 95: Désactivé

    CONFIGURATION Affichage de l'heure Analogique/numérique My MediaU Quand my mediaU est activé, il s’affiche dans le menu d’accueil. Si plusieurs comptes mediaU existent dans la radio, sélectionnez le compte d’identification par défaut ici. Réseau Configuration du réseau sans fil : Activez/désactivez le réseau WiFi. Si vous activez le réseau Wi-Fi, le système sélectionnera automatiquement l'AP requise.
  • Page 96 Réveil 3 alarmes indépendantes peuvent être réglées. 2 alarmes différentes (Alarm 1, Alarm 2 (Alarme 1, Alarme 2)) et une NAP alarm (Alarme de sieste) qui est une alarme de compte à rebours qui peut être utilisée lors d’une courte sieste. Appuyez sur la touche Alarm de la télécommande pour accéder directement au menu des paramètres d’alarme et suivez les étapes suivantes.
  • Page 97 Minuteur Compte à rebours (max. 100 min) English/Deutsch/Espanol/Francais/Portugese/Nederlands/Italiano/ Langue Pyccknn/Svenska/Norske/Dansk/Magyar/Cesky/Slovensky/Polski/Turkce/ Suomi Gradateur de lumière Économie d’énergie/Activation Affichage Couleur/monochrome Gestion d’alimentation Cette option configure le moment où le DIR-170 doit se mettre en mode veille. Vous pouvez sélectionner Turn off (désactiver)/ 5 minutes/ 15 minutes/ 30 minutes.
  • Page 98 Configurer la lecture Sélectionnez le mode de lecture du centre multimédia. Vous pouvez sélectionner : Off (désactivé) (ni répétition ni ordre aléatoire), Repeat all (répéter tout), Repeat one (répéter une piste) ou Shuffle (aléatoire). Appareil Le nom par défaut de l’appareil DIR-170 pour DLNA est « AirMusic ». Vous pouvez le renommer pour la configuration DLNA sur un ordinateur ou un appareil mobile.
  • Page 99 Ouvrez la plateforme UPnP Windows Media Player (11 ou ultérieur), ou bien vous pouvez utiliser d’autres plateformes ou serveurs tels que Windows Media Connection. Autorisez le partager de votre contenu multimédia vers le DIR-170. Ajoutez les fichiers audio et les dossiers à partager avec le DIR-170 vers la librairie multimédia. Vous pouvez également écouter de la musique en flux continu à...
  • Page 100 Vous pouvez rechercher et installer n'importe quelle application DLNA gratuite ou payante dans Google Play ou Apple Store si vous utilisez un mobile Android, une tablette ou un iPhone/iPad. Il est suggéré d'utiliser Bubble UPnP, Twonky Beam sur un mobile Android, une tablette ou Twonky Beam sur iPhone/iPad.
  • Page 101: Bluetooth

    Vous entendrez un son signifiant que le mode d’appariement est actif. Activez le mode d’appariement Bluetooth de votre téléphone/tablette et recherchez le nom Lenco DIR-170 votre téléphone/tablette. Ensuite, cliquez ici pour l’apparier. Quand la connexion est établie, un son indiquera que l’appareil est connecté.
  • Page 102 Vous pourrez ensuite naviguer parmi ces stations mémorisées en maintenant les boutons « < » ou « > » enfoncés pour basculer entre les stations mémorisées. Pour naviguer manuellement sur la fréquence FM, appuyez simplement sur les boutons « < » ou « > » pour reculer ou avancer sur l’onde de fréquence.
  • Page 103: Caractéristiques Techniques

    Pour revenir à la liste afin de naviguer manuellement, sélectionnez le bouton « < » pour revenir en arrière. Pour recommencer la recherche des stations, allez à la page de la liste principale pour les stations DAB et il y aura un message de rappel « Delete station list? » (Supprimer la liste des stations ?).
  • Page 104 Utilisez uniquement l’alimentation électrique indiquée dans ce mode d’emploi. GARANTIE Lenco propose un service et une garantie conformément à la législation européenne, ce qui signifie qu’en cas de besoin de réparation (aussi bien pendant et après la période de garantie), vous pouvez contacter votre revendeur le plus proche.
  • Page 105: Mise Au Rebut De L'appareil Usagé

    électriques (directive sur les déchets des équipements électriques et électroniques). SERVICE APRÈS-VENTE Pour en savoir plus et obtenir de l’assistance, visitez www.lenco.com Lenco Benelux BV, Thermiekstraat 1a, 6361 HB, Nuth, Pays-Bas.
  • Page 106: Español

    Español DIR-170WA PRECAUCIÓN: El uso de los controles o ajustes o el funcionamiento de los procedimientos excepto a aquellos especificados aquí pueden provocar una exposición peligrosa a la radiación. Esta unidad no debe ajustarse o repararse por ninguna persona salvo personal de servicio cualificado.
  • Page 107 15. *La salida de la toma debe instalarse cerca del equipo y debe ser fácilmente accesible. 16. *No sobrecargue las tomas CA o los cables de extensión. La sobrecarga puede provocar un incendio o una descarga eléctrica. 17. *Los dispositivos con construcción Clase 1 deben estar conectados a una toma de corriente con una conexión a tierra protegida.
  • Page 108 35. No retire nunca la carcasa de este aparato. 36. Nunca coloque el aparato sobre otro equipo eléctrico. 37. No utilice ni guarde el producto en lugares expuestos a la luz solar directa, a altas temperaturas, a la vibración ni en ambientes excesivamente polvorientos. 38.
  • Page 109: Descripción General Del Producto

    Descripción general del producto...
  • Page 110 1. Pantalla 2. Botón de modo de espera 3. Botón alarma 4. Botón Favoritos 5. Botón de apagado automático 6. Dial de Vol+/Vol-/OK 7. Botón anterior 8. Botón regulador de brillo 9. Botón Siguiente 10. Botón de inicio 11. Antena Telescópica 12.
  • Page 111: Mando A Distancia

    Mando a distancia 1. Botón de modo de espera 2. Entrada de letras y números 3. Botón navegar hacia arriba 4. Botón navegar hacia la izquierda 5. Botón navegar hacia la derecha 6. Botón navegar hacia abajo 7. Botón OK 8.
  • Page 112: Configuración Inicial

    12. Botón de inicio 13. Botón de Modo 14. Botón alarma 15. Botón regulador de brillo 16. Botón de apagado automático 17. Botón Silencio 18. Botón Favoritos 19. Botón Fav. + 20. Tono de ecualizador 21. Botón de selección de idioma Nota: Los botones del cursor (3, 4, 5, 6) del mando a distancia asimismo pueden usarse para navegar por los menús del sistema.
  • Page 113 ¿Desea comprobar la disponibilidad de red WIFI cuando encienda el dispositivo? Use el dial de navegación (6) para seleccionar la opción que desee y pulse el dial de navegación (6) para confirmarlo. Ahora puede configurar la red inalámbrica. 1. Seleccione YES (Si) si desea continuar y conectarse a su red WIFI usando el método estándar. Use el dial de navegación (6) para confirmarlo.
  • Page 114 Configuración de red 1. Configuración de la red estándar Tras seleccionar esta opción, el DIR-170 buscará todas las redes WIFI disponibles. La pantalla mostrará las redes que encuentre. Seleccione su red WIFI girando el dial de navegación/OK (6) y confirmarlo pulsando el dial de navegación /OK (6).
  • Page 115: Radio Por Internet

    Si desea introducir la contraseña directamente en el panel frontal del DIR-170, puede girar el dial de navegación (6) para seleccionar el primer caracter y después pulsar el botón (9) para avanzar al siguiente caracter. Para realizar una corrección, pulse el botón (7) para ir hacia atrás y eliminar el ultimo caracter al mismo tiempo.
  • Page 116 Puede añadirla a favoritos cuando reproduzca la emisora que desee como favorita o añadirla directamente desde la lista de “Radio Station/Music (Emisora de radio / Música)”. Selecciónela con el dial de navegación (6) y mantenga pulsado “Fav” en el dispositivo o los botones de navegación en el mando a distancia, posteriormente pulse el botón “Fav+”.
  • Page 117: Centro Multimedia

    Pulse para entrar en su submenú. Cuando elija Auto Scan (búsqueda automática), reproduce cada emisora en esta subcategoría durante 30 segundos hasta que se han reproducido todas las emisoras. Puede cancelar la función de búsqueda automática pulsando “OK”. Pulse el botón para ver información acerca de la emisora de radio activa.
  • Page 118 USB: Inserte una memoria USB en la toma (16) y posteriormente seleccione USB del MEDIA CENTER (Centro multimedia). El DIR-170 leerá los contenidos de la memoria USB. Navegue por carpetas / archivos con el dial de navegación (6) o las teclas de dirección del mando a distancia.
  • Page 119: Centro De Información

    Mis mediosU Aquí se muestran y se reproducen sus propias emisoras mediaU en el servidor mediaU. Fije primero su cuenta. Para activar su propia lista de emisoras, siga los pasos que aparecen debajo: Acceda a http://www.mediayou.net/. Hágase miembro de Mis mediosU. Inicie sesión en la página web;...
  • Page 120 Información financiera Ver el índice bursátil. Información del sistema Aquí puede ver los detalles de su unidad DIR-170, encontrar la versión de software y la información WIFI. La información incluye la dirección MAC única que es necesario cumplimentar cuando se registre su membresía a “my mediaU”...
  • Page 121 Fecha y hora Configure la fecha y la hora Establezca el formato de visualización de la hora como 12 Hour (12 horas) o 24 Hour (24 horas) Ajuste el formato de fecha (AAAA/MM/DD-DD/MM/AAAA-MM/DD/AAAA) Tiempo de ahorro de luz diurna (DST) ○...
  • Page 122 Al seleccionar USB como sonido de despertador, puede seleccionar uno de los archivos de música almacenados en el dispositivo de memoria USB que se ha introducido. Repita los pasos anteriores para establecer la alarma 2 Configuración de la alarma NAP Pulse el botón "Alarm"...
  • Page 123 sistema detecte su ubicación actual. Si elige detector su ubicación automáticamente, el sistema detectará la ubicación conforme a la dirección IP de la red a la que está conectado. Pulse Emisora local para entrar directamente en la lista de emisoras de radio locales. Configuración de Seleccione el modo de reproducción del centro multimedia.
  • Page 124 Reanudar al encenderse La configuración por defecto del sistema es reanudar la reproducción de radio por Internet si escuchaba la radio por Internet o el centro multimedia antes de apagar la unidad. Si apaga esta opción, el sistema volverá al menú principal cuando vuelva a encender la unidad.
  • Page 125 Conecte el móvil a la red Busque en la Google Play aplicaciones para compartir contenidos multimedia e instálelas. Agregue los archivos que desee compartir desde su móvil. Tras configurar el servidor compartido, elija la música y controle la reproducción del DIR-170 DLNA Además de UPnP, el DIR-170 es compatible con la funcionalidad DLNA;...
  • Page 126 Oirá un sonido, lo que significa que el modo de emparejamiento está activo. Active el modo de emparejamiento Bluetooth de su teléfono / tableta y busque el nombre de Lenco DIR-170 en su teléfono / tableta. Posteriormente, haga clic para emparejarlo. Cuando se haya conectado correctamente.
  • Page 127 RADIO FM Seleccione “FM mode” del menú principal usando el dial de navegación (6) o usando los botones de navegación del mando a distancia. Gire el dial de navegación (6) para entrar en el modo radio FM. El modo FM se iniciará en 87.5MHz. Para guardar todas las emisoras con una señal fuerte, gire el dial de navegación (6);...
  • Page 128 DAB+ (RADIO DIGITAL) Seleccione “DAB/DAB+” en la pantalla principal girando el dial y pulsando el dial de navegación o con los botones de navegación del mando a distancia. Cuando se usa por primera vez DAB en la radio, la radio empezará a buscar emisoras DABH y la pantalla mostrará...
  • Page 129: Adaptador De Corriente

    Use únicamente la alimentación que se enumera en estas instrucciones de usuario. GARANTÍA Lenco ofrece servicio y garantía en cumplimiento con las leyes de la Unión Europea, lo cual implica que, en caso de que su producto precise ser reparado (tanto durante como después del periodo de garantía), deberá...
  • Page 130 Este aparato no es adecuado para el uso profesional. En caso de darle un uso profesional, todas las obligaciones de garantía del fabricante quedarán anuladas.
  • Page 131 (Directiva sobre la Eliminación de Equipos Eléctricos y Electrónicos). SERVICIO Para obtener más información y soporte del departamento técnico, por favor, visite la página web www.lenco.com Lenco Benelux BV, Thermiekstraat 1a, 6361 HB, Nuth, Países Bajos.

Table des Matières