Sony CDX-GT310 Mode D'emploi
Table des Matières
Les langues disponibles
Les langues disponibles
Liens rapides
FM/AM
Compact Disc Player
Operating Instructions
Mode d'emploi
Owner's Record
The model and serial numbers are located on the bottom of the unit.
Record these numbers in the space provided below.
Refer to these numbers whenever you call upon your Sony dealer regarding this product.
Model No.
To cancel the demonstration (DEMO) display, see page 10.
Pour annuler l'affichage de démonstration (DEMO), reportez-vous à la page 10.
CDX-GT310
CDX-GT31W
© 2006 Sony Corporation
Serial No.
2-698-302-21 (1)
US
FR
Chapitres
Table des Matières
Dépannage

Manuels Connexes pour Sony CDX-GT310


Sommaire des Matières pour Sony CDX-GT310
- Page 18 (vendu séparément). Consultez votre détaillant agréé Sony le plus proche pour en savoir plus sur le fonctionnement du module tuner radio satellite. « SAT Radio », « SAT Radio Ready », les logos SAT Radio et SAT Radio Ready, ainsi que toutes les marques associées sont des marques de...
- Page 19 Table des matières Autres fonctions Félicitations ! ......4 Changement des réglages du son ... 9 Préparation Réglage des caractéristiques du son —...
-
Page 20: Félicitations
Félicitations ! Préparation Réinitialisation de l’appareil Nous vous remercions d’avoir fait l’acquisition de ce lecteur de disques compacts Sony. Ce lecteur vous offre les fonctions suivantes. Avant la première mise en service de l’appareil, • Lecture de CD ou après avoir remplacé la batterie du véhicule Vous pouvez lire des CD-DA (contenant ou modifié... -
Page 21: Réglage De L'horloge
Remarques Réglage de l’horloge • N’exercez pas de pression excessive sur la façade et la fenêtre d’affichage et ne l’échappez pas. • N’exposez pas la façade à une température ou à un L’horloge numérique fonctionne suivant un cycle taux d’humidité élevée. Évitez de la laisser dans un de 12 heures. -
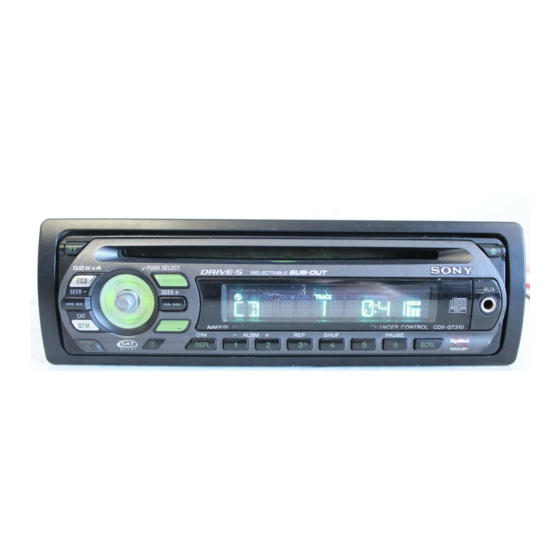
Page 22: Emplacement Des Commandes Et Opérations De Base
SEEK SEEK MODE ALBM SHUF PAUSE DSPL SCRL CDX-GT310 qfqg CDX-GT31W Mini-télécommande RM-X151 Pour plus de détails, reportez-vous aux numéros de pages indiqués. Les touches correspondantes de la mini-télécommande pilotent les mêmes fonctions que celles de l’appareil. A Touche OFF... - Page 23 K Touches SEEK –/+ Les touches suivantes de la mini-télécommande correspondent également à des touches/fonctions CD : différentes de celles de l’appareil. Retirez la Saut de plages (appuyez) ; saut de plages en feuille de protection avant de l’utiliser (page 4). continu (appuyez, puis appuyez de nouveau sur la touche dans un délai d’environ qk Touches <...
-
Page 24: Rubriques D'affichage
Radio Pour plus de détails sur la sélection d’un Mémorisation et réception des changeur CD/MD, reportez-vous à la page 11. stations Rubriques d’affichage Attention Pour syntoniser des stations pendant que vous conduisez, utilisez la fonction de mémorisation des meilleurs accords (BTM) afin d’éviter tout accident. -
Page 25: Réception Des Stations Mémorisées
Autres fonctions Réception des stations mémorisées Changement des réglages du Sélectionnez la bande, puis appuyez sur une touche numérique ((1) à (6)). Syntonisation automatique Réglage des caractéristiques du son — BAL/FAD/SUB Sélectionnez la bande, puis appuyez Vous pouvez régler la balance gauche-droite, sur (SEEK) –/+ pour rechercher la l’équilibre avant-arrière, ainsi que le volume du station. -
Page 26: Réglage Des Paramètres De Configuration
Tournez la molette de réglage du AUX-A* (AUX audio) volume pour régler le paramètre Pour régler l’affichage de la source AUX à sélectionné. « AUX-A-ON » ( ) ou « AUX-A-OFF » Le niveau de volume peut être réglé par (page 11). -
Page 27: Utilisation D'un Équipement En Option
Changeur CD/MD Utilisation d’un équipement en option Sélection du changeur 1 Appuyez plusieurs fois sur (SOURCE) Appareil audio auxiliaire jusqu’à ce que « CD » ou « MD » apparaisse. En raccordant un appareil audio portatif en 2 Appuyez plusieurs fois sur (MODE) jusqu’à option à... -
Page 28: Informations Complémentaires
• Les disques de forme non standard (ex. : en forme Informations complémentaires de cœur, de carré ou d’étoile) ne peuvent pas être lus avec cet appareil. Vous risquez d’endommager Précautions votre appareil si vous essayez de le faire. N’utilisez pas de tels disques. •... -
Page 29: Ordre De Lecture Des Fichiers Mp3
: 300 (lorsqu’un nom de concernant cet appareil qui ne sont pas abordés dans fichier ou de dossier contient un grand nombre ce mode d’emploi, contactez votre détaillant Sony. de caractères, ce nombre peut être inférieur à 300). -
Page 30: Remplacement Du Fusible
Retirez l’appareil. également, il est possible que l’appareil soit défectueux. Dans ce cas, contactez 1 Insérez simultanément les deux clés de votre détaillant Sony le plus proche. déblocage jusqu’au déclic. Nettoyage des connecteurs L’appareil peut ne pas fonctionner correctement si Crochet tourné... -
Page 31: Amplificateur De Puissance
Changeur CD (6 disques) : CDX-T69 t Effectuez la lecture avec un changeur CD Sélecteur de source : XA-C40 compatible MP3 de Sony ou cet appareil. Sélecteur AUX-IN : XA-300 Adaptateur d’interface pour iPod : XA-110IP Aucun bip n’est émis. -
Page 32: Affichage Des Erreurs Et Messages
Les stations mémorisées sont effacées et Le son saute. l’heure est remise à zéro. • L’appareil est mal installé. t Installez l’appareil suivant un angle de moins de Le fusible a fondu. Émission de bruits lorsque la position de la clé 45°... - Page 33 Le mode de recherche locale est activé en cours de syntonisation automatique. Si ces solutions ne permettent pas d’améliorer la NO DISC situation, contactez votre détaillant Sony le plus Le disque n’a pas été inséré dans le changeur CD/MD. proche. t Insérez un disque dans le changeur.