GE JCBS250 Manuel Du Propriétaire
Masquer les pouces
Voir aussi pour JCBS250:
- Manuel d'utilisation (41 pages) ,
- Manuel d'utilisation (31 pages)
Table des Matières
Les langues disponibles
Les langues disponibles
www.GEAppliances.ca
Safety Information
. . . . . . . . . . . 2–5
Operating Instructions
Clock, Timer and
Convenience Outlet . . . . . . . . . . . . .15, 16
Controls . . . . . . . . . . . . . . . . . . . . . . . . . 9 - 11
Cookware . . . . . . . . . . . . . . . . . . . . . . . . . . . .7
Oven . . . . . . . . . . . . . . . . . . . . . . . . . . . .12–14
Sabbath Feature . . . . . . . . . . . . . . . .19, 20
Self-Cleaning . . . . . . . . . . . . . . . . . . . .22, 23
Special Features . . . . . . . . . . . . . . . . . . . .18
Surface Units . . . . . . . . . . . . . . . . . . . . . . 6, 8
Temperature Conversions . . . . . . . . . . 11
Thermostat . . . . . . . . . . . . . . . . . . . . . . . . .21
Timed Baking and Roasting . . . . . . . .17
Care and Cleaning
. . . . . . . . . 22–30
Troubleshooting Tips
Accessories
. . . . . . . . . . . . . . . . . . . . . . 36
Consumer Support
Consumer Support . . . . . . . . . . . . . . . . .40
Product Registration . . . . . . . . . . . . 37, 38
Warranty . . . . . . . . . . . . . . . . . . . . . . . . . . 39
Write the model and serial
numbers here:
Model # __________________
Serial # __________________
You can find them on a label,
behind the storage drawer
on the oven frame.
. . . . . . 31–35
183D6379P063
Owner's Manual
Coil Top and
Radiant Top Models
Standard
Self-Clean
Clean Models
Models
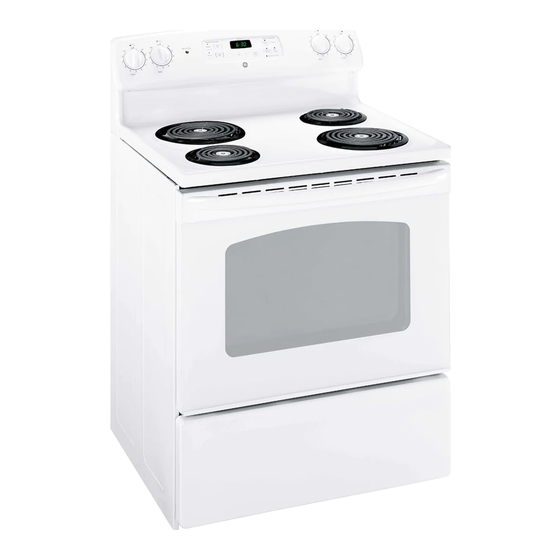
JCBS250
JCBP240
JCBP250
JCBS280
JCBS630
JCBP270
JCBS640
JCBP620
JCBP630
29-5716
Table des Matières
Dépannage

Manuels Connexes pour GE JCBS250


Sommaire des Matières pour GE JCBS250
-
Page 41: Table Des Matières
Contrôles ......9, 11 Conversions de température ..11 JCBP240 JCBS250 Éléments de surface ....6, 8 JCBP250 JCBS280 Réglage du thermostat... -
Page 42: Dispositif Antibasculement
CONSIGNES DE SÉCURITÉ IMPORTANTES. LISEZ TOUTES LES INSTRUCTIONS AVANT D’UTILISER VOTRE APPAREIL. AVERTISSEMENT! Lisez.toutes.les.consignes.de.sécurité.avant.d’utiliser.le.produit .Le.non-respect.de.ces.instructions.peut.entraîner. unincendie,.un.choc.électrique,.des.blessures.graves.ou.fatales DISPOSITIF ANTIBASCULEMENT Pour réduire le risque de basculement, la cuisinière doit être arrimée à un dispositif antibasculement correctement installé. Lisez les instructions d’installation détaillées qui sont livrées avec le dispositif avant de procéder à... -
Page 43: Consignes De Sécurité Générales
à la place de poignées. jusqu’à une température INTERNE d’au moins 80 °C (180 °F). N’utilisez jamais votre appareil pour chauffer ou réchauffer La cuisson à ces températures protège habituellement lapièce. contre les maladies d’origine alimentaire. CONSERVEZ LES MATÉRIAUX INFLAMMABLES À L’ÉCART AVERTISSEMENT! DE LA CUISINIÈRE... - Page 44 CONSIGNES DE SÉCURITÉ IMPORTANTES. LISEZ TOUTES LES INSTRUCTIONS AVANT D’UTILISER VOTRE APPAREIL. CONSIGNES DE SÉCURITÉ POUR LA SURFACE AVERTISSEMENT! DECUISSON Ne laissez jamais sans surveillance les éléments de surface Desustensiles de dimensions équivalentes à celles des àdes réglages moyens ou élevés. Les débordements élémentsde surface amélioreront également les résultats peuventproduire de la fumée et des projections de graisse de cuisson.
- Page 45 www.electromenagersge.ca CONSIGNES DE SÉCURITÉ POUR LE FOUR AVERTISSEMENT! Tirez la grille jusqu’au cran d’arrêt lorsque vous mettez Tenez-vous à l’écart de la cuisinière lorsque vous ouvrez laporte du four. De l’air chaud ou de la vapeur s’échappant desaliments dans le four ou les en retirez. Cela évite les brûluresdues à...
-
Page 46: Limiteur De Température
Utilisation des éléments radiants de surface. (sur certains modèles) À propos des éléments radiants de surface… Cuisson sur La surface de cuisson à éléments radiants est Les tâches d’eau (dépôts minéraux) peuvent la surface composée d’éléments de surface recouverts être enlevées à l’aide de la crème nettoyante d’une surface en verre lisse. -
Page 47: Conseils Pour Ustensiles De Cuisine De Surface
Choix de la catégorie d’ustensile de cuisine. www.electromenagersge.ca Les renseignements suivants vous aideront à choisir des ustensiles qui auront une bonne performance lors de leur utilisation avec des surfaces de cuisson en verre. Acier inoxydable : vitrifié. Il est recommandé de faire très attention si le récipient en fonte n’est pas complètement recommandé... -
Page 48: Voyants Lumineux
Utilisation des éléments de surface. Les caractéristiques et leur aspect, présentés dans ce manuel, peuvent varier du modèle qui est le vôtre. Réglage Appuyez sur le bouton et tournez-le dans une Aux positions OFF (ARRÊT) et HI (MAX.), direction ou l’autre jusqu’au réglage souhaité. la commande se met en place avec un déclic. - Page 49 Utilisation des commandes du four. www.electromenagersge.ca Les caractéristiques et leur aspect, présentés dans ce manuel, peuvent varier du modèle qui est le vôtre. modèles JCBS250, JCBS280, JCBS630 & JCBS640. modèles JCBP240, JCBP250, JCBP620 & JCBP630.
-
Page 50: Commandes Du Four, Horloge, Minuterie Et Réglages
modèle JCBP270. Commandes du four, horloge, minuterie et réglages Touche TIMER (MINUTERIE) Touche BAKE (CUIRE) Appuyez sur cette touche pour sélectionner Appuyez sur cette touche pour choisir la fonction de minuterie. Puis appuyez la fonction de cuisson. les touches + et – pour ajuster le temps. Voyant lumineux CUIRE Voyant lumineux TIMER (MINUTERIE) Clignote en mode d’édition vous pouvez... -
Page 51: Conversions De Température
www.electromenagersge.ca Commandes du four, horloge, minuterie et réglages Touche OFF (ARRÊT) Voyant lumineux AUTOMATIC OVEN (FOUR Appuyez sur cette touche pour annuler TOUS AUTOMATIQUE) les réglages du four à l’exception de l’horloge Ce voyant s’allume chaque fois que le four a été et de la minuterie. -
Page 52: Comment Régler Le Four Pour La Cuisson Ou Le Gril
Utilisation du four. Avant de commencer… ATTENTION : Quand vous Les grilles présentent des butées qui, si elles utilisez une grille dans la position la plus basse (R), sont placées correctement sur les supports, soyez prudent quand vous la retirez du four. Nous empêchent les grilles de sortir complètement vous recommandons de retirer la grille d’une dizaine et de basculer. -
Page 53: Préchauffage Et Placement Du Récipient
www.electromenagersge.ca Préchauffage et placement du récipient Préchauffez le four si la recette vous le Les résultats de cuisson seront meilleurs demande. Pour préchauffer le four, réglez-le si les ustensiles sont aussi centrés que possible sur la température appropriée. Le préchauffer dans le four. -
Page 54: Guide De Cuisson Au Gril
Utilisation du four. Guide de cuisson au gril La taille, le poids, l’épaisseur, la température initiale et vos préférences de degré de cuisson Quantité et/ou Position* Premier côté Deuxième côté affectent les durées de cuisson Aliment épaisseur de grille durée (mn) durée (mn) Commentaires au gril. -
Page 55: Pour Régler L'horloge
Utilisation de l’horloge, de la minuterie de cuisine, et de la prise confort. (sur certains modèles) www.electromenagersge.ca Tous les modèles n’ont pas toutes ces caractéristiques. Pour régler l’horloge Appuyez sur la touche START/ON (DÉPART) L’horloge doit être réglée à l’heure correcte pour que les fonctions automatiques de minutage du jusqu’à... -
Page 56: Pour Régler La Minuterie De Nouveau
Utilisation de l’horloge, de la minuterie de cuisine, et de la prise confort. (sur certains modèles) Tous les modèles n’ont pas toutes ces caractéristiques. Pour régler la minuterie de nouveau Si l’afficheur indique encore la durée restante, Si la durée restante n’apparaît pas à l’afficheur vous pouvez la changer en appuyant une fois (l’horloge, l’heure de la mise en marche différée sur la touche TIMER (MINUTERIE), puis en... -
Page 57: Comment Régler Une Mise En Marche Immédiate Et Un Arrêt Automatique
Utilisation des caractéristiques de cuisson et de rôtissage minutés. (sur certains modèles) www.electromenagersge.ca Ne verrouillez pas la porte du four pendant la cuisson minutée. Le verrou est utilisé uniquement pour l’autonettoyage. REMARQUE : Les aliments qui se gâtent facilement—tels que le lait, les oeufs, le poisson, la farce, les volailles et le porc—ne devraient pas rester dans le four plus d’une heure avant ou après la cuisson. -
Page 58: Arrêt Automatique Après 12 Heures
Caractéristiques spéciales des commandes de votre four. Votre nouveau tableau de commande à touches est doté de caractéristiques spéciales que vous souhaiterez peut-être utiliser. La section ci-dessous décrit ces caractéristiques et comment vous pouvez les activer. Les modes des caractéristiques spéciales peuvent seulement être activés quand l’afficheur indique l’heure du jour. Ils restent dans la mémoire du tableau de commande jusqu’à... -
Page 59: Caractéristique Sabbat
Utilisation de la caractéristique sabbat. (sur certains modèles) (Conçue pour être utilisée pendant le sabbat et les fêtes juives) www.electromenagersge.ca La caractéristique sabbat peut seulement être utilisée pour la cuisson courante et le rôtissage. Elle ne peut pas être utilisée pour la cuisson au gril, la cuisson différée ou l’autonettoyage. -
Page 60: Comment Sortir De La Caractéristique Sabbat
Utilisation de la caractéristique sabbat. (sur certains modèles) (Conçue pour être utilisée pendant le sabbat et les fêtes juives) Comment régler la mise en marche immédiate et l’arrêt automatique pour la cuisson/le rôtissage minutés REMARQUE : Pour comprendre le fonctionnement La température de départ préréglée du réglage du four, pratiquez en utilisant le mode sera automatiquement 175°C (350 °F). -
Page 61: Réglage Du Thermostat
Réglage du thermostat du four Faites-le vous-même! www.electromenagersge.ca Pour régler le thermostat sur les modèles avec les touches Appuyez simultanément sur les Une fois le réglage terminé, appuyez sur touches BROIL (GRIL) et BAKE (CUIRE) la touche START/ON (DÉPART) pour revenir pendant 3 secondes jusqu’à... -
Page 62: Avant L'autonettoyage
Utilisation du four autonettoyant. (sur certains modèles) Ne forcez jamais sur la poignée du verrou. Si vous forcez sur la poignée, vous risquez d’endommager le mécanisme de verrouillage de la porte. Vous devez fermer la porte du four et bien régler tous les contrôle pour permettre au cycle de bien fonctionner. -
Page 63: Comment Différer Le Début De L'autonettoyage
www.electromenagersge.ca Vous devez fermer la porte du four et bien régler tous les contrôle pour permettre au cycle de bien fonctionner. Comment différer le début de l’autonettoyage Appuyez sur la touche START TIME Vous pouvez régler le contrôle du four de (HEURE DE DÉPART). -
Page 64: Intérieur Du Four
Entretien et nettoyage de la cuisinière. Assurez-vous que toutes les commandes sont désactivées et que toutes les surfaces sont froides avant de nettoyer toute partie de la cuisinière. Si vous déplacez votre cuisinière pour quand la cuisinière est remise en place. la nettoyer, la réparer ou pour toute autre Si vous ne prenez pas cette précaution, raison, assurez-vous que le dispositif... -
Page 65: Porte De Four Amovible
www.electromenagersge.ca Porte du four amovible (sur certains modèles) La porte est très lourde. Faites attention lorsque Pendant que Bord Bras de vous enlevez et soulevez la porte. la porte est au inférieur charnière même angle de la fente Ne soulevez pas la porte par la poignée. que lorsque vous l’avez enlevée, Pour enlever la porte :... -
Page 66: Éléments De Chauffage Du Four
Entretien et nettoyage de la cuisinière. Éléments de chauffage du four Ne nettoyez jamais l’élément de cuisson ou Pour nettoyer le bas du four, soulevez l’élément de grillade. Toute leur saleté disparaîtra doucement l’élément de cuisson. Nettoyez en brûlant quand vous les chaufferez. avec de l’eau savonneuse chaude. -
Page 67: Unités De Surface (Sur Certains Modèles)
www.electromenagersge.ca Surface de cuisson basculante (sur certains modèles) Certains modèles ont une surface de cuisson Après avoir nettoyé sous la surface de cuisson que vous pouvez soulever pour nettoyer plus avec de l’eau légèrement savonneuse chaude facilement. Vous pouvez soulever toute la et un linge propre, abaissez la surface de surface de cuisson, et le soutenir en position cuisson. -
Page 68: Évent Du Four
Entretien et nettoyage de la cuisinière. Évent du four Sur les modèles à surface de cuisson en verre, Ne recouvrez jamais l’ouverture de papier d’aluminium ou de tout autre matériau. le four est aéré par une ouverture située à l’arrière de la surface de cuisson. Sur les modèles à... -
Page 69: Nettoyage Après Un Usage Quotidien Normal
Nettoyage de la surface de cuisson en verre. (sur certains modèles) www.electromenagersge.ca Nettoyage après un usage quotidien normal Utilisez SEULEMENT un nettoyant pour Secouez bien la crème de nettoyage. surfaces de cuisson en vitrocéramique sur Appliquez quelques gouttes du votre surface de cuisson en verre. Les autres nettoyant directement sur la surface types de nettoyants peuvent ne pas être de cuisson. -
Page 70: Marques Métalliques Et Rayures
Nettoyage de la surface de cuisson en verre. (sur certains modèles) Marques métalliques et rayures Veillez à ne pas faire glisser vos ustensiles d’aluminium ou de cuivre peut laisser et récipients sur votre surface de cuisson. une décoloration noire sur la surface Ils y laisseraient des marques métalliques. -
Page 71: Causes Possibles
Avant d’appeler le réparateur… www.electromenagersge.ca Conseils de dépannage Économisez du temps et de l’ a rgent! Vérifiez le tableau ci-dessous pour éviter tout appel de service qui ne serait pas nécessaire. Problème Causes possibles Solution Surfaces de cuisson radiantes Les éléments de surface •... - Page 72 Avant d’appeler le réparateur… Conseils de dépannage Problème Causes possibles Solution Surfaces de cuisson serpentins Les unités de surface • Les contrôles en position OFF (arrêt), verifiez que l’unité Les unité de surface ne sont pas ne fonctionnent pas bien de surface soit bien branchée dans la prise.
- Page 73 www.electromenagersge.ca Problème Causes possibles Solution Les aliments ne grillent • Sur les modèles avec un bouton de température, assurez-vous Le four n’est pas réglé pas correctement sur BROIL (GRIL). de bien tourner ce bouton jusqu’à sa position BROIL (GRIL) Sur les modèles avec une touche BROIL (GRIL), assurez-vous que cette touche a bien été...
-
Page 74: Prise Confort
Avant d’appeler le réparateur… Conseils de dépannage Problème Causes possibles Solution Température du four trop • Voyez la section Réglage du thermostat du four—Faites-le Le thermostat du four a besoin chaude ou trop froide vous-même! d’être réglé. L’horloge et la minuterie •... - Page 75 www.electromenagersge.ca Problème Causes possibles Solution Odeur de « brûlé » ou • Pour accélérer le processus, réglez un cycle d’autonettoyage Ces odeurs sont normales dans d’« huile » venant de d’au moins 3 heures. Voyez la section Utilisation du four un four neuf et disparaîtront l’évent autonettoyant.
-
Page 76: Accessoires
Vous en avez assez de vos grilles décolorées? Vous aimeriez avoir des grilles de four ultra-résistantes? DISPONIBLES ACTUELLEMENT pour votre cuisinière : Une innovation de GE : les grilles de four porcelanisées, autonettoyantes! • Ultra-résistantes • Durables • Pouvant être nettoyées dans un four autonettoyant... - Page 77 Instructions Mode d’emploi Entretien et nettoyage Dépannage Service à la clientèle de sécurité...
-
Page 78: Service À La Clientèle
Instructions Service à la clientèle Dépannage Entretien et nettoyage Mode d’emploi de sécurité... -
Page 79: Pendant Une Période De : Mabe Remplacera Ce Qui Suit
Cuisinière électrique GE Garantie. Les services sous garantie sont dispensés par nos Agrafez votre reçu ici. centres de réparation ou par nos réparateurs Pour l’obtention des services sous garantie, Customer Care autorisés. Pour prendre rendez-vous, ® il sera nécessaire de présenter un document appelez le 1.800.561.3344. -
Page 80: Service De Réparations
Service de réparations 1.800.561.3344 Service de réparations GE est tout près de vous. Pour faire réparer votre électroménager GE, il suffit de nous téléphoner. Pièces et accessoires Ceux qui désirent réparer eux-mêmes leurs électroménagers peuvent recevoir pièces et accessoires directement à...