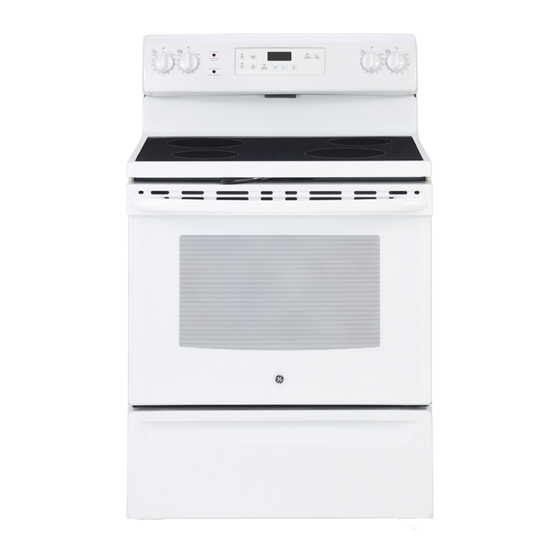
GE ECBP82 Manuel Du Propriétaire
Table des Matières
Printed in Mexico
www.GEAppliances.ca
Safety Instructions
. . . . . . . . . . . . . .2-5
Operating Instructions
Clock and Timer . . . . . . . . . . . . . . . . .15
Convenience Outlet . . . . . . . . . . . . . .11
Oven . . . . . . . . . . . . . . . . . . . . . . . .12-14
Broiling Guide . . . . . . . . . . . . . .13, 14
Oven Controls . . . . . . . . . . . . . . . .10, 11
Sabbath Feature . . . . . . . . . . . . . .18, 19
Self-Cleaning . . . . . . . . . . . . . . . . .22, 23
Special Features . . . . . . . . . . . . . . . . . .17
Surface Units . . . . . . . . . . . . . . . . . . 6-9
Temperature Conversions . . . . . . . . .11
Thermostat Adjustment-
Do It Yourself . . . . . . . . . . . . . . . . . . . .19
Timed Baking and
Roasting Features . . . . . . . . . . . . . . . .16
Warming Drawer . . . . . . . . . . . . .20, 21
. . . . . . . . . . 24-29
. . . . . . . . 30-34
. . . . . . . . . . . . . . . . . . . . . 37
Consumer Support
Consumer Support . . . . . . . . . . . . . . 39
Product Registration . . . . . . . . . . 35, 36
Warranty . . . . . . . . . . . . . . . . . . . . . . . 38
Write the model and serial
numbers here:
# ______________
Model
# ______________
Serial
You can find them on a label
behind the storage drawer
on the range frame.
Owner's Manual
ECBP82
JCBP62
JCBP65
JCBP66
JCBP67
JCBP68
JCBP70
JCBP71
JCBP78
JCBP80
JCBP81
JCBP83
JCB710
183D6379P050 29-5650 10-08 JR
Table des Matières

Manuels Connexes pour GE ECBP82


Sommaire des Matières pour GE ECBP82
-
Page 1: Table Des Matières
Operating Instructions Clock and Timer ....15 ECBP82 Convenience Outlet ....11 JCBP62 Oven . -
Page 2: Anti-Tip Device
IMPORTANT SAFETY INFORMATION. READ ALL INSTRUCTIONS BEFORE USING. WARNING! For your safety, the information in this manual must be followed to minimize the risk of fire, electric shock, or to prevent property damage, personal injury, or loss of life. ANTI-TIP DEVICE To reduce the risk of tipping the range, the range must be secured by a properly installed anti-tip bracket. - Page 3 www.GEAppliances.ca SAFETY PRECAUTIONS Do not operate the oven or cooktop controls if the glass is broken. Food splatter or cleaning solution may penetrate a broken control panel or cooktop and create a risk of electrical shock. Contact a qualified technician immediately should your glass control panel or cooktop become broken. ■...
- Page 4 IMPORTANT SAFETY INFORMATION. READ ALL INSTRUCTIONS BEFORE USING. WARNING! RADIANT SURFACE UNITS Use proper pan size—select cookware having flat bottoms large enough to cover the surface unit heating element. The use of undersized cookware will expose a portion of the surface unit to direct contact and may result in ignition of clothing.
-
Page 5: Self-Cleaning Oven
www.GEAppliances.ca OVEN Stand away from the range when opening the oven door. Hot air or steam which escapes can cause burns to hands, face and/or eyes. ■ ■ Do not heat unopened food containers. Pressure could Pulling out the rack to the stop-lock is a convenience in build up and the container could burst, causing an lifting heavy foods. -
Page 6: Temperature Limiter
About the radiant surface units. NOTE: Throughout this manual, features and appearance may vary from your model. About the Radiant Surface Units SURFACE NOTE: On models with light-colored glass COOKING WARNING: The surface cooktops, it is normal for the cooking zones to units are automatically disabled during change color when hot or cooling down. -
Page 7: Glass-Ceramic
www.GEAppliances.ca The following information will help you choose cookware which will give good performance on glass cooktops. Stainless Steel: Porcelain Enamel Covered Cast Iron: recommended recommended As long as the cookware is covered completely with porcelain enamel, this Aluminum: cookware is recommended. Caution is recommended for cast iron cookware heavy weight recommended that is not completely covered with... - Page 8 Using the surface units. How to Set Push the knob in and turn in either WARNING: The surface direction to the setting you want. units are automatically disabled during At both OFF and MAX the control clicks the self-clean cycle. Make sure that all into position.
-
Page 9: Using The Warming Zone
www.GEAppliances.ca Using the Warming Zone (on some models) The WARMING ZONE is located in the Food Type Control Setting back center of the glass surface. Always Sauces start with hot food. Do not use to heat Soups (cream) Medium cold food. Placing uncooked or cold food Stews Medium on the WARMING ZONE could result in... -
Page 10: Oven Controls
Using the oven controls. (on some models) Throughout this manual, features and appearance may vary from your model. Oven Control, Clock and Timer Features and Settings BAKE Pad TIMER Pad Touch this pad to select the bake function. Touch this pad to select the timer feature. Then touch the + and –... -
Page 11: Convenience Outlet
www.GEAppliances.ca Oven Control, Clock and Timer Features and Settings AUTOMATIC OVEN Light (on some models) OFF Pad Touch this pad to cancel ALL oven This lights anytime the oven has been programmed using the COOK TIME or operations except the clock and timer. START TIME functions. -
Page 12: Preheating And Pan Placement
Using the oven. To avoid possible burns, place the racks in the desired position before you turn the oven on. Before you begin… The racks have stops, so that when placed CAUTION: When you are using correctly on the supports, they will stop a rack in the lowest position (A), you will need before coming completely out, and will to use caution when pulling the rack out. -
Page 13: Aluminum Foil
www.GEAppliances.ca Aluminum Foil Do not use aluminum foil on the bottom A smaller sheet of foil may be used to of the oven. catch a spillover by placing it on a lower rack several inches below the food. Never entirely cover a rack with aluminum foil. - Page 14 Using the oven. Broiling Guide – 4 Pass Broil Element The size, weight, thickness, Quantity and/ Rack* First Side Second Side starting temperature Food or Thickness Position Time (min.) Time (min.) Comments and your preference of Ground Beef 454 g (1 lb.) (4 patties) 7–10 Space evenly.
-
Page 15: Clock And Timer
Using the clock and timer. www.GEAppliances.ca Not all features are on all models. To Set the Clock The clock must be set to the correct time setting. If this happens, touch the CLOCK of day for the automatic oven timing pad twice and reenter the time of day. -
Page 16: Roasting Features
Using the timed baking and roasting features. (on some models) Do not lock the oven door with the latch during timed cooking. The latch is used for self-cleaning only. NOTE: Foods that spoil easily—such as milk, eggs, fish, stuffings, poultry and pork—should not be allowed to sit for more than 1 hour before or after cooking. -
Page 17: Special Features
Special features of your oven control. www.GEAppliances.ca Your new touch pad control has additional features that you may choose to use. The following are the features and how you may activate them. The special feature modes can only be activated while the display is showing the time of day. They remain in the control’s memory until the steps are repeated. -
Page 18: Sabbath Feature
Using the Sabbath Feature. (Designed for use on the Jewish Sabbath and Holidays) The Sabbath feature can be used for baking/roasting only. It cannot be used for broiling, self-cleaning or Delay Start cooking. NOTE: The oven light comes on automatically (on some models) when the door is opened and goes off when the door is closed. -
Page 19: Do It Yourself
Using the Sabbath Feature. (Designed for use on the Jewish Sabbath and Holidays) www.GEAppliances.ca How to Exit the Sabbath Feature Touch the OFF pad. off after 12 hours. OFF indicates that the oven will not automatically turn If the oven is cooking, wait off. - Page 20 Using the warming drawer. (on some models) The warming drawer will keep hot, cooked foods at serving temperature. Always start with hot food. Do not use to heat cold food other than crisping crackers, chips or dry cereal. To Use the Warming Drawer Push and turn the control knob to any desired setting.
- Page 21 www.GEAppliances.ca Temperature Selection Chart To keep several different foods hot, Food Type Control Setting set the control to the food needing the Bacon highest setting. Breads ■ The temperature, type and amount Casserole Medium of food, and the time held will affect Chicken, fried the quality of the food.
-
Page 22: Self-Cleaning
Using the self-cleaning oven. Never force the latch handle. Forcing the handle will damage the door lock mechanism. Before a Clean Cycle We recommend venting your kitchen Do not clean the gasket. The fiberglass with an open window or using a material of the oven door gasket cannot ventilation fan or hood during the withstand abrasion. -
Page 23: After A Clean Cycle
www.GEAppliances.ca How to Delay the Start of Cleaning Make sure the clock shows the correct The display will show the delay start set time of day. time. It will not be possible to unlatch the oven door until the temperature drops Latch the door. -
Page 24: Control Knobs
Care and cleaning of the range. Be sure all controls are off and all surfaces are cool before cleaning any part of the range. WARNING: If your range is removed for cleaning, servicing or any reason, be sure the anti-tip device is re-engaged properly when the range is replaced. -
Page 25: Cleaning The Oven Door
www.GEAppliances.ca Cleaning the Oven Door To clean the inside of the door: To clean the outside of the door: ■ ■ Because the area inside the gasket is cleaned Use soap and water to thoroughly clean the during the self-clean cycle, you do not need to top, sides and front of the oven door. -
Page 26: Oven Light Replacement
Care and cleaning of the range. Oven Light Replacement Replace bulb with a 40-watt CAUTION: Before replacing your appliance bulb. oven light bulb, disconnect the electrical power To replace the cover: to the range at the main fuse or circuit breaker panel. - Page 27 www.GEAppliances.ca Removable Warming Drawer Pan (on some models) ■ Never place, use or self-clean the NOTE: For models with an electric warming warming drawer pan in the oven. drawer, before performing any adjustments, ■ cleaning or service, disconnect the range Warming drawer has a removable pan electrical power supply at the household for easy cleaning.
- Page 28 Cleaning the glass cooktop. Normal Daily Use Cleaning ONLY use Ceramic Cooktop Cleaner on Shake the cleaning cream well. Apply a few drops of Ceramic the glass cooktop. Other types of cleaners Cooktop Cleaner directly to the may not be as effective. cooktop.
- Page 29 www.GEAppliances.ca Metal Marks and Scratches Be careful not to slide pots and pans If pots with a thin overlay of across your cooktop. It will leave aluminum or copper are allowed metal markings on the cooktop to boil dry, the overlay may leave surface.
- Page 30 Before you call for service… Troubleshooting Tips Save time and money! Review the charts on the following pages first and you may not need to call for service. Problem Possible Causes What To Do Surface units will not • Use pans which are flat and match the diameter of Improper cookware maintain a rolling boil the surface unit selected.
- Page 31 www.GEAppliances.ca Problem Possible Causes What To Do Pitting (or indentation) • Call a qualified technician for replacement. Hot sugar mixture spilled of the cooktop on the cooktop. Frequent cycling • Use only flat cookware to minimize cycling. Improper cookware off and on of being used.
-
Page 32: Troubleshooting Tips
Before you call for service… Troubleshooting Tips Problem Possible Causes What To Do Oven temperature too • See the Adjust the oven thermostat—Do it yourself! Oven thermostat hot or too cold needs adjustment. section. Oven will not work • Make sure electrical plug is plugged into a live, Plug on range is not completely inserted in properly grounded outlet. - Page 33 www.GEAppliances.ca Problem Possible Causes What To Do “F – and a number • Press the OFF pad. Put the oven back into You have a function or letter” flash error code. operation. in the display • Disconnect all power to the range for at least 30 If the function code repeats.
-
Page 34: Warming Drawer
Before you call for service… Problem Possible Causes What To Do Oven racks are The shiny, silver-colored • Apply a small amount of vegetable oil to a paper difficult to slide racks were cleaned in a towel and wipe the edges of the oven racks with self-clean cycle. -
Page 35: Product Registration
Please place in envelope and mail to: Veuillez mettre dans une enveloppe et envoyez à : OWNERSHIP REGISTRATION P.O. BOX 1780 MISSISSAUGA, ONTARIO L4Y 4G1 (FOR CANADIAN CONSUMERS ONLY) -
Page 37: Accessories
Accessories. Looking For Something More? To inquire about purchasing a part or an accessory for your appliance, call our National Parts Centre at 1.800.661.1616. Oven Racks Broiler Pan Oven Elements Light Bulbs Knobs Cleaner Cleaning Pads Scraper... -
Page 38: Warranty
Electric Range Warranty. All warranty service provided by our Factory Service Centres, Staple your receipt here. or an authorized Customer Care technician. To schedule ® Proof of the original purchase service, on-line, visit us at www.geappliances.ca, or call date is needed to obtain service 1.800.561.3344. -
Page 39: Consumer Support
1.800.661.1616. Contact Us www.GEAppliances.ca If you are not satisfied with the service you receive from GE, contact us on our Website with all the details including your phone number, or write to: Mabe Canada Inc. 1 Factory Lane Moncton, New Brunswick... - Page 59 ⊃ ⊃ ⊃ ⊃ ⊃ ⊃ ⊃...