Télécharger Imprimer la page
NEC MultiSync LCD1880SX Guide De Mise En Marche Rapide

NEC MultiSync LCD1880SX Guide De Mise En Marche Rapide

Masquer les pouces Voir aussi pour MultiSync LCD1880SX:

Publicité

Les langues disponibles
  • FR

Les langues disponibles

Liens rapides

All manuals and user guides at all-guides.com
MultiSync LCD1880SX
QUICK START GUIDE
Quick start Handbuch
Guia rapida de comienzo
Mise en marche rapide
Guida per avviamento rapido
LCD1880SX_QS.P65
1
16/1/02, 12:09 pm

Publicité

loading

Sommaire des Matières pour NEC MultiSync LCD1880SX

  • Page 1 All manuals and user guides at all-guides.com MultiSync LCD1880SX QUICK START GUIDE Quick start Handbuch Guia rapida de comienzo Mise en marche rapide Guida per avviamento rapido LCD1880SX_QS.P65 16/1/02, 12:09 pm...
  • Page 2 All manuals and user guides at all-guides.com LCD1880SX_QS.P65 16/1/02, 12:09 pm...
  • Page 3 All manuals and user guides at all-guides.com Index Warning ......................English - 1 Caution ......................English - 1 Declaration of the Manufacturer ............English - 1 Quick Start ....................English - 3 Controls......................English - 5 Recommended Use..................English - 8 Specifications ....................English - 9 Troubleshooting ..................English -10 Warnung ......................Deutsch - 1 Vorsicht ......................Deutsch - 1 Erklärung des Herstellers .................Deutsch - 1...
  • Page 4 All manuals and user guides at all-guides.com TCO’95 MultiSync LCD1880SX Black Model Congratulations! You have just purchased a TCO’95 approved and labeled product! Your choice has provided you with a product developed for professional use. Your purchase has also contributed to reducing the burden on the environment and also, to the further development of environmentally adapted electronics products.
  • Page 5 You may also obtain current information on TCO’95 approved and labelled products by visiting their website at: http : //www.tco-info.com/ TCO’99 MultiSync LCD1880SX White Model Congratulations! You have just purchased a TCO’99 approved and labeled product! Your choice has provided you with a product developed for professional use. Your purchase has also contributed to reducing the burden on the environment and also to the further development of environmentally adapted electronics products.
  • Page 6 All manuals and user guides at all-guides.com TCO’99 Environmental Requirements Flame retardants Flame retardants are present in printed circuit boards, cables, wires, casings and housings. In turn, they delay the spread of fire. Up to thirty percent of the plastic in a computer casing can consist of flame retardant substances. Most flame retardants contain bromine or chloride and these are related to another group of environmental toxins, PCBs, which are suspected to give rise to severe health effects, including reproductive damage in fisheating birds and mammals, due to the bioaccumulative* processes.
  • Page 7 All manuals and user guides at all-guides.com English Deutsch Español Français Italiano LCD1880SX_QS.P65 16/1/02, 12:09 pm...
  • Page 8 All manuals and user guides at all-guides.com LCD1880SX_QS.P65 16/1/02, 12:09 pm...
  • Page 9 – EN 60950 Council Directive 89/336/EEC: – EN 55022 – EN 61000-3-2 – EN 61000-3-3 – EN 55024 and marked with NEC-Mitsubishi Electric Visual Systems Corporation 4-13-23, Shibaura, Minato-Ku Tokyo 108-0023, Japan : Trademarks apply to appropriate countries. English- LCD1880SX_QS.P65...
  • Page 10 We hereby declare that the equipment specified above conforms to the technical standards as specified in the FCC Rules. Windows is a registered trademark of Microsoft Corporation. NEC is a registered trademark of NEC Corporation. E NERGY is a U.S. registered trademark. All other brands and product names are trademarks or registered trademarks of their respective owners.
  • Page 11 Refer to the Controls section of this User ’s Manual for a full description of these OSM controls. NOTE : If you have any problems, please refer to the Troubleshooting section of this User’s Manual. NOTE : Refer to User’s Manual in the NEC LCD Setup Software CD case for installation and operation of this software.
  • Page 12 All manuals and user guides at all-guides.com Quick Start Remove Monitor Stand for Mounting To prepare the monitor for alternate mounting purposes: 1. Disconnect all cables. 2. Place hands on each side of the monitor and lift up to the highest position. 3.
  • Page 13 All manuals and user guides at all-guides.com Controls ® * (On-Screen Manager) control buttons on the front of the monitor function as follows: To access OSM menu, press any of the control buttons ( , –, +). To change signal input, press the SELECT button. NOTE : OSM must be closed in order to change signal input.
  • Page 14 All manuals and user guides at all-guides.com Controls Tools 1 SHARPNESS : This function is digitally capable to keep crisp image at any timings. It is continuously adjustable to get distinct image or soft one as you prefer, and set independently by different timings. The number of adjustment steps is different depending on whether EXPANSION Mode is OFF, FULL or ASPECT (1280 x 1024 is OFF Mode).
  • Page 15 All manuals and user guides at all-guides.com Controls Information DISPLAY MODE : Provides information about the current resolution display and technical data including the preset timing being used and the horizontal and vertical frequencies. Increases or decreases the current resolution. MONITOR INFO : Indicates the model and serial numbers of your monitor.
  • Page 16 All manuals and user guides at all-guides.com Recommended Use Safety Precautions and Maintenance FOR OPTIMUM PERFORMANCE, PLEASE NOTE THE FOLLOWING WHEN SETTING UP AND USING THE MULTISYNC ® * LCD COLOR MONITOR: • DO NOT OPEN THE MONITOR. There are no user serviceable parts inside and opening or removing covers may expose you to dangerous shock hazards or other risks.
  • Page 17 All manuals and user guides at all-guides.com Recommended Use • Position whatever you are looking at most of the time (the screen or reference material) directly in front of you to minimize turning your head while you are typing. • Avoid displaying fixed patterns on the monitor for long periods of time to avoid image persistence (after-image effects). •...
  • Page 18 All manuals and user guides at all-guides.com Troubleshooting No picture • The signal cable should be completely connected to the display card/computer. • The display card should be completely seated in its slot. • Check the Vacation Switch should be in the ON position. •...
  • Page 19 – EN 60950 EG-Direktive 89/336/EG: – EN 55022 – EN 61000-3-2 – EN 61000-3-3 – EN 55024 und mit folgendem Siegel gekennzeichnet sind: NEC-Mitsubishi Electric Visual Systems Corporation 4-13-23, Shibaura, Minato-Ku Tokyo 108-0023, Japan : Marken gelten für die jeweiligen Länder. Deutsch LCD1880SX_QS.P65...
  • Page 20 Wir erklären hiermit, dass das oben angegebene Gerät den technischen Standards der FCC-Richtlinien entspricht. Windows ist eine eingetragene Marke der Microsoft Corporation. NEC ist eine eingetragene Marke der NEC Corporation. ist eine eingetragene Marke in den USA. Alle anderen Marken und Produktnamen sind Marken oder NERGY eingetragene Marken der jeweiligen Eigentümer.
  • Page 21 OSM-Steuerungen. HINWEIS: Treten Probleme auf, beachten Sie das Kapitel Fehlerbehebung dieser Bedienungsanleitung. HINWEIS: Installation und Benutzung der Software werden im Benutzerhandbuch beschrieben, das sich in der Hülle mit der NEC LCD-Installationssoftware-CD befindet. : Marken gelten für die jeweiligen Länder. Deutsch LCD1880SX_QS.P65...
  • Page 22 All manuals and user guides at all-guides.com Kurzanleitung Entfernen des Monitorfußes für die Montage So bereiten Sie den Monitor für eine alternative Montage vor: 1. Ziehen Sie alle Kabel ab. 2. Fassen Sie den Monitor auf beiden Seiten an und heben Sie ihn in die höchste Position. 3.
  • Page 23 All manuals and user guides at all-guides.com Bedienelemente Die OSM ® *-Tasten (On-Screen-Manager) auf der Vorderseite des Monitors besitzen folgende Funktionen: Sie können auf das OSM-Menü zugreifen, indem Sie eine der Steuerungstasten ( ,–,+) drücken. Zum Wechseln des Signaleingangs drücken Sie die Taste SELECT. HINWEIS: Das OSM-Menü...
  • Page 24 All manuals and user guides at all-guides.com Bedienelemente Hilfsfunktionen 1 WEICHZEICHNEN: Mit dieser Funktion wird die Schärfe des Bildes bei unterschiedlichen Timings auf digitalem Wege gewährleistet. Die Einstellung erfolgt stufenlos zu schärferen oder weicheren Konturen und kann unabhängig vom Signaltiming vorgenommen werden. Die Anzahl der Einstellungsschritte sind unterschiedlich, je nachdem, ob der EXPANSIONSMODUS auf AUS, VOLLBILD oder SEITENVERM (1280 x 1024 ist AUS-Modus) eingestellt ist.
  • Page 25 All manuals and user guides at all-guides.com Bedienelemente Information GRAFIKMODUS: Stellt Informationen zur aktuellen Auflösung sowie technische Daten wie verwendetes Signaltiming, horizontale und vertikale Frequenz bereit. Erhöht oder verringert die aktuelle Auflösung. MONITORINFORMATION: Die Modell-und die Seriennummer des Monitors. * Warnung: OSM-Warnungen können mit der Taste „Exit“ ausgeblendet werden. ®...
  • Page 26 All manuals and user guides at all-guides.com Einsatzempfehlungen Sicherheitsvorkehrungen und Pflege BEACHTEN SIE ZUR ERZIELUNG OPTIMALER LEISTUNG DIE FOLGENDEN HINWEISE ZUM EINRICHTEN UND NUTZEN DES MULTISYNC ® LCD-FARBMONITORS: • ÖFFNEN SIE DEN MONITOR NICHT. Es befinden sich keine vom Benutzer zu wartenden Teile im Inneren. Das Öffnen oder Abnehmen der Abdeckungen kann zu gefährlichen Stromschlägen führen und birgt weitere Risiken.
  • Page 27 All manuals and user guides at all-guides.com Einsatzempfehlungen • Lassen Sie Ihre Augen regelmäßig untersuchen. Ergonomie Wir empfehlen folgendes Vorgehen, um eine ergonomisch optimale Arbeitsumgebung einzurichten: • Korrigieren Sie die Helligkeit, bis das Hintergrundraster nicht mehr erkennbar ist. • Verwenden Sie nicht die Maximaleinstellung der Kontraststeuerung. •...
  • Page 28 All manuals and user guides at all-guides.com Fehlerbehebung Kein Bild • Das Signalkabel muss richtig mit Grafikkarte/Computer verbunden sein. • Die Grafikkarte muss richtig in den Steckplatz eingesetzt sein. • Der Vacation-Schalter muss sich in der Position ON befinden. Der Netzschalter auf der Vorderseite des Monitors und der Netzschalter des Computers müssen sich in der Position ON bzw.
  • Page 29 Directiva 73/23/CEE: –EN 60950 Directiva 89/336/CEE: –EN 55022 –EN 61000-3-2 –EN 61000-3-3 –EN 55024 y lleva la marca NEC-Mitsubishi Electric Visual Systems Corporation 4-13-23, Shibaura, Minato-Ku Tokyo 108-0023, Japan : Las marcas registradas están vinculadas a determinados países. Español LCD1880SX_QS.P65...
  • Page 30 Por la presente certificamos que el equipo anteriormente mencionado se ajusta a los estándares técnicos especificados en las normas de la FCC. Windows es una marca registrada de Microsoft Corporation. NEC es una marca registrada de NEC Corporation. es una marca registrada en EE.UU. Las demás marcas comerciales o marcas registradas son propiedad NERGY de sus respectivas empresas.
  • Page 31 NOTA: Si surgiera algún problema, consulte la sección Solución de problemas de este manual del usuario. NOTA: Antes de instalar y utilizar este software, consulte el manual del usuario del CD de software de instalación de NEC LCD. : Las marcas registradas están vinculadas a determinados países.
  • Page 32 All manuals and user guides at all-guides.com Inicio rápido Retire el soporte del monitor para el montaje Para preparar el monitor para montajes alternativos: 1. Desconecte todos los cables. 2. Coloque una mano a cada lado del monitor y levántelo hasta alcanzar la posición más alta. 3.
  • Page 33 All manuals and user guides at all-guides.com Controles os controles OSM ® * (On-Screen Manager : gestor de pantalla) situados en la parte frontal del monitor funcionan del siguiente modo: Para acceder al menú OSM, pulse cualquiera de los botones de control ( , ,–,+). para modificar la entrada de señal, pulse el botón SELECT (seleccionar).
  • Page 34 All manuals and user guides at all-guides.com Controles Tools 1 (herramientas 1) M.ECO: Con esta función se mantiene nítida la imagen sea cual sea la cadencia. Se puede ajustar en todo momento según se desee mayor o menor nitidez, y se puede configurar por separado según la cadencia.
  • Page 35 All manuals and user guides at all-guides.com Controles Información MODO VISUALIZACIÓN: Ofrece información sobre la imagen de resolución actual y los datos técnicos, incluida la cadencia predefinida utilizada y las frecuencias horizontal y vertical. Aumenta o disminuye la resolución actual. INFORMACIÓN MONITOR: Indica los números de modelo y de serie del monitor.
  • Page 36 All manuals and user guides at all-guides.com Uso recomendado Medidas de seguridad y mantenimiento PARA GARANTIZAR EL RENDIMIENTO ÓPTIMO DEL PRODUCTO, TENGA EN CUENTA LAS SIGUIENTES INSTRUCCIONES AL CONFIGURAR Y UTILIZAR EL MONITOR EN COLOR MULTISYNC ® * LCD: • NO ABRA EL MONITOR. El monitor no contiene piezas que deba manipular el usuario. Si se abren o retiran las cubiertas, existe el riesgo de sufrir descargas eléctricas peligrosas u otros daños.
  • Page 37 All manuals and user guides at all-guides.com Uso recomendado • Revise su vista con regularidad. Ergonomía Para conseguir las máximas ventajas ergonómicas, recomendamos que: • Ajuste el brillo hasta que desaparezca el fondo de la imagen. • No ajuste el control Contraste en el valor máximo. •...
  • Page 38 All manuals and user guides at all-guides.com Solución de problemas No hay imagen • El cable de señal debería estar completamente conectado a la tarjeta de visualización/ordenador. • La tarjeta de visualización debería estar completamente insertada en la ranura correspondiente. •...
  • Page 39 89/336/EEC : – EN 55022 – EN 61000-3-2 – EN 61000-3-3 – EN 55024 et que la marque suivante apparaît : NEC-Mitsubishi Electric Visual Systems Corporation 4-13-23, Shibaura, Minato-Ku Tokyo 108-0023, Japan : Les marques déposées s'appliquent aux pays appropriés.
  • Page 40 FCC. Windows est une marque déposée de Microsoft Corporation. NEC est une marque déposée de NEC Corporation. Energy Star est une marque déposée aux Etats-Unis. Toutes les autres marques commerciales ou déposées appartiennent à...
  • Page 41 REMARQUE : Si vous rencontrez des problèmes, veuillez vous reporter à la section Dépannage de ce manuel. REMARQUE : Reportez-vous au manuel de l’utilisateur sur le CD-ROM du logiciel d’installation du LCD NEC pour installer et utiliser correctement ce logiciel. : Les marques déposées s'appliquent aux pays appropriés.
  • Page 42 All manuals and user guides at all-guides.com Mise en marche rapide Démontage du socle du moniteur en vue d'un montage différent Pour préparer le moniteur à un autre montage : 1. Déconnectez tous les câbles. 2. Placez les mains de chaque côté du moniteur et levez-le jusqu'à la position maximale. 3.
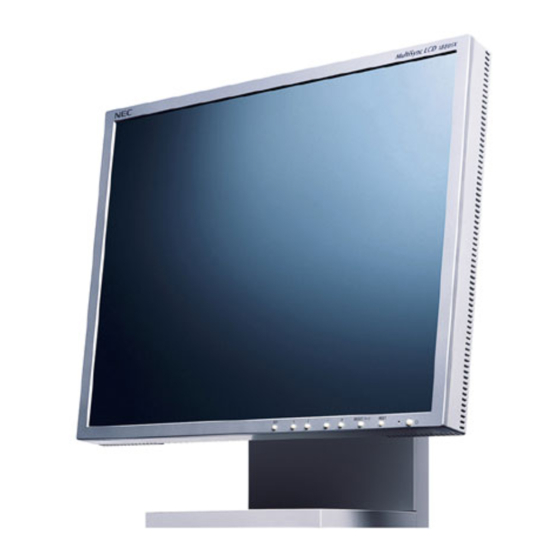
  • Page 43 All manuals and user guides at all-guides.com Commandes Commandes OSM ® * (On-Screen-Manager - Gestionnaire à l’écran) les fonctions des commandes OSM situées à l'avant du moniteur sont décrites ci-après : Pour accéder à l’OSM, appuyez sur l’un des boutons de commande ( , –, +).
  • Page 44 All manuals and user guides at all-guides.com Commandes Outils 1 LISSAGE : Cette fonction permet de conserver la netteté de l'image numériquement pour toutes les résolutions. Elle est réglable de façon continue afin d'obtenir, comme vous préférez, une image distincte ou plus floue. Elle est réglée de manière indépendante par différentes résolutions. Le nombre d'étapes de réglage dépend du mode d'agrandissement: ARRET, COMPLET ou FORMAT.
  • Page 45 All manuals and user guides at all-guides.com Commandes Informations MODE D’AFFICHAGE : Fournit des informations sur la résolution d’affichage actuelle, des données techniques comprenant le préréglage de temps utilisé et les fréquences horizontale et verticale. Augmente ou diminue la résolution actuelle. INFORMATION ÉCRAN : Indique le nom du modèle et les numéros de série de votre moniteur.
  • Page 46 All manuals and user guides at all-guides.com Conseils d’utilisation Consignes de sécurité et d’entretien POUR UN FONCTIONNEMENT OPTIMAL, VEUILLEZ RESPECTER LES INDICATIONS SUIVANTES SUR LE RÉGLAGE ET L’UTILISATION DU MONITEUR COULEUR MULTISYNC * LCD : ® • N’OUVREZ JAMAIS LE BOÎTIER DU MONITEUR. Aucune pièce interne ne peut être réparée par l’utilisateur et l’ouverture ou la dépose des caches peut vous exposer à...
  • Page 47 All manuals and user guides at all-guides.com Conseils d’utilisation • Placez le moniteur à un angle de 90° par rapport aux fenêtres et autres sources de lumière pour réduire au maximum les reflets et l’éblouissement. Réglez l’inclinaison du moniteur pour que l’éclairage du plafond ne soit pas reflété...
  • Page 48 All manuals and user guides at all-guides.com Dépannage Pas d’image • Le câble de signal vidéo doit être correctement connecté à la carte graphique et à l’ordinateur. • La carte graphique doit être complétement insérée dans son logement. • Vérifiez que l'interrupteur est positionné sur ON. Les interrupteurs d'alimentation du moniteur (à l'avant) et de l'ordinateur doivent être sur la position ON.
  • Page 49 Direttiva del Consiglio Europeo 89/336/CEE: – EN 55022 – EN 61000-2-3 – EN 61000-3-3 – EN 55024 ed è contrassegnato con NEC-Mitsubishi Electric Visual Systems Corporation 4-13-23, Shibaura, Minato-Ku Tokyo 108-0023, Japan : I marchi di fabbrica si applicano nei paesi appropriati.
  • Page 50 FCC. è un marchio registrato U.S. NERGY In qualità di partner E *, NEC-Mitsubishi Electronics Display of America, Inc. ha stabilito che questo prodotto ® NERGY soddisfa le direttive di efficienza energetica ENERGYSTAR.
  • Page 51 Vedere la sezione Controlli di questo Manuale Utente per la descrizione completa dei controlli OSM. NOTA: Per qualsiasi problema, vedere la sezione Ricerca guasti di questo manuale utente. NOTA: Fare riferimento al manuale utente nel CD di Setup NEC LCD per l’installazione e il funzionamento di questo software.
  • Page 52 All manuals and user guides at all-guides.com Guida rapida Rimozione del supporto monitor per montaggio Per predisporre il monitor per un diverso montaggio: 1. Scollegare tutti i cavi. 2. Afferrare con le mani i due lati del monitor e sollevare il più in alto possibile. 3.
  • Page 53 All manuals and user guides at all-guides.com Controlli Controlli OSM ® * (On-Screen Manager): I controlli OSM sulla parte anteriore del monitor funzionano nel seguente modo. Per accedere all’OSM premere uno dei pulsanti di controllo ( , –, +). Per cambiare l’ingresso di segnale, premere il pulsante SELECT.
  • Page 54 All manuals and user guides at all-guides.com Controlli Strumenti 1 ADATTAMENTO: Questa funzione è digitalmente in grado di mantenere l’immagine nitida con qualsiasi temporizzazione. E' regolabile con continuità per ottenere un'immagine più netta o più morbida a piacere e viene impostata indipendentemente per diverse temporizzazioni. Il numero di passi di regolazione cambia se la modalità...
  • Page 55 All manuals and user guides at all-guides.com Controlli Informazioni MODALITÀ DISPLAY: Fornisce informazioni sulla risoluzione corrente e i dati tecnici compresa la temporizzazione preimpostata in uso e le frequenze orizzontali e verticali. Aumenta o diminuisce la risoluzione corrente. (Solo ingresso analogico) MONITOR INFO.: Indica il modello e i numeri di serie del monitor.
  • Page 56 All manuals and user guides at all-guides.com Uso consigliato Precauzioni di sicurezza e manutenzione PER UNA RESA OTTIMALE, ATTENERSI ALLE SEGUENTI ISTRUZIONI PER L’INSTALLAZIONE E L’UTILIZZO DEL MONITOR LCD A COLORI MULTISYNC ® • NON APRIRE IL MONITOR. All’interno non ci sono parti manutenibili dall’utente e l’apertura o la rimozione di coperture può...
  • Page 57 All manuals and user guides at all-guides.com Uso consigliato • Se la luce riflessa rende difficoltosa la visione dello schermo, usare un filtro anti riflesso. • Pulire la superficie del monitor LCD con un panno senza pelo e non abrasivo. Non usare detersivi o pulivetro! •...
  • Page 58 All manuals and user guides at all-guides.com Ricerca guasti Nessuna figura • Il cavo segnali deve essere collegato completamente alla scheda video del computer. • La scheda video deve essere completamente inserita nel suo slot. • Controllare che l’interruttore “Vacanza” sia in posizione ON. L’interruttore di alimentazione sulla parte anteriore e l’interruttore di alimentazione del computer devono essere in posizione ON.
  • Page 59 All manuals and user guides at all-guides.com LCD1880SX_QS.P65 16/1/02, 12:10 pm...
  • Page 60 All manuals and user guides at all-guides.com Printed in Japan 7A811452 LCD1880SX_QS.P65 16/1/02, 12:10 pm...