Table des Matières
Publicité
Les langues disponibles
Les langues disponibles
Liens rapides
158009
Bedienungs-
anleitung
DE
GB
FR
IT
CZ
SK
6 V
12 V
2 A
2 A
8 A
15 A
12V/100A
Mode
15 A
Bedienungsanleitung
Werkstatt Ladegerät WM 15/100A
Instructions for use
Workshop Charger WM 15/100 A
Mode d'emploi
Chargeur d'atelier WM 15/100 A
Manuale d'istruzioni
Caricabatterie da officina WM 15/100 A
Návod k obsluze
Dílenská nabíječka WM 15/100 A
Návod na obsluhu
Dielenská nabíjačka WM 15/100 A
STD
V
A
AGM
%
GEL
Type
V/A/%
Publicité
Chapitres
Table des Matières

Manuels Connexes pour AEG WM 15/100 A


Sommaire des Matières pour AEG WM 15/100 A
- Page 1 Instructions for use Workshop Charger WM 15/100 A Mode d’emploi Chargeur d‘atelier WM 15/100 A Manuale d’istruzioni Caricabatterie da officina WM 15/100 A Návod k obsluze Dílenská nabíječka WM 15/100 A Návod na obsluhu Dielenská nabíjačka WM 15/100 A Bedienungs-...
- Page 2 DE - Seite 3 Vor jeder Benutzung unbedingt lesen. Anleitung und Ratschläge befolgen. GB - Page 15 Read these instructions before using the charger. Follow all instructions and recommendations. FR - Page 27 Veuillez lire les présentes instructions avant toute utilisation de l’appareil et suivre les conseils mentionnés ici. IT - Pagina 39 Leggere attentamente le istruzione i seguire tutti i consigli e gli avvisi prima di utilizzare il prodotto.
-
Page 3: Table Des Matières
INhALT Einleitung ................... . 4 Bestimmungsgemäßer Gebrauch. -
Page 4: Einleitung
EINLEITUNG Erklärung der Symbole und Signalworte, die in dieser Bedienungsanleitung und/oder am Gerät verwendet werden: Beachten Sie diese Bedienungsanleitung bei der Verwendung des Geräts. Lebens- und Unfallgefahr für Kinder! Beachten Sie Warn- und Sicherheitshinweise! Stromschlaggefahr! Gerät nur an witterungsgeschützten Standorten verwenden! Schutzisoliertes Gehäuse (Schutzklasse II) -
Page 5: Bestimmungsgemäßer Gebrauch
Blei-Säure-Akkus (Batterien) hergestellt, wie sie Teile auf Beschädigungen. Nehmen Sie ein defektes in Autos, Schiffen, LKW und anderen Fahrzeugen Gerät oder Teile nicht in Betrieb. • eingebaut sind z. B.: Werkstatt Ladegerät WM 15/100 A • • Nassbatterien (WET) Blei-Säure-Batterien Bedienungsanleitung (Flüssig-Elektrolyt) Geben Sie alle Unterlagen auch an andere Benutzer •... -
Page 6: Sicherheit
SIChERhEIT Verätzungsgefahr! • Batterien enthalten Säure, welche Augen und Allgemeine Sicherheitshinweise haut schädigt. Beim Laden der Batterie entstehen Lesen Sie alle Sicherheitshinweise und Anwei- zudem Gase und Dämpfe, welche die Gesundheit sungen. Versäumnisse bei der Einhaltung der gefährden. Sicherheitshinweise und Anweisungen können •... - Page 7 Deutsch Stromschlaggefahr Verletzungsgefahr • • Ladegeräte können aktive elektronische Implanta- Versuchen Sie niemals, nicht wiederaufladbare, te wie z. B. herzschrittmacher in ihrem Betrieb beschädigte oder gefrorene Batterien aufzuladen. • stören und dadurch Personen gefährden. Verwenden Sie das Ladegerät nicht für das Auf- •...
-
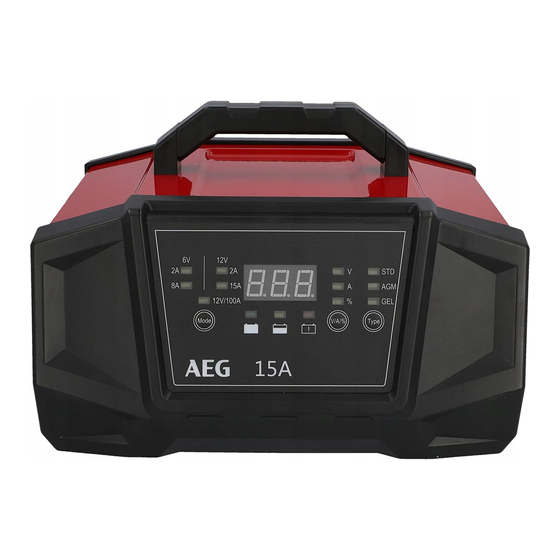
Page 8: Produktübersicht
PRODUKtüBERSICht 12 V 15 A 12V/100A Mode V/A/% Type 15 A 11 10 9 Bezeichnung Funktion Display zur Anzeige der Parameter. Anzeige des ausgewählten Ladeparameters (nur im Lademodus). LED „V / A / %“ Umschaltbar über Taste (3). LED „STD / EFB / AGM / GEL“... -
Page 9: Funktionen
Deutsch Funktionen Gerät anschließen Das Ladegerät ist mit einem Mikroprozessor (MCU - Micro-Computer-Unit) ausgerüstet und besitzt vollautomatische Diagnose-, Lade- und Wartungs- 12 V funktionen. Wird eine falsche Batteriespannung 10 A 10 A 15 A 12V/100A BOOST SELECT SELECT Mode Full Charge Error DISPLAY... -
Page 10: Ladevorgang Starten
4. Stellen Sie sicher, dass die am Ladegerät Starthilfefunktion verwenden (Starthilfe-Modus) eingestellte Ladespannung (6 V oder 12 V) Die Starthilfefunktion (13) des Ladegeräts kann der angeschlossenen Batterie entspricht. Eine verwendet werden, um Fahrzeuge mit schwacher zu hoch eingestellte Ladespannung kann zu Batterie beim Startvorgang zu unterstützen. -
Page 11: Umschaltung Der Anzeige
Während des Ladevorgangs können Sie durch wie- derholtes Drücken der Taste „V / A / %“ (5) folgende Modell Ladespannung (V) Ladestrom (A) Parameter anzeigen: • WM 15/100 A V = Ladespannung • A = Ladestrom 12 V: Langsam laden • % = Ladezustand der Batterie... -
Page 12: Fehlersuche
FEhLERSUChE Fehler/Problem Mögliche Ursache Abhilfe Im Display (1) wird „---“ Keine Batterie angeschlossen. Batterie anschließen (siehe „Gerät anschlie- angezeigt. Batteriespannung unter 0,5 V. ßen“). Laden der Batterie nicht möglich. Im Display (1) wird „Er1“ Nicht kompatible Batterie angeschlossen. Nur geeignete Batteriearten anschließen angezeigt. -
Page 13: Reinigung, Pflege Und Wartung
Deutsch REINIGUNG, PFLEGE UND WARTUNG • Entsorgung Reinigen Sie die Batterieklemmen jedes Mal nach Beendigung des Ladevorgangs. Wischen Sie, um Die Verpackung besteht aus umweltfreundlichen Korrosion zu vermeiden, jegliche Batterieflüssig- Materialien, die Sie über die örtlichen Recyclingstel- keit ab, die eventuell mit den Batterieklemmen in len entsorgen können. - Page 15 tABLE OF CONtENtS Introduction ..................16 Normal use .
-
Page 16: Introduction
INtRODUCtION Explanation of symbols and signal words used in these operating instructions and/ or the device: Refer to operator‘s manual Risk of bodily or fatal injury to children! Attention - Danger! Follow safety instructions and warnings! Danger of electric shock! -
Page 17: Normal Use
8 Ah - 90 Ah to improper use. battery capacity 12 V: 15 Ah - 180 Ah Workshop charger WM 15/100 A for 6 V / 12 V batteries Charge indicator Familiarise yourself with all device functions and Ambient C till +40 º... -
Page 18: Safety
SAFETY Risk of chemical burns! • Batteries contain acid, which could damage the General Safety Guidelines eyes and skin. Charging batteries further genera- Read all safety guidelines and instructions. Non- tes gasses and vapours hazardous to the health. compliance with safety guidelines and instructions •... - Page 19 English 19 Risk of electrical shock! Risk of injury! • • Chargers may interfere with the operation of Never attempt to charge non-rechargeable, active electronic implants, e.g. pacemakers, thus damaged or frozen batteries. • pose a personal hazard. Do not use this device to charge dry cell batteries. •...
-
Page 20: Product Overview
PRODUCt OVERVIEW 12 V 15 A 12V/100A Mode V/A/% Type 15 A 11 10 9 Description Function Display indicates the parameters. Indicates the selected charging parameter (in charging mode only). LED V / A / % Switch with the button (3). -
Page 21: Functions
English 21 Functions 1. Connect the red (+) terminal connection cable with clamp (8) to the positive battery terminal. The charger is equipped with a microprocessor 2. Connect the black (-) terminal connection cable (MCU - Micro Computer Unit) and features fully with clamp (7) to the negative battery terminal. -
Page 22: Start Charging
Start charging Attention! If the charging device is correctly connected it will Do not turn the ignition for more than 5 seconds at automatically start charging. a time. The “Charge” LED (10) will light up. 3. try starting the vehicle. -
Page 23: Charging Current
6 V: slow charging Charging voltage Charging current Model WM 15/100 A 12 V: slow charging Charging voltage Charging current Model WM 15/100 A 12 V 12 V: quick charging... -
Page 24: Troubleshooting
Error/Problem Possible cause Correction Display shows (1) "---". No battery connected. Connect battery (see “Connecting the Battery voltage below 0.5 V. Device"). Unable to charge battery. Display (1) shows "Er1". Connected battery incompatible. Only connected compatible batteries (see “Intended Use"). -
Page 25: Cleaning, Care And Maintenance
English 25 CLEANING, CARE AND MAINTENANCE • Clean clamps after every charging. to prevent Do not throw electrical appliances in with corrosion, wipe off any battery fluid which may domestic waste! have come into contact with the clamps. • In accordance with European Directive 2012/19/ Carefully wind the cable when storing the device. - Page 27 TABLE DES MATIèRES Introduction ..................28 Utilisation conforme.
-
Page 28: Introduction
INtRODUCtION Explication des symboles et mots d’avertissements qui sont utilisés dans la présente notice d’explication et/ou sur l’appareil: Lorsque vous utilisez l’appareil, veuillez vous conformer à la présente notice d’utilisation. Risque d’accident et danger de mort pour les enfants ! Veuillez respecter les consignes de mise en garde et de sécurité... -
Page 29: Utilisation Conforme
Affichage de charge résultant d’une utilisation non conforme. à Température ambiante º º Chargeur d‘atelier WM 15/100 A pour batteries 6 V / 12 V Geeignete batteries plomb-acide Batteriearten (WET, MF, EFB, AGM, GEL) Familiarisez-vous avant la première mise en service avec toutes les fonctions de l‘appareil et informez-... -
Page 30: Sécurité
SÉCURITÉ Risque de brûlure ! • Les batteries contiennent des acides qui peuvent Consignes generales de sécurité brûler les yeux et la peau. Lors de la charge de Veuillez lire toutes les consignes de sécurité et la batterie, des gaz et des vapeurs nocifs pour la les instructions. - Page 31 Français 31 Risque de choc électrique ! Risque de blessure ! • • Les chargeurs peuvent gêner le fonctionnement N’essayez jamais de charger des batteries non des implants électroniques comme les pacema- rechargeables, endommagées ou gelées. • kers cardiaques et ainsi mettre en danger les N’utilisez pas l’appareil pour charger des batteries personnes.
-
Page 32: Aperçu Du Produit
APERçU DU PRODUIt 12 V 15 A 12V/100A Mode V/A/% Type 15 A 11 10 9 Dénomination Fonction Afficheur Pour l’affichage des paramètres. Affichage du paramètre de charge sélectionné (uniquement en mode LED V / A / % de charge). Commutable par la touche (3). -
Page 33: Fonctions
Français 33 Dénomination Fonction Affichage de la tension de charge sélectionnée. Commutable par Voyants LED touche (12). Poignée Pour porter le chargeur. Fonctions Brancher l’appareil Le chargeur est équipé d‘un microprocesseur (MCU- Micro Computer Unit) et possède des fonctions de diagnostic, de charge et de maintenance enti- èrement automatiques. -
Page 34: Démarrer Le Processus De Charge
Si la batterie est incorrectement branchée, le voyant Utiliser la fonction d‘assistance au démarrage (mode d‘assistance au démarrage) LED « Error » (9) s’allume. Débrancher dans ce cas le chargeur et vérifier la batterie ainsi que son bran- La fonction d‘assistance au démarrage (13) du char- chement (voir aussi «... -
Page 35: Commutation De L'affichage
Courant de Modèle pressant plusieurs fois la touche „V / A / %“ (5), charge (A) afficher les paramètres suivants : WM 15/100 A • V = Tension de charge • A = Courant de charge 12 V: charge lente •... -
Page 36: Analyse D'erreurs
ANALYSE D’ERREURS Erreur/Problème Cause possible Remède « --- » apparaît sur l'écran (1). Pas de batterie branchée. Brancher la batterie (voir « Brancher Tension de batterie sous 0,5 V l'appareil »). Recharge de la batterie impossible. « Er1 » apparaît sur l'écran (1). -
Page 37: Nettoyage, Entretien Et Maintenance
Français 37 NEttOYAGE, ENTRETIEN ET MAINTENANCE • Mise au rebut Nettoyez la pince à chaque fois une fois que le processus de charge est terminé. Essuyez tout li- L’emballage est composé de matériaux respectueux quide de la batterie pouvant être entré en contact de l’environnement que vous pourrez éliminer dans avec les pinces pour éviter toute corrosion. - Page 39 SOMMARIO Introduzione ..................40 Uso conforme.
-
Page 40: Introduzione
INtRODUzIONE Spiegazione dei simboli e dei termini di avverten- za utilizzati in queste istruzioni per l’uso e/o sul dispositivo: Per l’utilizzo del dispositivo attenersi a queste istruzioni. Pericolo di vita e di incidenti per i bambini! Rispettare le istruzioni e le avvertenze per... -
Page 41: Uso Conforme
C a +40 º º Temperatura ambiente Caricabatterie da officina WM 15/100 A per batterie piombo-acido batterie 6 V / 12 V Tipo di batterien (WET, MF, EFB, AGM, GEL) Prima della messa in esercizio informarsi bene sul corretto utilizzo dell’apparecchio. -
Page 42: Sicurezza
SICUREZZA Pericolo di corrosione! • Le batterie contengono acido dannoso per gli Indicationi di sicurezza generali occhi e per la pelle. Durante il processo di ricarica Leggere tutte le indicazioni e le istruzioni di sicurez- vengono emessi gas e vapori dannosi per la za. - Page 43 Italiano 43 Pericolo di folgorazione! Pericolo di lesioni! • • I caricabatterie possono condizionare il funzio- Non cercare mai di caricare batterie danneggiate, namento di impianti elettronici, quali ad esempio non ricaricabili o congelate. • i pace-maker, e quindi essere pericolosi per le Non utilizzare il caricabatterie per caricare persone che li portano.
-
Page 44: Descrizione Del Prodotto
DESCRIzIONE DEL PRODOttO 12 V 15 A 12V/100A Mode V/A/% Type 15 A 11 10 9 Denominazione Funzione Display Per la visualizzazione dei parametri. Visualizzazione del parametro di carica selezionato (solo in modalità di LED V / A / % carica). -
Page 45: Funzioni
Italiano 45 Denominazione Funzione Visualizzazione della tensione di carica selezionata. Commutabile attraverso il tasto (12). Manico Per il trasporto del caricabatterie. Funzioni Collegamento del dispositivo Questo caricabatterie è provvisto di un micropro- cessore (MCU - Micro-Computer-Unit) e di funzioni interamente automatiche di ricarica, diagnosi e 12 V manutenzione. -
Page 46: Avvio Del Processo Di Ricarica
Se la batteria non è collegata correttamente, il LED Utilizzare la funzione di ausilio all’avviamento (modalità ausilio all’avviamento) “Error” (9) si illumina. In tali casi, staccare il cari- cabatterie e la batteria e verificare il collegamento Il caricabatterie fornisce una funzione di ausilio (fare riferimento anche a “Ricerca degli errori”). -
Page 47: Commutazione Della Visualizzazione
Tensione di carica Corrente di Modello del tasto „V / A / %“ (5) permetterà di visualizzare i ricarica (A) seguenti parametri: WM 15/100 A • T = Tensione di carica • A = Corrente di carica 12 V: carica lenta •... -
Page 48: Analisi Degli Errori
ANALISI DEGLI ERRORI Guasto / problema Possibili cause Soluzione Sul display (1) appare il Nessuna batteria collegata. Collegare la batteria (vedi “Collegamento simbolo “---“. Tensione batteria inferiore a 0,5 V. del dispositivo“). Impossibile ricaricare la batteria. Sul display (1) appare il Batteria non compatibile collegata. -
Page 49: Pulizia, Manutenzione E Riparazioni
Italiano 49 PULIZIA, MANUtENzIONE E RIPARAzIONI • Pulire sempre i morsetti dopo la ricarica. Per evitare la corrosione, pulire i morsetti da eventuali residui di liquido batteria. • Avvolgere con cura i cavi del dispositivo prima di riporlo. Ciò aiuta a evitare danneggiamenti accidentali ai cavi del dispositivo. - Page 51 OBSAh Úvod ....................52 Použití...
-
Page 52: Úvod
ÚVOD Vysvětlení symbolů a signální slov, použitých v tomto návodu k obsluze nebo na přístroji: Při používání přístroje dbejte vždy na tento návod k obsluze. Nebezpečí ohrožení života a nehody pro malé děti! Dbejte na výstražná a bezpečnostní upozornění! Riziko zásahu elektrickým proudem! -
Page 53: Použití Ke Stanovenému Účelu
účelu. C až +40 º º Provozní teploty Dílenská nabíječka WM 15/100 A pro nabíjení 6 V kyselino-olovnatých baterií nebo 12 V baterií typy baterií (WET, MF, EFB, AGM, GEL) Seznamte se před uvedením nabíječky do provozu se všemi funkcemi a informujte se o správném... -
Page 54: Bezpečnost
BEzPEČNOSt Nebezpečí poleptání! • Baterie obsahují kyselinu, která může zranit oči a Všeobecné bezpečnostní pokyny pokožku. Při nabíjení baterie vznikají plyny a páry Přečtěte si bezpečnostní pokyny a pokyny pro ohrožující zdraví. použití. nedodržení bezpečnostních pokynů a • Vyhýbejte se jakémukoliv kontaktu se žíravou pokynů... - Page 55 Česky 55 Nebezpečí zásahu elektrickým proudem Nebezpečí zranění! • • Nabíječky mohou rušit aktivní implantáty jako Nenabíjejte nikdy vadné nebo zmrzlé baterie ani např. kardiostimulátory a ohrozit tím dotyčné baterie, které nejsou určené k nabíjení. • osoby. Nepoužívejte přístroj k nabíjení baterií se suchými •...
-
Page 56: Popis Výrobku
POPIS VýROBKU 12 V 15 A 12V/100A Mode V/A/% Type 15 A 11 10 9 Č. Název Funkce Displej pro zobrazení parametrů. zobrazení zvoleného nabíjecího parametru (jen v režimu nabíjení). LED V / A / % Přepínání je možné tlačítkem (3). -
Page 57: Funkce
Česky 57 Funkce 1. Připojte červený (+) kabel se svorkou (8) na Nabíječka je vybavena mikroprocesorem (MCU - kladný pól baterie. Micro-Computer-Unit) a funkcemi automatického 2. Připojte černý (-) kabel se svorkou (7) na nabíjení, diagnózy a údržby baterií. Jestliže je záporný... -
Page 58: Start Nabíjení
Start nabíjení Přepnutí ukazatele Při správně zapojené nabíječce začíná nabíjení Během nabíjení si můžete opakovaným stisknutím automaticky. tlačítka „V / A / %“ (5) nechat ukázat následující parametry: začne nabíjení. LED „Charge“ (10) svítí. • V = nabíjecí napětí... -
Page 59: 6 V: Pomalé Nabíjení
Na pomocné startování vozidel a přístrojů se slabou • přebití baterií. 6 V: pomalé nabíjení Nabíjecí napětí Nabíjecí proud Model WM 15/100 A 12 V: pomalé nabíjení Nabíjecí napětí Nabíjecí proud Model WM 15/100 A 12 V 12 V: rychlé nabíjení... -
Page 60: Analýza Poruch
ANALýzA PORUCh Chyba/Problém Možné příčina Pomoc Na displeji (1) se ukáže „---“. Baterie není připojena. Připojení baterie (viz „Připojení přístroje“). Napětí baterie pod 0,5 V. Nabíjení baterie není možné. Na displeji (1) se ukáže „Er1“. Připojena nekompatibilní baterie. Připojovat jen vhodné druhy baterií (viz „Použití... -
Page 61: Čištění, Ošetřování Aúdržba
Česky 61 ČIštěNí, OšEtřOVáNí A ÚDRžBA • Po každém nabíjení vyčistěte svorky. Otírejte vždy tekutinu z baterie, která zůstala na svorkách, aby jste zabránili korozi. • Před skladováním přístroje pečlivě stočte kabely. toto pomáhá vyloučit nechtěné poškození kabelů a přístroje. •... - Page 63 OBSAh Úvod ....................64 Používanie v súlade s určeným účelom .
-
Page 64: Úvod
ÚVOD Význam symbolov a výstražných upozornení, ktoré sú používané v tomto návode na používanie a/alebo na prístroji: Pri používaní prístroja dodržiavajte tento návod na ovládanie. Nebezpečenstvo ohrozenia života a nehody pre deti! Rešpektujte varovné a bezpečnostné pokyny! Riziko zásahu elektrickým prúdom! Prístroj používajte iba na miestach chráne-... -
Page 65: Používanie V Súlade S Určeným Účelom
C až +40 º º Okolitá teplota Dielenská nabíjačka WM 15/100 A pre 6 V / 12 V olovo-kyselinové batérie batérie Druhy batérií (WET, MF, EFB, AGM, GEL) Skôr ako zariadenie začnete používať, sa oboznámte so všetkými jeho funkciami a informujte sa, ako sa... -
Page 66: Bezpečnosť
BEzPEČNOSť Nebezpečenstvo poranenia! • Batérie obsahujú kyselinu, ktorá poškodzuje oči a Všeobecné bezpečnostné pokyny pokožku. Pri dobíjaní batérií okrem toho dochádza Prečítajte si bezpečnostné pokyny a pokyny pre k tvorbe plynov a výparov, ktoré ohrozujú zdravie. použitie. nedodržanie bezpečnostných pokynov •... - Page 67 Slovenčina 67 Nebezpečenstvo zásahu elektrickým Nebezpečenstvo poranenia! prúdom! • Nikdy sa nepokúšajte dobíjať nedobíjateľné, • Nabíjačky batérií môžu rušiť činnosť aktívnych poškodené alebo zamrznuté batérie. • elektronických implantátov ako je napr. kardiosti- Nabíjačku batérií nikdy nepoužívajte na nabíjanie mulátor a tým ohroziť osoby. batérií...
-
Page 68: Prehľad Produktu
PREhľAD PRODUKtU 12 V 15 A 12V/100A Mode V/A/% Type 15 A 11 10 9 Č. Označenia Funkcia Displej pre zobrazenie parametrov. zobrazenie zvoleného nabíjacieho parametra (len v nabíjacom režime). LED-kontrolka V / A / % Prepínateľné tlačidlom (3). -
Page 69: Funkcie
Slovenčina 69 Funkcie 1. Červený (+) pólový pripojovací kábel so svorkou Nabíjačka je vybavená mikroprocesorom (MCU - Mi- (8) pripojte na kladný pól batérie. cro-Computer-Unit) a má plnoautomatické funkcie 2. Čierny (-) pólový pripojovací kábel so svorkou diagnostiky, nabíjania a údržby. V prípade nespráv- (7) pripojte na záporný... -
Page 70: Spustenie Procesu Nabíjania
Spustenie procesu nabíjania Upozornenie! Keď je prístroj správne pripojený, nabíjanie sa spustí štartér nenamáhajte dlhšie ako 5 sekúnd bez automaticky. prerušenia. Nabíjací proces sa začne. LED-kontrolka „Charge“ 3. Vyskúšajte naštartovať auto. (10) svieti. Poznámka: Nabíjanie prebieha celkom automaticky. Neštartujte dlhšie ako 5 sekúnd. Pred novým testovacím štartom počkajte cca 3 minúty, aby... -
Page 71: Nabíjací Prúd
Pre pomoc pri štartovaní vozidiel a prístrojov so slabou batériou. 6 V: pomalé nabíjanie Nabíjacie napätie Nabíjací prúd Model WM 15/100 A 12 V: pomalé nabíjanie Nabíjacie napätie Nabíjací prúd Model WM 15/100 A 12 V 12 V: rýchle nabíjanie Nabíjacie napätie... -
Page 72: Analýza Chýb
ANALýzA ChýB Chyba/problém Možné príčiny Riešenie Na displeji (1) sa objaví Batéria nie je pripojená. Pripojenie batérie (pozri „Pripojenie príst- symbol „---“. Batériové napätie pod 0,5 V roja“). Batéria sa nedá nabiť. Na displeji (1) sa objaví Pripojená je nekompatibilná batéria. -
Page 73: Čistenie, Starostlivosť Aúdržba
Slovenčina 73 ČIStENIE, StAROStLIVOSť A ÚDRžBA • Likvidácia Po každom ukončení nabíjacieho procesu vyčistite svorky. Aby ste predišli korózii, utrite každú baté- Obal je vyrobený z materiálu, ktorý neznečisťuje riovú tekutinu, ktorá sa môže eventuálne dostať prostredie a preto ho môžete zlikvidovať v zber- do kontaktu so svorkami. - Page 75 AEG is a registered trademark used under license from AB Electrolux (publ).
- Page 76 76185 Karlsruhe - Germany ▪ www.mts-gruppe.com InterTEC POLSKA Sp. z o.o. Stara Wies, ul. Grodziska 22 05-830 Nadarzyn - Polska ▪ www.intertec-polska.pl Tegro AG Ringstr. 3 8603 Schwerzenbach - Schweiz ▪ www.tegro.ch www.aeg-automotive.com Stand der Informationen: 08/ 2017 EAN: 4038373974020...