Toro PowerPlex 51491 Mode D'emploi

Toro PowerPlex 51491 Mode D'emploi

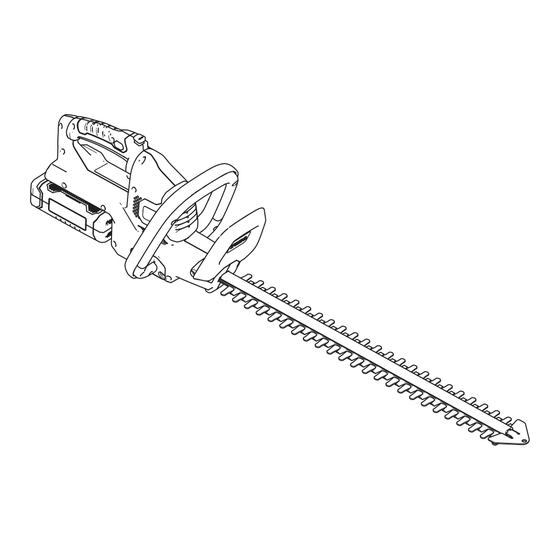
Taille-haie 61 cm (24 po) 40 v max
Masquer les pouces Voir aussi pour PowerPlex 51491:

Publicité

Les langues disponibles

Les langues disponibles

Liens rapides

Form No. 3424-883 Rev A
PowerPlex 24in 40V MAX Hedge Trimmer
51491 , 51491T
Cortasetos PowerPlex 40 V MAX de 61 cm
(24")
51491 , 51491T
Taille-haie PowerPlex 61 cm (24 po) 40 V MAX
51491 , 51491T
*3424-883* A
www.Toro.com.

Publicité

Table des Matières
loading

Sommaire des Matières pour Toro PowerPlex 51491

  • Page 1 Form No. 3424-883 Rev A PowerPlex 24in 40V MAX Hedge Trimmer 51491 , 51491T Cortasetos PowerPlex 40 V MAX de 61 cm (24") 51491 , 51491T Taille-haie PowerPlex 61 cm (24 po) 40 V MAX 51491 , 51491T *3424-883* A www.Toro.com.
  • Page 2 Form No. 3424-880 Rev A PowerPlex 24in 40V MAX Hedge Trimmer Model No. 51491—Serial No. 319000001 and Up Model No. 51491T—Serial No. 319000001 and Up *3424-880* A Register at www.Toro.com. Original Instructions (EN)
  • Page 3 You are responsible for operating the product properly and safely. You may contact Toro directly at www.Toro.com for product and accessory information, help finding a dealer, complete warranty details, or to register your product.
  • Page 4 Safety part of the power tool may result in personal injury. Do not overreach. Keep proper WARNING footing and balance at all times. This enables better control of the power tool in Failure to follow all warnings and instructions unexpected situations. may result in electric shock, fire and/or Dress properly.
  • Page 5 instructions, taking into account the blades contacting a “live” wire may make exposed working conditions and the work to metal parts of the power tool “live” and could give be performed. Using the power tool for you an electric shock. operations different from those intended •...
  • Page 6 of experience and knowledge if they have been the leakage gets in your eyes, flush your eyes with given supervision or instruction concerning use clean water for a minimum of 10 minutes and seek of the charger in a safe way and understand the immediate medical attention.
  • Page 7: Safety And Instructional Decals

    Safety and Instructional Decals Safety decals and instructions are easily visible to the operator and are located near any area of potential danger. Replace any decal that is damaged or missing. Symbol Designation/Explanation Read the instruction manual. Wear hearing protection. decal136-2462 136-2462 Wear eye protection.
  • Page 8 decal136-2476 136-2476 1. The battery pack is 3. The battery pack is too charging. warm. 2. The battery pack is fully 4. Replace the battery pack. charged. decal136-2534 decal136-2539 136-2534 136–2539 1. The battery does not 4. Stop—follow these 1. Charge the battery where the temperature is between 0°C come out of the box fully instructions before first and 40°C (32°F and 104°F).
  • Page 9: Product Overview

    Setup Product Overview Note: The battery pack is not fully charged when it is purchased. Before using the tool for the first time, refer to Charging the Battery Pack (page 10). Mounting the Battery Charger (Optional) If desired, mount the battery charger securely on a g204357 wall using the wall-mount key holes on the back of Figure 3...
  • Page 10: Starting The Hedge Trimmer

    Operation The trimmer stays on as long as the auxiliary-handle switch is engaged and the trigger is squeezed. You may release the Starting the Hedge Trimmer lock switch once the hedge trimmer is running (Figure Remove the protective cover from the blades (Figure Rotating the Hedge Trimmer WARNING...
  • Page 11: Removing The Battery Pack

    Removing the Battery Pack Charging the Battery Pack Press the battery latch on the tool to release the Important: Read all safety precautions. battery pack and slide the battery pack out of the tool Important: Charge the battery pack only in (Figure temperatures that are within the appropriate range;...
  • Page 12: Operating Tips

    Operating Tips Slide the battery pack into the charger until it is fully seated (Figure • Use the power tool for cutting in either direction in a slow, sweeping action from side to side. • Stand so that you are stable and balanced on both feet.
  • Page 13 For more information on recycling lithium-ion battery packs and to locate the battery recycling facility closest to you, visit www.Call2Recycle.org (US and Canada only). If you are located outside of the US and Canada, please contact your authorized Toro distributor.
  • Page 14 Troubleshooting Perform only the steps described in these instructions. All further inspection, maintenance, and repair work must be performed by an authorized service center or a similarly qualified specialist if you cannot solve the problem yourself. Problem Possible Cause Corrective Action The tool does not start.
  • Page 15 Problem Possible Cause Corrective Action 1 LED indicator is blinking on the battery 1. The battery pack voltage is low. 1. Place the battery pack on the charger. pack. It is difficult to remove the battery pack 1. The battery pack/tool is new or there 1.
  • Page 16 While the exposure from Toro products may be negligible or well within the “no significant risk” range, out of an abundance of caution, Toro has elected to provide the Prop 65 warnings. Moreover, if Toro does not provide these warnings, it could be sued by the State of California or by private parties seeking to enforce Prop 65 and subject to substantial penalties.
  • Page 17 Form No. 3424-881 Rev A Cortasetos PowerPlex 40 V MAX de 61 cm (24") Nº de modelo 51491—Nº de serie 319000001 y superiores Nº de modelo 51491T—Nº de serie 319000001 y superiores *3424-881* A Registre su producto en www.Toro.com. Traducción del original (ES)
  • Page 18 Usted puede ponerse en contacto directamente con Toro en www.Toro.com si desea información sobre productos y accesorios, si necesita localizar un distribuidor, buscar datos completos sobre su garantía o registrar su producto.
  • Page 19 Seguridad conectar la herramienta a la toma de corriente y/o a la batería, y antes de levantar o transportar la herramienta. Transportar las herramientas eléctricas ADVERTENCIA con el dedo sobre el interruptor o enchufar Si no se observan todas las advertencias e herramientas eléctricas con el interruptor en instrucciones, pueden producirse descargas la posición de encendido es una invitación...
  • Page 20 la herramienta eléctrica o con estas expulsado de la batería puede causar instrucciones de uso. Las herramientas irritación o quemaduras. eléctricas son peligrosas en manos de El tiempo de carga aumenta si la usuarios inexpertos. batería no se carga dentro del intervalo de temperatura apropiado;...
  • Page 21 • • Siempre asegúrese de que el protector de Desconecte el cargador del suministro de energía seguridad provisto está colocado antes de usar y deje que se enfríe antes de limpiar, mantener, el producto. Nunca intente usar un producto almacenar o transportarlo. incompleto o uno adaptado con una modificación •...
  • Page 22 • No almacene ni lleve una batería de repuesto en el bolsillo o en la caja de herramientas o en ningún otro lugar donde pueda entrar en contacto con objetos metálicos. La batería podría hacer cortocircuito y causar daños a la batería, quemarse o provocar un incendio.
  • Page 23: Pegatinas De Seguridad E Instrucciones

    Pegatinas de seguridad e instrucciones Las pegatinas de seguridad e instrucciones están a la vista del operador y están ubicadas cerca de cualquier zona de peligro potencial. Sustituya cualquier pegatina que esté dañada o que falte. Símbolo Designación/explicación Lea el manual de instrucciones.
  • Page 24 decal136-2476 136-2476 1. La batería se está 3. La batería está demasiado cargando. caliente. 2. La batería está 4. Sustituya la batería. completamente cargada. decal136-2534 decal136-2539 136-2534 136-2539 1. La batería no se suministra 4. Pare: siga estas 1. Cargue la batería a una temperatura de entre 0 °C y 40 °C totalmente cargada.
  • Page 25 Montaje El producto Nota: En el momento de la compra la batería no está totalmente cargada. Antes de usar la herramienta por primera vez, consulte Carga de la batería (página 11). Cómo montar el cargador de la batería (opcional) Si lo desea, monte el cargador de la batería g204357 firmemente en la pared utilizando los orificios de Figura 3...
  • Page 26 Operación Presione el interruptor de bloqueo y apriete el interruptor del gatillo mientras activa el interruptor de la empuñadura auxiliar para Cómo arrancar el encender el cortasetos (Figura El cortasetos seguirá encendido mientras se cortasetos aprieten el interruptor de la empuñadura auxiliar y el gatillo.
  • Page 27: Cómo Retirar La Batería

    Cómo retirar la batería Presione el cierre de la batería en la herramienta para liberar la batería, y retire la batería de la herramienta (Figura g228487 Figura 8 1. Hueco de la batería 4. Botón del indicador de g194190 carga de la batería Figura 7 2.
  • Page 28: Consejos De Operación

    Indicador Indicador Indica: izquierdo derecho Cargador encendido, sin Apagado Rojo batería Rojo Rojo La batería se está cargando Verde Rojo La batería está cargada La batería está demasiado Naranja Rojo caliente Rojo Rojo Sustituya la batería intermitente Consejos de operación •...
  • Page 29: Lubricación De La Cuchilla

    (EE.UU. y Canadá únicamente). Si se encuentra fuera de EE.UU. o Canadá, póngase en contacto con su distribuidor Toro autorizado.
  • Page 30: Solución De Problemas

    Solución de problemas Realice solo los pasos descritos en estas instrucciones. Cualquier otro trabajo de inspección, mantenimiento o reparación debe ser realizado por un Servicio Técnico Autorizado o por un especialista autorizado si no puede solucionar el problema usted mismo. Problema Posible causa Acción correctora...
  • Page 31 Problema Posible causa Acción correctora 1 indicador LED de la batería parpadea. 1. El voltaje de la batería es bajo. 1. Coloque la batería en el cargador. Es difícil retirar la batería de la 1. La batería/herramienta es nueva 1. Limpie los terminales de la batería herramienta.
  • Page 32 Aunque la exposición que provocan los productos Toro puede ser insignificante, o estar dentro de los límites de la categoría "sin riesgo significativo", Toro ha optado por proporcionar las advertencias de la Proposición 65 por simple precaución.
  • Page 33 Form No. 3424-882 Rev A Taille-haie PowerPlex 61 cm (24 po) 40 V MAX N° de modèle 51491—N° de série 319000001 et suivants N° de modèle 51491T—N° de série 319000001 et suivants *3424-882* A Enregistrez votre produit à www.Toro.com. Traduction du texte d'origine (FR)
  • Page 34 éviter de l'endommager ou de vous blesser. Vous êtes responsable de l'utilisation sûre et correcte du produit. Vous pouvez contacter Toro directement sur www.Toro.com pour tout renseignement concernant un produit ou un accessoire, pour obtenir l'adresse des dépositaires, pour connaître tous les détails concernant la garantie ou pour enregistrer votre produit.
  • Page 35 Sécurité Évitez tout démarrage accidentel. Assurez-vous que l'interrupteur marche/arrêt est en position ARRÊT ATTENTION avant de connecter l'outil à une source d'alimentation et/ou à la batterie, de le Le non respect de tous les avertissements et prendre en main ou de le transporter. toutes les consignes peut entraîner des chocs Des accidents peuvent se produire si vous électriques, un incendie et/ou des blessures...
  • Page 36 Ces mesures de sécurité préventives En cas de contact du liquide avec les réduisent le risque de démarrage accidentel yeux, consultez en plus un médecin. Le de l'outil. liquide éjecté de la batterie peut causer des irritations ou des brûlures. Rangez les outils électriques non utilisés hors de portée des enfants et ne confiez Le temps de charge augmente si la...
  • Page 37 • • N'utilisez jamais le produit sur un escalier ou Débranchez le chargeur de l'alimentation et une échelle. Ne travaillez jamais plus haut qu'à laissez-le refroidir avant de le nettoyer, l'entretenir, hauteur d'épaule. le remiser et le transporter. • • Vérifiez toujours que le déflecteur de sécurité...
  • Page 38 tout autre endroit où elle pourrait entrer en contact avec des objets métalliques. Un court-circuit pourrait se produire et endommager la batterie ou causer des brûlures ou un incendie. • Ne percez pas la batterie avec des clous, ne la frappez pas avec un marteau, ne marchez pas dessus et ne la soumettez à...
  • Page 39: Autocollants De Sécurité Et D'instruction

    Autocollants de sécurité et d'instruction Des autocollants de sécurité et des instructions bien visibles par l'opérateur sont placés près de tous les endroits potentiellement dangereux. Remplacez tout autocollant endommagé ou manquant. Symbole Désignation/Explication Lisez la notice d'utilisation. Portez des protecteurs d'oreilles.
  • Page 40 decal136-2476 136-2476 1. La batterie est en charge. 3. La batterie est trop chaude. 2. La batterie est 4. Remplacez la batterie. complètement chargée. decal136-2534 decal136-2539 136-2534 136-2539 1. La batterie n'est pas 4. Stop – suivez ces 1. Chargez la batterie à une température ambiante comprise chargée au départ.
  • Page 41: Mise En Service

    Mise en service Vue d'ensemble du produit Remarque: La batterie n'est pas complètement chargée lors de l'achat de l'outil. Avant la toute première utilisation de l'outil, voir Charge de la batterie (page 11). Montage du chargeur de batterie (option) Si vous le souhaitez, fixez le chargeur de batterie solidement à...
  • Page 42: Utilisation

    Utilisation Rangez l'outil, la batterie et le chargeur dans un lieu fermé, propre et sec. Démarrage du taille-haie Enlevez le couvercle de protection des lames (Figure ATTENTION Les lames du taille-haie peuvent causer des coupures ou des mutilations. Manipulez toujours le taille-haie avec prudence quand le couvercle de protection est retiré.
  • Page 43: Retrait De La Batterie

    Retrait de la batterie actionnant le commutateur de poignée auxiliaire pour mettre le taille-haie en marche (Figure Appuyez sur le verrou de batterie de l'outil afin de Le taille-haie reste en marche tant que vous débloquer la batterie, et faites glisser cette dernière appuyez sur le commutateur de poignée hors de l'outil (Figure...
  • Page 44: Conseils D'utilisation

    • Assurez-vous que les évents sur le chargeur N'utilisez jamais le taille-haie près de lignes de batterie sont exempts de toute poussière et électriques, clôtures, poteaux, bâtiments ou autres tout débris. objets ne pouvant être déplacés. • Glissez la batterie dans le chargeur jusqu'à ce Si la lame heurte un objet dur, vérifiez toujours qu'elle soit bien enclenchée (Figure...
  • Page 45: Entretien

    Pour plus de renseignements sur le recyclage des batteries lithium-ion et pour trouver le centre de recyclage de batteries le plus proche, rendez-vous sur www.Call2Recycle.org (États-Unis et Canada seulement). Hors des États-Unis et du Canada, veuillez contacter votre dépositaire Toro agréé.
  • Page 46: Dépistage Des Défauts

    Dépistage des défauts Effectuez uniquement les opérations décrites dans cette notice. Tout autre travail d'inspection, d'entretien ou de réparation doit être réalisé par un centre d'entretien agréé ou autre spécialiste qualifié si vous n'arrivez pas à résoudre le problème vous-même. Problème Cause possible Mesure corrective...
  • Page 47: Proposition 65 De Californie - Informations Concernant Cet Avertissement

    Bien que l'exposition avec les produits Toro puisse être négligeable ou parfaitement dans les limites « sans aucun risque significatif », par mesure de précaution, Toro a décidé de fournir les avertissements de la Proposition 65. De plus, en l'absence de ces avertissements, la société...

Ce manuel est également adapté pour:

Powerplex 51491tPowerplex 245149151491t

Table des Matières