AEG IAE84411FB Notice D'utilisation
Masquer les pouces Voir aussi pour IAE84411FB:
Table des Matières

Publicité

Les langues disponibles

Les langues disponibles

Liens rapides

IAE84411FB
USER
MANUAL
EN
User Manual
Hob
FR
Notice d'utilisation
Table de cuisson
DE
Benutzerinformation
Kochfeld
2
22
45

Publicité

Table des Matières
loading

Sommaire des Matières pour AEG IAE84411FB

  • Page 1 IAE84411FB User Manual Notice d'utilisation Table de cuisson Benutzerinformation Kochfeld USER MANUAL...
  • Page 2: Table Des Matières

    10. ENERGY EFFICIENCY..................21 FOR PERFECT RESULTS Thank you for choosing this AEG product. We have created it to give you impeccable performance for many years, with innovative technologies that help make life simpler – features you might not find on ordinary appliances. Please spend a few minutes reading to get the very best from it.
  • Page 3: Children And Vulnerable People Safety

    ENGLISH instructions in a safe and accessible location for future reference. 1.1 Children and vulnerable people safety This appliance can be used by children aged from 8 • years and above and persons with reduced physical, sensory or mental capabilities or lack of experience and knowledge if they have been given supervision or instruction concerning the use of the appliance in a safe way and understand the hazards involved.
  • Page 4: Safety Instructions

    CAUTION: The cooking process has to be supervised. • A short term cooking process has to be supervised continuously. WARNING: Danger of fire: Do not store items on the • cooking surfaces. Metallic objects such as knives, forks, spoons and lids •...
  • Page 5: Electrical Connection

    ENGLISH appliance when the door or the • Make sure not to cause damage to window is opened. the mains plug (if applicable) or to the • Each appliance has cooling fans on mains cable. Contact our Authorised the bottom. Service Centre or an electrician to •...
  • Page 6 • Do not use the appliance as a work other purposes, for example room surface or as a storage surface. heating. • If the surface of the appliance is 2.4 Care and cleaning cracked, disconnect immediately the appliance from the power supply. This •...
  • Page 7: Installation

    ENGLISH 3. INSTALLATION WARNING! Refer to Safety chapters. 3.1 Before the installation Before you install the hob, write down the information bellow from the rating plate. The rating plate is on the bottom of the hob. Serial number ......3.2 Built-in hobs Only use the built-in hobs after you assemble the hob into correct built-in units and work surfaces that align to the...
  • Page 8: Product Description

    4. PRODUCT DESCRIPTION 4.1 Cooking surface layout Induction cooking zone Control panel 4.2 Control panel layout Use the sensor fields to operate the appliance. The displays, indicators and sounds tell which functions operate. Sen‐ Function Comment field ON / OFF To activate and deactivate the hob.
  • Page 9 ENGLISH Sen‐ Function Comment field Timer display To show the time in minutes. Hob²Hood To activate and deactivate the manual mode of the function. To select the cooking zone. To increase or decrease the time. PowerBoost To activate the function. Control bar To set a heat setting.
  • Page 10: Daily Use

    4.4 OptiHeat Control (3 step The induction cooking zones produce the heat necessary for the cooking process Residual heat indicator) directly in the bottom of the cookware. The glass ceramic is heated by the heat WARNING! of the cookware.
  • Page 11: Automatic Heat Up

    ENGLISH You can cook with large cookware If there is any residual heat placed on two cooking zones at the ) on the same time. The cookware must cover the cooking zone you want to centres of both zones. use, an acoustic signal is 5.6 Automatic Heat Up emitted and the function does not start.
  • Page 12: Child Safety Device

    The To activate the function: touch the timer to set the time (00 - 99 heat setting display shows minutes). When the indicator of the To activate the function: touch cooking zone starts to flash slowly the time counts down.
  • Page 13: Power Management

    ENGLISH • The function decreases the power to Touch for 4 seconds. comes on. the other cooking zones connected to Deactivate the hob with the same phase. • The heat setting display of the To deactivate the function: activate the reduced zones changes between two hob with .
  • Page 14: Hints And Tips

    When you finish cooking and Auto‐ Boil‐ deactivate the hob, the hood Frying matic fan may still operate for a light certain period of time. After that time the system Mode H1 On deactivates the fan automatically and prevents...
  • Page 15: Examples Of Cooking Applications

    ENGLISH 6.3 Hints & Tips for Use the induction cooking SenseBoil® zones with suitable cookware. The function works best for boiling water and preparing potatoes. Cookware material It does not work with cast • correct: cast iron, steel, enamelled iron and non-stick cookware, steel, stainless steel, multi-layer e.g.
  • Page 16 When you increase the heat The data in the table is for setting, it is not proportional to the guidance only. increase of the consumption of power. It means that a cooking zone with the medium heat setting uses less than a half of its power.
  • Page 17: Care And Cleaning

    Cooker hoods with the Hob²Hood function To find the full range of cooker hoods which work with this function refer to our consumer website. The AEG cooker hoods that work with this function must have the symbol Other remotely controlled appliances may block the signal.
  • Page 18 8.1 What to do if... Problem Possible cause Remedy You cannot activate or oper‐ The hob is not connected to Check if the hob is correctly ate the hob. an electrical supply or it is connected to the electrical connected incorrectly.
  • Page 19 ENGLISH Problem Possible cause Remedy The sensor fields become The cookware is too large or Put large cookware on the hot. you put it too near to the rear zones, if possible. controls. There is no sound when you The sounds are deactivated. Activate the sounds. Refer to touch the panel sensor "Daily use".
  • Page 20: Technical Data

    (it is in the corner of the glass 9. TECHNICAL DATA 9.1 Rating plate Model IAE84411FB PNC 949 597 476 00 Typ 62 D4A 01 AA 220 - 240 V / 400 V 2N 50 - 60 Hz Induction 7.35 kW...
  • Page 21: Energy Efficiency

    10. ENERGY EFFICIENCY 10.1 Product information according to EU 66/2014 valid for EU market only Model identification IAE84411FB Type of hob Built-In Hob Number of cooking zones Heating technology Induction Diameter of circular cook‐...
  • Page 22: Service Et Assistance À La Clientèle

    10. RENDEMENT ÉNERGÉTIQUE................ 43 POUR DES RÉSULTATS PARFAITS Merci d’avoir choisi ce produit AEG. Nous l’avons conçu pour qu’il vous offre des performances irréprochables pendant de nombreuses années, en intégrant des technologies innovantes vous simplifiant la vie – fonctions que vous ne trouverez peut-être pas sur des appareils ordinaires.
  • Page 23: Sécurité Des Enfants Et Des Personnes Vulnérables

    FRANÇAIS utilisation. Conservez toujours les instructions dans un lieu sûr et accessible pour vous y référer ultérieurement. 1.1 Sécurité des enfants et des personnes vulnérables Cet appareil peut être utilisé par des enfants de plus • de 8 ans, ainsi que des personnes dont les capacités physiques, sensorielles et mentales sont réduites ou dont les connaissances et l'expérience sont insuffisantes, à...
  • Page 24 AVERTISSEMENT : Il peut être dangereux de laisser • chauffer de la graisse ou de l'huile sans surveillance sur une table de cuisson car cela pourrait provoquer un incendie. N'essayez JAMAIS d'éteindre un feu avec de l'eau. • Éteignez l'appareil puis couvrez les flammes, par exemple avec un couvercle ou une couverture ignifuge.
  • Page 25: Consignes De Sécurité

    FRANÇAIS 2. CONSIGNES DE SÉCURITÉ 2.1 Installation 2.2 Branchement électrique AVERTISSEMENT! AVERTISSEMENT! L'appareil doit être installé Risque d'incendie ou uniquement par un d'électrocution. professionnel qualifié. • L'ensemble des branchements électriques doit être effectué par un AVERTISSEMENT! technicien qualifié. Risque de blessure •...
  • Page 26: Utilisation

    • Si la prise de courant est lâche, ne 30 cm des zones de cuisson à branchez pas la fiche d'alimentation induction lorsque l'appareil est en secteur. cours de fonctionnement. • Ne tirez jamais sur le câble • Lorsque vous versez un aliment dans d'alimentation pour débrancher...
  • Page 27: Mise Au Rebut

    FRANÇAIS toujours ces objets lorsque vous • Concernant la/les lampe(s) à devez les déplacer sur la surface de l’intérieur de ce produit et les lampes cuisson. de rechange vendues séparément : • Cet appareil est exclusivement Ces lampes sont conçues pour destiné...
  • Page 28: Montage

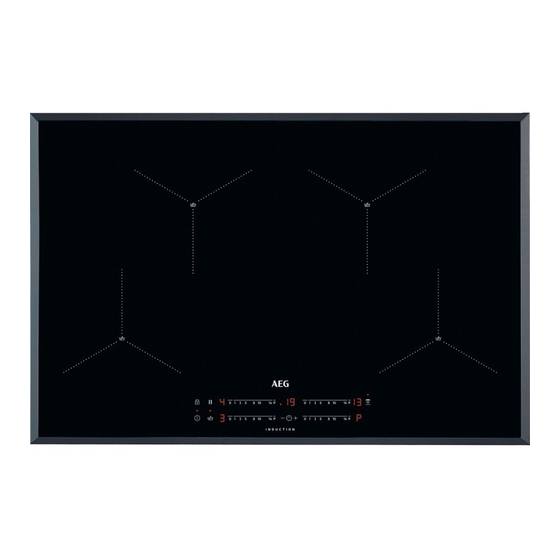
    3.4 Montage min. 500mm min. 50mm 4. DESCRIPTION DE L'APPAREIL 4.1 Description de la table de cuisson Zone de cuisson à induction Bandeau de commande 4.2 Description du bandeau de commande Les touches sensitives permettent de faire fonctionner l'appareil. Les affichages, les...
  • Page 29: Indicateurs De Niveau De Cuisson

    FRANÇAIS Tou‐ Fonction Commentaire sensi‐ tive MARCHE/ARRÊT Pour allumer et éteindre la table de cuisson. Verrouillage / Dispositif de Pour verrouiller ou déverrouiller le bandeau sécurité enfants de commande. SenseBoil® Pour activer et désactiver la fonction. Les indicateurs au-dessus du symbole mon‐ trent l'avancée de la fonction.
  • Page 30: Optiheat Control (Voyant De Chaleur Résiduelle À Trois Niveaux)

    Affichage Description Une anomalie de fonctionnement s'est produite. + chiffre OptiHeat Control (Voyant de chaleur résiduelle à trois niveaux) : con‐ tinuer la cuisson / maintien au chaud / chaleur résiduelle. Verrouillage /Dispositif de sécurité enfants est activée. Le récipient est inapproprié ou trop petit, ou bien il n'y a pas de réci‐...
  • Page 31: Niveau De Cuisson

    FRANÇAIS 3. Touchez le bandeau de sélection de instants, s'allume et la table de l'une des zones de cuisson cuisson s'éteint. disponibles pour y activer la fonction La relation entre le niveau de cuisson (entre les niveaux de cuisson 1 et 14) et la durée après laquelle la table de La fonction démarre.
  • Page 32: Démarrage Automatique De La Cuisson

    5.6 Démarrage automatique Pour sélectionner la zone de cuisson : de la cuisson appuyez sur à plusieurs reprises jusqu'à ce que l'indicateur de la zone de Activez cette fonction pour obtenir le cuisson correspondante s'affiche. niveau de cuisson souhaité plus Pour activer la fonction : appuyez sur rapidement.
  • Page 33: Verrouillage

    FRANÇAIS sélectionnée : sélectionnez la zone de cuisson fonctionnent. Vous éviterez ainsi une modification accidentelle du réglage cuisson à l'aide de . Le voyant de la du niveau de cuisson. zone de cuisson clignote rapidement. L'affichage indique la durée de Réglez d'abord le niveau de cuisson.
  • Page 34: Gestionnaire De Puissance

    5.12 OffSound Control (Activation et désactivation des signaux sonores) Éteignez la table de cuisson. Appuyez pendant 3 secondes. L'affichage s'allume, puis s'éteint. Appuyez sur pendant 3 secondes ; s'allume. Appuyez sur la touche du minuteur pour choisir l'une des options suivantes : •...
  • Page 35 FRANÇAIS Modes automatiques Pour faire fonctionner directement la hotte, Éclaira‐ Faire Faire fri‐ désactivez le mode ge auto‐ automatique de la fonction bouillir matique sur le bandeau de commande de la hotte. Mode H0 Désacti‐ Désacti‐ Désacti‐ vé vé vé Lorsque la cuisson est terminée et que vous Mode H1 Activé...
  • Page 36: Conseils

    L'éclairage de la hotte s'éteint 2 minutes après avoir éteint la table de cuisson. 6. CONSEILS plus petit que le diamètre minimal AVERTISSEMENT! recommandé ne reçoit qu'une petite Reportez-vous aux chapitres partie de la puissance générée par la concernant la sécurité.
  • Page 37: Öko Timer (Minuteur Éco)

    FRANÇAIS blender ou en posant votre téléphone Elle ne fonctionne pas avec portable à proximité de l'appareil) les récipients en fer forgé et lorsque la fonction est en cours anti-adhésifs, par ex. avec d'utilisation. un revêtement en • Si vous souhaitez ajouter du sel dans céramique.
  • Page 38 Niveau de Utilisation : Durée Conseils cuisson (min) 3 - 5 Faire mijoter des plats à base 25 - 50 Ajoutez au moins deux fois de riz et de laitage, réchauffer plus de liquide que de riz, mé‐ des plats cuisinés.
  • Page 39: Entretien Et Nettoyage

    Les autres appareils hottes dotées de cette fonction, télécommandés peuvent consultez notre site web destiné aux bloquer le signal. N'utilisez consommateurs. Les hottes AEG qui pas d'autre appareil sont dotées de cette fonction doivent télécommandé en même porter le symbole temps que la fonction de la table de cuisson.
  • Page 40: En Cas D'anomalie De Fonctionnement

    8.1 En cas d'anomalie de fonctionnement Problème Cause probable Solution Vous ne pouvez pas allumer La table de cuisson n'est pas Vérifiez que la table de cuis‐ la table de cuisson ni la faire connectée à une source son est correctement bran‐...
  • Page 41 FRANÇAIS Problème Cause probable Solution Démarrage automatique de La zone est chaude. Laissez la zone de cuisson la cuisson ne fonctionne refroidir. pas. Le niveau de cuisson le plus Le niveau de cuisson le plus élevé est réglé. élevé est identique à la fonc‐ tion.
  • Page 42 Problème Cause probable Solution Le récipient contient trop Reportez-vous au chapitre apparaissent en al‐ d'eau ou pas assez. « Conseils ». Ne faites bouil‐ ternance. Vous avez fait bouillir un ali‐ lir que de l'eau et des pom‐ ment autre que de l'eau et mes de terre à...
  • Page 43: Caractéristiques Techniques

    FRANÇAIS 9. CARACTÉRISTIQUES TECHNIQUES 9.1 Plaque de calibrage Modèle IAE84411FB PNC 949 597 476 00 Type 62 D4A 01 AA 220 - 240 V / 400 V 2N 50 - 60 Hz Induction 7.35 kW Fabriqué en Allemagne Numéro de série ..
  • Page 44: Économie D'énergie

    Consommation d'énergie Avant gauche 179,6 Wh / kg selon la zone de cuisson Arrière gauche 177,0 Wh / kg (EC electric cooking) Avant droite 188,8 Wh / kg Arrière droite 177,0 Wh / kg Consommation d'énergie 180,6 Wh / kg...
  • Page 45: Kundendienst Und Service

    9. TECHNISCHE DATEN..................66 10. ENERGIEEFFIZIENZ..................66 FÜR PERFEKTE ERGEBNISSE Danke, dass Sie sich für dieses AEG Produkt entschieden haben. Wir haben es geschaffen, damit Sie viele Jahre von seiner ausgezeichneten Leistung und den innovativen Technologien, die Ihnen das Leben erleichtern, profitieren können. Es ist mit Funktionen ausgestattet, die in gewöhnlichen Geräten nicht vorhanden...
  • Page 46: Sicherheit Von Kindern Und Schutzbedürftigen Personen

    Verwendung des Geräts übernimmt der Hersteller keine Haftung. Bewahren Sie die Anleitung immer an einem sicheren und zugänglichen Ort zum späteren Nachschlagen auf. 1.1 Sicherheit von Kindern und schutzbedürftigen Personen Das Gerät kann von Kindern ab 8 Jahren und •...
  • Page 47 DEUTSCH Sie vorsichtig und berühren Sie niemals die Heizelemente. Schalten Sie das Gerät nicht über eine externe • Zeitschaltuhr oder eine separate Fernsteuerung ein. WARNUNG: Kochen mit Fett oder Öl auf einem • unbeaufsichtigten Kochfeld ist gefährlich und kann zu einem Brand führen.
  • Page 48: Sicherheitsanweisungen

    Bedienungsanleitung als geeignete und empfohlene Schutzabdeckungen oder die im Gerät enthaltene Schutzabdeckung. Es besteht Unfallgefahr durch die Verwendung ungeeigneter Schutzabdeckungen. 2. SICHERHEITSANWEISUNGEN 2.1 Montage Kühlgebläse beschädigen oder das Kühlsystem beeinträchtigen WARNUNG! können. Die Montage des Geräts darf – Halten Sie einen Abstand von...
  • Page 49 DEUTSCH das Netzkabel oder ggf. der • Dieses Gerät ist ausschließlich zur Netzstecker nicht mit dem heißen Verwendung im Haushalt bestimmt. Gerät oder heißem Kochgeschirr in • Nehmen Sie keine technischen Berührung kommt. Änderungen am Gerät vor. • Verwenden Sie keine •...
  • Page 50: Entsorgung

    • Reinigen Sie das Gerät mit einem WARNUNG! weichen, feuchten Tuch. Verwenden Risiko von Schäden am Sie ausschließlich Neutralreiniger. Gerät. Benutzen Sie keine Scheuermittel, scheuernde • Stellen Sie kein heißes Kochgeschirr Reinigungsschwämmchen, auf das Bedienfeld. Lösungsmittel oder • Legen Sie keine heißen Topfdeckel Metallgegenstände.
  • Page 51 DEUTSCH Typenschild ist auf dem Boden des Kochfelds angebracht. Seriennummer .... 3.2 Einbau-Kochfelder Einbau-Kochfelder dürfen nur nach dem Einbau in bzw. unter normgerechte, passende Einbauschränke und Arbeitsplatten betrieben werden. 3.3 Anschlusskabel • Das Kochfeld wird mit einem Anschlusskabel geliefert. • Ersetzen Sie ein defektes Netzkabel durch den Kabeltyp H05V2V2-F, der einer Temperatur von mindestens 90 °C standhält.
  • Page 52: Gerätebeschreibung

    4. GERÄTEBESCHREIBUNG 4.1 Kochfeldanordnung Induktionskochzone Bedienfeld 4.2 Bedienfeldanordnung Bedienen Sie das Gerät über die Sensorfelder. Die Anzeigen, Kontrolllampen und akustischen Signale informieren Sie über die aktiven Funktionen. Sen‐ Funktion Kommentar sor‐ feld EIN/AUS Ein- und Ausschalten des Kochfeldes. Verriegeln / Kindersiche‐...
  • Page 53 DEUTSCH Sen‐ Funktion Kommentar sor‐ feld Timer-Anzeige Zeigt die Zeit in Minuten an. Hob²Hood Ein- und Ausschalten des manuellen Modus der Funktion. Auswählen der Kochzone. Erhöhen oder Verringern der Zeit. PowerBoost Einschalten der Funktion. Einstellskala Einstellen der Kochstufe. 4.3 Anzeige der Kochstufen Display Beschreibung Die Kochzone ist ausgeschaltet.
  • Page 54: Täglicher Gebrauch

    4.4 OptiHeat Control Die Induktionskochzonen erzeugen die erforderliche Hitze zum Kochen direkt im (Restwärmeanzeige, 3-stufig) Boden des Kochgeschirrs. Die Glaskeramik wird nur durch die Wärme WARNUNG! des Kochgeschirrs erhitzt. Es besteht Verbrennungsgefahr durch Restwärme. Die Anzeigen zeigen den Restwärmegrad der Kochzonen an, die Sie gerade verwenden.
  • Page 55 DEUTSCH 5.4 SenseBoil® verringert) oder berühren Sie die Einstellskala und stellen Sie die Diese Funktion regelt die Kochstufe manuell ein. Wassertemperatur automatisch, so dass Die Funktion Pause und das es nicht überkocht, wenn es den Anheben des Topfs schalten Siedepunkt erreicht. die Funktion SenseBoil®...
  • Page 56 CountUp Timer (Garzeitmesser) Siehe Kapitel „Technische Mit dieser Funktion können Sie Daten“. feststellen, wie lange eine Kochzone bereits in Betrieb ist. Einschalten der Funktion für eine Auswählen der Kochzone:Berühren Kochzone: Berühren Sie leuchtet auf. so oft, bis die Anzeige der gewünschten Kochzone aufleuchtet.
  • Page 57: Offsound Control (Einund Ausschalten Der Signaltöne)

    DEUTSCH Wenn diese Funktion eingeschaltet ist, Kochvorgang: Schalten Sie das werden alle anderen Symbole des Kochfeld mit ein. leuchtet auf. Bedienfelds verriegelt. Berühren Sie 4 Sekunden lang. Die Funktion unterbricht nicht die Timer- Stellen Sie die Kochstufe innerhalb Funktionen. von 10 Sekunden ein. Das Kochfeld kann jetzt benutzt werden.
  • Page 58 Phase angeschlossen Automatikmodi sind. • Die Anzeige der Kochzonen mit Automa‐ Ko‐ Braten reduzierter Leistung wechselt tische chen zwischen zwei Kochstufen. Ein‐ schal‐ tung der Be‐ leuch‐ tung Modus Modus Modus Lüfterge‐ Lüfterge‐ schwin‐ schwin‐ 5.14 Hob²Hood...
  • Page 59: Tipps Und Hinweise

    DEUTSCH Lüftergeschwindigkeit manuell ändern. 5. Berühren Sie des Timers, um Durch Drücken von erhöht sich die einen automatischen Modus Lüftergeschwindigkeit um eine Stufe. auszuwählen. Wenn Sie die Intensivstufe gewählt Schalten Sie den haben und erneut drücken, wird die Automatikbetrieb aus, um Geschwindigkeit auf 0 gesetzt und die die Dunstabzugshaube Dunstabzugshaube ausgeschaltet.
  • Page 60 Die Kochzoneneffizienz hängt vom Leitungswasser, so dass 4 cm bis Durchmesser des Kochgeschirrs ab. An zum Topfrand frei bleiben. Verwenden Kochgeschirr mit einem kleineren Sie nicht weniger als 1 und nicht mehr Durchmesser als der als 5 Liter Wasser. Achten Sie darauf,...
  • Page 61 DEUTSCH Kochstufe Verwendung: Dauer Hinweise (Min.) Warmhalten von gegarten Nach Legen Sie einen Deckel auf Speisen. Bedarf das Kochgeschirr. 1 - 3 Sauce Hollandaise, Schmelzen 5 - 25 Gelegentlich umrühren. von: Butter, Schokolade, Gela‐ tine. 1 - 3 Stocken: Lockere Omeletts, 10 - 40 Mit Deckel garen.
  • Page 62: Reinigung Und Pflege

    Dunstabzugshauben mit der Funktion Hob²Hood Die komplette Palette von Dunstabzugshauben, die mit dieser Funktion ausgestattet sind, finden Sie auf unserer Verbraucher-Website. Die AEG Dunstabzugshauben, die mit dieser Funktion ausgestattet sind, sind mit dem Symbol gekennzeichnet. Andere ferngesteuerte Geräte können das Signal blockieren.
  • Page 63: Fehlersuche

    DEUTSCH 8. FEHLERSUCHE WARNUNG! Siehe Kapitel Sicherheitshinweise. 8.1 Was tun, wenn.. Störung Mögliche Ursache Abhilfe Das Kochfeld kann nicht ein‐ Das Kochfeld ist nicht oder Prüfen Sie, ob das Kochfeld geschaltet oder bedient wer‐ nicht ordnungsgemäß an die ordnungsgemäß an die den.
  • Page 64 Störung Mögliche Ursache Abhilfe Hob²Hood funktioniert nicht. Sie haben das Bedienfeld Entfernen Sie den Gegen‐ bedeckt. stand vom Bedienfeld. Sie benutzen einen sehr gro‐ Verwenden Sie einen kleine‐ ßen Topf, der das Signal ren Topf, wechseln Sie die blockiert.
  • Page 65 DEUTSCH Störung Mögliche Ursache Abhilfe Der Topf ist leer oder enthält Verwenden Sie die Funktion erscheinen ab‐ eine andere Flüssigkeit als nicht für andere Flüssigkei‐ wechselnd. Wasser, z.B. Öl. ten als Wasser. Der Topf enthält zu viel oder Siehe Kapitel „Tipps und erscheinen ab‐...
  • Page 66: Technische Daten

    9. TECHNISCHE DATEN 9.1 Typenschild Modell IAE84411FB Produkt-Nummer (PNC) 949 597 476 00 Typ 62 D4A 01 AA 220 - 240 V/400 V 2N, 50 - 60 Hz Induktion 7.35 kW Made in Germany Ser. Nr... 7.35 kW 9.2 Technische Daten der Kochzonen...
  • Page 67: Energie Sparen

    DEUTSCH Energieverbrauch des 180,6 Wh/kg Kochfelds (EC electric hob) EN 60350-2 - Elektrische Kochgeräte für • Decken Sie Kochgeschirr, wenn den Hausgebrauch - Teil 2: Kochfelder - möglich, mit einem Deckel ab. Verfahren zur Messung der • Stellen Sie Kochgeschirr auf die Gebrauchseigenschaften Kochzone, bevor Sie sie einschalten.
  • Page 68 www.aeg.com/shop...

Table des Matières