Tecsun PL-660 Manuel D'utilisation
Table des Matières
Les langues disponibles
Les langues disponibles
Liens rapides
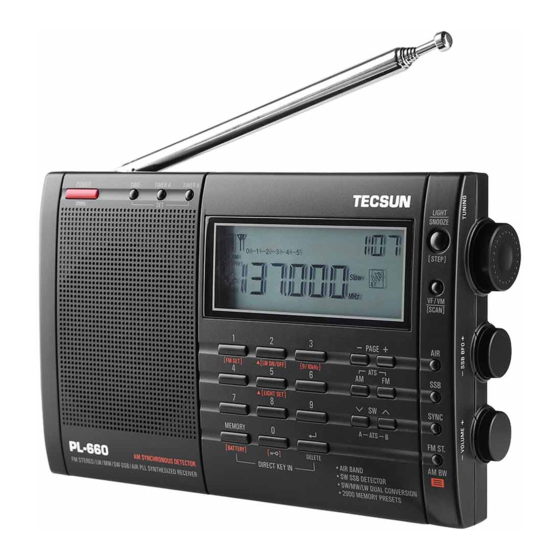
TECSUN PL-660
Contenu de ce fichier PDF :
- notice originale en anglais page 2 à page 35 (comprenant photos et schémas)
- traduction page par page de la notice originale en Français (page 36 à page 50)
TECSUN RADIOS AUSTRALIA
24/9 Powells Road, Brookvale, NSW 2100 Australia
Email: info@tecsunradios.com.au
TECSUN
R A D I O S A U S T R A L I A
Ph: +61 2 9939 4377
www.tecsunradios.com.au
Table des Matières

Manuels Connexes pour Tecsun PL-660


Sommaire des Matières pour Tecsun PL-660
- Page 2 TECSUN PL-660 PLL SYNTHESIZED RECEIVER FM STEREO / MW / LW / SW-SSB / AIR BAND OPERATION MANUAL --- 1 ---...
-
Page 3: Table Des Matières
TABLE OF CONTENTS TABLE OF CONTENTS …………………………………………………………………. FEATURES ……………………………………………………………………………………... CONTROL LOCATIONS ……………………………………………………………….. LCD DISPLAY ………………………………………………………………………………... HOW TO TURN ON/OFF THE RADIO …………………………………………. TUNE IN STATIONS ……………………………………………………………………… METHOD 1: MANUAL STATION TUNING ………………………………. METHOD 2: AUTO BROWSE STATION …………………………………… METHOD 3: DIRECT KEYPAD ENTRY ……………………………………. -
Page 6: Control Locations
CONTROL LOCATIONS -- 5 -- www.tecsunradios.com.au... - Page 32 Traducion page par page en Français --- 1 --- Traduction page 1 : TECSUN ELECTRONIC IND. LTD. TECSUN PL-660 Récepteurs large bandes STEREO FM / MW / LW / SW-SSB / Bande Aéronautique Guide de l’Utilisateur RN3AMM - 2010 Traduction page 2 : Table des matières………………………………………………………………….
- Page 33 Traducion page par page en Français Activer / Désactiver la bande de fréquences LW …………………………………………………………. 25 Configurer le pas de fréquence en mode MW (AM)………………………………………….. 25 Activer / Désactiver le déclanchement automatique de l’éclairage ……………. 25 Activer / Désactiver la fonction permettant de recharger les piles insérées dans le récepteur …... 25 Utiliser des piles non rechargeables pour alimenter le récepteur ………………………………..
- Page 34 · 4 piles rechargeables de type AA taille (UM3), DC-6V · Dimension: 187 x 114 x 33 mm Section : Localisation des différents éléments de l’appareil Traducion page par page en Français Page 5 : Schémas de l’appareil Traduction page 6 : 1.
- Page 35 9. PAGE: Numéro de la page de mémoire PRESET (présélection) : Numéro de l’adresse de la Mémoire 10. Indicateur On/ Off pour les réveils A ou B - 11. Indicateur du verrouillage des touches Traducion page par page en Français 12.
- Page 36 Section : Travailler en utilisant des fréquences préalablement misent en mémoire Le récepteur PL-660 peux mémoriser jusqu’à 2000 mémoires, ce qui lui confère une grande capacité de mémorisation de fréquences. Veuillez noter la répartition des mémoires selon le partage suivant : 1.
- Page 37 Traducion page par page en Français METHODE n° 1: Enregistrement Manuel de Fréquence 1. Pressez le bouton [FM], [MW/LW] ou [SW]pour sélectionner une bande, puis tournez le potentiomètre jusqu’à trouver la fréquence désirée. 2. Appuyez sur le bouton [MEMORY] ce qui affichera le numéro de la mémoire suivante disponible. 3.
- Page 38 Traducion page par page en Français Traduction page 15 : Comment sélectionner différentes pages de mémoire : vous sur 1. Pressez le bouton [FM], [MW/LW] ou [SW] pour sélectionner une bande, puis rendez- fréquence désirée. 2. Pressez le bouton [MEMORY] ce qui affichera un numéro de mémoire dans le coin en haut à droite de l’afficheur 3.
- Page 39 Traducion page par page en Français Tournez le potentiomètre permettant de changer de fréquences pour naviguer parmi les différentes mémoires. METHODE n°2: Navigation automatique parmi les différentes mémoires Maintenez le bouton [VF/VM] enfoncé jusqu’à ce que l’élément "PRESET" (présélection) clignote et se transforme en auto scan (scan automatique) et passe d’une mémoire à...
- Page 40 Traducion page par page en Français 4. Pressez le bouton [TIMER A] pour enregistrer les nouveaux paramètres. Si le bouton [TIMER A] n’à pas été à nouveau pressé dans les 3 secondes, la radio confirmera automatiquement les nouveaux paramètres de l’alarme. Remarque: La radio s’allumera et se rendra automatiquement à...
- Page 41 Traducion page par page en Français FM ST. (STEREO FM) Section : FM ST. (Stéréo FM) 1. Lors de l’écoute d’une fréquence FM émettant un programme dans le mode stéréo, pressez le bouton [FM ST.] cela fera apparaître le symbole " " Sur l’afficheur afin de vous indiquer que le mode stéréo est bien actif.
- Page 42 Traducion page par page en Français Remarques: 1. Veuillez toujours utiliser les piles rechargeables jusqu’à ce qu’elles soient totalement déchargées avant de les recharger. Cela permettra d’étendre leur durée de vie. 2. Toujours utiliser ces quatre piles rechargeables pour le même appareil. Le fait de les utiliser avec d’autres appareils pourrait réduire leurs performances.
- Page 43 Traducion page par page en Français Pour activer ou désactiver le mode LW, maintenez le bouton [AM] enfoncé jusqu’à ce que "LW ON" ou "LW OFF" apparaisse sur l’afficheur. CONFIGURER LE PAS DE FREQUENCES POUR LE MODE MW (AM) : Maintenez le bouton [9/10 kHz] enfoncé...
- Page 44 3. Le fait de mélanger des piles usagées avec des piles rechargeables ou des piles non rechargeables pourrait endommager votre récepteur et afficher de manière incorrecte le niveau de charge des batteries. 4. Afin d’éviter que les piles coulent dans votre récepteur, enlever toujours les piles lorsque celui-ci ne Traducion page par page en Français sera pas utilisé...
- Page 45 Traducion page par page en Français composant interne de votre radio . radio se nommant le : Si cela ne fonctionne toujours « computer micro chip »ne pas mieux, pressez sur le fonctionne pas correctement bouton de réinitialisation (recet) à l’aide d’un objet pointu. Traduction page 29 : Section : Spécifications 1.
- Page 46 Traducion page par page en Français Bande aéronautique: 100 Mémoires 1200 mémoires pour 12 pages de mémoires (Chaque page contient 100 mémoires) 9. Mode de l’alarme: programmation d’un réveil en utilisant uniquement la radio (2alarmes programmables) 10. Au Repos FM < 50 mA MW/LW <...