Table des Matières
Publicité
Les langues disponibles
Les langues disponibles
Liens rapides
Publicité
Chapitres
Table des Matières

Manuels Connexes pour Beko MWOTR30102SS


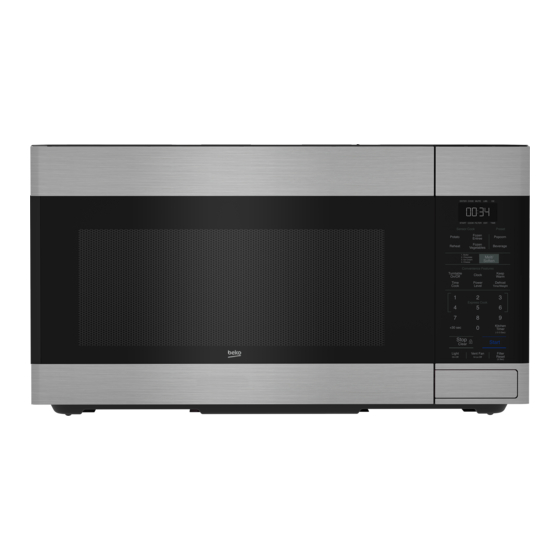
Sommaire des Matières pour Beko MWOTR30102SS
- Page 1 Over The Range Microwave Oven Installation Manual MWOTR30102SS TINSKB303MRR0 TINSKB303MRR0_MWOTR30102SS_Beko OTR_Install Manual.indd 1 TINSKB303MRR0_MWOTR30102SS_Beko OTR_Install Manual.indd 1 8/19/20 2:41 PM 8/19/20 2:41 PM...
-
Page 2: Table Des Matières
CONTENTS 1 MOUNTING SPACE ......3 2 WALL CONSTRUCTION .....4 3 ELECTRICAL GROUNDING INSTRUCTIONS ........5 4 HOOD EXHAUST DUCT .....6 Exhaust connection ..........6 Rear exhaust ............6 Maximum duct length ..........6 5 TOOLS RECOMMENDED FOR INSTALLATION ........7 6 INSTALLATION HARDWARE .....8 7 VENTILATION SYSTEM ......9 A. -
Page 3: Mounting Space
MOUNTING SPACE Please read all instructions thoroughly before This oven requires a mounting space on a wall as installing the Over The Range Microwave Oven. shown in Figure 1. Two people are recommended to install this For proper installation and servicing, a 2 in/ product. -
Page 4: Wall Construction
WALL CONSTRUCTION This Over-the-range microwave oven should be If the unit is unable to be supported by a stud, mounted against and supported by a flat vertical toggle bolts and top cabinet screws will need to wall. The wall must be flat for proper installation. be placed, see details in the WALL TEMPLATE. -
Page 5: Electrical Grounding Instructions
ELECTRICAL GROUNDING INSTRUCTIONS This appliance must be grounded. This oven is NOTE: equipped with a cord having a grounding wire with 1. If you have any questions about the grounding a grounding plug. It must be plugged into a wall or electrical instructions, consult a qualified receptacle that is properly installed and grounded electrician or serviceperson. -
Page 6: Hood Exhaust Duct
HOOD EXHAUST DUCT Maximum duct length When the hood is vented to the outside, a hood exhaust duct is required. All ductwork must be For satisfactory air movement, the total duct metal; do not use plastic duct. Check that all con- length of 3 ⁄... -
Page 7: Tools Recommended For Installation
TOOLS RECOMMENDED FOR INSTALLATION • Phillips screwdriver • Electric drill • 1 ⁄ in (38 mm) wood bit or metal hole cutter (if metal cabinet is used) • ⁄ in (12.7 mm), ⁄ in (15.8 mm) and ⁄ in (2.3 mm) drill bits •... -
Page 8: Installation Hardware
INSTALLATION HARDWARE The following is a list of parts you may need for installing your Over-the-range microwave oven. You will find the installation hardware contained in a packet with the unit. Check to make sure you have all these parts. Item Part Quantity... -
Page 9: Ventilation System
VENTILATION SYSTEM Step 2 This Over-the-range microwave oven is designed for adaptation to three types of hood ventilation • Remove the screws (3) for blower attachment systems. Select the type required for your instal- and save screws. See Figure 7. lation. - Page 10 VENTILATION SYSTEM Step 3 Step 4 • Turn the blower unit so that the fan blade open- • Place the blower unit into the opening and ings are facing back (rear of unit). See Figure 9. secure it to the oven with the screws (3) from step 2.
-
Page 11: Vertical Ventilation System
VENTILATION SYSTEM C. Vertical ventilation system of the microwave and attach the damper to blower motor cover by sliding it into the guides Step 1 & 2 at the blower motor cover. See Figures 16, 17. A-1 Ventilation motor. See Section B, steps 1 •... -
Page 12: Oven Installation
OVEN INSTALLATION This oven cannot be properly installed without re- of the wall between the mounting plate and the ferring to the mounting instructions found on both end of the toggle nut, (in closed position). If you templates. do not leave this space, the toggle nut will not open on the other side of the wall. -
Page 13: Mounting Oven To The Wall
MOUNTING OVEN TO THE WALL Step 3 IMPORTANT: Do not grip or use handle during installation. • Thread power cord through the hole at the bottom of the top cabinet. Swing the unit Preparation of top cabinet upward to meet the top of the mounting plate You need to drill holes for the top support screws and hold it securely. -
Page 14: Connecting Ductwork
CONNECTING DUCTWORK • Extend the house duct down to connect to the exhaust adapter. Seal exhaust duct joints using duct tape. See Figure 25. • Install the grease filters. Refer to the User Man- ual for installation steps. • Plug in the power cord. House Duct Figure 25 14 / 29 EN... -
Page 15: Check List For Operation
CHECK LIST FOR OPERATION 1. Make sure the unit has been installed according to all of the installation instructions, the top cabinet template and wall template. 2. Remove all packing material from the oven. 3. Plug in the power cord. 4. - Page 16 TABLE DES MATIÈRES 1 ESPACE DE MONTAGE ....17 2 CONSTRUCTION DU MUR ....18 3 INSTRUCTIONS POUR LA MISE À LA TERRE ......19 4 CONDUIT DE SORTIE DE LA HOTTE ........20 Raccordement du conduit de sortie......20 Échappement à l’arrière ........20 Longueur maximale des tuyaux ......20 5 OUTILS RECOMMANDÉS POUR L’INSTALLATION ....21 6 QUINCAILLERIE...
-
Page 17: Espace De Montage
ESPACE DE MONTAGE Veuillez lire attentivement toutes les instructions Ce four à micro-ondes à hotte intégrée nécessite avant d’installer le four à micro-ondes à hotte un espace de montage sur un mur, comme illus- intégrée. Deux personnes sont recommandées tré à la figure 1. pour installer ce produit. -
Page 18: Construction Du Mur
CONSTRUCTION DU MUR Ce four à micro-ondes à hotte intégrée doit être S’il est impossible de fixer l’appareil à un monté contre et soutenu par une paroi verticale montant du mur, il faudra porter une atten- plate. Le mur doit être plat pour une installation tion particulière au placement des ancrages adéquate. -
Page 19: Instructions Pour La Mise À La Terre
INSTRUCTIONS POUR LA MISE À LA TERRE Cet appareil doit être mis à la terre. Ce four est REMARQUE : équipé d’un cordon avec fil de mise à la terre et 1. Si vous avez des questions concernant la une fiche pour mise à la terre. Il doit être branché mise à... -
Page 20: Conduit De Sortie De La Hotte
CONDUIT DE SORTIE DE LA HOTTE Longueur maximale des Si la hotte est ventilée vers l’extérieur, un con- tuyaux duit de sortie est nécessaire. Tous les conduits doivent être en métal; n’utilisez absolument ja- Pour permettre un mouvement d’air satisfais- mais de tuyauterie en plastique. -
Page 21: Outils Recommandés Pour L'installation
OUTILS RECOMMANDÉS POUR L’INSTALLATION • Tournevis Phillips • Perceuse électrique • Ciseaux • Crayon • Ruban à mesurer • Ruban adhésif • Foret pour bois ou foret emporte-pièce pour le métal (si armoire en métal) de 38 mm (1 1⁄2 po) •... -
Page 22: Quincaillerie D'installation
QUINCAILLERIE D’INSTALLATION La liste qui suit comprend les pièces dont vous pourriez avoir besoin pour installer votre four à mi- cro-ondes à hotte intégrée. La quincaillerie d’installation est fournie dans un sac accompagnant l’ap- pareil. Assurez-vous d’avoir toutes ces pièces en votre possession. Profitez-en pour vous familiariser avec chacune des pièces. -
Page 23: Système De Ventilation
SYSTÈME DE VENTILATION Étape 2 Ce four à micro-ondes à hotte intégrée est conçu pour s’adapter à trois types de systèmes de ven- • Retirez les vis (3) de fixation du ventilateur et tilation à hotte. Sélectionnez le type requis pour conservez les vis. - Page 24 SYSTÈME DE VENTILATION Étape 3 Étape 4 • Tournez le ventilateur afin que les ouvertures • Placez le ventilateur dans l’ouverture et fixez-le du ventilateur soient tournées vers l’arrière (de au four avec les vis (3) de l’étape 2. Voir la fig- l’appareil).
-
Page 25: Système De Ventilation Vertical
SYSTÈME DE VENTILATION C. Système de ventilation de l’orifice d’évacuation du four à micro-ondes vertical et fixez l’amortisseur au capot du moteur du ventilateur en le faisant glisser dans les guides Étape 1 & 2 situés sur le capot du moteur du ventilateur. Voir les figures 16-2 et 17. -
Page 26: Installation Du Four
INSTALLATION DU FOUR Ce four ne peut pas être installé correctement Assurez-vous de laisser un espace d’au moins sans consulter les instructions de montage im- l’épaisseur du mur entre la plaque de mon- primées sur les deux gabarits. tage et la fin de l’écrou à ailettes (en position fermée). -
Page 27: Fixation Du Four Àmicro-Ondes Au Mur
FIXATION DU FOUR À MICRO-ONDES AU MUR Étape 3 IMPORTANT : Ne tenez ou n’utilisez pas la poi- gnée pendant l’installation. • Acheminez le cordon d’alimentation à travers l’orifice dans la base de l’armoire supérieure. Préparation de l’armoire Basculez l’appareil vers le haut pour qu’il re- supérieure joigne le dessus de la plaque de montage et Vous devez percer des trous pour les vis de mon-... -
Page 28: Connexion Des Conduits
CONNEXION DES CONDUITS • Abaissez le conduit de la maison pour le raccorder à l’adaptateur d’échappement. Scellez les joints du tuyau de sortie avec du ruban à conduits. Voir la figure 25. • Installez les filtres à graisse. Reportez-vous au guide d’installation pour les étapes d’installation. -
Page 29: Liste De Vérification Pour Le Fonctionnement
LISTE DE VÉRIFICATION POUR LE FONCTIONNEMENT 1. Vérifier que l’appareil a été installé conformément à toutes les instructions d’installation et celles du plateau pour placard supérieur et du plateau du mur. 2. Le cas échéant, retirer du four le matériel d’emballage restant. 3. - Page 30 TINSKB303MRR0_MWOTR30102SS_Beko OTR_Install Manual.indd 30 TINSKB303MRR0_MWOTR30102SS_Beko OTR_Install Manual.indd 30 8/19/20 2:41 PM 8/19/20 2:41 PM...
- Page 31 TINSKB303MRR0_MWOTR30102SS_Beko OTR_Install Manual.indd 31 TINSKB303MRR0_MWOTR30102SS_Beko OTR_Install Manual.indd 31 8/19/20 2:41 PM 8/19/20 2:41 PM...
- Page 32 TINSKB303MRR0_MWOTR30102SS_Beko OTR_Install Manual.indd 32 TINSKB303MRR0_MWOTR30102SS_Beko OTR_Install Manual.indd 32 8/19/20 2:41 PM 8/19/20 2:41 PM...