Table des Matières
Publicité
Les langues disponibles
Les langues disponibles
Liens rapides
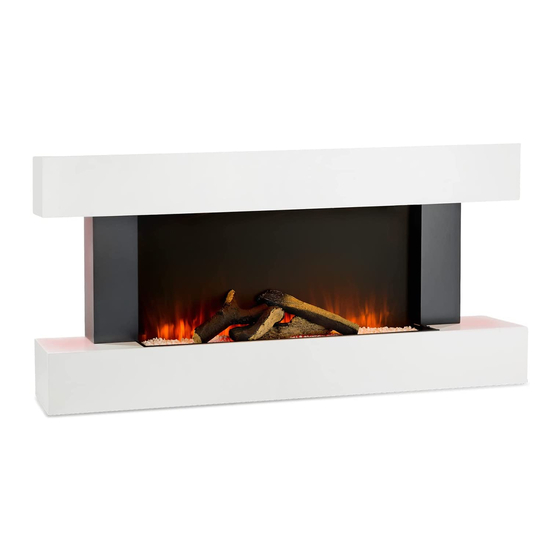
STUDIO LIGHT &
FIRE 1 / STUDIO 1
Elektrischer Kamin
Fireplace Heater
Cheminée électrique
Camino elettrico
Chimenea eléctrica
10032725 10032727 10034486
www.klarstein.com
Hinweis: Das Gerät eignet sich nicht zur Nutzung als
primäre Heizquelle.
Note: The device is not suitable for use as a primary
heat source.
Remarque : l'appareil ne convient pas en tant que
source principale de chauffage.
Nota: il dispositivo non è idoneo ad essere utilizzato
come fonte di riscaldamento primaria.
Advertencia: el aparato no es apto para utilizar como
fuente de calefacción primaria.
Publicité
Chapitres
Table des Matières
Dépannage

Manuels Connexes pour Klarstein STUDIO LIGHT & FIRE 1


Sommaire des Matières pour Klarstein STUDIO LIGHT & FIRE 1
- Page 1 Fireplace Heater Cheminée électrique Camino elettrico Chimenea eléctrica 10032725 10032727 10034486 www.klarstein.com Hinweis: Das Gerät eignet sich nicht zur Nutzung als primäre Heizquelle. Note: The device is not suitable for use as a primary heat source. Remarque : l‘appareil ne convient pas en tant que source principale de chauffage.
-
Page 3: Table Des Matières
Sehr geehrter Kunde, wir gratulieren Ihnen zum Erwerb Ihres Gerätes. Lesen Sie die folgenden Hinweise sorgfältig durch und befolgen Sie diese, um möglichen Schäden vorzubeugen. Für Schäden, die durch Missachtung der Hinweise und unsachgemäßen Gebrauch entstehen, übernehmen wir keine Haftung. Scannen Sie den folgenden QR-Code, um Zugriff auf die aktuellste Bedienungsanleitung und weitere Informationen rund um das Produkt zu erhalten. -
Page 4: Sicherheitshinweise
SICHERHEITSHINWEISE • Prüfen Sie vor der Benutzung die angegebene Spannung auf der Geräteplakette und schließen Sie das Gerät nur an Steckdosen an, die der Spannung des Geräts entsprechen. • Falls das Netzkabel beschädigt ist, lassen Sie es von einer ausgebildeten Fachkraft ersetzen. -
Page 5: Produktdatenblatt
PRODUKTDATENBLATT Modellkennzahl(en) 10032725, 10032727 Angabe Symbol Wert Einheit Angabe Einheit Wärmeleistung Nur bei elektrischen Speicher-Einzelraumheizgeräten: Art der Regelung der Wärmezufuhr Nennwärmeleistung Manuelle Regelung der Wärmezufuhr mit nein integriertem Thermostat Mindestwärmeleistung Manuelle Regelung der Wärmezufuhr nein (Richtwert) mit Rückmeldung der Raum- und/oder Außentemperatur Maximale kontinuierliche Elektronische Regelung der Wärmezufuhr... - Page 6 PRODUKTDATENBLATT Modellkennung(en) 10034486 Angabe Symbol Wert Einheit Angabe Einheit Wärmeleistung Nur bei elektrischen Speicher-Einzelraumheizgeräten: Art der Regelung der Wärmezufuhr Nennwärmeleistung Manuelle Regelung der Wärmezufuhr mit k.A. integriertem Thermostat Mindestwärmeleistung Manuelle Regelung der Wärmezufuhr k.A. (Richtwert) mit Rückmeldung der Raum- und/oder Außentemperatur Maximale kontinuierliche Elektronische Regelung der Wärmezufuhr...
-
Page 7: Geräteübersicht (100327725 & 10032727)
GERÄTEÜBERSICHT (100327725 & 10032727) Heizmodul Rahmen Holzscheitset Fernbedienung... -
Page 8: Geräteübersicht (10034486)
GERÄTEÜBERSICHT (10034486) Heizmodul Rahmen Holzscheitset... -
Page 9: Lieferumfang (10034486)
LIEFERUMFANG (10034486) Kamin Fernbedienung Schraube x 6 Wanddübel x 6 Unterlegscheibe x 6 Kieselsteine 3,2 kg Hinweis: Einige Teile sind im Hohlraum der Einfassung auf der Rückseite des Kamins verpackt. Obere Wandhalterung... -
Page 10: Montage
MONTAGE WARNUNG Gefahr eines Stromschlag und anderer Verletzungen! Setzen Sie dos Gerät nur so zusammen, wie es in der Bedienungsanleitung beschrieben wird. Benötigte Werkzeuge: Pilotbohrer (2 mm) Bohrer (8 mm, u. U. Steinbohrer) Kreuzschlitzschraubendreher Bohrmaschine Montagehinweise Bevor Sie mit der Montage beginnen, beachten Sie folgende Punkte: •... - Page 11 Montage 1. Der Kamin ist so konstruiert, dass er dauerhaft an der Wand befestigt ist. Die Höhe beträgt 30 cm. Die Wandhalterung muss waagerecht befestigt werden und das Kabel zur rechten unteren Basis geführt werden. Um einen idealen Blick auf Brennstoffdekoration zu bekommen, empfiehlt sich eine Höhe von 60 cm vom Boden zur Unterseite des Kamins.
-
Page 12: Bedienung
BEDIENUNG Bedienung per Hand Zum Einschalten des Kamins den Ein/Aus-Schalter in die Position „1“ schalten. Die Steuerung erfolgt über die Tasten links am Kamin unter der Abdeckung. Das Gerät gibt einen Piepton von sich und zeigt damit an, dass es eingeschaltet wurde. •... - Page 13 Fernbedienung und Tastenfunktionen 10032725 &10032727 Drücken Sie die Taste, um das Ein/Aus- Gerät ein- und auszuschalten. Taste Drücken Sie die Taste, um zwischen den drei Flammen- Flammen- effekt einstellungen zu Taste wechseln. Verwenden Sie die Tasten, um die gewünschte Raumtemperatur einzustellen. Pfleil-Tasten Die aktuell gewählte Temperatur wird angezeigt.
- Page 14 Uhrzeit Bevor Sie den Wochen-Timer verwenden können, muss die aktuelle Uhrzeit eingestellt werden. Gehen Sie folgendermaßen vor: • Drücken Sie die Uhrzeit-Taste und verwenden Sie dann die Pfeiltasten, um den Tag auszuwählen. • Drücken Sie die Uhrzeit-Taste erneut und wählen Sie dann mit den Pfeiltasten den Stundenwert (24-Stunden- Format) aus.
-
Page 15: Abschaltsicherung
Erkennung Ihr Kamin verfügt über eine Funktion, die die Heizfunktion offener nach einer gewissen Zeit stoppt, wenn die Raumtemperatur Fenster nicht ansteigt, unter der Annahme, dass eine offene Tür oder ein offenes Fenster vorhanden ist. Dies dient der Energieeinsparung und kann mit der AUTO-Taste ein- und ausgeschaltet werden. -
Page 16: Fehlerbehebung
FEHLERBEHEBUNG Abschaltsicherung Um das Gerät vor eventuellen Schäden zu schützen, die durch die Abdeckung der Lüftungsöffnungen entstehen, ist dieses Gerät mit einer automatischen Überhitzungsabschaltung versehen. Wenn Sie aktiviert wird, ist das Gerät außer Betrieb gesetzt. Falls dies eintritt, kann das Geät mit folgenden Schritte wieder in Betrieb genommen werden: Schalten Sie das Gerät mit dem Ein/Aus-Schalter aus. -
Page 17: Spezielle Entsorgungshinweise Für Verbraucher In Deutschland
SPEZIELLE ENTSORGUNGSHINWEISE FÜR VERBRAUCHER IN DEUTSCHLAND Entsorgen Sie Ihre Altgeräte fachgerecht. Dadurch wird gewährleistet, dass die Altgeräte umweltgerecht verwertet und negative Auswirkungen auf die Umwelt und menschliche Gesundheit vermieden werden. Bei der Entsorgung sind folgende Regeln zu beachten: • Jeder Verbraucher ist gesetzlich verpflichtet, Elektro- und Elektro- nikaltgeräte (Altgeräte) sowie Batterien und Akkus getrennt vom Hausmüll zu entsorgen. - Page 18 • Bei einem Vertrieb unter Verwendung von Fernkommunikationsmitteln ist die unentgeltliche Abholung am Ort der Abgabe auf Elektro- und Elektronikgeräte der Kategorien 1, 2 und 4 gemäß § 2 Abs. 1 ElektroG, nämlich „Wärmeüberträger“, „Bildschirmgeräte“ (Oberfläche von mehr als 100 cm²) oder „Großgeräte“ (letztere mit mindestens einer äußeren Abmessung über 50 Zentimeter) beschränkt.
-
Page 19: Hinweise Zur Entsorgung
HINWEISE ZUR ENTSORGUNG Wenn es in Ihrem Land eine gesetzliche Regelung zur Entsorgung von elektrischen und elektronischen Geräten gibt, weist dieses Symbol auf dem Produkt oder auf der Verpackung darauf hin, dass dieses Produkt nicht im Hausmüll entsorgt werden darf. Stattdessen muss es zu einer Sammelstelle für das Recycling von elektrischen und elektronischen Geräten gebracht werden. - Page 21 Dear Customer, Congratulations on purchasing this device. Please read the following instructions carefully and follow them to prevent possible damages. We assume no liability for damage caused by disregard of the instructions and improper use. Scan the QR code to get access to the latest user manual and more product information.
-
Page 22: Safety Instructions
SAFETY INSTRUCTIONS • Do not use the appliance until it is securely fi xed as described in this manual. • Check that the voltage indicates on the data plate corresponds with that of the local network before connecting the appliance to the mains power supply. •... -
Page 23: Product Data Sheet
PRODUCT DATA SHEET Model identifier(s): 10032725, 10032727 Item Symbol Value Unit Item Unit Heat output Type of heat input, for electric storage local space heaters only Nominal heat output manual heat charge control, with integrated thermostat Minimum heat output manual heat charge control with room and/or (indicative) outdoor temperature feedback Maximum continuous heat... - Page 24 PRODUCT DATA SHEET 10034486 Model identifier(s): Item Symbol Value Unit Item Unit Heat output Type of heat input, for electric storage local space heaters only Nominal heat output manual heat charge control, with integrated thermostat Minimum heat output manual heat charge control with room and/or (indicative) outdoor temperature feedback Maximum continuous heat...
-
Page 25: Product Overview (100327725 & 10032727)
PRODUCT OVERVIEW (100327725 & 10032727) Heater Surround Log set Remote control... -
Page 26: Product Overview (10034486)
PRODUCT OVERVIEW (10034486) Heater Surround Log set... -
Page 27: Parts Supplied (10034486)
PARTS SUPPLIED (10034486) Fireplace Remote Control Screw x 6 Wall Plug x 6 Washer x 6 Pebbles 3,2 kg Note: Some parts are packaged within the cavity of the surround on the rear of the fireplace. Upper Wall Bracket... -
Page 28: Assembly
ASSEMBLY WARNING Risk of electric shock and other injuries! Only assemble the dos device as described in the operating instructions. Required tools: 2mm pilot drill bit Drill bit (8 mm, you may need to be a masonry bit) Phillips screwdriver Power drill Assembly instructions Before you begin with the assembly, please note the following points:... - Page 29 Installation 1. The fireplace is designed to be permanently fixed to o woll ot a minimum height of 300 mm. The wall bracket must be fitted horizontally and the cable routed to the bottom right of the fire. A height of 600 mm from the floor to the bottom of the wall fire is recommended for optimum viewing of the fuel bed.
-
Page 30: Operation
OPERATION Manual operation The On/Off switch is must be switched to ‚I‘ to begin operating the fireplace. It is operated via the buttons on the left side of the fireplace under the canopy. The fireplace will beep to indicate that it is powered up. •... - Page 31 Remote control and button functions 10032725 &10032727 Press this button to turn the Power Button appliance on and off. Press this button to cycle between the three flame Flame Button effect settings. Use the buttons to change the desired room temperature.
- Page 32 Clock Before using the weekly timer, the clock must be set. To do this: • Press the clock button, then use the arrow buttons to select the day. • Press the clock button again, then use the arrow buttons to select the hour value (24 hour format). •...
-
Page 33: Safety Cut-Out
SAFETY CUT-OUT This appliance is fitted with a safety cut-off which will operate if the fireplace overheats (e.g. due to blocked air vents). For safety reasons, the fire will NOT automatically reset. To reset the appliance, disconnect the appliance from the mains supply for at least 15 minutes. -
Page 34: Troubleshooting
TROUBLESHOOTING Safety Cut-Out device To ensure against the potential hazard caused by blockage of the air outlet, this unit is equipped with an automatic overtemperature safety cut-out device. When the device is activated the heater will not operate. If this occurs, the unit can be reset using the following procedure: Turn the fire off by depressing the on/off switch on the unit. -
Page 35: Disposal Considerations
DISPOSAL CONSIDERATIONS If there is a legal regulation for the disposal of electrical and electronic devices in your country, this symbol on the product or on the packaging indicates that this product must not be disposed of with household waste. Instead, it must be taken to a collection point for the recycling of electrical and electronic equipment. - Page 37 Estimado cliente: Le felicitamos por la adquisición de este producto. Lea atentamente las siguientes instrucciones y sígalas para evitar posibles daños. No asumimos ninguna responsabilidad por los daños causados por el incumplimiento de las instrucciones y el uso inadecuado. Escanee el siguiente código QR para obtener acceso a la última guía del usuario y más información sobre el producto: ÍNDICE...
-
Page 38: Indicaciones De Seguridad
INDICACIONES DE SEGURIDAD • Antes de utilizar el aparato, compruebe la tensión en la placa técnica del mismo y conecte el aparato solamente a tomas de corriente que se adecuen a dicha tensión. • Si el cable de alimentación está dañado, deberá ser sustituido por un servicio técnico. •... -
Page 39: Hoja De Datos Del Producto
HOJA DE DATOS DEL PRODUCTO Denominación del modelo 10032725, 10032727 Dato Símbolo Valor Unidad Dato Unidad Potencia térmica Solo con disposítivos de acumulación de calor eléctricos para abastecimiento local: Tipo de regulación del abastecimiento de calor Potencia térmica nominal Regulación manual del abastecimiento de calor con termostato integrado: Potencia térmica mínima Regulación manual de abastecimiento de calor... - Page 40 HOJA DE DATOS DEL PRODUCTO 10034486 Denominación del modelo Dato Símbolo Valor Unidad Dato Unidad Potencia térmica Solo con disposítivos de acumulación de calor eléctricos para abastecimiento local: Tipo de regulación del abastecimiento de calor Potencia térmica nominal Regulación manual del abastecimiento de calor con termostato integrado: Potencia térmica mínima Regulación manual de abastecimiento de calor...
-
Page 41: Vista General Del Aparato (100327725 & 10032727)
VISTA GENERAL DEL APARATO (100327725 & 10032727) Módulo de calefacción Marco Haz de leña Mando a distancia... -
Page 42: Vista General Del Aparato (10034486)
VISTA GENERAL DEL APARATO (10034486) Módulo de calentamiento Marcos Juego de troncos de madera... -
Page 43: Alcance De Suministro (10034486)
ALCANCE DE SUMINISTRO (10034486) Chimenea Control remoto Tornillo x 6 Taco de pared x 6 Arandela x 6 Guijarros 3,2 kg Nota: Algunas piezas se embalan en la cavidad del borde en la parte posterior de la chimenea. Soporte de pared superior... -
Page 44: Montaje
MONTAJE ADVERTENCIA Peligro de electrocución y otras lesiones! Monte el aparato sólo como se describe en el manual de instrucciones. Herramientas necesarias: • Broca piloto (2 mm) • Broca (8 mm, broca para piedra si es necesario) • Destornillador de estrella •... - Page 45 Montaje 1. La chimenea está diseñada para que quede fijada de forma permanente a la pared. La altura es de 30 cm. El soporte de pared se debe fijar horizontalmente y el cable se debe colocar en la base inferior derecha. Para obtener una vista ideal de la decoración de la chimenea, recomendamos una altura de 60 cm desde el suelo hasta la parte inferior de la chimenea.
-
Page 46: Operación
OPERACIÓN Funcionamiento manual Para encender el calentador, coloque el interruptor de encendido/apagado en la posición „1“. El control se realiza a través de los botones situados a la izquierda de la chimenea, bajo la cubierta. La unidad emite un pitido para indicar que ha sido encendida. - Page 47 Mando a distancia y funciones de teclas 10032725 &10032727 Tecla Pulse el botón para encender y encender/ apagar la unidad. apagar Pulse el botón para cambiar Tecla de entre los tres ajustes de efecto llamas de llama. Con las teclas se puede ajustar la temperatura ambiente Teclas de deseada.
- Page 48 Tiempo Antes de poder utilizar el temporizador semanal, debe ajustarse la hora actual. Siga estos pasos: • Presione la tecla de hora y, a continuación, utilice las teclas de flecha para seleccionar el día. • Pulse de nuevo el botón de la hora y, a continuación, utilice los botones de flecha para seleccionar el valor de la hora (formato de 24 horas).
-
Page 49: Desconexión De Seguridad
Detección Su chimenea incluye "Open Window Detection" de ventanas (Detección de ventanas abiertas) que detendrá la función abiertas de calefacción después de un período de tiempo si la temperatura ambiente no aumenta, suponiendo que hay una puerta o ventana abierta. Esto está diseñado para ahorrar energía y puede encenderse y apagarse con el botón AUTO. -
Page 50: Detección Y Reparación De Anomalías
DETECCIÓN Y REPARACIÓN DE ANOMALÍAS Apagado de seguridad Para proteger al aparato frente a posibles daños provocaos por la cubierta de las ranuras de ventilación, este aparato está provisto de un dispositivo de apagado de seguridad en caso de sobrecalentamiento. Cuando está activado, el aparato se apaga. Si esto sucede, el aparato puede volver a ponerse en marcha siguiendo estos pasos: Apague el aparato mediante el interruptor on/off. -
Page 51: Indicaciones Sobre La Retirada Del Aparato
INDICACIONES SOBRE LA RETIRADA DEL APARATO Si en su país existe una disposición legal relativa a la eliminación de aparatos eléctricos y electrónicos, este símbolo estampado en el producto o en el embalaje advierte que no debe eliminarse como residuo doméstico. En lugar de ello, debe depositarse en un punto de recogida de reciclaje de aparatos eléctricos y electrónicos. - Page 53 Chère cliente, cher client, Toutes nos félicitations pour l’acquisition de ce nouvel appareil. Veuillez lire attentivement et respecter les instructions de ce mode d’emploi afin d’éviter d’éventuels dommages. Nous ne saurions être tenus pour responsables des dommages dus au non-respect des consignes et à...
-
Page 54: Consignes De Sécurité
CONSIGNES DE SÉCURITÉ • Avant utilisation, vérifi ez la tension sur l‘étiquette de l‘appareil et ne branchez l‘appareil que sur des prises correspondant à la tension de l‘appareil. • Si le câble d‘alimentation est endommagé, faites-le remplacer par un professionnel qualifi é. -
Page 55: Fiche De Données Produit
FICHE DE DONNÉES PRODUIT Référence (s) du produit 10032725 10032727 Donnée Symbole Valeur Unité Donnée Unité Puissance calorifique Uniquement pour les radiateurs électriques à accumulation : Type de régulation de l'apport de chaleur Puissance calorifique Régulation manuelle de l'apport de chaleur nominale avec thermostat intégré... - Page 56 FICHE DE DONNÉES PRODUIT Référence (s) du produit 10034486 Donnée Symbole Valeur Unité Donnée Unité Puissance calorifique Uniquement pour les radiateurs électriques à accumulation : Type de régulation de l'apport de chaleur Puissance calorifique Régulation manuelle de l'apport de chaleur Sans nominale avec thermostat intégré...
-
Page 57: Aperçu De L'appareil (100327725 & 10032727)
APERÇU DE L‘APPAREIL (100327725 & 10032727) Module chauffant Cadre Lot de bûches de bois Télécommande... - Page 58 APERÇU DE L‘APPAREIL (10034486) Module de chauffage Cadre Ensemble de bûches de bois...
-
Page 59: Contenu De L'emballage (10034486)
CONTENU DE L‘EMBALLAGE (10034486) Cheminée Télécommande Vis x 6 Chevilles murales x 6 Rondelles x 6 Galets 3,2 kg Remarque : Certaines pièces sont emballées dans le creux du support à l‘arrière de la cheminée. Support mural supérieur... -
Page 60: Montage
MONTAGE MISE EN GARDE Danger d‘électrocution et autres blessures ! Assemblez l‘appareil uniquement comme décrit dans le mode d‘emploi. Outils nécessaires : Foret pilote (2 mm) Foret (8 mm, éventuellement foret à béton) Tournevis cruciforme Perceuse Instructions d‘installation Avant de commencer l’assemblage, notez les points suivants : •... - Page 61 Montage 1. La cheminée est conçue pour être fixée au mur de façon permanente. La hauteur est de 30 cm. Le support mural doit être fixé horizontalement et le câble doit être acheminé vers la base inférieure droite. Pour avoir une vue idéale sur la décoration du foyer, il est recommandé...
-
Page 62: Utilisation
UTILISATION Utilisation manuelle Pour allumer la cheminée, placez l‘interrupteur marche / arrêt en position „1“. Il se contrôle avec les touches sur le côté gauche de la cheminée sous le cache. L‘appareil émet un bip indiquant qu‘il est allumé. • Pour allumer l‘appareil : appuyez sur l‘interrupteur marche / arrêt •... - Page 63 Télécommande et fonctions des touches 10032725 &10032727 Touche de Appuyez sur la touche pour marche/ allumer et éteindre l'appareil. arrêt Appuyez sur la touche pour Touche des basculer entre les trois réglages flammes d’effets de flamme. Utilisez les touches pour régler la température ambiante Touches souhaitée.
- Page 64 Horloge Avant d‘utiliser la minuterie hebdomadaire, vous devez avoir réglé l‘heure. Pour ce faire : • Appuyez sur la touche Horloge puis utilisez les touches fléchées pour sélectionner le jour. • Appuyez à nouveau sur la touche Horloge, puis utilisez les touches fléchées pour régler la valeur de l‘heure (format 24 heures).
-
Page 65: Arrêt De Sécurité
Détection Votre cheminée est équipée de la "détection de fenêtre de fenêtre ouverte" qui arrêt la fonction de chauffage au bout d'un ouverte certain temps si la température ambiante n'augmente pas, en supposant qu'une porte ou une fenêtre est ouverte. Ceci a pour but d'économiser de l'énergie et peut être activé... -
Page 66: Résolution Des Problèmes
RÉSOLUTION DES PROBLÈMES Arrêt de sécurité Pour protéger l'appareil d'éventuels dégâts, consécutifs à l'obstruction des ouvertures, cet appareil est équipé d'un arrêt automatique de sécurité en cas de surchauffe. Lorsque cette sécurité est déclenchée l'appareil se met hors service. Si cela se produit, voici les étapes à... -
Page 67: Informations Sur Le Recyclage
INFORMATIONS SUR LE RECYCLAGE S‘il existe une réglementation pour l‘élimination ou le recyclage des appareils électriques et électroniques dans votre pays, ce symbole sur le produit ou sur l‘emballage indique que cet appareil ne doit pas être jeté avec les ordures ménagères. - Page 69 Gentile cliente, La ringraziamo per aver acquistato il dispositivo. La preghiamo di leggere attentamente le seguenti istruzioni per l’uso e di seguirle per evitare possibili danni. Non ci assumiamo alcuna responsabilità per danni scaturiti da una mancata osservazione delle avvertenze di sicurezza e da un uso improprio del dispositivo.
-
Page 70: Avvertenze Di Sicurezza
AVVERTENZE DI SICUREZZA • Prima dell‘uso, controllare la tensione sulla targhetta del dispositivo e collegare il dispositivo solo ad una presa che corrisponde alla tensione indicata. • Se il cavo di alimentazione è danneggiato, farlo sostituire da un tecnico qualifi cato. •... -
Page 71: Scheda Informativa Del Prodotto
SCHEDA INFORMATIVA DEL PRODOTTO Identificazione del modello (i) 10032725, 10032727 Indicazione Simbolo Valore Unità Indicazione Unità Potenza termica Solo per gli apparecchi per il riscaldamento d'ambiente locale elettrici ad accumulo: Tipo di controllo dell´apporto termico Potenza termica nominale Controllo manuale del carico termico con termostato integrato Potenza termica minima Controllo manuale del carico termico con... - Page 72 SCHEDA INFORMATIVA DEL PRODOTTO Identificazione del modello (i) 10034486 Indicazione Simbolo Valore Unità Indicazione Unità Potenza termica Solo per gli apparecchi per il riscaldamento d'ambiente locale elettrici ad accumulo: Tipo di controllo dell´apporto termico Potenza termica nominale Controllo manuale del carico termico con N.D.
-
Page 73: Panoramica Del Dispositivo
PANORAMICA DEL DISPOSITIVO (100327725 & 10032727 Modulo riscaldante Telaio Set di ceppi di legno Telecomando... -
Page 74: Panoramica Del Dispositivo (10034486)
PANORAMICA DEL DISPOSITIVO (10034486) Modulo di riscaldamento Margine Set per legno... -
Page 75: Volume Di Consegna (10034486)
VOLUME DI CONSEGNA (10034486) Camino Telecomando Vite x 6 Tassello x 6 Rondella x 6 Sassolini 3,2 kg Nota: alcune parti sono imballate nella cavità del rivestimento sul retro del camino. Supporto per parete superiore... -
Page 76: Montaggio
MONTAGGIO AVVERTENZA Rischio di scosse elettriche e altre lesioni! Montare il dispositivo solo come descritto nelle istruzioni per l‘uso. Strumenti necessari: Punta pilota (2 mm) Punta da trapano (8 mm, possibilmente da muratura) Cacciavite a croce Trapano Istruzioni per l‘installazione Prima di iniziare il montaggio, tenere presente i seguenti punti: •... - Page 77 Montaggio 1. Il camino è progettato in modo tale da essere fissato in modo permanente al muro. L‘altezza è di 30 cm. Il supporto da parete deve essere fissato orizzontalmente e il cavo deve essere inserito sulla base inferiore a destra. Per avere una visione ideale della decorazione del combustibile, si consiglia di avere un‘altezza di 60 cm dal fondo laterale del camino.
-
Page 78: Funzionamento
FUNZIONAMENTO Funzionamento manuale Per accendere il camino, portare l‘interruttore on/off in posizione „1“. Il controllo avviene grazie a dei pulsanti sul lato sinistro del camino sotto il coperchio. Il dispositivo emette un segnale acustico per indicare che è stato acceso. •... - Page 79 Telecomando e funzioni dei pulsanti 10032725 &10032727 Premere il pulsante per Pulsante accendere e spegnere il on/off dispositivo. Premere il pulsante per Pulsante passare tra le tre impostazioni fiamme dell'effetto fiamma. Utilizzare i pulsanti per impostare la temperatura Pulsante ambiente desiderata. Viene freccia visualizzata la temperatura attualmente selezionata.
- Page 80 Orologio Prima di poter utilizzare il timer settimanale, è necessario impostare l‘ora corrente. Seguire i seguenti passaggi: • Premere il tasto orologio, quindi utilizzare i tasti freccia per selezionare il giorno. • Premere di nuovo il tasto orologio, quindi utilizzare i tasti freccia per selezionare le ore (formato 24 ore).
-
Page 81: Sicurezza In Caso Di Arresto
Rilevamento Il camino include al funzione "Rilevamento finestre aperte" di finestre che interrompe quella di riscaldamento dopo un certo aperte periodo di tempo se la temperatura ambiente non aumenta, nell´assunzione che ci sia una finestra oppure una porta aperta. Questo pulsante è progettato per risparmiare energia e può... -
Page 82: Risoluzione Degli Errori
RISOLUZIONE DEGLI ERRORI Spegnimento di sicurezza Per proteggere da eventuali danni dovuti alla copertura delle aperture di ventilazione, questo dispositivo è dotato di uno spegnimento automatico in caso di surriscaldamento. Una volta attivato, il dispositivo non funziona. Se si attiva, seguire questi passaggi per riattivarlo: Spegnere il dispositivo con il tasto On/Off. -
Page 83: Avviso Di Smaltimento
AVVISO DI SMALTIMENTO Se nel proprio paese si applicano le regolamentazioni inerenti lo smaltimento di dispositivi elettrici ed elettronici, questo simbolo sul prodotto o sulla confezione segnala che questi prodotti non possono essere smaltiti con i rifiuti normali e devono essere portati a un punto di raccolta di dispositivi elettrici ed elettronici.