Table des Matières
Publicité
Les langues disponibles
Les langues disponibles
Liens rapides
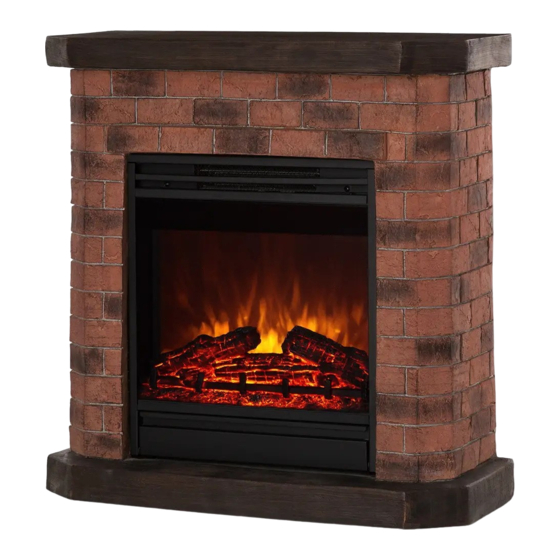
Elektrischer Kamin
Electric Fireplace
Chimenea eléctrica
Cheminée électrique
Camino elettrico
10032595 10032596 10034122 10034123
10034124
10035041 10035042 10035043
10035316
10035317
Hinweis: Das Gerät eignet sich nicht zur
Nutzung als primäre Heizquelle.
Note: The device is not suitable for use as a
primary heat source.
Remarque : l'appareil ne convient pas en tant
que source principale de chauffage.
Nota: il dispositivo non è idoneo ad essere
utilizzato come fonte di riscaldamento primaria.
Advertencia: el aparato no es apto para utilizar
como fuente de calefacción primaria.
Publicité
Chapitres
Table des Matières

Manuels Connexes pour Klarstein 10032595


Sommaire des Matières pour Klarstein 10032595
- Page 1 Nota: il dispositivo non è idoneo ad essere Camino elettrico utilizzato come fonte di riscaldamento primaria. Advertencia: el aparato no es apto para utilizar como fuente de calefacción primaria. 10032595 10032596 10034122 10034123 10034124 10035041 10035042 10035043 10035316 10035317...
-
Page 3: Table Des Matières
Funktionen und Einstellungen 8 Betriebsmodi 1 1 Wochen-Timer programmieren 13 Gerät auf Werkseinstellung zurücksetzen 16 Reinigung und Pflege 16 Hinweise zur Entsorgung 17 TECHNISCHE DATEN 10032595, 10032596, 10034122, 10034123, 10034124, Artikelnummer 10035041, 10035042, 10035043, 10035316, 10035317 Stromversorgung 220-240 V ~ 50 Hz Leistung 1800 W KONFORMITÄTSERKLÄRUNG Hersteller: Chal-Tec GmbH, Wallstraße 16, 10179 Berlin, Deutschland. -
Page 4: Sicherheitshinweise
SICHERHEITSHINWEISE • Prüfen Sie vor der Benutzung die Spannung auf der Geräteplakette und schließen Sie das Gerät nur an Steckdosen an, die der Spannung des Geräts entsprechen. • Falls das Netzkabel beschädigt ist, lassen Sie es von einer ausgebildeten Fachkraft ersetzen. •... -
Page 5: Produktdatenblatt
PRODUKTDATENBLATT Modellkennung(en) 10032595, 10032596, 10034122, 10034123, 10034124, 10035041, 10035042, 10035043, 10035316, 10035317 Angabe Symbol Wert Einheit Angabe Einheit Wärmeleistung Nur bei elektrischen Speicher-Einzelraumheizgeräten: Art der Regelung der Wärmezufuhr Nennwärmeleistung Manuelle Regelung der Wärmezufuhr mit k.A. integriertem Thermostat Mindestwärmeleistung Manuelle Regelung der Wärmezufuhr k.A. -
Page 6: Abmessungen
ABMESSUNGEN... -
Page 7: Bedienfeld Und Fernbedienung
BEDIENFELD UND FERNBEDIENUNG Bedienfeld (A) Hauptschalter (B) Ein-/Aus-Taste (C) Tastensperre/ Eingabe bestätigen (D) MENÜ (E) Wert erhöhen (F) Wert verringern Fernbedienung Batterie Wenn Sie die Fernbedienung das erste Mal benutzen, entfernen Sie die Kunststofflasche an der Batterie. Hinweis: Diese Heizung wird mit einer Fernbedienung geliefert. Um das Gerät mit der Fernbedienung bedienen zu können, muss sich der Hauptschalter (A) in der Stellung ON befinden. -
Page 8: Funktionen Und Einstellungen
FUNKTIONEN UND EINSTELLUNGEN Hauptschalter (A) Öffnen Sie die Abdeckung unten am Gerät und drücken Sie den Knopf A nach unten auf die Position ON. Ein-/Aus-Taste (B) Drücken Sie die Ein-/Aus-Taste, um den Flammeneffekt zu starten. Auf dem Display erscheint die folgende Anzeige: •... - Page 9 Heizung ein- und ausschalten / Schnellstart Drücken Sie die Taste (+) oder (-), um die Wärmeeinstellung direkt zu starten (auch wenn ein Wochenprogramm eingestellt ist). • Drücken Sie entweder die Taste (+) oder (-), um die aktuelle Temperatur auf dem Bildschirm zu sehen. •...
- Page 10 Niedrige Heizleistung einstellen Drücken Sie zweimal auf die Taste MENU, das Display zeigt L und das blinkende Heizsymbol an. Drücken Sie die OK-Taste, um die Temperatur einzustellen. Die voreingestellte Temperatur beträgt 10°C (50°F). Auf dem Display erscheint die linke Anzeige. Drücken Sie die Taste (+) oder (-), um die Temperatur einzustellen.
-
Page 11: Betriebsmodi
Dimmer einstellen (nur bestimmte Modelle) Drücken Sie mehrmals auf die Taste MENU, um in die Dimmereinstellung zu gelangen. Das Display zeigt [doLi] an. Drücken Sie die OK-Taste, um die Dimmereinstellung zu starten. Drücken Sie die Taste (+) oder (-), um die gewünschte Dimm-Level (D1/D2/D3/D4/OFF) auszuwählen. - Page 12 Offenes-Fenster-Modus Drücken Sie mehrmals auf die Taste MENU, um in die Betriebsmodi [ModE] zu gelangen. Drücken Sie auf OK, um die Moduseinstellung zu öffnen und benutzen Sie die Taste (+) oder (-), um den Offenes-Fenster-Modus auszuwählen. Das Display zeigt [OPEN] an. Drücken Sie zur Bestätigung auf OK und benutzen Sie die Taste (+) oder (-), um ON (ein) oder OFF (aus) auszuwählen: Nach dem Aktivieren der Offenes-Fenster-Erkennung schaltet das Gerät die Heizung...
-
Page 13: Wochen-Timer Programmieren
Hinweis: Sie können die Timereinstellung jederzeit verlassen, indem Sie auf MENU drücken. Im Falle eines Stromausfalls blink das Timer-Symbol (Uhr) permanent und signalisiert damit, dass kein Timer eingestellt wurde. In diesem Fall müssen Sie den Timer erneut programmieren. WOCHEN-TIMER PROGRAMMIEREN Hinweis: Bevor Sie den Wochen-Timer programmieren können, müssen Sie zuerst den aktuellen Wochentaf und die aktuelle Uhrzeit einstellen (siehe Aktuellen Wochentag und Uhrzeit einstellen). - Page 14 Voreingestelltes Programm auswählen Drücken Sie mehrmals auf die Taste MENU, um in die Betriebsmodi [ModE] zu gelangen. Drücken Sie auf OK, um die Moduseinstellung zu öffnen und benutzen Sie die Taste (+) oder (-), um den Programm-Modus auszuwählen. Das Display zeigt [ProG] an.
- Page 15 Beispiel für einen manuell eingestellten Wochen-Timer Im linken Beispiel ist Montag (d1) der erste Tag für die Hinweis: Mehrere Programmierung und am Sonntag (d7) der letzte Tag für die programmierte Programmierung. Heiz-Zeiträume können für einen Tag genutzt werden. Ein Drücken Sie die Taste (+) oder (-), um die Heizstufe zu wählen: programmierter Heiz- Zeitraum kann abenso H = hohe Heizleistung,...
-
Page 16: Gerät Auf Werkseinstellung Zurücksetzen
Hinweis: Damit vorgenommene Einstellungen gespeichert werden, müssen Sie immer auf die Taste OK drücken. Es können maximal 8 Heiz-Zeiträume für ein Programm programmiert werden. Nachdem die manuellen Einstellung für den Wochen-Timer abgeschlossen ist, überschreibt das ausgewählte Programm die voreingestellten Standardwerte. GERÄT AUF WERKSEINSTELLUNG ZURÜCKSETZEN Trennen Sie das Gerät für mindestens 5 Sekunden vom Stromnetz und schließen Sie es... -
Page 17: Hinweise Zur Entsorgung
HINWEISE ZUR ENTSORGUNG Befindet sich die linke Abbildung (durchgestrichene Mülltonne auf Rädern) auf dem Produkt, gilt die Europäische Richtlinie 2012/19/EU. Diese Produkte dürfen nicht mit dem normalen Hausmüll entsorgt werden. Informieren Sie sich über die örtlichen Regelungen zur getrennten Sammlung elektrischer und elektronischer Gerätschaften. -
Page 19: Technical Data
Operating Modes 27 Program Weekly Timer 29 Restore Device to Factory Default Settings 32 Cleaning and Care 32 Hints on Disposal 33 TECHNICAL DATA 10032595, 10032596, 10034122, 10034123, 10034124, Item number 10035041, 10035042, 10035043, 10035316, 10035317 Power supply 220-240 V ~ 50 Hz Power 1800 W... -
Page 20: Safety Instructions
SAFETY INSTRUCTIONS • Do not use the appliance until it is securely fi xed as described in this manual. • Check that the voltage indicates on the data plate corresponds with that of the local network before connecting the appliance to the mains power supply. •... -
Page 21: Product Data Sheet
PRODUCT DATA SHEET Model identifier(s): 10032595, 10032596, 10034122, 10034123, 10034124, 10035041, 10035042, 10035043, 10035316, 10035317 Item Symbol Value Unit Item Unit Heat output Type of heat input, for electric storage local space heaters only Nominal heat output manual heat charge control, with integrated... -
Page 22: Dimensions
DIMENSIONS... -
Page 23: Control Panel And Remote Control
CONTROL PANEL AND REMOTE CONTROL Control panel (A) Main switch (B) On / Off button (C) Key lock / confirm entry (D) MENU (E) Increase value (F) Decrease value Remote control Battery When using the remote control for the first time, remove the plastic strap from the battery. -
Page 24: Functions And Settings
FUNCTIONS AND SETTINGS Main switch (A) Open the cover on the bottom of the unit and press button A down to the ON position. On / Off button (B) Press the on / off button to start the flame effect. The following will appear on the display: •... - Page 25 Switch heating on / off / quick start Press the (+) or (-) button to start the heat setting directly (even if a weekly program is set). • Press either the (+) or (-) button to see the current temperature on the screen.
- Page 26 Set low heat output Press the MENU button twice, the display will show L and the flashing heating symbol. Press the OK button to set the temperature. The default temperature is 10 ° C (50 ° F). The image at left will appear on the display. Press the (+) or (-) button to set the temperature.
-
Page 27: Operating Modes
Adjust dimmer (specific models only) Press the MENU button repeatedly to enter the dimmer setting. The display will show [doLi]. Press the OK button to start the dimmer adjustment. Press the (+) or (-) button to select the desired dimming levels (D1 / D2 / D3 / D4 / OFF). - Page 28 Open window mode Press the MENU button several times to enter the [ModE] operating modes. Press OK to enter the mode setting and use the (+) or (-) button to select the open window mode. The display will show [OPEN]. Press OK to confirm and use the (+) or (-) button to select ON or OFF: After activating the open window detection, the unit automatically turns off the heater when it detects that the room temperature has dropped more than 4 °...
-
Page 29: Program Weekly Timer
Note: You can exit the timer setting at any time by pressing MENU. In the event of a power failure, the timer icon (clock) will blink continuously, signaling that no timer has been set. In this case, you must reprogram the timer. PROGRAM WEEKLY TIMER Note: Before you can program the week timer, you must first set the current weekday and time (see Setting the Current Weekday and Time). - Page 30 Select preset program Press the MENU button several times to enter the [ModE] operating modes. Press OK to enter the mode setting and use the (+) or (-) button to select the program mode. The display will show [ProG]. Press button + or - to select “ON” or “OFF” to turn on or turn off the weekly program. Press OK to validate.
- Page 31 Example of a manually set weekly timer For selecting “d1” (Monday) as first activation day, and “d7” Note: Several (Sunday) as last activation day. programmed heating periods can be used for one day. A programmed heating Press the (+) or (-) button to select the heating level: period can also be used for several days.
-
Page 32: Restore Device To Factory Default Settings
Note: To save the settings made, always press the OK button. A maximum of 8 heating periods can be programmed for one program. After the manual setting for the weekly timer is completed, the selected program will overwrite the default preset values. RESTORE DEVICE TO FACTORY DEFAULT SETTINGS Disconnect the device for at least 5 seconds, and then reconnect it to restore factory... -
Page 33: Hints On Disposal
HINTS ON DISPOSAL According to the European waste regulation 2012/19/EU this symbol on the product or on its packaging indicates that this product may not be treated as household waste. Instead it should be taken to the appropriate collection point for the recycling of electrical and electronic equipment. -
Page 35: Datos Técnicos
Modos de funcionamiento 43 Programar temporizador semanal 45 Restablecer los valores de fábrica 48 Limpieza y cuidado 48 Retirada del aparato 49 DATOS TÉCNICOS 10032595, 10032596, 10034122, 10034123, 10034124, Número de artículo 10035041, 10035042, 10035043, 10035316, 10035317 Suministro eléctrico 220-240 V ~ 50 Hz Potencia 1800 W DECLARACIÓN DE CONFORMIDAD... -
Page 36: Indicaciones De Seguridad
INDICACIONES DE SEGURIDAD • Antes de utilizar el aparato, compruebe la tensión en la placa técnica del mismo y conecte el aparato solamente a tomas de corriente que se adecuen a dicha tensión. • Si el cable de alimentación está dañado, deberá ser sustituido por un servicio técnico. -
Page 37: Hoja De Datos Del Producto
HOJA DE DATOS DEL PRODUCTO Denominación del modelo 10032595, 10032596, 10034122, 10034123, 10034124, 10035041, 10035042, 10035043, 10035316, 10035317 Dato Símbolo Valor Unidad Dato Unidad Potencia térmica Solo con disposítivos de acumulación de calor eléctricos para abastecimiento local: Tipo de regulación del abastecimiento de calor Potencia térmica nominal... -
Page 38: Dimensiones
DIMENSIONES... -
Page 39: Dimensiones
DIMENSIONES Panel de control (A) Interruptor principal (B) Tecla on/off (C) Bloqueo de las teclas/ confirmar selección (D) Aumentar valor (E) Reducir valor Mando a distancia Batería Si utiliza el mando a distancia por primera vez, retire la tira plástica de la pila. Nota: Esta calefacción se entrega con un mando a distancia. -
Page 40: Funciones Y Ajustes
FUNCIONES Y AJUSTES Interruptor principal (A) Abra la cubierta bajo el aparato y presione el botón A hacia abajo, hasta la posición Botón on/off (B) Pulse el botón ON/OFF para iniciar el efecto llamas. En el display aparece el siguiente indicador: •... - Page 41 Encender/apagar calefacción / inicio rápido Pulse el botón (+) o (-) para iniciar directamente la configuración de la calefacción (incluso cuando se haya configurado un programa semanal). • Pulse el botón (+) o (-) para visualizar la temperatura actual en el display. •...
- Page 42 Ajustar la potencia de calefacción baja Pulse dos veces el botón MENU y el display mostrará L y el símbolo de calefacción parpadeando. Pulse el botón OK para configurar la temperatura. La temperatura predeterminada es de 10 °C (50 °F). En el display aparece el indicador izquierdo.
-
Page 43: Modos De Funcionamiento
Ajustar atenuación (solo en determinados modelos) Pulse varias veces el botón MENU para acceder al ajuste de la atenuación. El display muestra [doLi]. Pulse el botón OK para iniciar el ajuste de la atenuación. Utilice los botones (+) o (-) para seleccionar el nivel deseado de atenuación (D1/D2/D3/D4/OFF). - Page 44 Modo de ventana abierta Pulse varias veces el botón MENU para acceder al modo de funcionamiento [MODE]. Pulse OK para abrir el ajuste del modo y utilice el botón (+) o (-) para seleccionar el modo de ventana abierta. El display muestra [OPEN]. Pulse OK para confirmar y utilice el botón (+) o (-) para seleccionar ON (encendido) o OFF (apagado).
-
Page 45: Programar Temporizador Semanal
Nota: Puede abandonar los ajustes de tiempo en cualquier momento pulsando el botón MENU. En caso de una caída del suministro, el símbolo del temporizador (reloj) parpadea continuamente para indicar que no se ha configurado ningún temporizador. En este caso, deberá realizar de nuevo los ajustes. PROGRAMAR TEMPORIZADOR SEMANAL Nota: Antes de poder programar el temporizador semanal, deberá... - Page 46 Seleccionar programa predeterminado Pulse varias veces el botón MENU para acceder al modo de funcionamiento [MODE]. Pulse OK para abrir el ajuste del modo y utilice el botón (+) o (-) para seleccionar el modo de programación. El display muestra [ProG]. Pulse OK para confirmar y utilice los botones (+) o (-) para seleccionar ON u OFF.
- Page 47 Ejemplo de un temporizador semanal configurado manualmente En el ejemplo de la izquierda, el lunes (d1) es el primer día Nota: Pueden utilizarse para la programación y el domingo (d7) es el último día para la varios periodos de programación. tiempo de calefacción programados en un día.
-
Page 48: Restablecer Los Valores De Fábrica
Nota: Para que puedan guardarse los ajustes realizados, deberá pulsar siempre OK. Pueden programarse un máximo de 8 periodos de tiempo de calefacción para un programa. Después de haber finalizado la configuración del temporizador semanal, el programa seleccionado se sobrescribe a los valores estándares predeterminados. RESTABLECER LOS VALORES DE FÁBRICA Desconecte el aparato durante al menos 5 segundos del suministro eléctrico y conéctelo de nuevo para restablecer los valores de fábrica. -
Page 49: Retirada Del Aparato
RETIRADA DEL APARATO Si el aparato lleva adherida la ilustración de la izquierda (el contenedor de basura tachado) entonces rige la normativa europea, directiva 2012/19/UE. Este producto no debe arrojarse a un contenedor de basura común. Infórmese sobre las leyes territoriales que regulan la recogida separada de aparatos eléctricos y electrónicos. -
Page 51: Fiche Technique
Modes de fonctionnement 59 Programmation de la minuterie hebdomadaire 61 Réinitialisation aux paramètres d‘usine 64 Nettoyage et entretien 64 Informations sur le recyclage 65 FICHE TECHNIQUE 10032595, 10032596, 10034122, 10034123, 10034124, Numéro d'article 10035041, 10035042, 10035043, 10035316, 10035317 Alimentation 220-240 V ~ 50 Hz Puissance 1800 W DÉCLARATION DE CONFORMITÉ... -
Page 52: Consignes De Sécurité
CONSIGNES DE SÉCURITÉ • Avant utilisation, vérifi ez la tension sur l‘étiquette de l‘appareil et branchez l‘appareil uniquement aux prises correspondant à la tension de l‘appareil. • Si le câble d‘alimentation est endommagé, faites-le remplacer par un professionnel qualifi é. •... -
Page 53: Fiche De Données Produit
FICHE DE DONNÉES PRODUIT Référence (s) du produit 10032595, 10032596, 10034122, 10034123, 10034124, 10035041, 10035042, 10035043, 10035316, 10035317 Donnée Symbole Valeur Unité Donnée Unité Puissance calorifique Uniquement pour les radiateurs électriques à accumulation : Type de régulation de l'apport de chaleur Puissance calorifique Régulation manuelle de l'apport de chaleur... -
Page 54: Dimensions
DIMENSIONS... -
Page 55: Panneau De Commande Et Télécommande
PANNEAU DE COMMANDE ET TÉLÉCOMMANDE Panneau de commande (A) Interrupteur principal (B) Touche de marche/arrêt (C) Verrouillage des touches / Confirmer la saisie (D) Augmenter la valeur (E) Réduire la valeur Télécommande Batterie Lorsque vous utilisez la télécommande pour la première fois, retirez la languette en plastique du compartiment de la pile. -
Page 56: Fonctions Et Paramètres
FONCTIONS ET PARAMÈTRES Interrupteur principal (A) Ouvrez le cache sous l‘appareil et appuyez sur le bouton A vers le bas pour le mettre en position ON. Touche de marche /arrêt (B) Appuyez sur la touche de marche / arrêt pour démarrer la simulation de flammes. L‘écran affiche l‘indication suivante : •... - Page 57 Démarrage et arrêt du chauffage / démarrage rapide Appuyez sur le bouton (+) ou (-) pour régler directement le niveau de chauffage (même si un programme hebdomadaire est défini). • Appuyez sur la touche (+) ou (-) pour voir la température actuelle à...
- Page 58 Réglage d‘un chauffage doux Appuyez deux fois sur la touche MENU, l'écran affiche L et l'icône clignotante du chauffage. Appuyez sur la touche OK pour régler la température. La température par défaut est de 10°C (50°F). Le témoin de gauche apparaît sur l'écran.
-
Page 59: Modes De Fonctionnement
Réglage du dimmer (sur certains modèles uniquement) Appuyez plusieurs fois sur la touche MENU pour accéder au réglage du dimmer. L'écran affiche [doLi]. Appuyez sur la touche OK pour démarrer le réglage du dimmer. Appuyez sur la touche (+) ou (-) pour sélectionner les niveaux de dimmer souhaités (D1/D2/D3/D4/OFF). - Page 60 Mode fenêtre ouverte Appuyez plusieurs fois sur la touche MENU pour accéder aux modes de fonctionnement [ModE]. Appuyez sur OK pour entrer dans le réglage du mode et utilisez la touche (+) ou (-) pour sélectionner le mode de fenêtre ouverte. L‘écran affiche [OPEN]. Appuyez sur OK pour confirmer et utilisez la touche (+) ou (-) pour sélectionner ON ou OFF: Lorsque la détection de fenêtre ouverte est activée, l‘appareil éteint automatiquement le...
-
Page 61: Programmation De La Minuterie Hebdomadaire
Remarque : Vous pouvez quitter le réglage de la minuterie à tout moment en appuyant sur MENU. En cas de panne de courant, l‘icône de la minuterie (horloge) clignotera continuellement, signalant qu‘aucune minuterie n‘a été réglée. Dans ce cas, vous devrez reprogrammer la minuterie. PROGRAMMATION DE LA MINUTERIE HEBDOMADAIRE Remarque : pouvoir programmer la minuterie de la semaine, vous devez d‘abord... - Page 62 Choix d‘un programme prédéfini Appuyez plusieurs fois sur la touche MENU pour accéder aux modes de fonctionnement [ModE]. Appuyez sur OK pour accéder au réglage du mode et utilisez la touche (+) ou (-) pour sélectionner le mode de programme. L'écran affiche [ProG]. Appuyez sur OK pour confirmer et utilisez les boutons (+) ou (-) pour sélectionner ON ou OFF.
- Page 63 Exemple de réglage manuel pour une minuterie hebdomadaire Dans l‘exemple de gauche, le lundi (d1) est le premier jour pour Remarque : Vous la programmation et le dimanche (d7) est le dernier jour pour la pouvez programmer programmation. plusieurs périodes de chauffage dans Appuyez sur les touches (+) ou (-) pour sélectionner la puissance une journée.
-
Page 64: Réinitialisation Aux Paramètres D'usine
Remarque : pour que les nouveaux paramètres soient sauvegardés, vous devez toujours appuyer sur la touche OK. Vous pouvez enregistrer un maximum de 8 périodes de chauffage par programme. Une fois le réglage manuel de la minuterie hebdomadaire terminé, le programme sélectionné... -
Page 65: Informations Sur Le Recyclage
INFORMATIONS SUR LE RECYCLAGE Vous trouverez sur le produit l’image ci-contre (une poubelle sur roues, barrée d‘une croix), ce qui indique que le produit se trouve soumis à la directive européenne 2012/19/UE. Renseignez- vous sur les dispositions en vigueur dans votre région concernant la collecte séparée des appareils électriques et électroniques. -
Page 67: Dati Tecnici
Modalità di funzionamento 75 Programmare il timer settimanale 77 Riportare il dispositivo ai valori predefiniti 80 Pulizia e manutenzione 80 Smaltimento 81 DATI TECNICI 10032595, 10032596, 10034122, 10034123, 10034124, Numero articolo 10035041, 10035042, 10035043, 10035316, 10035317 Alimentazione 220-240 V ~ 50 Hz Potenza 1800 W DICHIARAZIONE DI CONFORMITÀ... -
Page 68: Avvertenze Di Sicurezza
AVVERTENZE DI SICUREZZA • Prima dell’utilizzo controllare la tensione sulla targhetta del dispositivo e collegarlo solamente a prese elettriche con tensione corrispondente. • Se il cavo di rete è danneggiato, farlo sostituire da tecnici specializzati. • Non posizionare il camino direttamente sotto a una presa di corrente. •... -
Page 69: Scheda Informativa Del Prodotto
SCHEDA INFORMATIVA DEL PRODOTTO Identificazione del modello (i) 10032595, 10032596, 10034122, 10034123, 10034124, 10035041, 10035042, 10035043, 10035316, 10035317 Indicazione Simbolo Valore Unità Indicazione Unità Potenza termica Solo per gli apparecchi per il riscaldamento d'ambiente locale elettrici ad accumulo: Tipo di controllo dell´apporto termico... -
Page 70: Dimensioni
DIMENSIONI... -
Page 71: Pannello Di Controllo E Telecomando
PANNELLO DI CONTROLLO E TELECOMANDO Pannello di controllo (A) Interruttore principale (B) Tasto on/off (C) Blocco tasti/conferma immissione (D) Aumenta valore (E) Diminuisci valore Telecomando Batteria Se si utilizza il telecomando per la prima volta, togliere la copertura in plastica dalla batteria. Nota: il camino è... -
Page 72: Funzioni E Impostazioni
FUNZIONI E IMPOSTAZIONI Interruttore principale (A) Aprire la copertura in basso sul dispositivo e premere il tasto A verso il basso in posizione ON. Tasto on/off (B) Premere il tasto on/off per attivare l’effetto fiamma. Sul display compare la seguente indicazione: •... - Page 73 Accendere e spegnere il riscaldamento/Avvio rapido Premere (+) o (-) per attivare direttamente l’impostazione del calore (anche se è impostato un programma settimanale). • Premere (+) o (-) per vedere sullo schermo la temperatura attuale. • Premere (+) o (-) per impostare la temperatura desiderata. Premere il tasto OK per confermare le impostazioni.
- Page 74 Impostare la potenza riscaldante ridotta Premere due volte il tasto MENU, il display mostra L e il simbolo del riscaldamento lampeggiante. Premere il tasto OK per impostare la temperatura. La temperatura predefinita è di 10 °C (50 °F). Sul display compare l’indicazione a sinistra.
-
Page 75: Modalità Di Funzionamento
Impostare il dimmer (solo per alcuni modelli) Premere più volte il tasto MENU per raggiungere l’impostazione del dimmer. Il display mostra [doLi]. Premere il tasto OK per iniziare a impostare il dimmer. Premere poi (+) o (-) per selezionare il livello di dimmeraggio desiderato (D1/D2/D3/D4/OFF). - Page 76 Modalità finestra aperta Premere più volte MENU per raggiungere le modalità di funzionamento. Il display mostra [ModE]. Premere OK per aprire le impostazioni di modalità e utilizzare (+) o (-) per selezionare la modalità finestra aperta. Il display mostra [OPEN]. Premere OK per confermare e utilizzare i tasti (+) o (-) per selezionare ON (acceso) o OFF (spento).
-
Page 77: Programmare Il Timer Settimanale
Nota: è possibile lasciare in ogni momento l’impostazione del timer premendo MENU. In caso di un blackout, il simbolo del timer (orologio) lampeggia continuamente e segnala che non è stato impostato alcun timer. In tal caso è necessario impostare il timer nuovamente. PROGRAMMARE IL TIMER SETTIMANALE Nota: prima di poter programmare il timer settimanale è... - Page 78 Selezionare i programmi predefiniti Premere più volte MENU per raggiungere le modalità di funzionamento [ModE]. Premere OK per aprire l’impostazione delle modalità e utilizzare (+) o (-) per selezionare la modalità programma. Il display mostra [ProG]. Premere OK per confermare e utilizzare il pulsante (+) o (-) per selezionare ON o OFF. Premere di nuovo OK per confermare.
- Page 79 Esempio di timer settimanale impostato manualmente Nell‘esempio a sinistra, lunedì (d1) è il primo giorno per la Nota: per un giorno programmazione e domenica (d7) è l‘ultimo giorno per la possono essere programmazione. utilizzati diversi periodi di riscaldamento. Allo stesso modo un periodo Premere (+) o (-) per selezionare il livello di riscaldamento: di riscaldamento può...
-
Page 80: Riportare Il Dispositivo Ai Valori Predefiniti
Nota: per salvare le impostazioni è necessario premere sempre OK. Possono essere impostati fino a 8 periodi di riscaldamento. Dopo aver concluso l’impostazione manuale del timer settimanale, il programma selezionato sovrascrive i valori predefiniti. RIPORTARE IL DISPOSITIVO AI VALORI PREDEFINITI Scollegare il dispositivo dalla rete elettrica per almeno 5 secondi e ricollegarlo per reimpostare i valori predefiniti. -
Page 81: Smaltimento
SMALTIMENTO Se sul prodotto è presente la figura a sinistra (il cassonetto mobile sbarrato), si applica la direttiva europea 2012/19/UE. Questi prodotti non possono essere smaltiti con i rifiuti normali. Informarsi sulle disposizioni vigenti sulla raccolta separata di dispositivi elettrici ed elettronici. Non smaltire i vecchi dispositivi con i rifiuti domestici.